GlobalSuite® allows carrying out the risk analysis of any type, which can be developed through the different options presented, from the inventory of elements to the monitoring of the actions defined for the reduction of the detected risks.
The functionality of GlobalSuite® that allows performing a complete risk analysis is found in the option “ Analysis”, specifically, in the option “ Risk Analysis ”. This is located immediately after the option “ Inventory ” in the left menu.
Creation of the analysis.
Step 1
Once the list of elements of the services and processes is defined, we can proceed to the next step, corresponding to the risk analysis itself.
To generate a new risk analysis, you need to click the “ New” button, creating a new line. This line corresponds to a specific risk analysis that must be configured following the steps below.
In the main screen of the “ Risk Analysis” option, it is also possible to delete a specific analysis, download the complete list in Excel format, and copy an already created analysis.

Configuration of the analysis.
Step 2
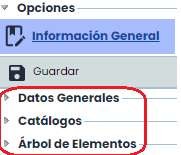
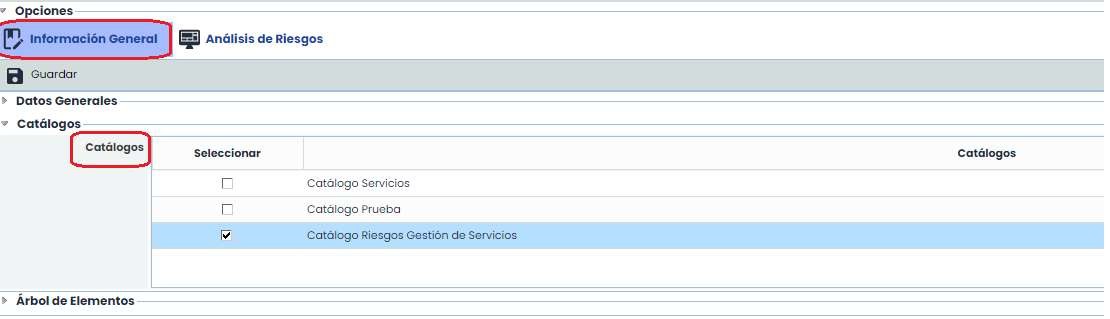
The first time you access a risk analysis, the “ General Information” tab is loaded, which allows the configuration of the risk analysis.
To do this, it is necessary to complete the information in the three sections that appear.
-
General Data
-
Catalogs
-
Element Tree
Step 3
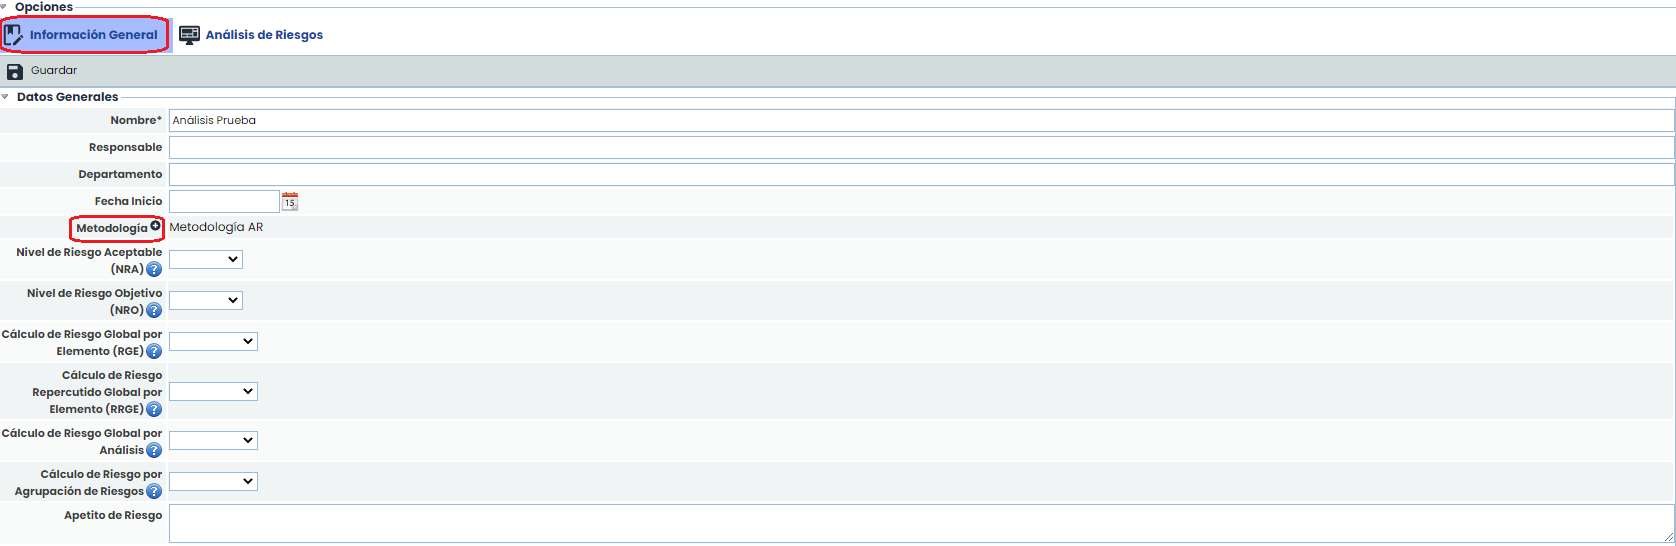
The definition of the “ General Data” section allows indicating all the information related to the analysis.
It is worth highlighting the dropdown field “ Methodology”, which allows selecting the methodology to be used for the risk analysis. The list of methodologies displayed corresponds to the set of methodologies that the Entity possesses in the section Settings > Methodologies of Elements
Step 4
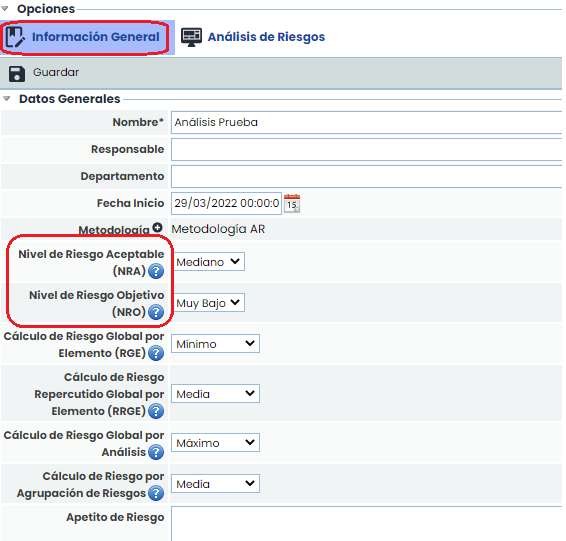
Once a methodology is selected, the fields “ NRA” and “ NRO” allow defining an Acceptable and Objective Risk Level, respectively. These values are important as the risk evaluation and management will take this level into account.
Additionally, it is possible to define the criterion used to obtain the global risk levels from the specific risks.
Step 5
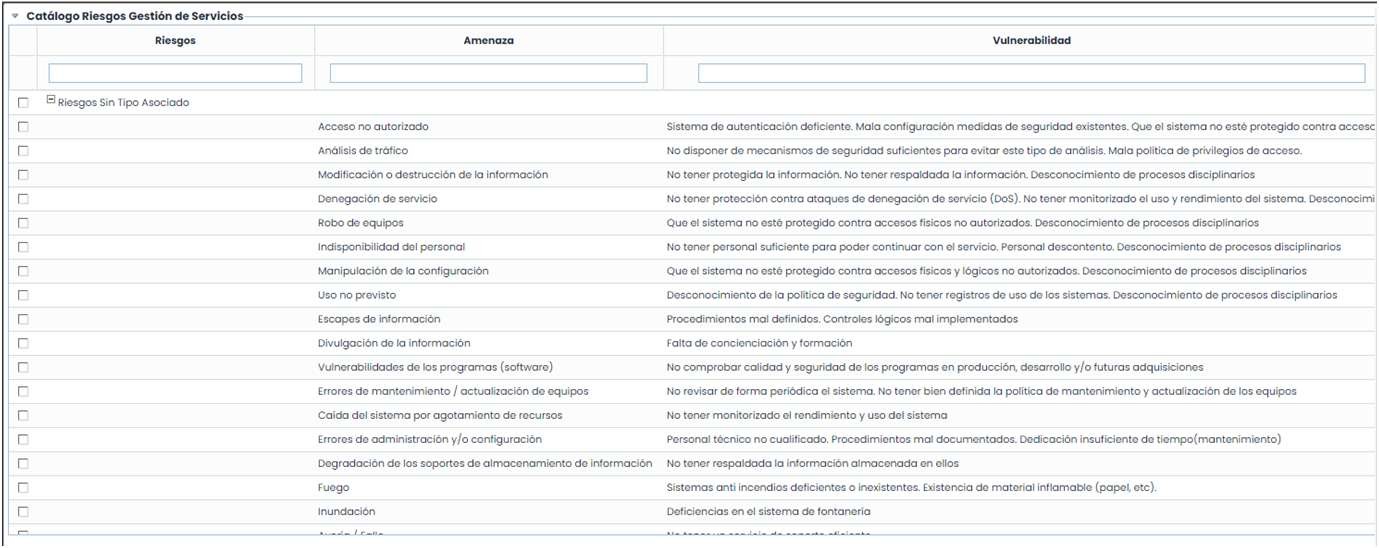
In the “ Catalogs” section, the list of available catalogs that can be used for the risk analysis appears. It is not mandatory to use a specific catalog, but it is recommended as it allows the tool to associate a set of risks and vulnerabilities to each element, based on its defined category.
To select a catalog, simply click on the “check” that appears next to each one.
Step 6
The last step to configure the risk analysis concerns the selection of elements. To do this, in the “ Element Tree” section, the element tree defined in the “ Inventory ” option appears.
To select the elements to be analyzed, it is necessary to select them through the “ Select” column by checking the box to the left of each element. Once checked, by clicking the “ Associate” button, all elements are moved to the table on the right. This table contains all those elements (services, processes, and elements) selected for their analysis.

Step 7
Once the risk analysis is configured, new tabs appear at the top. By clicking on the “ Risk Analysis” tab, you access the table that allows analyzing the risks of the elements selected in the “ General Information” tab (as per step 5).
To identify the risks to be analyzed for each element, there are three options: automatically load the risks from the catalogs, manually register all the risks, or use the retrieve risks option.
For the first case, you need to click the “ Add/Propose Risks” button. By clicking this button, the risks will be automatically associated with all the elements, based on the catalogs selected for the risk analysis and the category to which each element belongs.
The difference between proposing and adding is that when risks are proposed, all those in the catalog for that category are added regardless of whether they are already associated or not. However, if they are added, the system checks if the risk is already associated with the element, and in that case, it does not associate it again, only inserting the risks that the element does not already have associated.
Step 7 (I)
Once the risks are proposed for an element, the last column (Proposed) of the elements to which the risks have been included will change to “ Yes”. To propose risks again for an element, you need to change this field to “ No”.

In this view, you can also see the information in the column:
% Completed: Shows the degree of completion of the risk analysis for each element. In parentheses, the number of dimensions evaluated for that element and the total number of dimensions to be evaluated are indicated.
In the last option to obtain the risks, through the retrieve risks button (found within the risk analysis, once an element has been selected), it allows inserting one or more risks from the list previously defined in the section Settings > Templates > Analysis Catalogs .
Step 7 (II)

By clicking the button, a list of all defined risks is displayed, with those applicable to the element by the category to which it belongs highlighted in red.
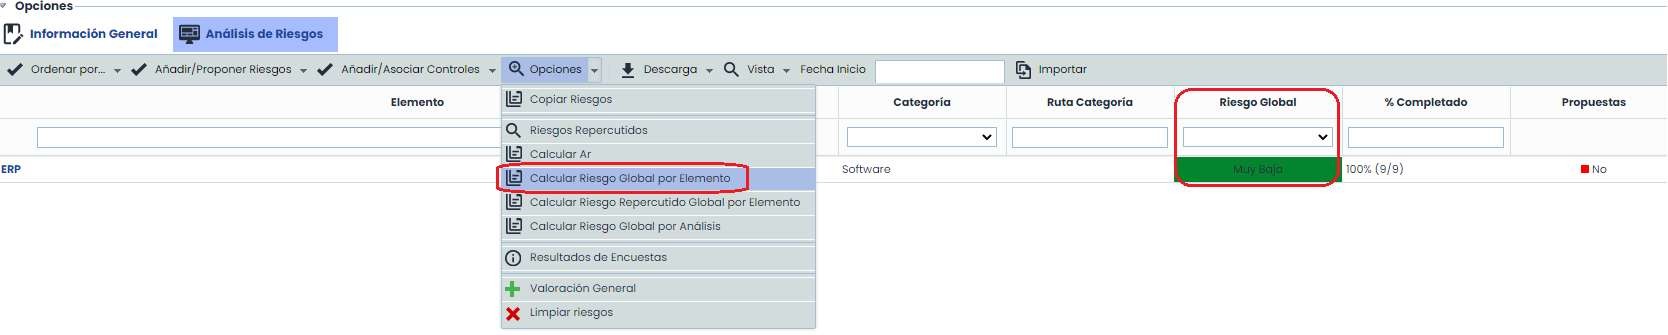
Step 8
In this view, it is possible to calculate grouped risk values based on the criteria established in the configuration (See Step 4). These values are:
-
Global Risk by Element: Specific risk value for each element, obtained from its risks.
-
Global Repercussed Risk by Element: Risk value for each element, calculated from the lower risks (from the Element Tree).
-
Global Risk by Analysis: Unique risk value for the entire analysis, obtained from the risks of all the elements involved.
Step 9
By clicking on the name of an element, the table that allows performing the risk analysis appears. This table allows the following options:

-
New: Generate new risks that have not been automatically loaded.
-
Delete: Allows deleting already generated risks.
-
Back: Allows returning to the main screen, where the list of elements to be analyzed is displayed.
-
Download: Allows downloading the list of risks associated with the elements.
-
Assign responsible: Allows defining the person responsible for the risk. To do this, it is necessary to select the risk to be assigned and click the button. By doing so, the list of Employees will be displayed, and the desired one can be defined, or if necessary, to remove the responsible person, the "Clear Selection" button must be clicked.
-
Retrieve risks: Displays the list of all risks from the catalogs, allowing one or more to be associated.
-
History: Allows consulting the history of previously performed risk analyses.
-
Calculate AR: Allows forcing the calculation of all formulas associated with automatic dimensions (to be used in case the risk analysis methodology has been modified).
Step 10
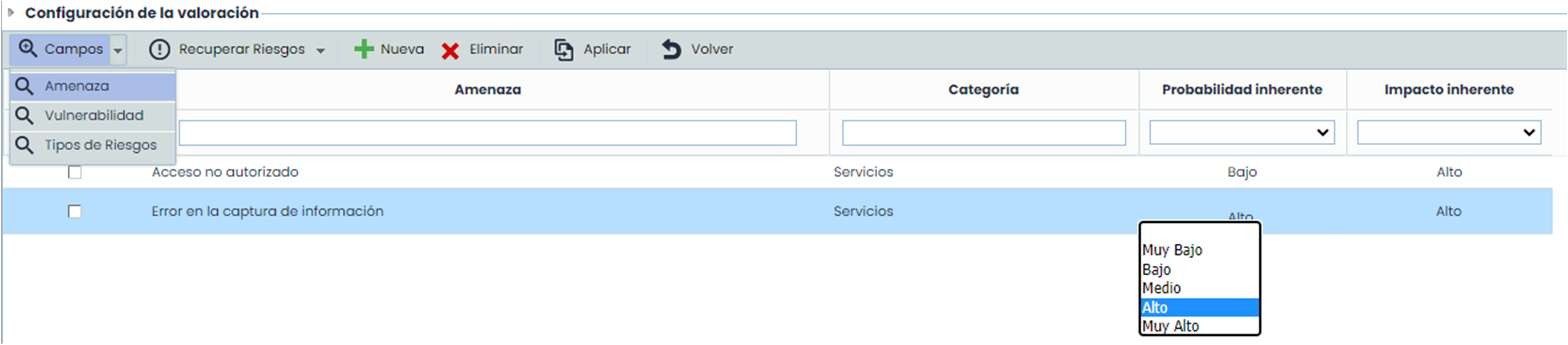
To perform the assessments of Probability and Impact that allow calculating the risk level affecting the organization's activities, it is necessary to establish the levels individually for each identified risk.
To establish the levels, it is necessary to expand (by double-clicking) the probability and impact field for each risk, associating the corresponding level in each case.

Once each probability and impact level is identified, the risk level associated with the risk will be automatically calculated based on the formula defined in the risk methodology.
Step 11
At the bottom of the screen, a summary of the risk analysis is displayed in “form” format. To use this view, you must first select one of the risks from the table.
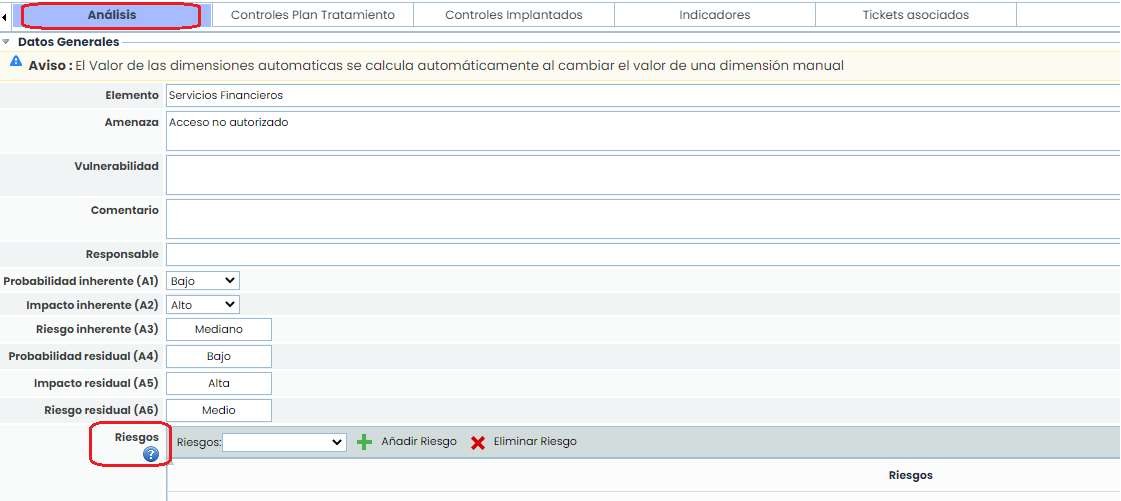
At the end of the form in the analysis section, in Risks, it is possible to insert the types of risks (previously configured in Settings > Methodologies > Elements > Risk Category ).
Step 11 (I)
At the bottom, it is also possible to consult the information of the following tabs:
-
Treatment Plan Controls: Offers the possibility to view the controls of the Treatment Plan (Analysis > Risk Management) that have been associated with this specific risk.
-
Implemented Controls: Allows associating the controls already implemented in the organization to a specific risk.
-
Indicators: This tab allows setting Key Risk Indicators or KRIs for each of the risks in the Risk Analysis. This tab is not displayed by default; to make it appear, it must be configured from Settings > Methodologies > Elements .
-
Associated Tickets: This section shows if the risk is associated with any ticket.
In the General Assessment view (within the options menu), as in the Inventory, it is possible to assess the Probability and Impact of multiple risks directly, as well as the category of the elements where it will be applied.

To do this, the risks to be generally assessed can be retrieved either from the total enabled catalogs or from those used in the analysis, and proceed to assess them in terms of the configured manual dimensions. This assessment can be applied to all risks with the same name or overwrite existing assessments for all risks belonging to elements with those categories.