Connection with SAML 2.0
This guide explains how to configure and manage a SAML connection in GlobalSuite®, from accessing the Settings > Connections section, to defining general parameters, default roles, and IDP certificate. It also details the necessary configuration on the ADFS server and the available authentication methods (IDP initiated SSO and SP initiated SSO), including key considerations for proper synchronization of users and roles.
SAML 2.0 connection configuration
To access the SAML connection screen, you need to go to the Settings section of GlobalSuite, specifically the “Connections” option (as shown in the image). This option is accessible to Platinum, Gold, Consulting, Consulting Administrator, Platform Administrator, Enterprise Administrator, and Configuration Administrator users.
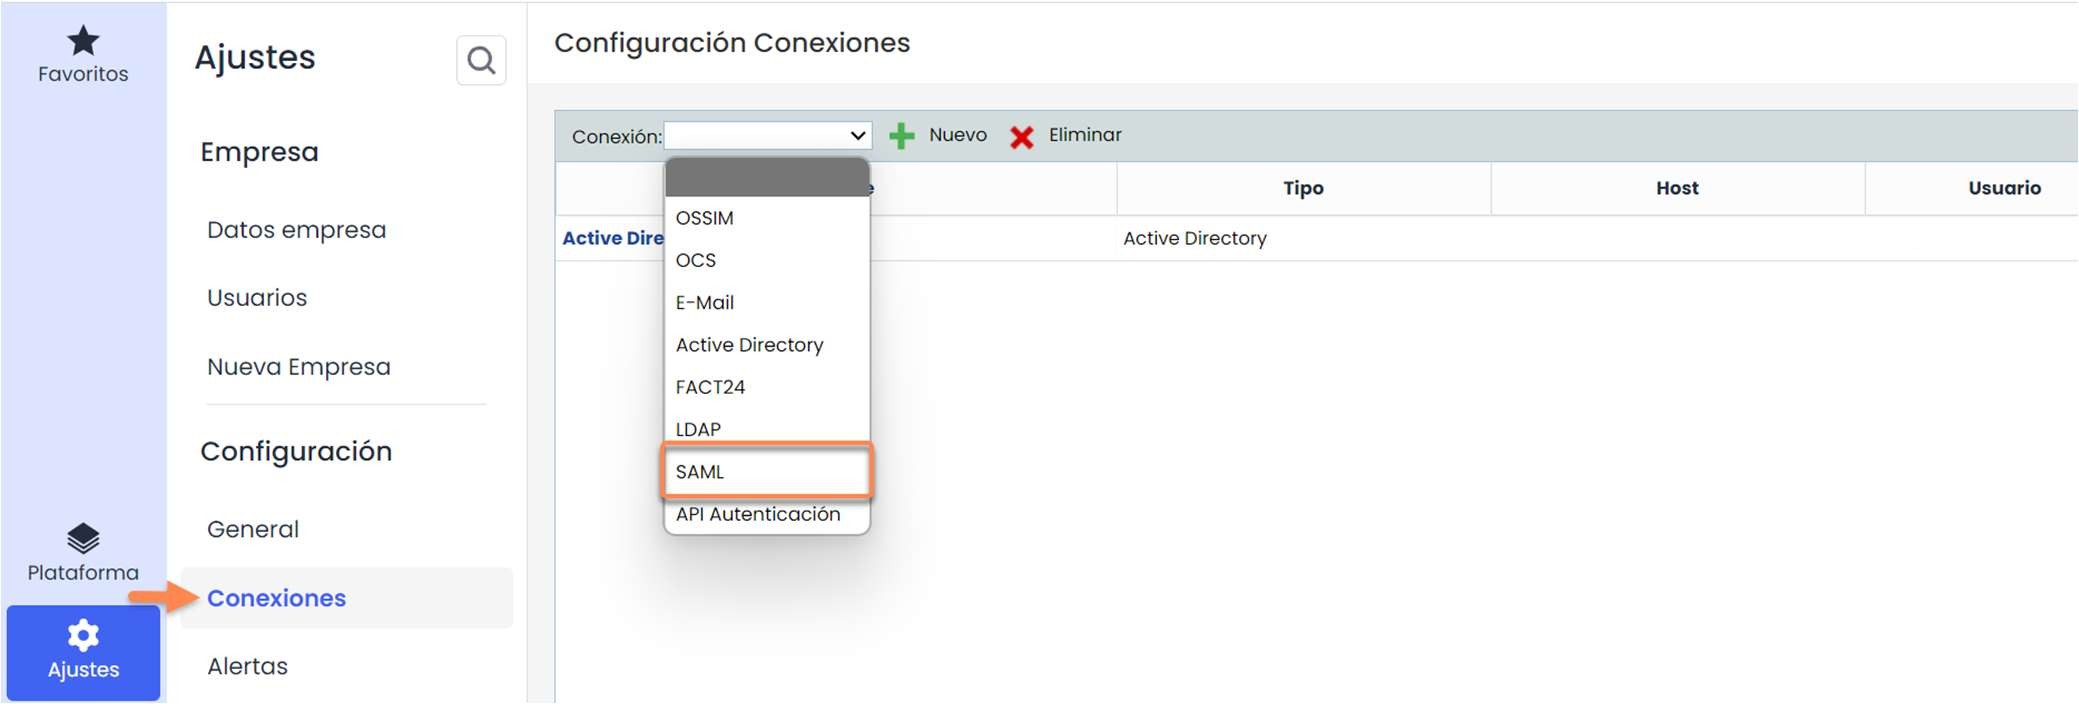
This screen has several columns described below:
-
Name: Contains the name of the connection, which is used to identify it.
-
Type: Contains the type of connection, in this case, it will be SAML.
-
Host: In this case, it will be empty.
-
User: It is not necessary, so it appears empty.
-
Enabled: Indicates whether a connection is enabled or not.
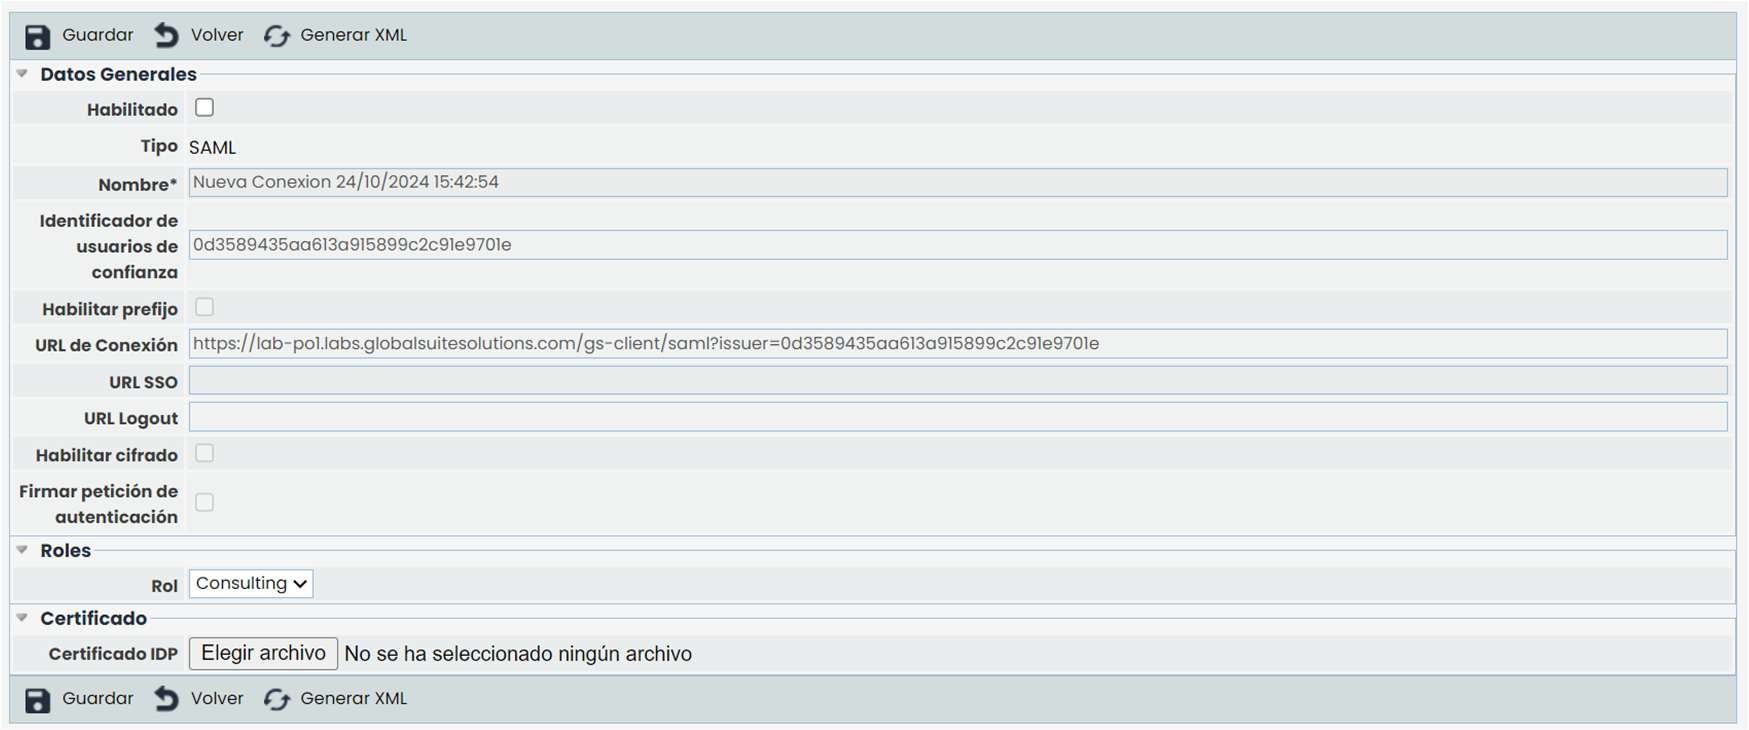
The SAML connection form consists of different fields, which are described below.
First, there is the “General Data” section:
-
Enabled: Indicates that this SAML connection is enabled. Two SAML connections cannot be enabled at the same time.
-
Type: Indicates the type of the connection (in this case, SAML).
-
Name*: This is a mandatory field and indicates the name of this connection to be used in other options of the tool.
-
Trust Identifier: It is generated automatically. Indicates the trust string established between the server and GlobalSuite, which must be unique.
-
SSO URL: When configuring a connection using the SP initiated SSO method, the URL of the IDP service where authentication via SAML is performed must be entered.
-
Logout URL: Address to which the user is redirected when a user with SAML authentication logs out.
-
Enable encryption: SAML connection configuration that allows the parameters received from the IDP to be encrypted.
-
Sign authentication request: Indicates that, using the SP initiated SSO configuration, the authentication request made to the IDP will be signed.
Secondly, there is the roles section. In this section, you can configure the default roles with which new SAML users will be created.
Initially, roles can be obtained directly from the server. If no role data is received or the received data is incorrect, the roles configured in this section will be used.
Finally, there is the “IDP Certificate” section. In this section, a file with a .crt or .cer extension containing the certificate must be uploaded. This must be the same one used to sign the calls from the server for the configured trust relationship.
Server Configuration (SAML 2.0)
The SAML 2.0 connection service URL to be entered in the server configuration is: https://Domain_Name/Core/Adfs/trust.php
Where Domain_Name is the access URL to GlobalSuite.
In the ADFS server configuration, it must be indicated that the data to be passed in the request are at least:
-
Name ID (nameidentifier)
-
Email address (emailaddress)
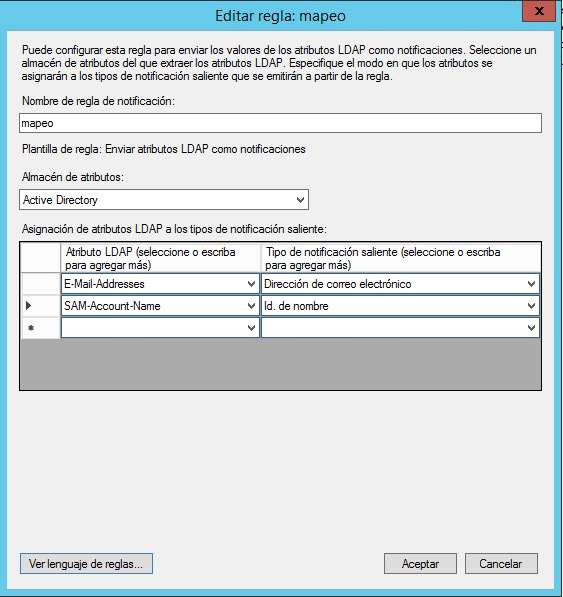
If you want to send the role configuration to create new ADFS users, you must use the claim:
http://schemas.microsoft.com/ws/2008/06/identity/claims/role
Important
The role name sent from the ADFS server must match one of the roles configured in GlobalSuite.
For more information on ADFS server configuration, you can visit:
https://docs.microsoft.com/en-us/windows-server/identity/adfs/operations/create-a-relying-party-trust
SAML 2.0 Authentication
There are two types of authentication with ADFS:
-
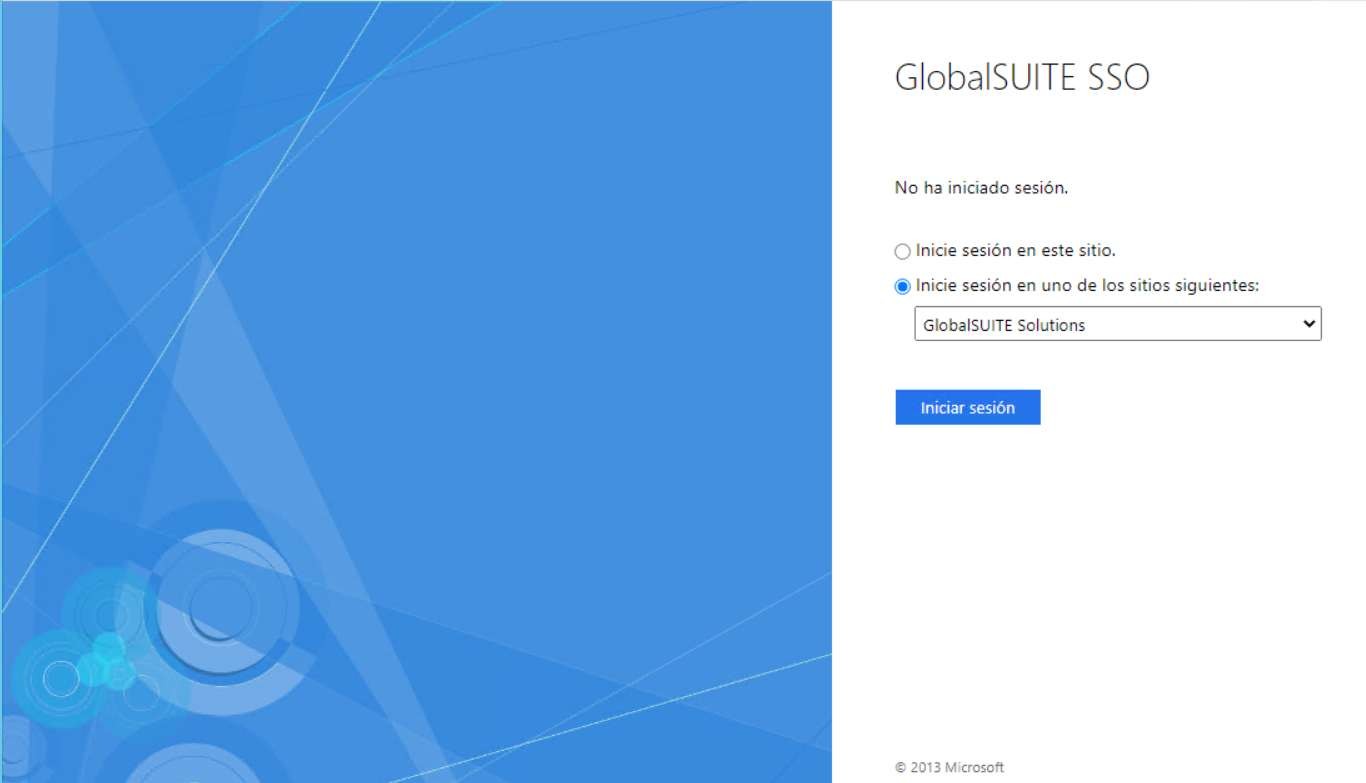
IDP initiated SSO, the authentication process is initiated by the IDP. The user has a list of “corporate applications,” selects the one corresponding to GlobalSuite, and initiates authentication. Below is a sample image of this application form.
-
SP initiated SSO, the authentication process is initiated by GlobalSuite. To use this method, you must access a specific URL. This URL is formed by concatenating the GlobalSuite URL with the text: ?issuer=trust identifier, where the trust identifier is the code generated in the connection and can be found in the field with the same name. See section 1 of this document. An example URL is:
https://sg.GlobalSuite.es/Core/index.php?issuer=a443c212c23af8ea8a107a f75345b0f8
SAML authentication has the following particularities:
-
If the user is accessing the tool for the first time through SAML, a user will be automatically created with the username provided in the SAML request.
If the username already exists in GlobalSuite and is not the same as the one created in the first connection, an error message will be displayed.