This tutorial explains, step by step, how to receive, complete, and submit the control surveys with evidence in GlobalSuite®.
This guide details the entire process from the receipt of the notification email to the completion and submission of the survey, including opening the received link, filling out the control fields, and the incorporation of attached evidence.
Additionally, it shows how to create new evidence records, add associated files, and confirm the completion of the survey to automatically notify the management system administrator.
Phases for conducting Control Surveys
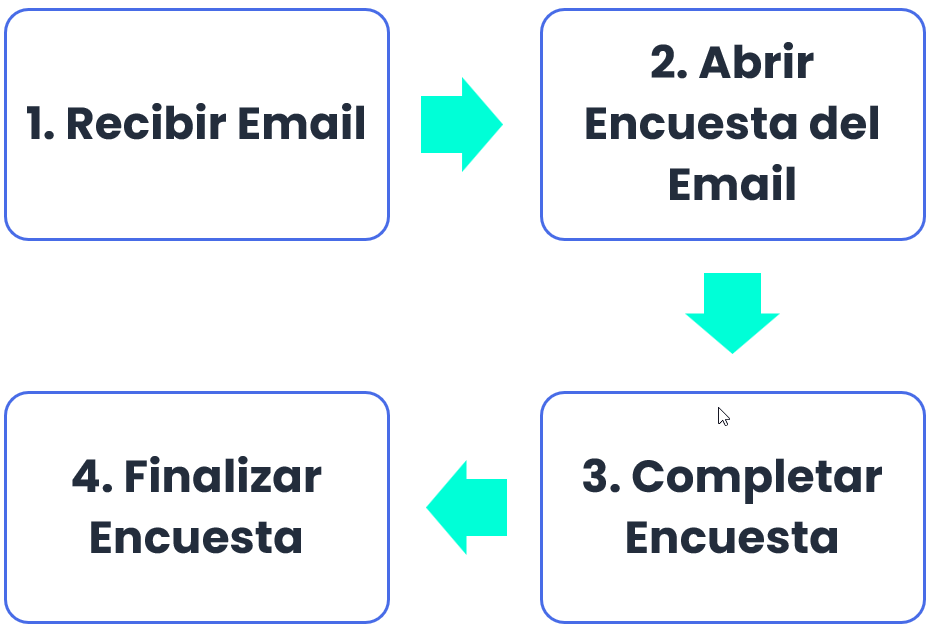
1. Receive Email
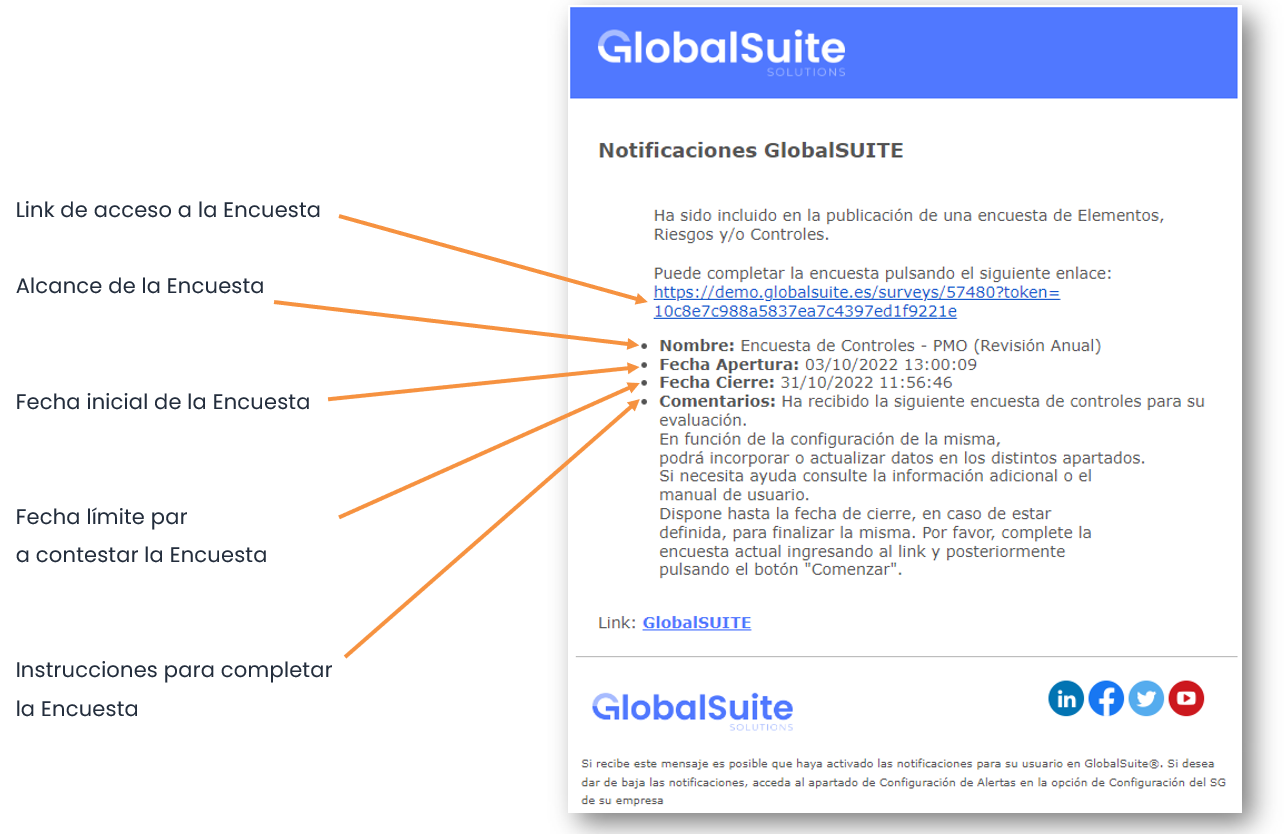
Each employee responsible for at least one control will receive an email from GlobalSuite® with the information about the Control Survey they need to complete. The email will be sent from the following address: Alertas GlobalSuite <n oreply@GlobalSuitesoftware.com>
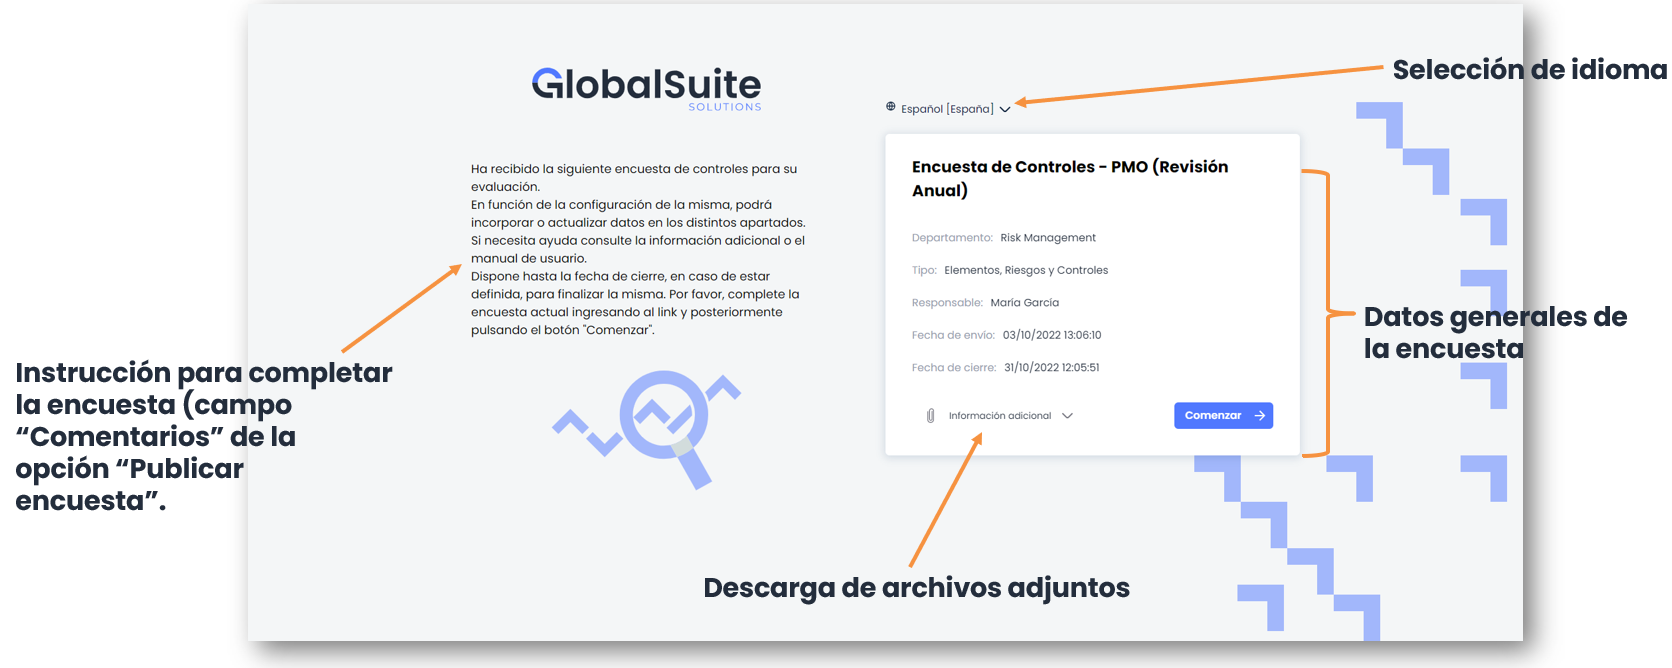
2. Open Survey from Email
To access the assigned Control Survey, simply click on the link in the received email. Clicking the link will open the survey in the browser. To start completing the survey, click on Start.
3. Complete Survey
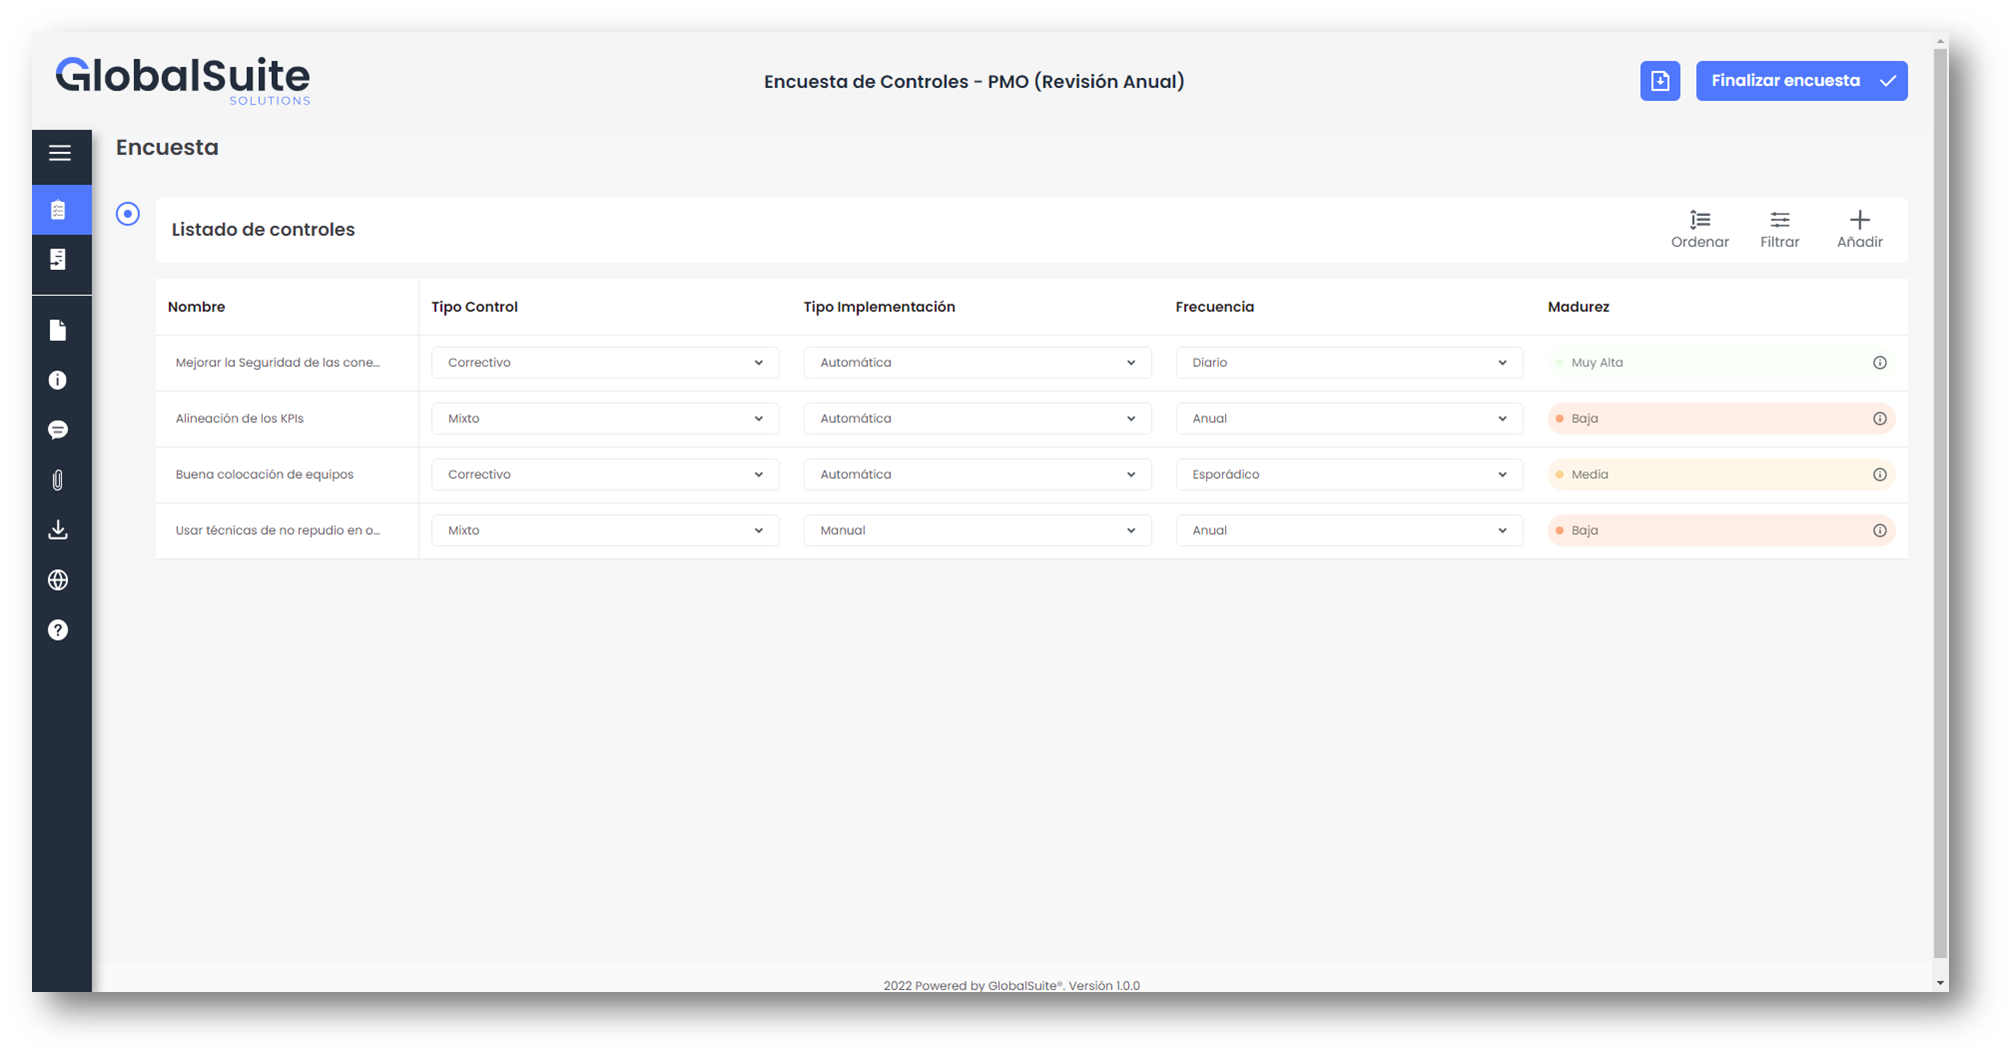
Next, the table of assigned Controls will appear. This table contains several columns, depending on your company's Control Methodology. In this example, the columns that can be viewed are as follows:
-
Name: Name of the Control
-
Control Type
-
Implementation Type
-
Frequency
-
Maturity
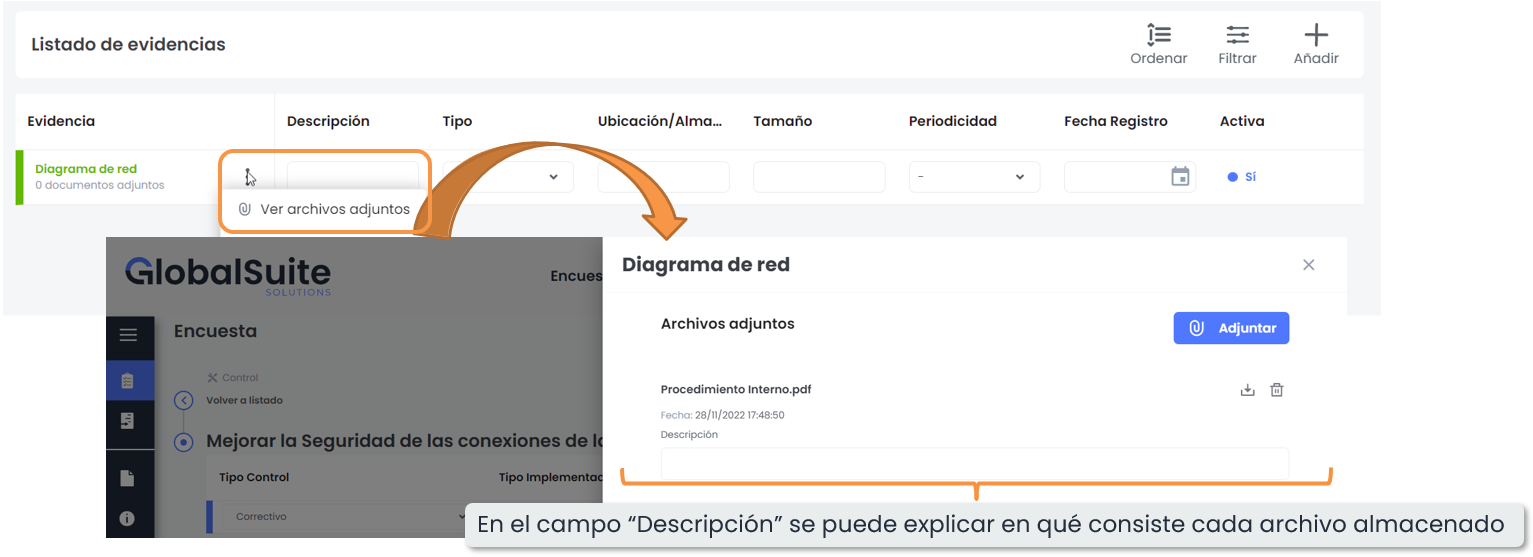
For each control, it is necessary to record the evidence. To do this, click on a control from the Control List and access it. Once inside the control, you can locate the “Evidence List” section.
The creation of evidence is done by clicking the “ Add” button. When doing so, a new window will appear where you can write a descriptive name for the evidence.

Once the evidence is created, the final step is to attach the corresponding file(s). To do this, click on the 3 dots of the evidence and then click the “View attachments” option.
Clicking the button will open a window where the existing attachments will be displayed along with the Attach button, which will open a pop-up window to select the file.
4. Complete Survey
Once the survey is completed, click on the Complete Survey button located at the top. This action will automatically notify the Management System administrators that the survey has been completed.
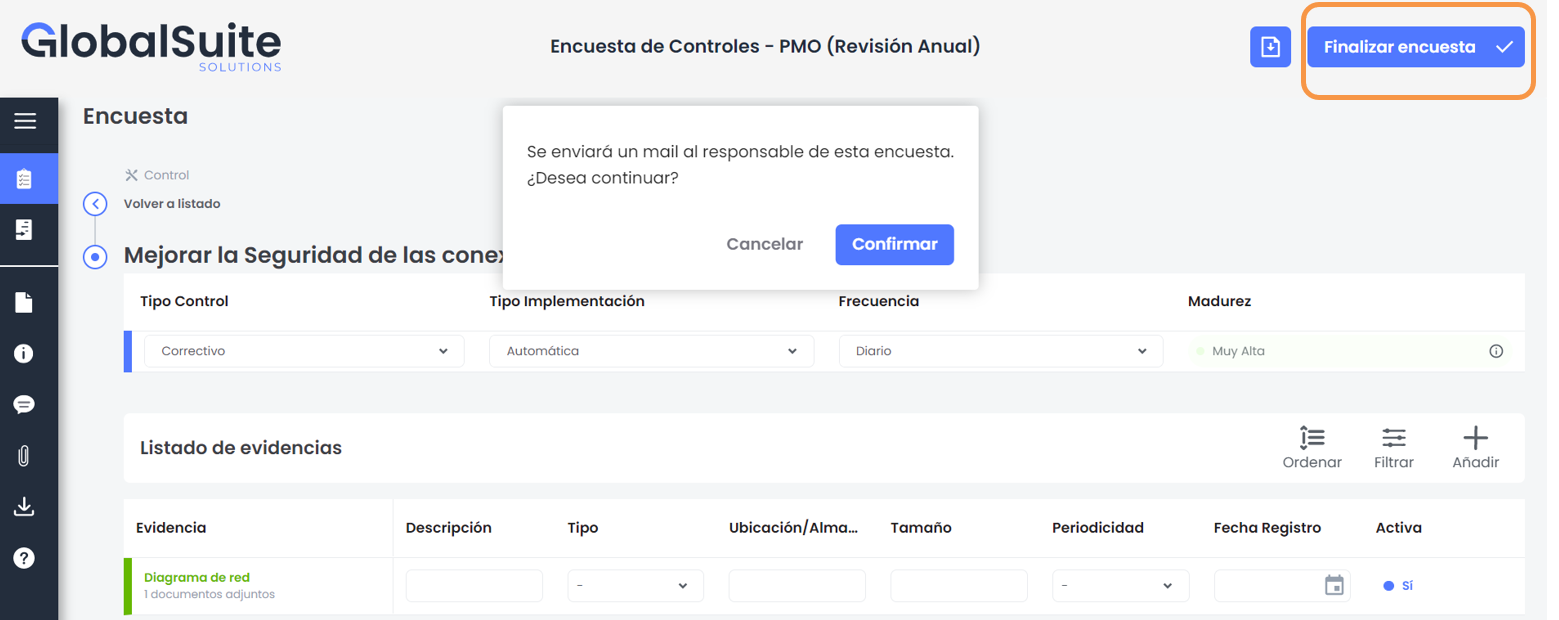
In the surveys, there is no “save” button; all changes are automatically saved. You can access the survey at another time through the same link received in the email.