This tutorial explains, step by step, how to manage a crisis in GlobalSuite® from its activation to closure and subsequent analysis, within the Business Continuity module.
This guide details how to activate a crisis management plan, create a new management entry, and record the general data of the crisis such as name, description, related incidents, crisis level, and progress status.
It also describes how to associate scenarios, infrastructures, services, clients, suppliers, and decision committees, manage disruptive events and resolution actions, and configure roles and access permissions for different users.
Additionally, it shows how to track associated recovery plans, view the progress of tasks and sequences, and consult consolidated information in the Dashboard, which allows analyzing the impact, executed actions, and overall results of the crisis.
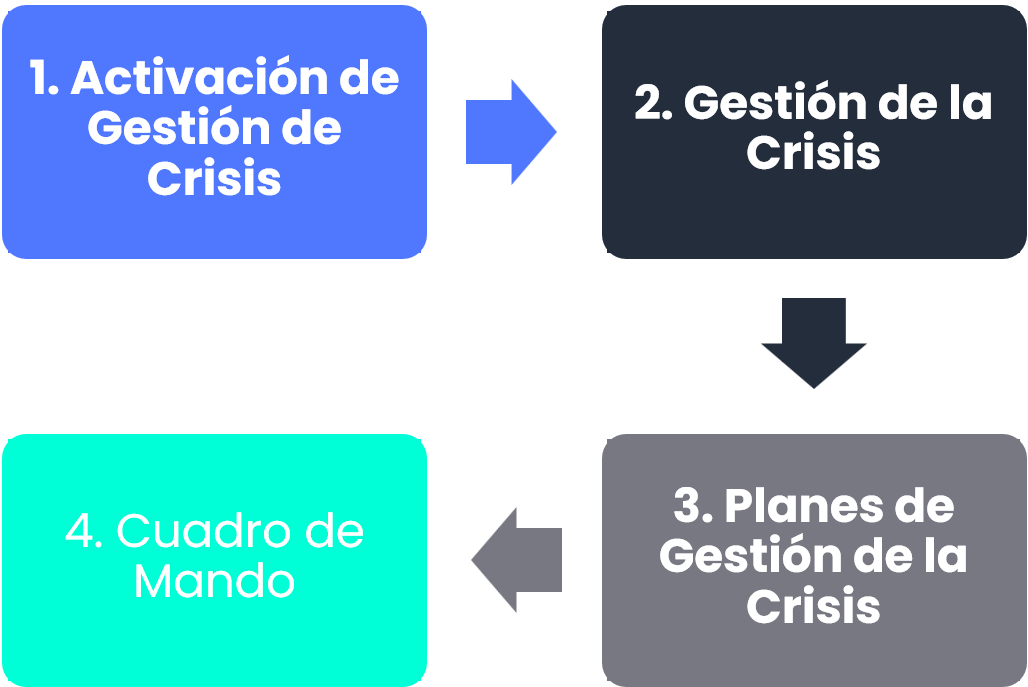
Phases for the initial configuration of Crisis Management
Crisis Management Activation
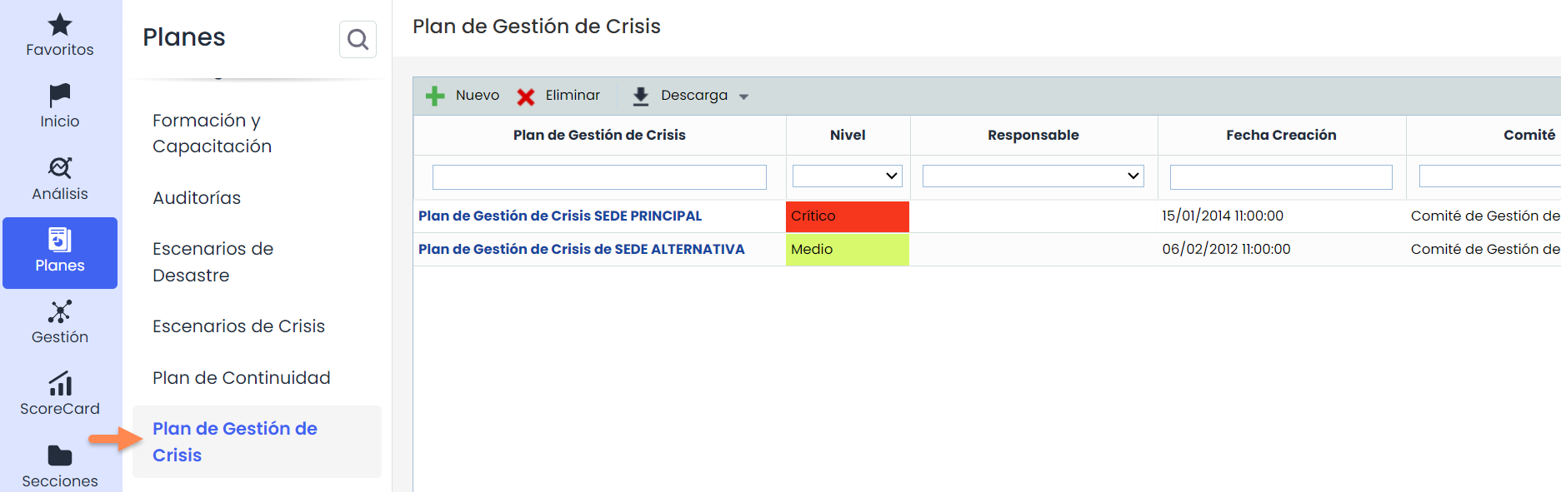
The activation of crisis management will be carried out from the option Plans > Crisis Management Plan , by clicking the buttons “ Activate” or “ Drill” within the plan form.

The set of activated or drill plans can be viewed in the option Management > Crisis Management . If the “ Simulate” button is clicked, it will be created with the label “DRILL” followed by the plan name. If the “ Activate” button is clicked, it will be created with the label “Activation”.
Crisis Management
When clicking on the name of a crisis management plan, within the option Management > Crisis Management , three options will appear at the top.
By default, it enters the Dashboard, however, we will start detailing the first one, which is Crisis Management, where we will have the general data of the crisis management, many of which will be copied from the activated crisis management plan.
First, the activation or simulation data will be specified, which are:
-
Name: General name of the crisis to identify it in the management list.
-
Simulation: Label indicating if it is a simulation and which plan it comes from.
-
Planned Date: Planned start date of the crisis after detection.
-
Related Incidents: Incidents that caused the crisis. If the crisis was activated from the Incidents option, this table would already include the related incident. It is possible to add more than one incident.
-
Description: Brief description of the crisis.
-
Coordinator: Person in charge of managing the crisis. An employee defined in Management > Employees will be selected.
-
D etection Date: When the incident was detected. It is completed automatically.
-
Status: Option to choose when the crisis is notified, in progress, and completed.
-
Related Tickets: Allows adding or associating tickets related to the plan.
-
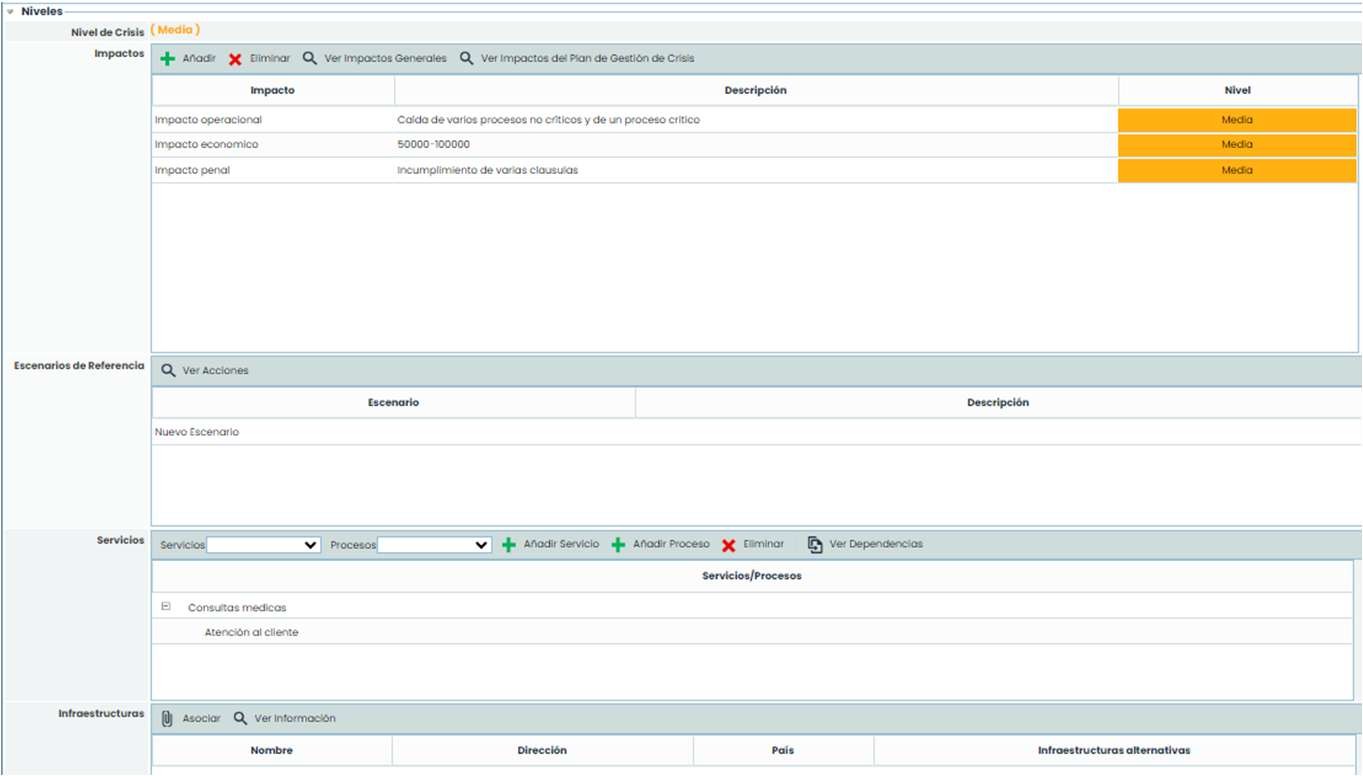
Crisis Level: It will be copied from the plan with the marked level and its impacts.
-
Reference Scenarios: These are the scenarios of the crisis management plan.
-
Services: By default, those defined in the crisis management plan will appear, but they can be modified.
-
Infrastructures: By default, those defined in the crisis management plan will be copied, but they can be modified.
-
Decision Committee: This is the committee configured in the plan, and these committee members have received an alert.

The data that also comes from the plan but can be modified are: Objectives, Clients, and Suppliers.
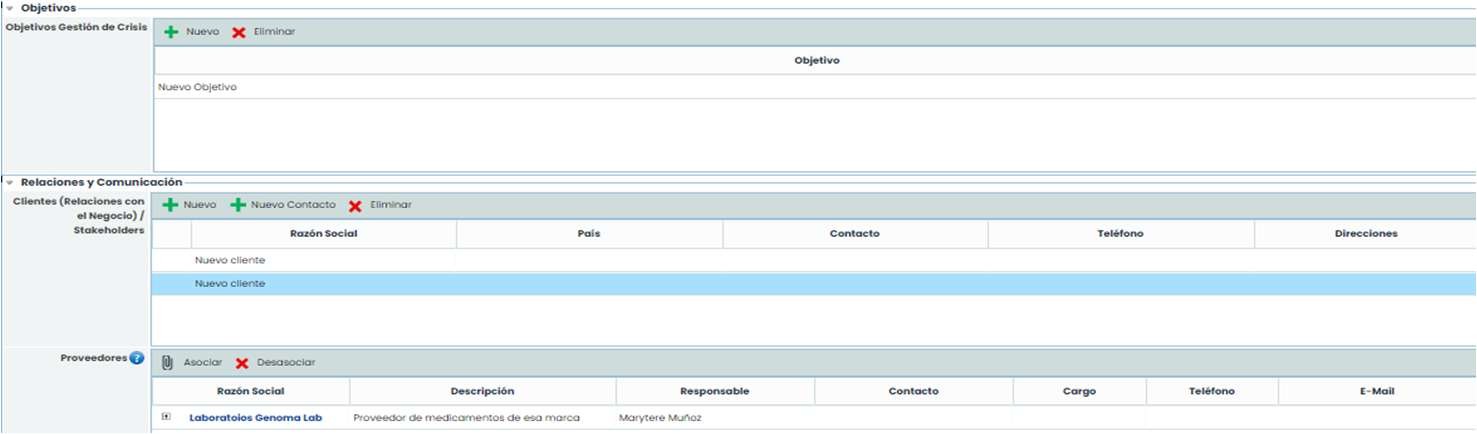
Disruptive Events (Entries) In this table, the events occurring during crisis management that require subsequent treatment can be managed. In addition to creating and deleting, it is possible to:
-
Associate Impacts: Allows associating types of impacts that are being affected by the event.
-
Associate Actions: Allows associating actions from the Resolution Actions table, which are addressing the disruptive event.
-
Associate Stakeholders: Allows associating clients/stakeholders defined in the Clients/Business Relationships table, who are being affected by the event.
-
Associate Suppliers: Allows associating suppliers defined in the Suppliers table, who are being affected by the event.
Escalation: If the crisis worsens and there is a crisis plan with higher impact levels, the crisis can be escalated to that plan. By selecting the New Plan and clicking “ Escalate”, the following message will appear:
Another aspect to consider is user permissions for modifying tasks. For this reason, a user can be configured to only have access to their tasks.
In Settings > Company Roles , mark crisis management with Access to My Information.
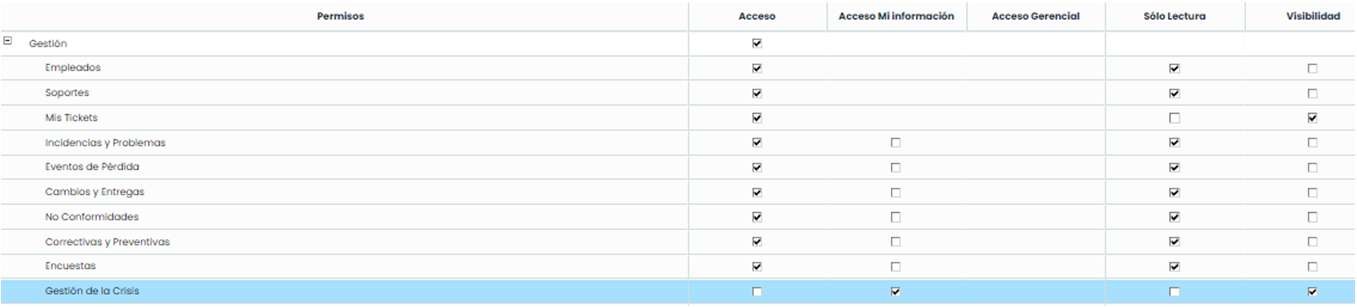
The task tree will look as follows: Only tasks for which they have permission will have links.
The alerts that can be generated from the tool will be specified.
General Alerts: Button “ Send Notifications”, if clicked on the general plan screen, an email can be sent to all employees responsible for the plan. If clicked on a task screen, only the assigned task managers will appear.
Automatic Alerts: When a task is completed, the notification will be sent to the next task.
If it is a task with subtasks, the alert will be sent to the first or first subtasks of the parent task.
If this task has a subsequent sequence, the alert will be sent to the first or first tasks of the next sequence.
If there are multiple subsequent tasks, the alert will be sent to all subsequent tasks.
Crisis Management Plans
From this option, the tracking of recovery plans involved in the crisis can be carried out. To activate related plans, click the “ Activate” button or choose the Activated option from the dropdown list in the Status field. When activated, the button will change to “ Finish” to complete the plans when necessary.

Send Notifications: Allows informing via email the personnel responsible for the tasks to be performed to complete the specific test. Clicking will open a pop-up window with the employees.

Control and Summary: General dashboard of a plan.
Status: Allows indicating the status of the plans related to crisis management.
Execution Date: Allows setting the execution date of the plan.
Completion Date: Allows setting the completion date of the plan.
Delay Margin: Allows entering the delay margin within which tasks can start or finish.

Continuity Plans: Allows associating the plans established for crisis management.
Recovery Plans: Allows associating the recovery plans defined in Plans > Recovery Plans .
Recovery Plan Sequences: By clicking on the plan, its sequences will be displayed. In the right table, the order of these sequences can be configured. To do this, select the previous sequence and a task from that sequence. The sequence can start when the marked task is completed.
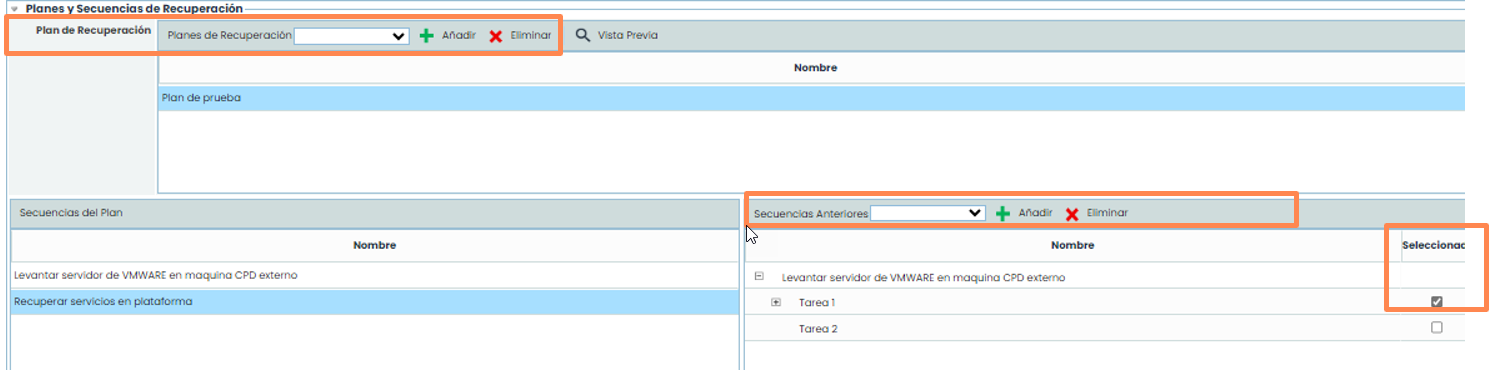
Task Tree: This option allows selecting which sequences of your recovery plan to configure for the crisis. By selecting the sequence and clicking Associate, it will be added to the table ordered by the planned start date.

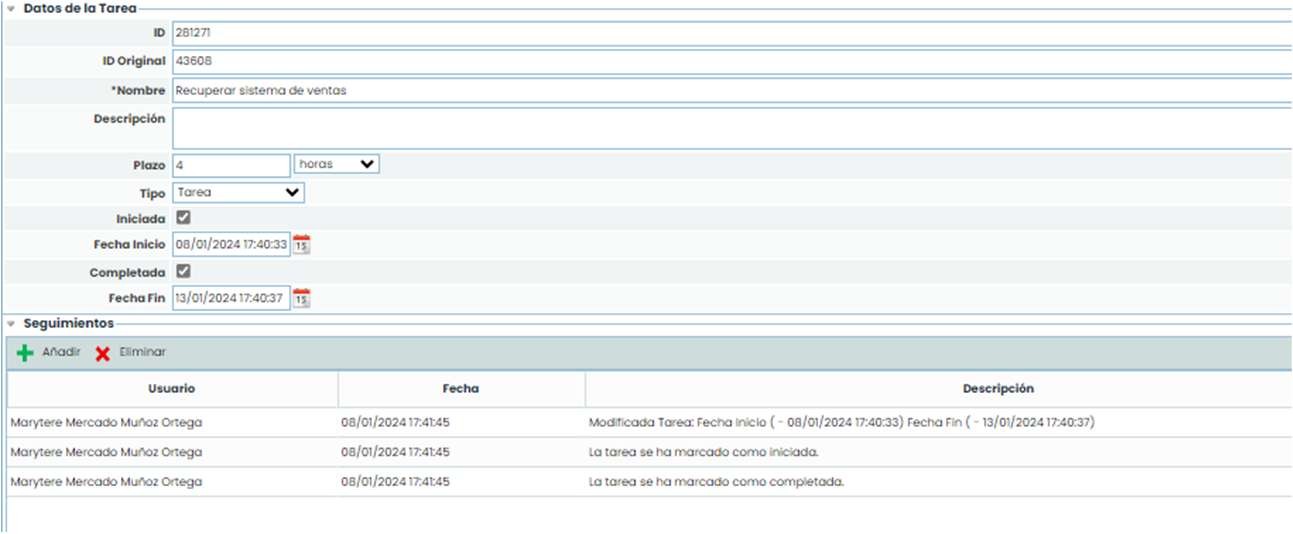
To start the crisis, the general notifications of the plan will be sent so that participants know they need to take action on specific tasks. The person responsible for the first task will need to access their task and modify it (start and complete it).
Note: Tasks with subtasks cannot be started and completed. They will be completed with the subtasks. The information must be saved.
When saving the information and activating the plan, the system will ask if you want to notify the responsible parties.
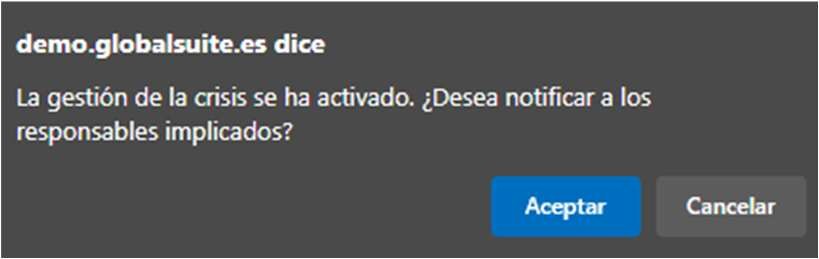
In this way, the system will automatically notify all tasks in the plan. When the user receives this notification, their task will be available to start.
Note: Tasks with dependent tasks that have not been completed cannot be started.
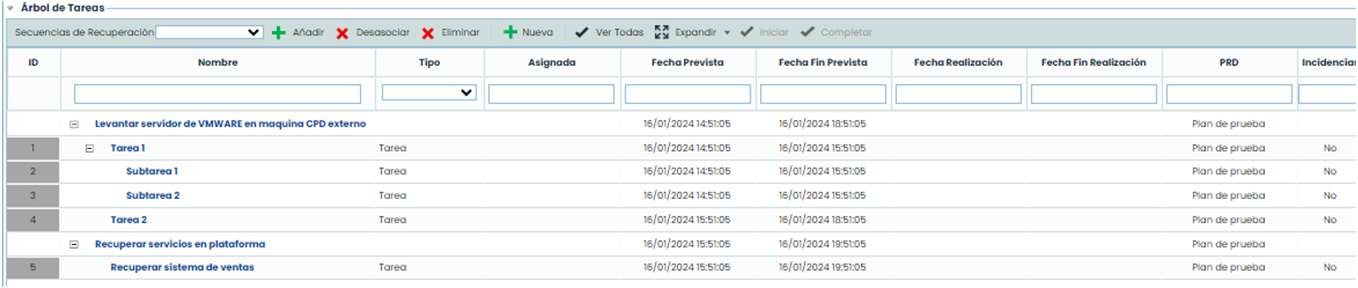
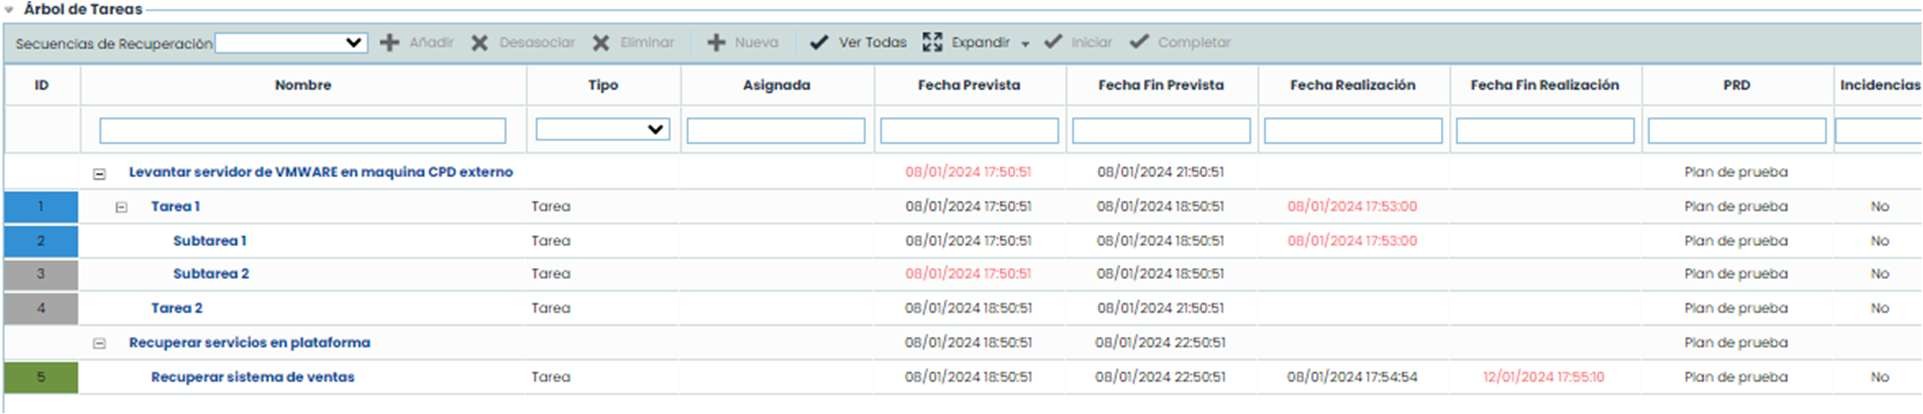
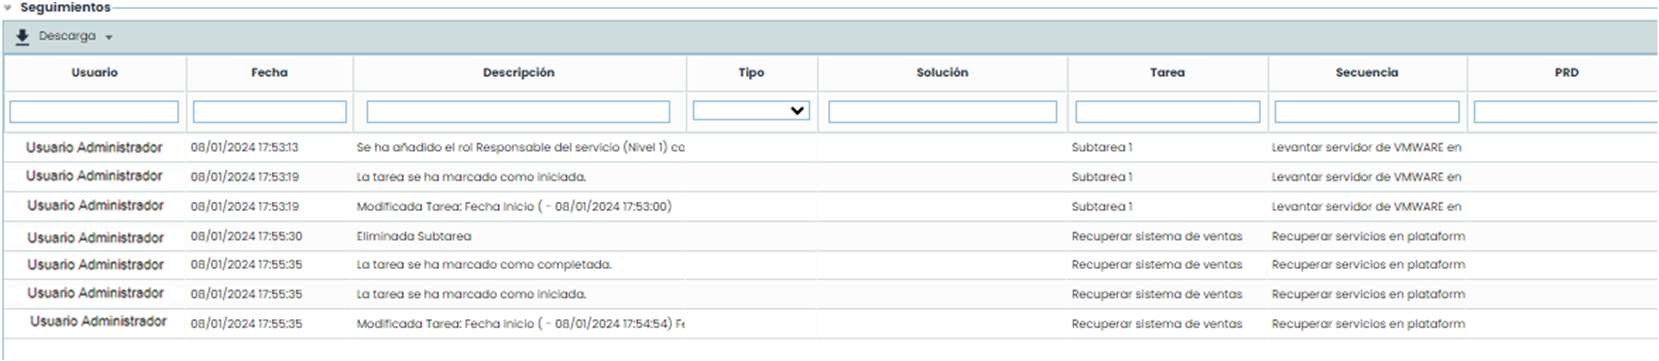
The tracking of the table would be as follows:
Tasks in green have been completed successfully. Tasks in blue are in progress. Tasks that ended with an incident will appear in red.
Tasks in gray have not started. Additionally, tasks that are delayed will have the date in red to identify them.
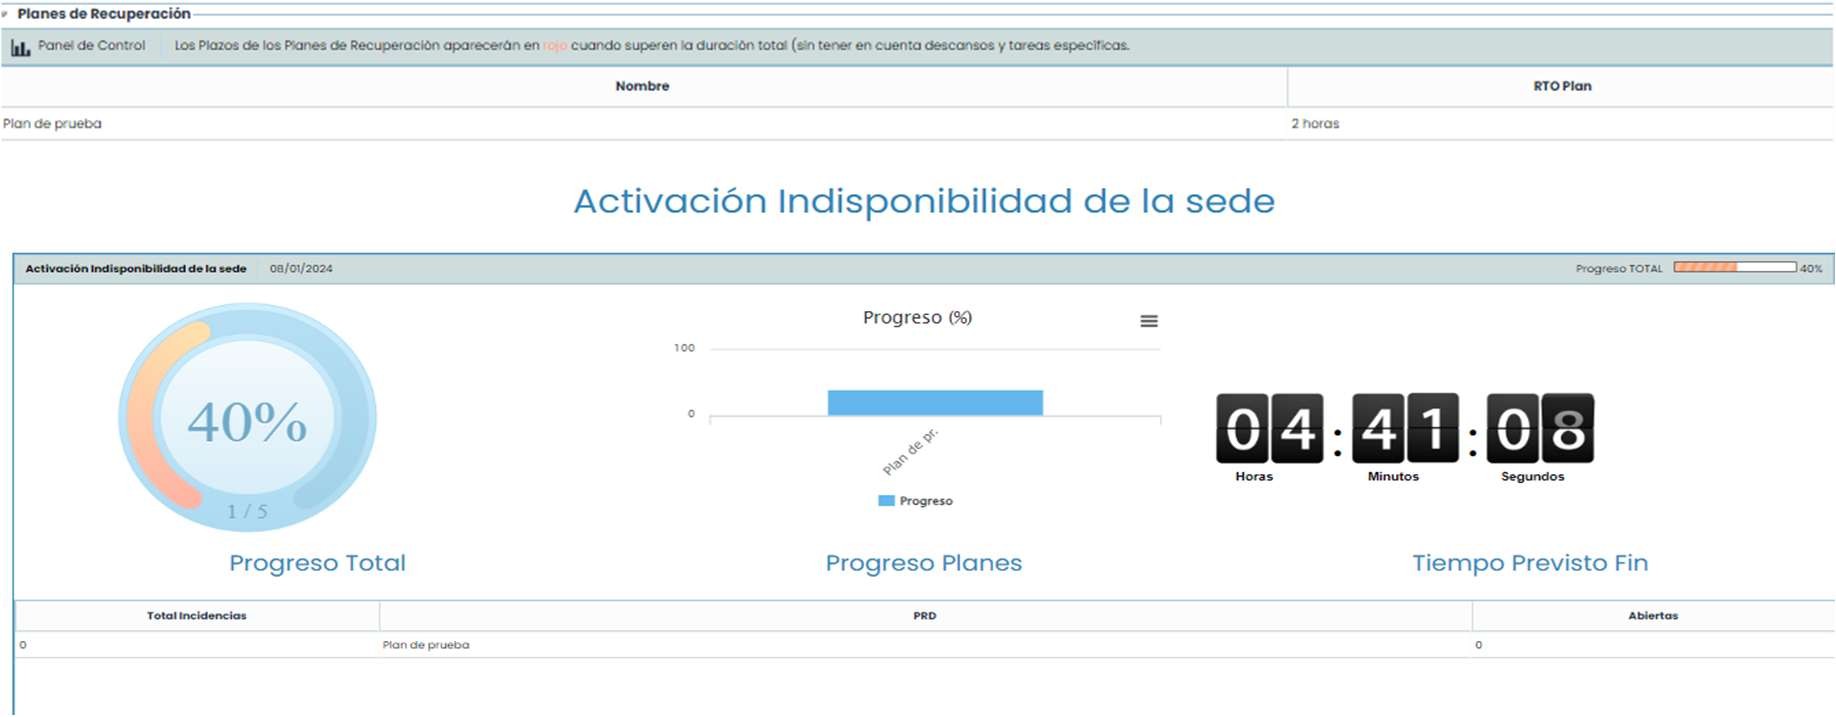
The button “ Control and Summary” is used to view the status of the plans launched in the crisis. First, several graphs indicating tasks and sequences on schedule can be seen.
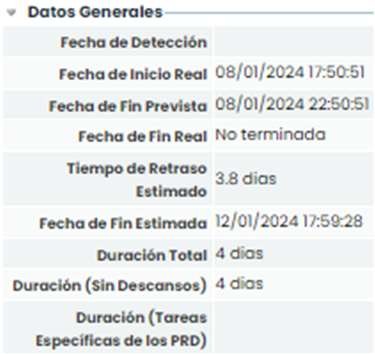
Subsequently, we have the general data of the plan.
The following table shows all the tracking generated in the plan. In addition to manual tracking and incidents that occurred in crisis management.
In the recovery plans table, there is a view to see the status and end time of a plan. By clicking the “ Control Panel” button.
In the sequences table, there is a summary of the recovery sequences of the plan.

Finally, the conclusions section is shown, where corrective actions, non-conformities, detected changes, etc., can be inserted.

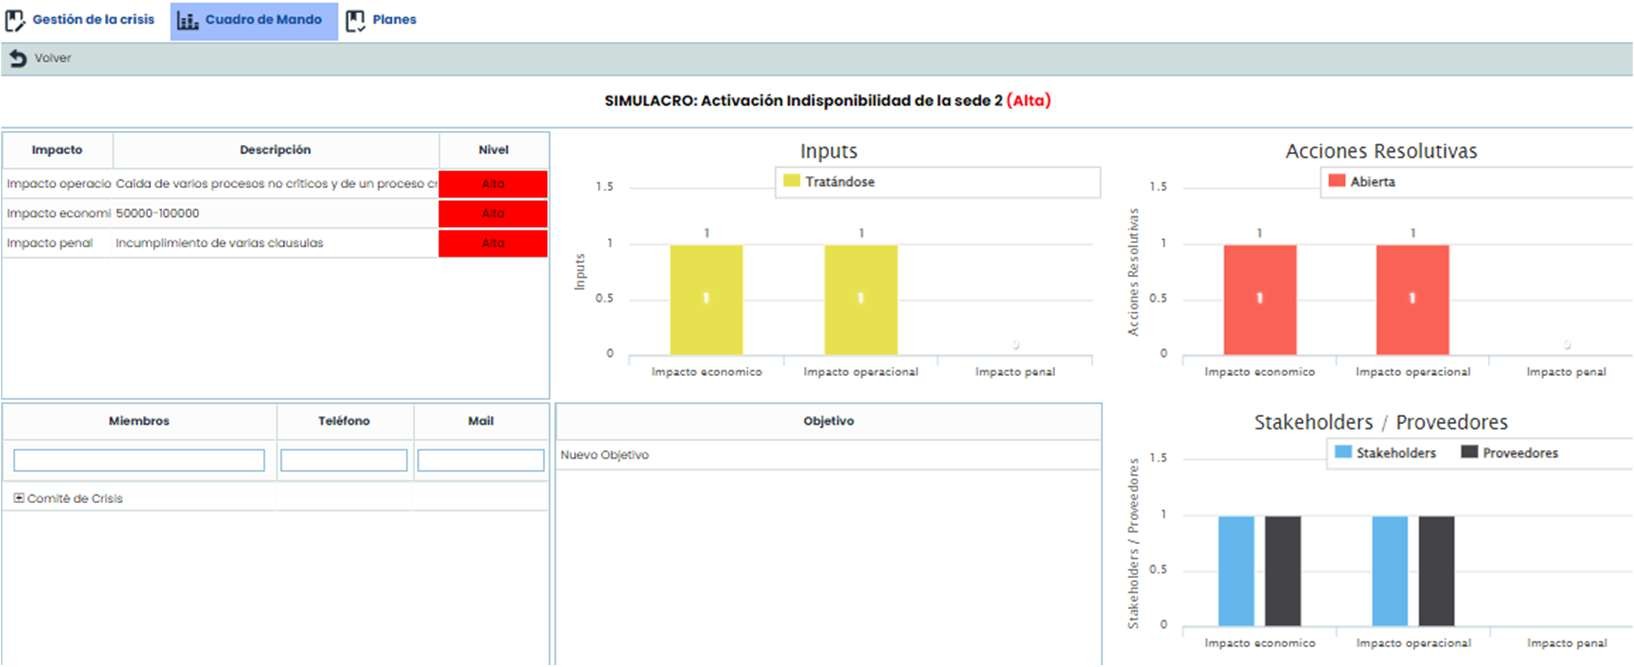
Dashboard
There is a view where specific crisis information can be seen. This information can be viewed in the Dashboard option.