This tutorial describes the use of the Data Import module of GlobalSuite®, which allows bulk information uploads to the platform using Excel templates.
The guide explains the process of downloading the template, uploading the file, field mapping, data validation, and reviewing the import report, as well as its application in different system modules.
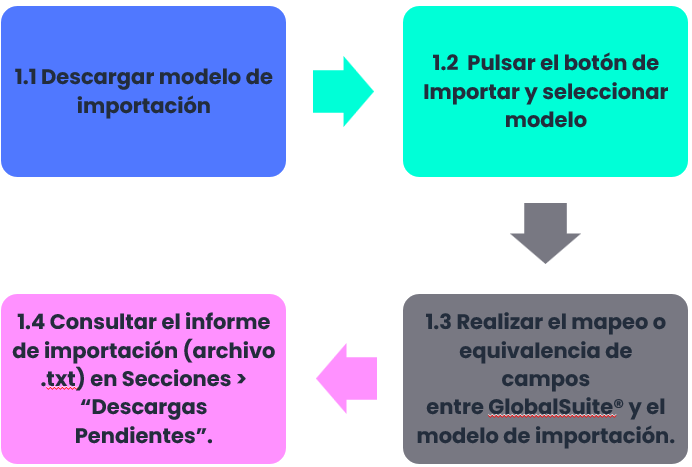
Phases for the import process
Introduction
The GlobalSuite® Data Import license allows the upload of large volumes of data in different options of the GlobalSuite® tool. Depending on the contracted features, more or fewer options will be available. The options for which a license for bulk data uploads can be contracted include: services, processes, employees, suppliers, inventory, control management, risk analysis, and ticketing.
If a specific import license is enabled for any of the aforementioned options, the “Import” option will appear in that section.
Download template
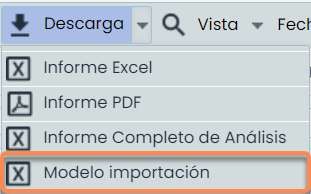
In most GlobalSuite® options, there is an import template, i.e., an Excel file containing all the parameters that can be imported into that option, and whose data can be uploaded in bulk. These templates are obtained through the button called Download.
If no template is available, a blank Excel file must be used, and the column names must be added manually.
The templates are generated in the background, so to obtain them, after downloading, it is necessary to go to the “Downloads” option. Once the template is downloaded, the desired columns must be filled in to then start the data upload. In subsequent slides, the upload templates for each of the GlobalSuite® options will be shown, as well as the data uploads they allow.
Import and select template
To perform an import or data upload, click the Import button in the desired GlobalSuite® option, then click the Choose File button to select the previously downloaded and filled template. Once this is done, click the Continue button.
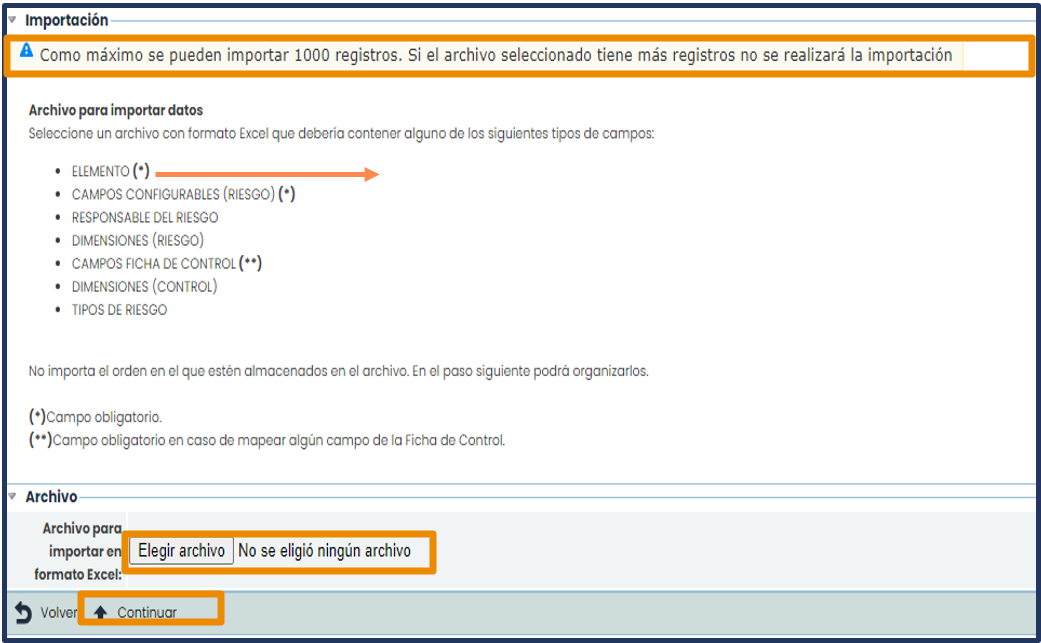
NOTE: Mandatory columns will be marked with an asterisk (*).
It should be noted that only a maximum of 1,000 records (Excel rows) can be uploaded per import. Therefore, if you want to import 3,500 records, it will be necessary to prepare 4 import templates (e.g., 3 of a thousand records and 1 of 500). This notice is always displayed before the import file is uploaded to the platform.
Mapping or equivalence
VERY IMPORTANT!
During the mapping, the following question is asked:
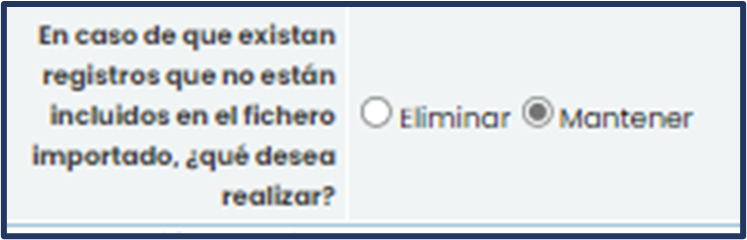
By default, the decision to Keep is selected, which allows adding new records while preserving the information currently existing in the option where the import or data upload is being performed. If the goal is to update existing records, those not included in the template will be preserved. If the Delete checkbox is selected, all current data will be deleted, and only the data in the import template (Excel file) will be saved.
There are options that only allow adding and/or updating records but not deleting them through the import.
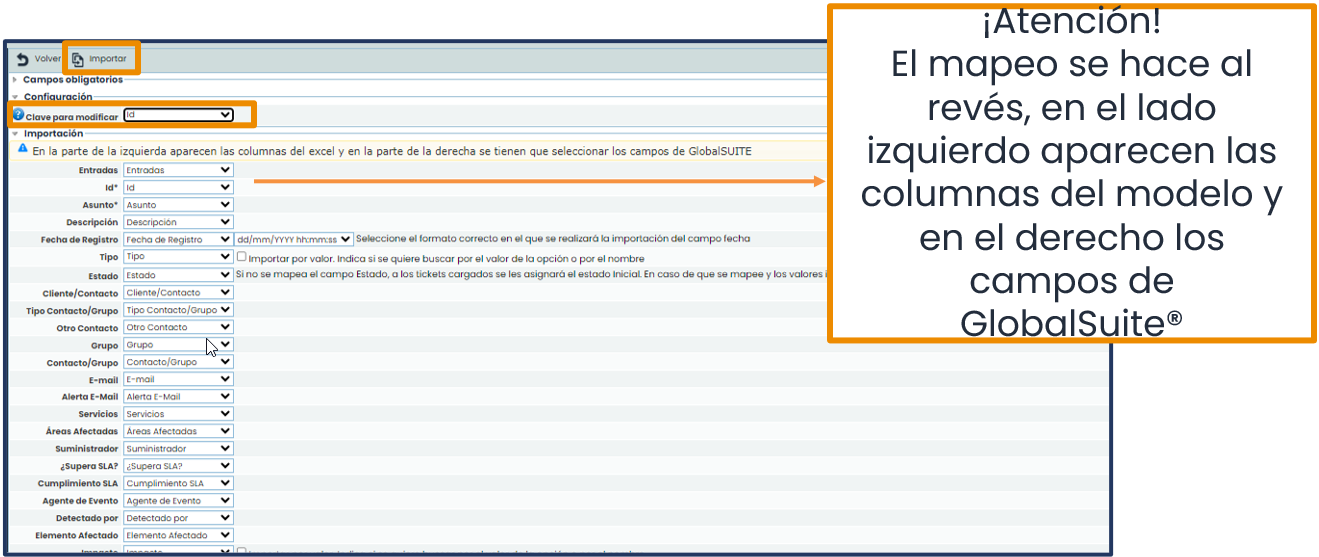
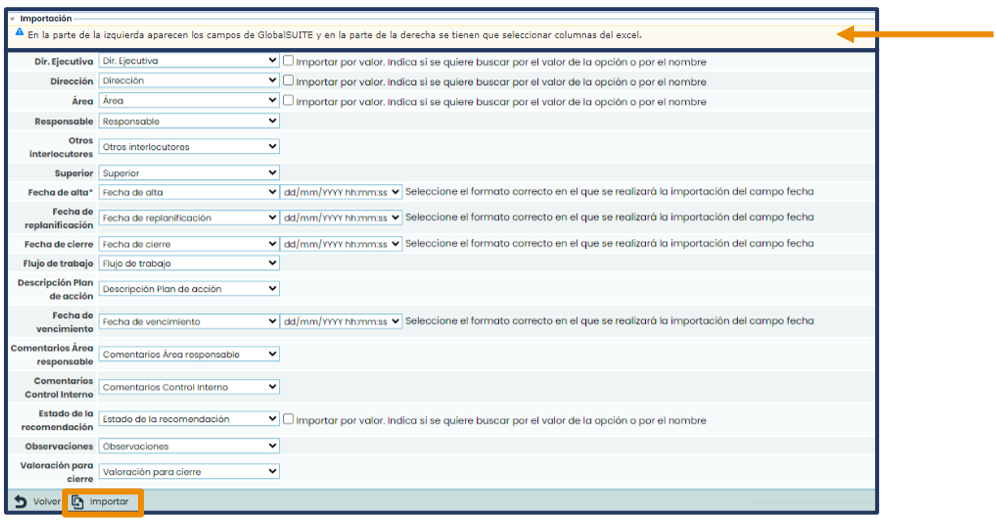
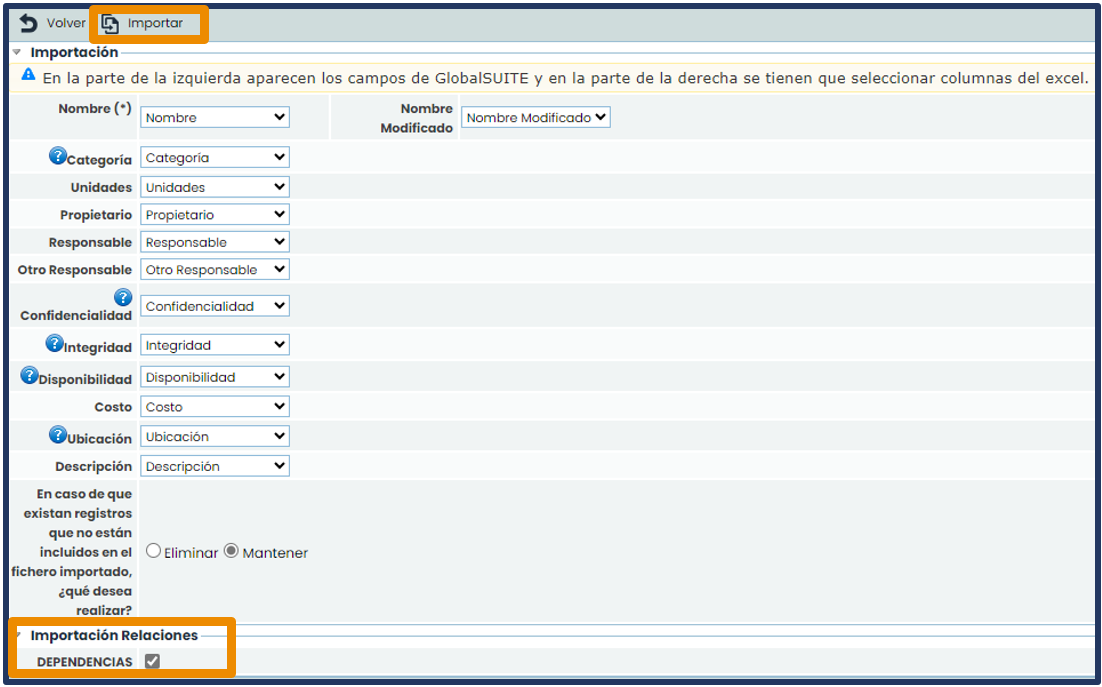
Finally, it will be necessary to perform a mapping or equivalence of fields between GlobalSuite® and the upload file. If the column names in the template match the dimension names of the GlobalSuite® option where the upload is to be performed, the mapping will be done automatically, as indicated in the message highlighted in yellow. By clicking on the white cells on the right, a list of the columns from the previously uploaded file will be displayed, allowing you to modify the equivalence at your discretion. Finally, click the Import button.
Import report
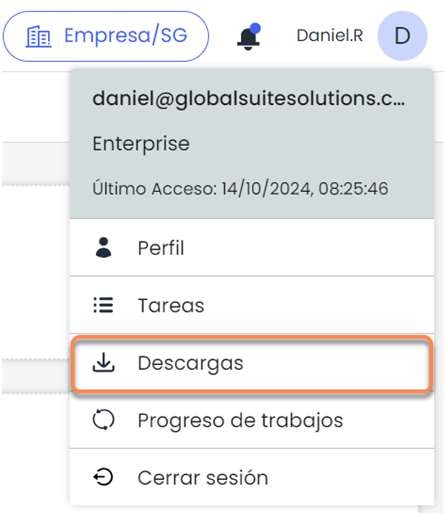
When the import is complete, a report will be automatically generated in Downloads, accessible from the user menu .
This report includes information about:
-
The errors that may have occurred in the data entered in the template.
-
The fields that were not filled in or whose value is incorrect.
-
The number of imported records.
-
The number of modified records (only in options that have this function).

In the import template, it is important to pay attention to the format and the values entered to ensure the upload is successful:
-
Whenever a date-type field is completed, the cell format must be changed to text, and to enter the value, it must be verified that the date fields in the import template match those in the import form. Regularly, in each import form, next to the date field, there is a dropdown field that allows modifying the format to match the template.
-
Dropdown fields: the values of the fields in the template must exactly match (accents, spaces, punctuation marks) the options that appear in GlobalSuite®.
-
Fields that are not to be uploaded or updated should be left blank in the import template, and their mapping should also be left blank to avoid deleting data already loaded in GlobalSuite®, if any. If a field is left blank in the template and the mapping is not removed during the upload, the content in GlobalSuite® will be deleted.
-
In some GlobalSuite® options such as Inventory , Controls or Risk Analysis , there are manual and automatic dimensions (see methodologies). Only manual dimensions can be imported. Whenever there is an automatic dimension, it will be necessary to run the Calculate AR process after importing the template.

-
When copying data from another Excel to the import template, it is essential to use the paste values option to avoid copying metadata into the template, as this could result in a failed import.
Import details
As previously mentioned, the GlobalSuite® Data Import license allows bulk uploads of large volumes of data in different options within the tool itself. These options include: services, processes, employees, suppliers, inventory, control management, risk analysis, and ticketing.
Below, the details of the imports for each of the aforementioned options will be shown.
Services
After downloading the import template in the Home > Service Catalog option and opening the template, the following will be observed:
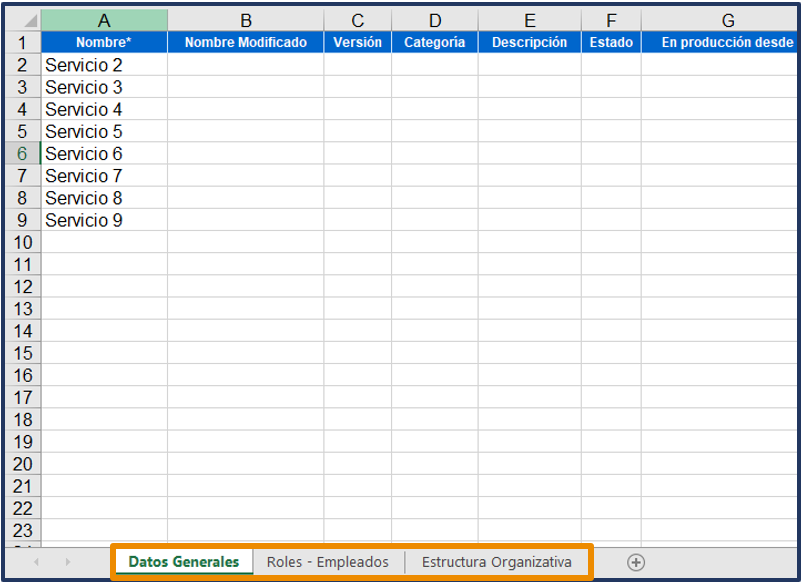
Within the General Data of the template tab, it will be possible to add records and also modify the Name* of the existing ones if the Modified Name column is completed. Additionally, if the Category and Status columns are not completed, the tool will default to the values of Services and In production.

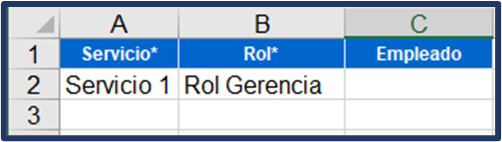
The Roles - Employees tab will serve to link the roles and employees registered in the tool. It will not modify or delete existing values under any circumstances.

In the Organizational Structure tab, it will be possible to link parts of the structure already registered within GlobalSuite®. It will not modify or delete existing values under any circumstances.
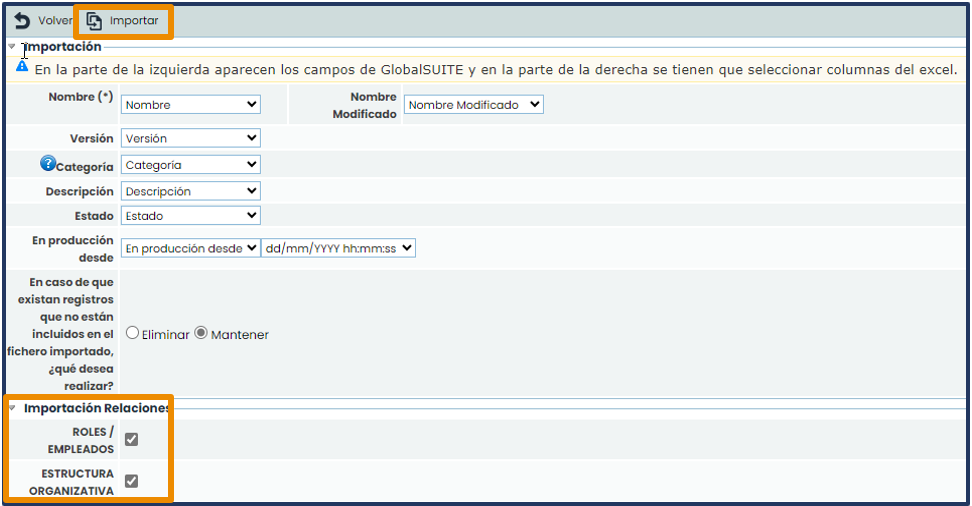
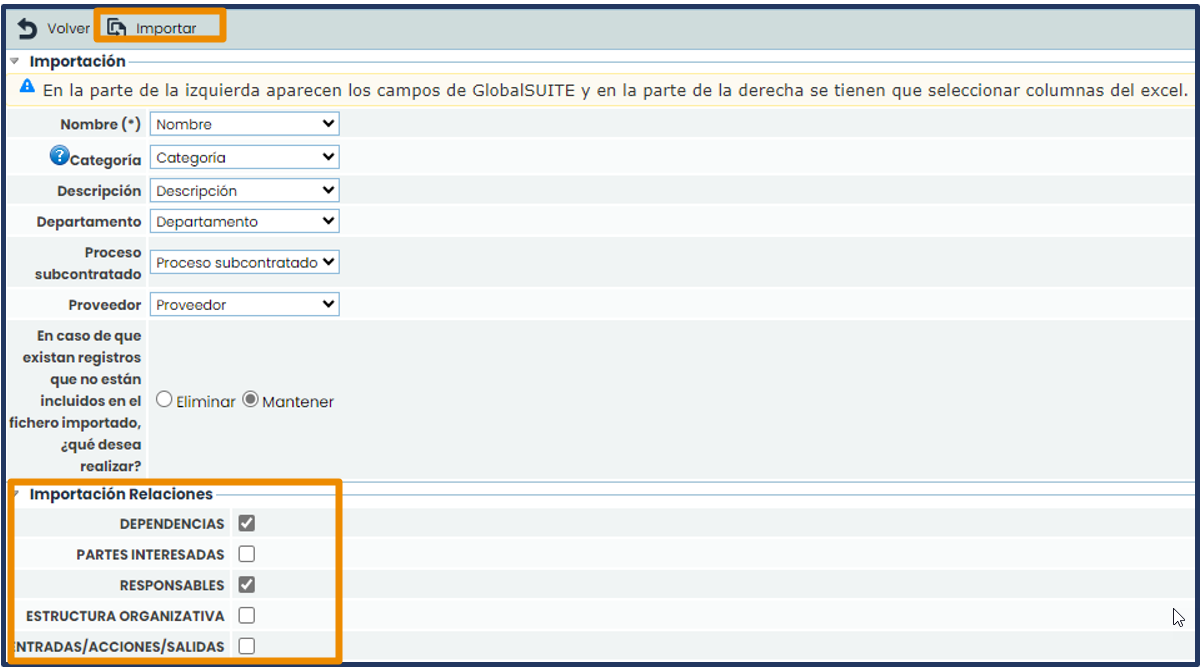
Subsequently, within the GlobalSuite® tool on the mapping screen, the tabs of the template to be imported can be selected. By default, the General Data tab will always be loaded. If you want to add Roles/Employees or link parts of the Organizational Structure, the corresponding checkbox must be marked within the Import Relationships option.
If Services are neither updated nor added, their corresponding fields must be left blank. This last case could occur only if you want to add Roles/Employees or parts of the Organizational Structure.
Finally, to conclude, the Import button must be clicked.
Processes
The import in the Home > Processes option allows adding new records and modifying existing ones except for the Name* field in the General Data tab. The other tabs of the template allow adding but not modifying. For example, outdated Dependencies must be manually deleted from the Process Tree.
In the Dependencies tab, the Process Tree upload is indicated. It is always necessary to specify the Service or Process on which another Process will depend. Services cannot depend on Processes or other Services. If dependency levels are not used, the last column must state Fully dependent.
In the other tabs of the import template, the Process column and the data to be imported must always be filled in. It should be remembered that columns marked with an asterisk (*) are mandatory.
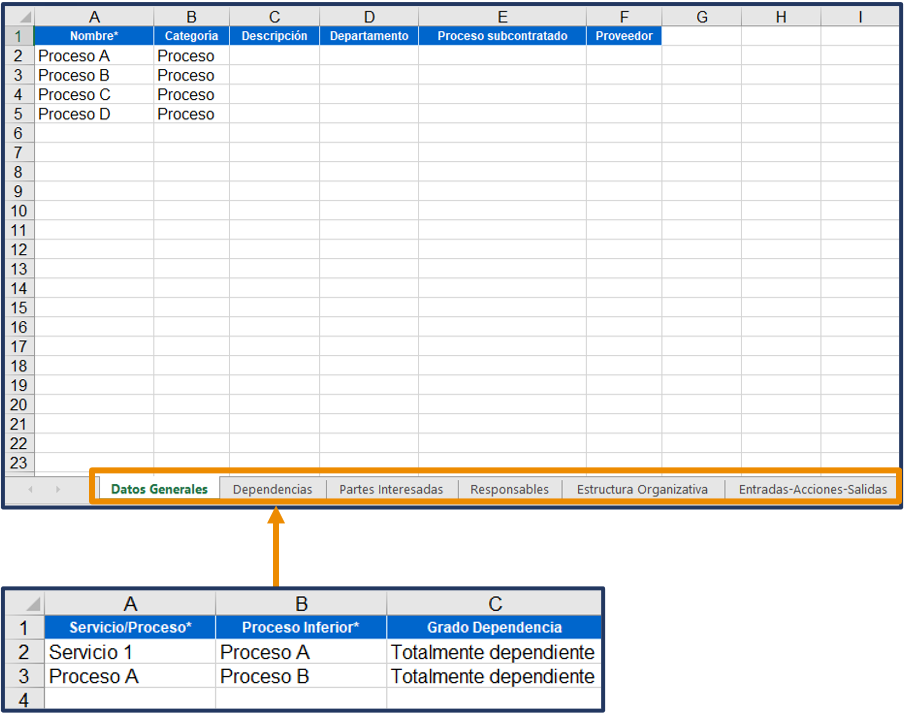
Subsequently, within the GlobalSuite® tool on the mapping screen, the tabs of the template to be imported can be marked. By default, the General Data tab will always be loaded. If relationships are to be imported, the desired checkboxes must be marked. If Processes are neither updated nor added and only relationships are imported, all mapping should be left blank. Finally, to conclude, the Import button must be clicked.
Employees

In the Management > Employees option, there is also the possibility of performing bulk data uploads. The import template for the Employees option is downloaded directly in the browser and not in the background in the Downloads option of the User menu.
Pending as seen in previous options.
When mapping, it will always be necessary to indicate the equivalence between fields, as they will not come by default. Additionally, as in all other options, you can choose only the fields you want to upload.
In this mapping, it is only allowed to add records. Deletion must be done directly from the Employees option, as there is no option to edit through the template.
In the Tif. Mobile and Tif. Alternative identifiers, there are adjacent dropdowns where you can indicate the type: either fixed or mobile, and if there are more categories, they will also appear in the dropdown. Finally, to conclude, the Import button must be pressed.
Suppliers
In the Home > Suppliers option, the import template will also be downloaded directly from the browser and not in the background.
Similarly, when mapping, it will always be necessary to indicate the equivalence between fields, as they will not come by default. Additionally, as in all other options, you can choose only the fields you want to upload.
In this mapping, it is only allowed to add records. Deletion must be done manually from the Suppliers option, as there is no option to edit through the template.
Inventory
The import in the Analysis > Inventory option allows adding records and modifying existing ones, including the Name* field (through Modified Name) in the Data tab.
The Dependencies tab allows adding, but not modifying. For example, outdated Dependencies must be manually deleted from the Element Tree.
In the Dependencies tab, the Element Tree load is indicated. It is always necessary to indicate the Service/Process/Element on which another Element will depend. Services and Processes cannot be related to each other from this option. If dependency degrees are not used, the last column must state Fully dependent.
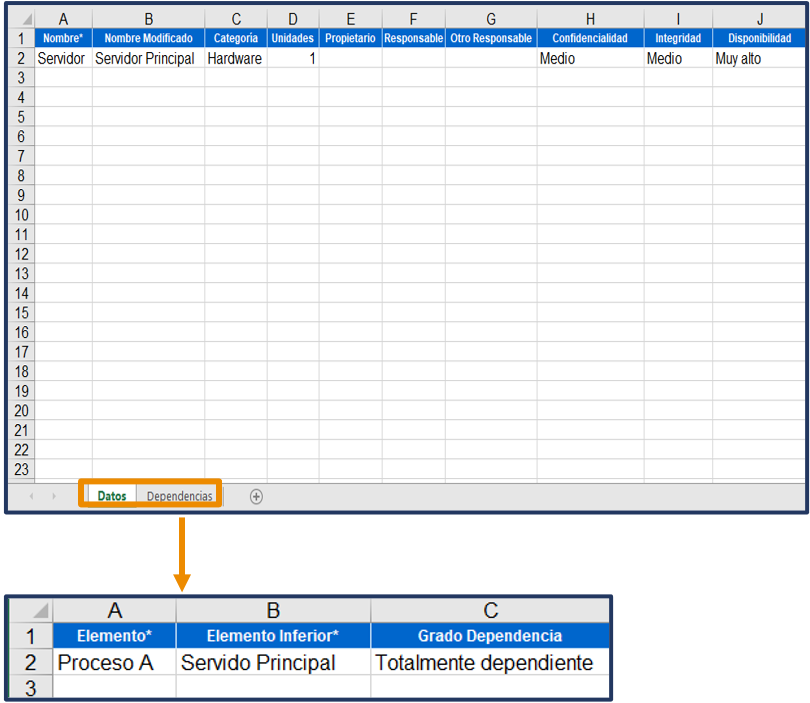
Once inside the mapping screen, you can check the Dependencies box if you want to upload it, as by default, the Data will always be uploaded. If you do not update or add elements and only import dependencies, the entire mapping must be left blank except for the Name field.
Finally, to conclude, the Import button must be pressed.
Control Management
The import in the Analysis > Control Management option allows adding records and modifying existing ones, with the exception of the Name field.
It is important to note that there is no template for importing controls. Therefore, it is recommended to download the Excel Report available in the Download button to use it as a template.
When mapping, it will always be necessary to indicate the equivalence between fields, as they will not come by default. Additionally, as in all other options, you can choose only the fields you want to upload.
Finally, to conclude, the Import button must be pressed.
VERY IMPORTANT!
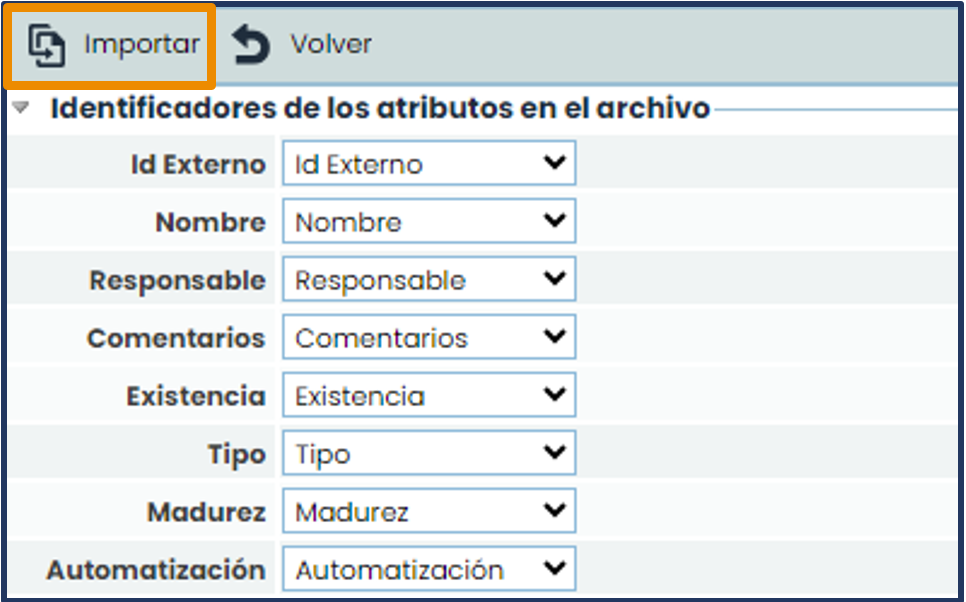
All controls uploaded must have an External Id, which is a numeric value that identifies and differentiates them. This id must be assigned to each control in the Excel file to be uploaded. To do this, an additional column must be created or the External Id column itself must be used if the Excel Report from the option is used.
If controls have already been manually created within the tool, it will also be necessary to add an External Id to them in case a massive update of all controls in an analy sis is required in the future.

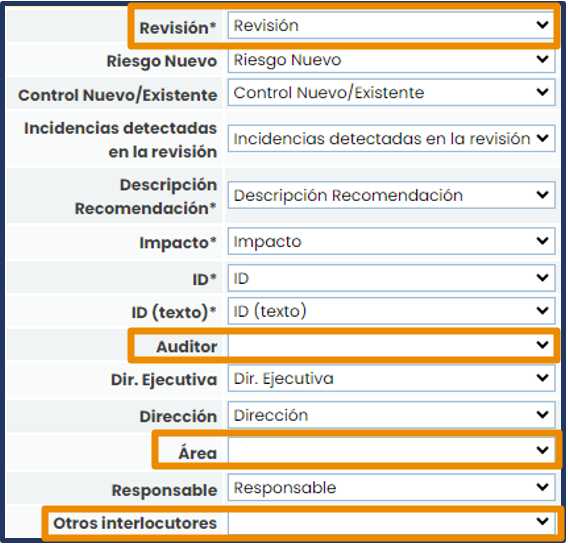
Risk Analysis
The import in the Analysis > Risk Analysis option allows adding records and modifying existing ones, except for the Risk column in the Data tab of the template. The Configuration tab allows viewing the possible values to select in the manual dimensions of the risk methodology.
The template is divided into two sections:
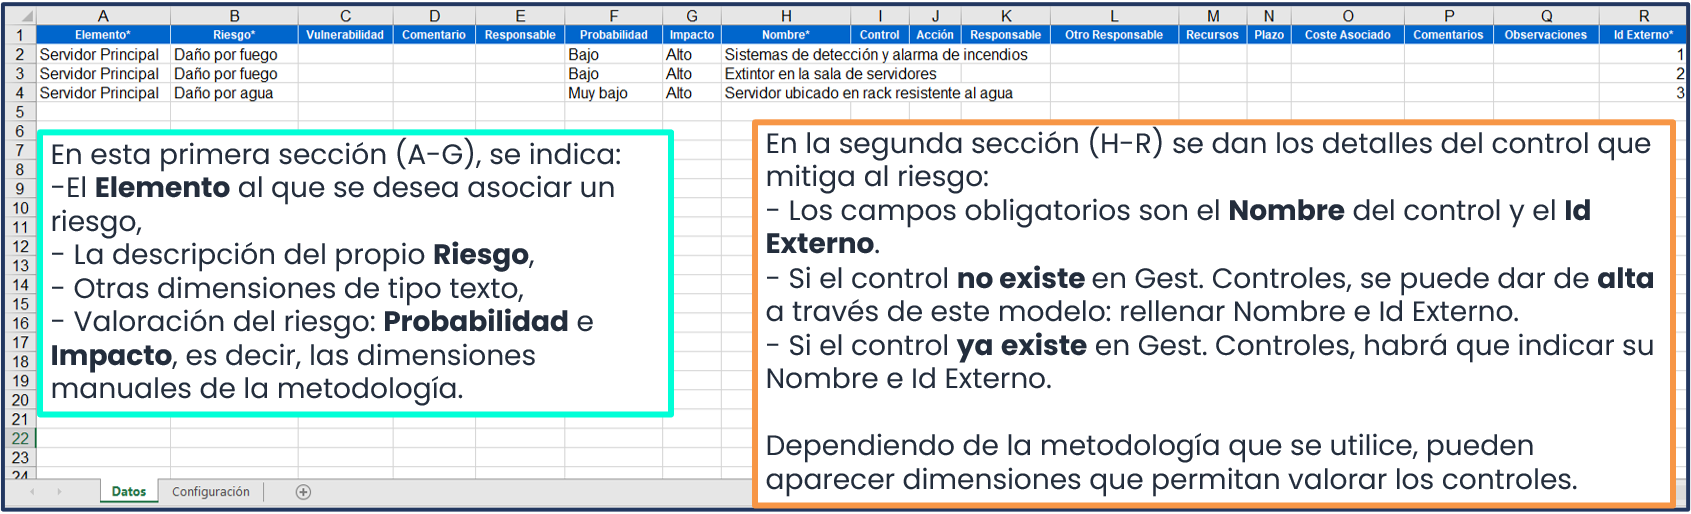
The template must have as many rows as controls associated with the risks of all the elements to be imported into the Risk Analysis. It should be noted that each import allows a maximum of 1,000 records.
In the following image, it can be seen that the element Main Server has been associated with two risks: fire damage and water damage. For the first risk, there are 2 controls , and therefore the risk with its assessment appears duplicated, and for the second risk, there is only one control, so only the risk itself with its assessment appears.

Within the GlobalSuite® tool, on the mapping screen, a Key to modify must be selected, which will be the reference field used to identify the risks whose assessments or descriptive fields you want to update (the risk dimension cannot be updated). It is usually recommended that the key be the Threat field.
Finally, the Import button is pressed to carry out the upload.
After uploading the file or files, it will be necessary to launch the Calculate RA process to calculate the values of the automatic dimensions.
Ticketing
To access the import of ticketing forms, you must go to the Management tab. Once there, select the type of ticketing you want to access to start the data import process. This will be done in the same way for all forms; the only difference is the import template, i.e., the fields each one contains. Therefore, you must always download the template from the ticketing option where you want to perform the import.

For a correct ticket import, it is essential to consider 3 very important factors:
-
The semicolon (;) is used as a separator, for example, when the form is linked to multiple Services or Processes. In the corresponding cell, it will be necessary to indicate it as follows: Service 1;Service 2
-
The dates must always have the format indicated in point 1.5. of this guide.
-
All follow-ups of a ticket must be recorded in the same cell and separated by the string $$. Additionally, since each follow-up consists of 3 different fields (user, date, and description), these must be separated by the sequence ||. There should be no spaces before or after $$ or ||. The date of the follow-ups must have the same format indicated in the previous point. For example: juan.perez||20/03/2021 10:00:00||Description of the first follow-up$$juan.perez||23/03/2021 18:45:00||Description of the second follow-up.
On the mapping screen, a Key to modify must be selected, which will be the reference field used to identify the risks whose assessments or descriptive fields you want to update. It is not recommended to modify the format of date-type fields. Next to the mapping fields, important indications appear; it is advisable to read them before performing the upload in case it is necessary to modify the template. Finally, the Import button is pressed to carry out the upload.