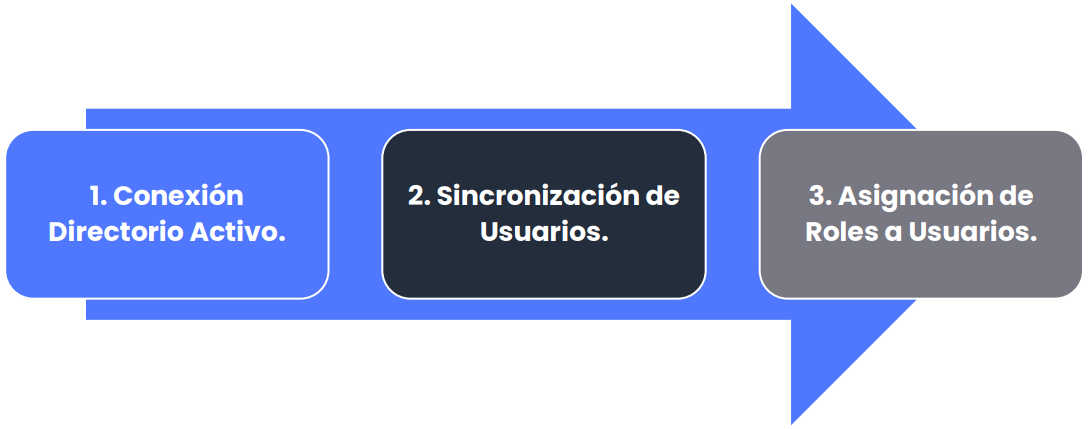
Steps for Synchronization with Active Directory
The synchronization of GlobalSuite® with Active Directory can be performed once the relevant connection has been configured. This guide describes the steps for synchronization with Active Directory, assuming the connection has been previously configured.
Active Directory Connection
Step 1
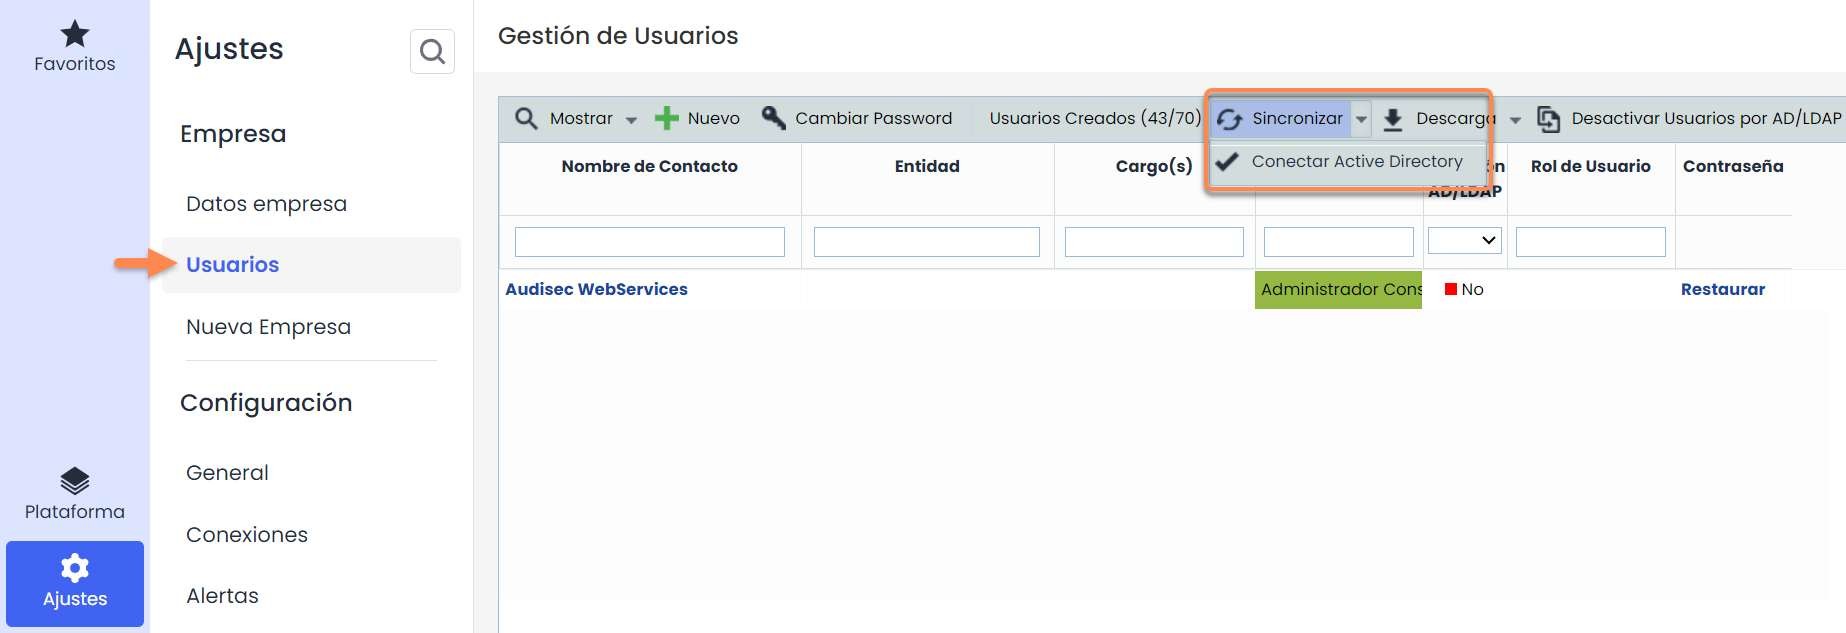
Through the “Settings” section, you can access all the configuration options of the Platform. In the Users option, you can establish the connection with Active Directory through the “Synchronize” button.
When clicking on the “Synchronize” button, all configured connections with Active Directory appear.
Step 2
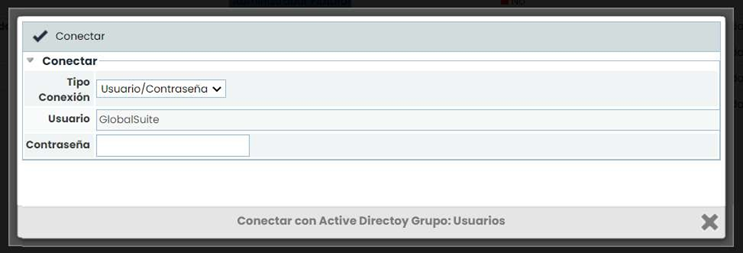
After selecting a connection, a window appears to enter the access password. Once the password is entered, you need to click on the “Connect” button.
If the password is valid, the user synchronization screen appears.
Step 3
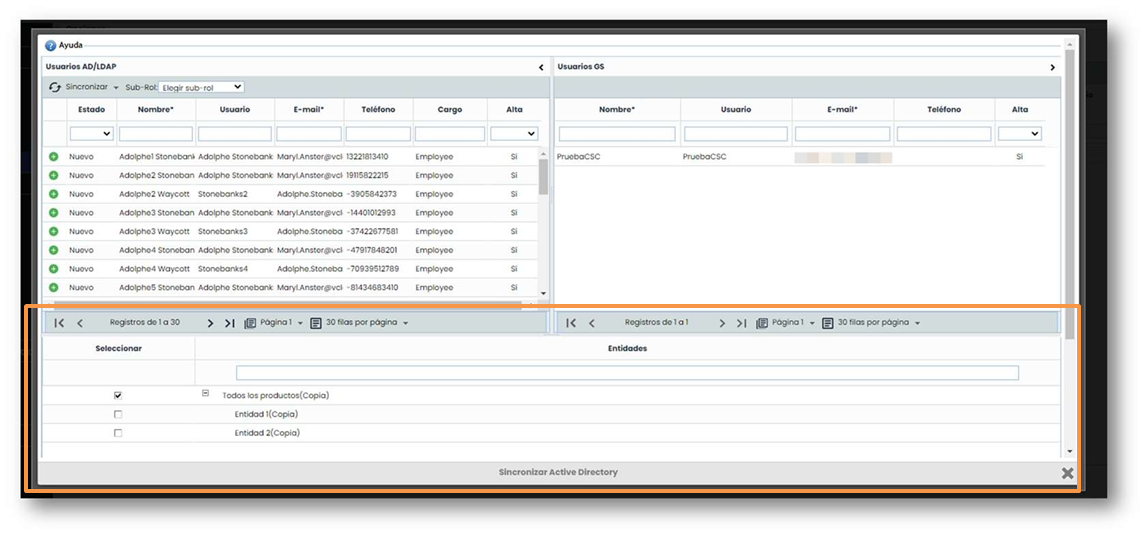
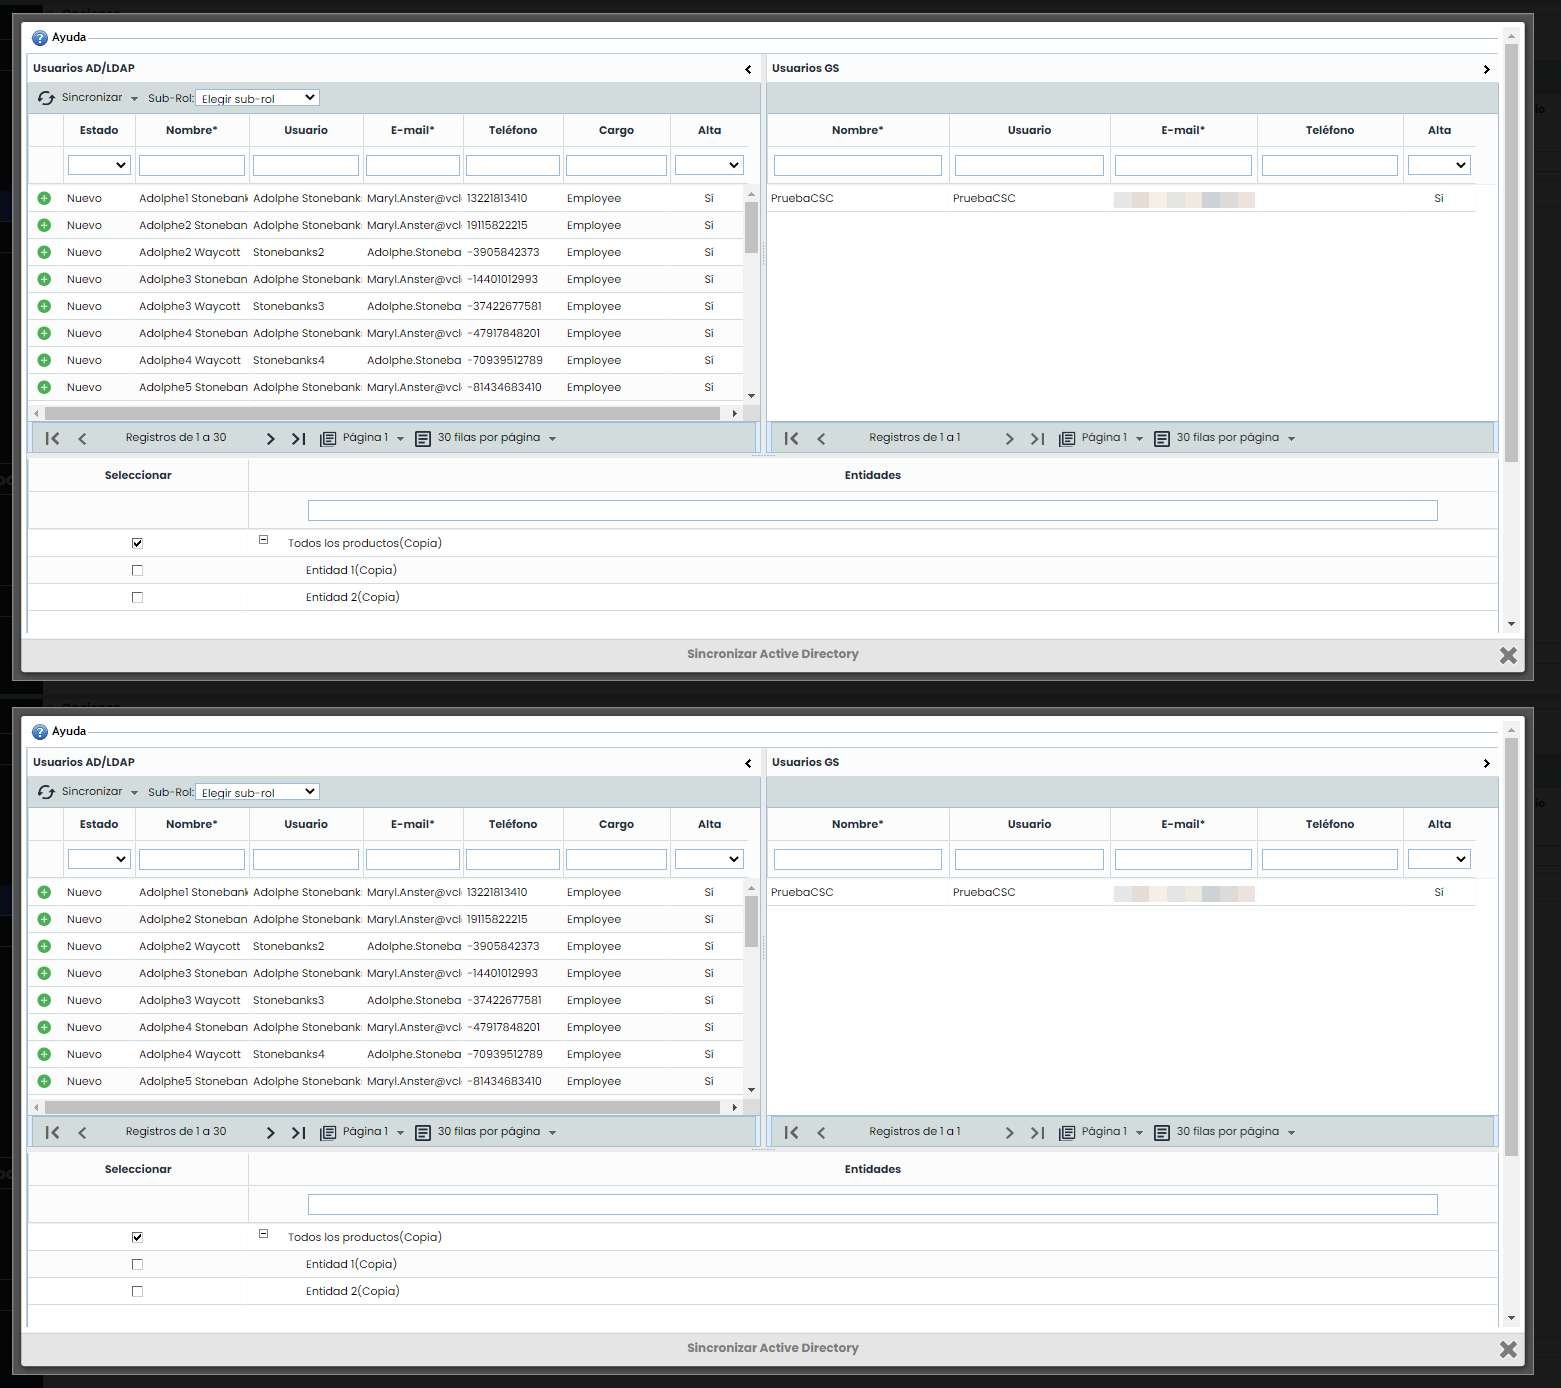
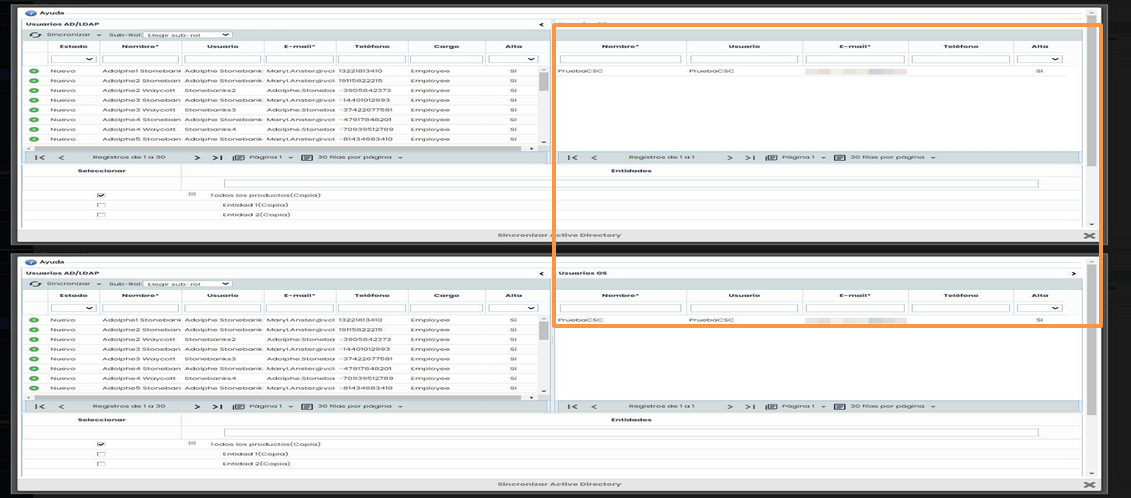
The user synchronization screen is divided into 3 sections. This screen allows you to create, update, and delete GlobalSuite® users from Active Directory, as well as assign a sub-role to each user during the synchronization process.
The following pages detail each of the sections.
Step 4
The upper left section corresponds to the section of users found in Active Directory. The table shows the users belonging to Active Directory that can be synchronized with GlobalSuite®. Users can have 3 statuses:
Indicates that the user is already synchronized with GlobalSuite®.
Indicates that the user exists in Active Directory but is not synchronized in GlobalSuite®.
Indicates that the user exists in both Active Directory and GlobalSuite®, but some data has changed in one of the two tools.
Note
If the Active Directory configuration has the “Create and associate employees when synchronizing users” check enabled, then the user also appears with this image in any of the following cases:
If the user has an associated employee who is inactive.
If the user no longer has an associated employee.
Step 5
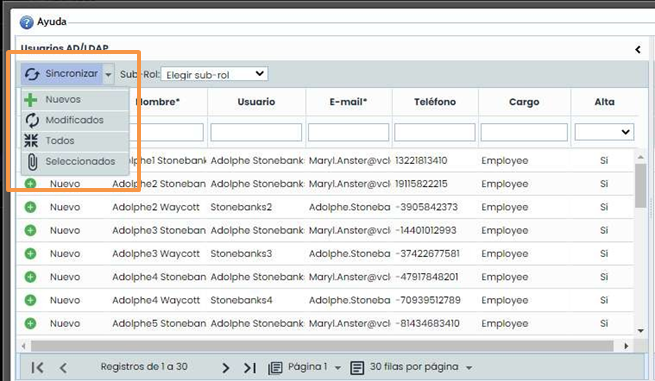
In the upper left part, there is the “ Synchronize” button. This button allows performing different actions to carry out the synchronization.
The description of each button is as follows:
-
New: Adds Active Directory users that were not synchronized (unless the established user limit is exceeded). Additionally, if the connection configuration has the “Create and associate employees when synchronizing users” check enabled, an associated employee is created for each user.
-
Modified: Updates users with the changes detected in Active Directory. • All: Adds Active Directory users that were not synchronized and updates modified users.
-
Selected: Adds or modifies (depending on each case) the users selected in the table.
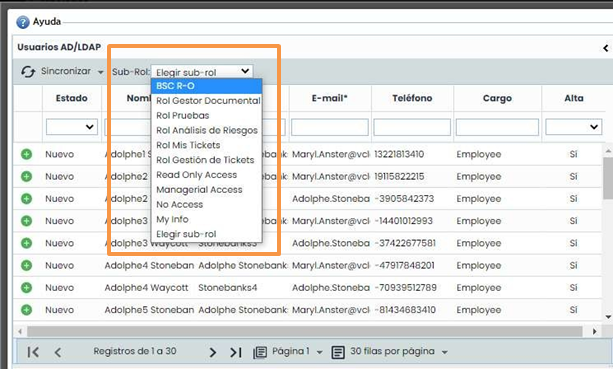
Role Assignment to Users
Step 6
All users that are synchronized are registered with the “Enterprise” user type by default. If it is necessary to modify the user type, it must be done later after synchronization, by accessing the users to be changed and setting the corresponding user type.
“ Enterprise” users can have an associated sub-role that limits access privileges to different options (sub-roles are registered in the “ Company Roles” option). The synchronization window allows assigning a sub-role to synchronized users. To do this, the following must be done:
-
Select the sub-role to be used.
-
Select the users to be synchronized and associated with the sub-role.
-
Click on the “Selected” option of the “Synchronize” button.
Step 7
The upper right section corresponds to the section of users already registered in GlobalSuite®. The table shows both users synchronized with Active Directory and local users registered directly in the tool.
Step 8
The lower section shows the entities associated with the company. This allows selecting which companies or entities the synchronized users will have access to.