This tutorial explains, step by step, how to create, configure, publish, and consolidate surveys for items, risks, and controls in GlobalSuite®.
The objective is to demonstrate how to use survey templates to identify inventory items, analyze associated risks, and evaluate implemented controls within the organization. Additionally, it details the phases of configuration, publication to responsible parties, response management, and final consolidation of information for integration into the system's risk and control analyses.
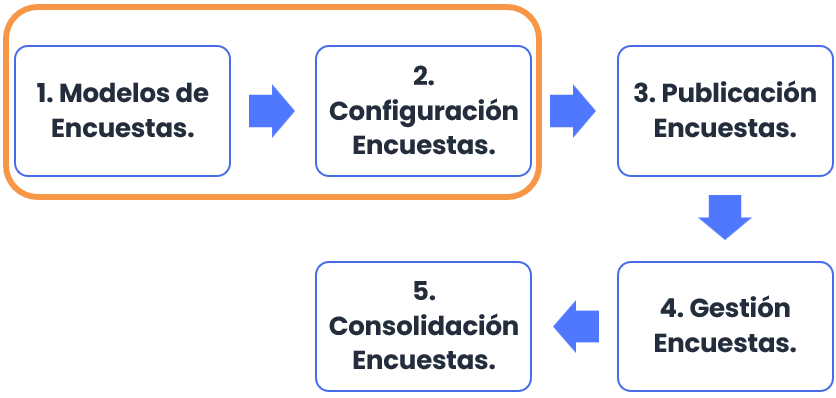
Phases for conducting Item-Risk Surveys
This guide will explain phases 1 and 2 of the survey creation process.
Survey Models
GlobalSuite® allows identifying and classifying the inventory of items, performing risk analysis, and evaluating the organization's controls through surveys sent to various responsible parties within the organization. To do this, the survey template to be sent must first be created. Multiple templates can be created and configured to adapt them to the organization's needs.
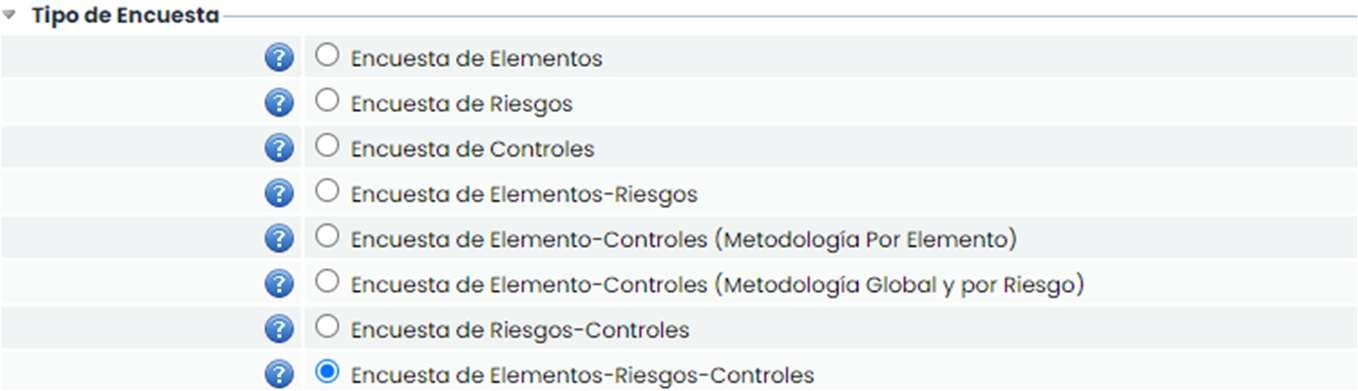
For this purpose, each survey template can be configured by indicating its type. There are three types of surveys that can be considered when creating a template:
-
Item Survey: Allows the identification of items, their categorization, and classification.
-
Risk Survey: Allows the identification of risks for each item (including services and processes) as well as their evaluation according to the organization's methodology.
-
Control Survey: Allows the identification of controls implemented in the organization, as well as their maturity evaluation according to the corresponding methodology.
This guide will explain how the “Item, Risk, and Control Survey” type works.
To configure a survey model, you must be an Administrator user (Platform Administrator, Enterprise Administrator, or Configuration Administrator), as it is located in the Settings section. The option is called “Survey Models.”
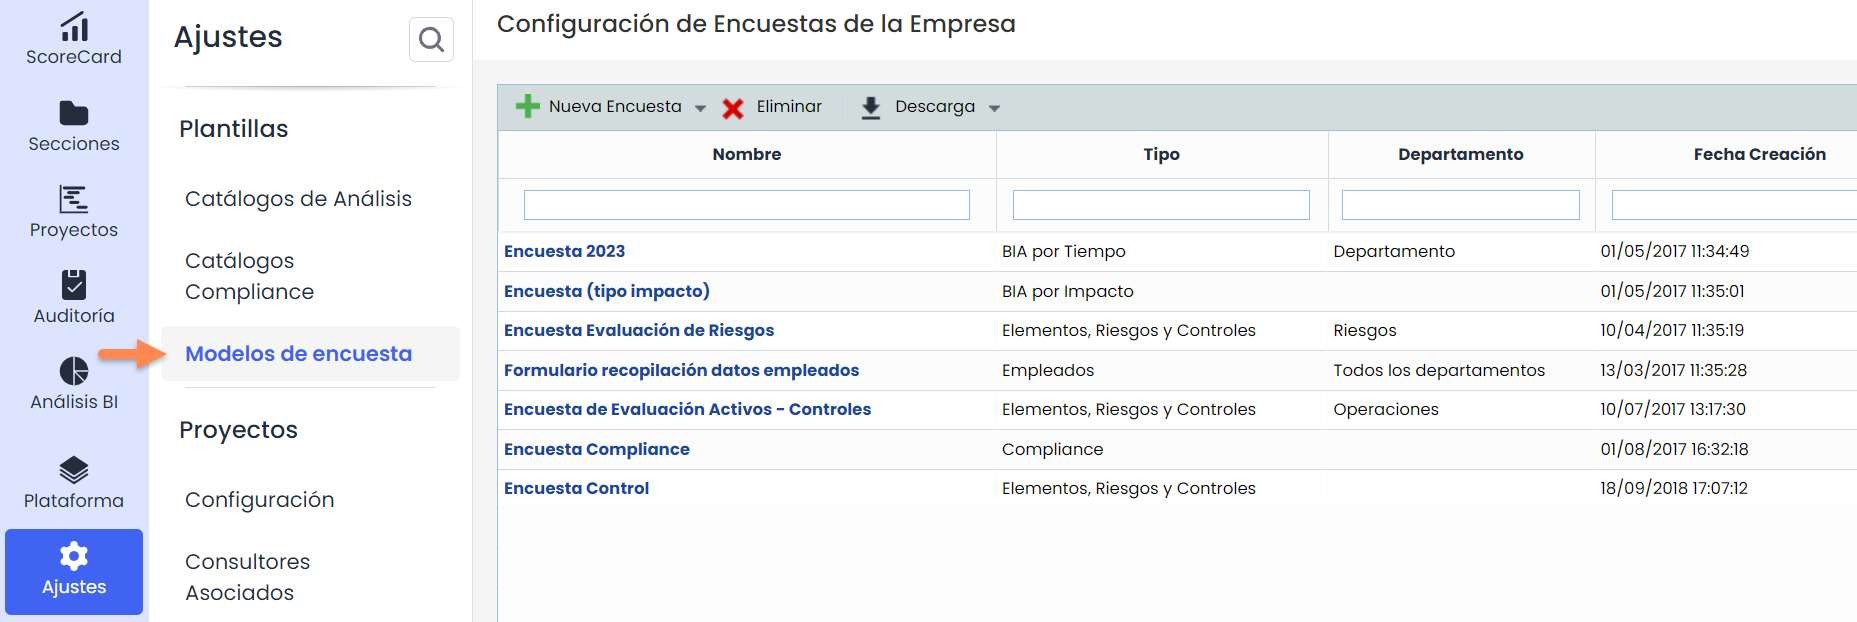
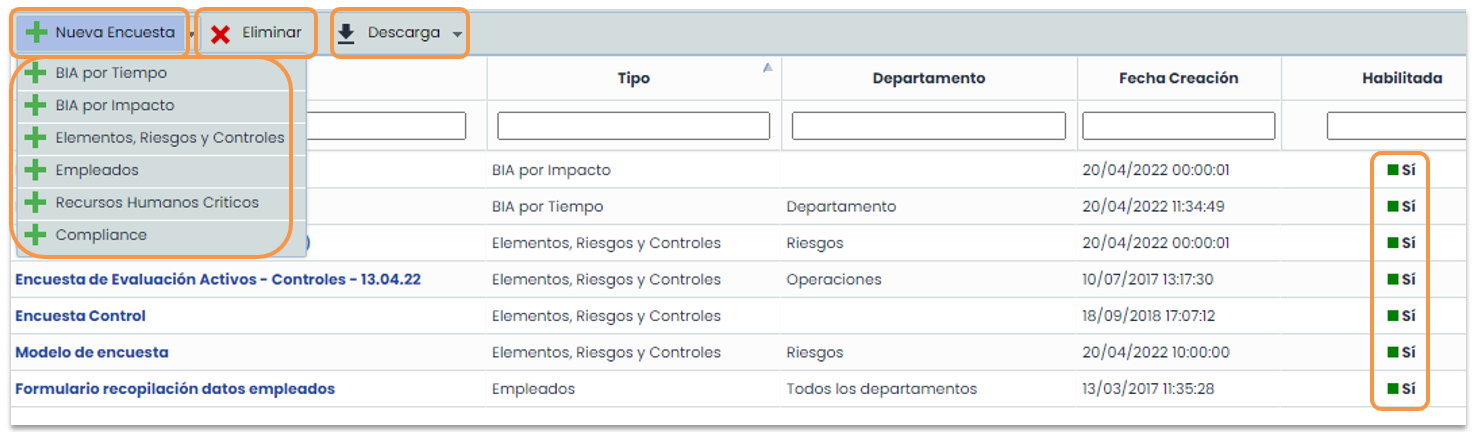
In the option, you must choose what type of survey model you want to create using the “New Survey” button (in this case, the “Items, Risks, and Controls” type). Additionally, in this option, you can delete models (using the “Delete” button) and download a list of the configured models (using the “Download” button).
The last column will show the templates that are enabled. Surveys can only be created from enabled templates.
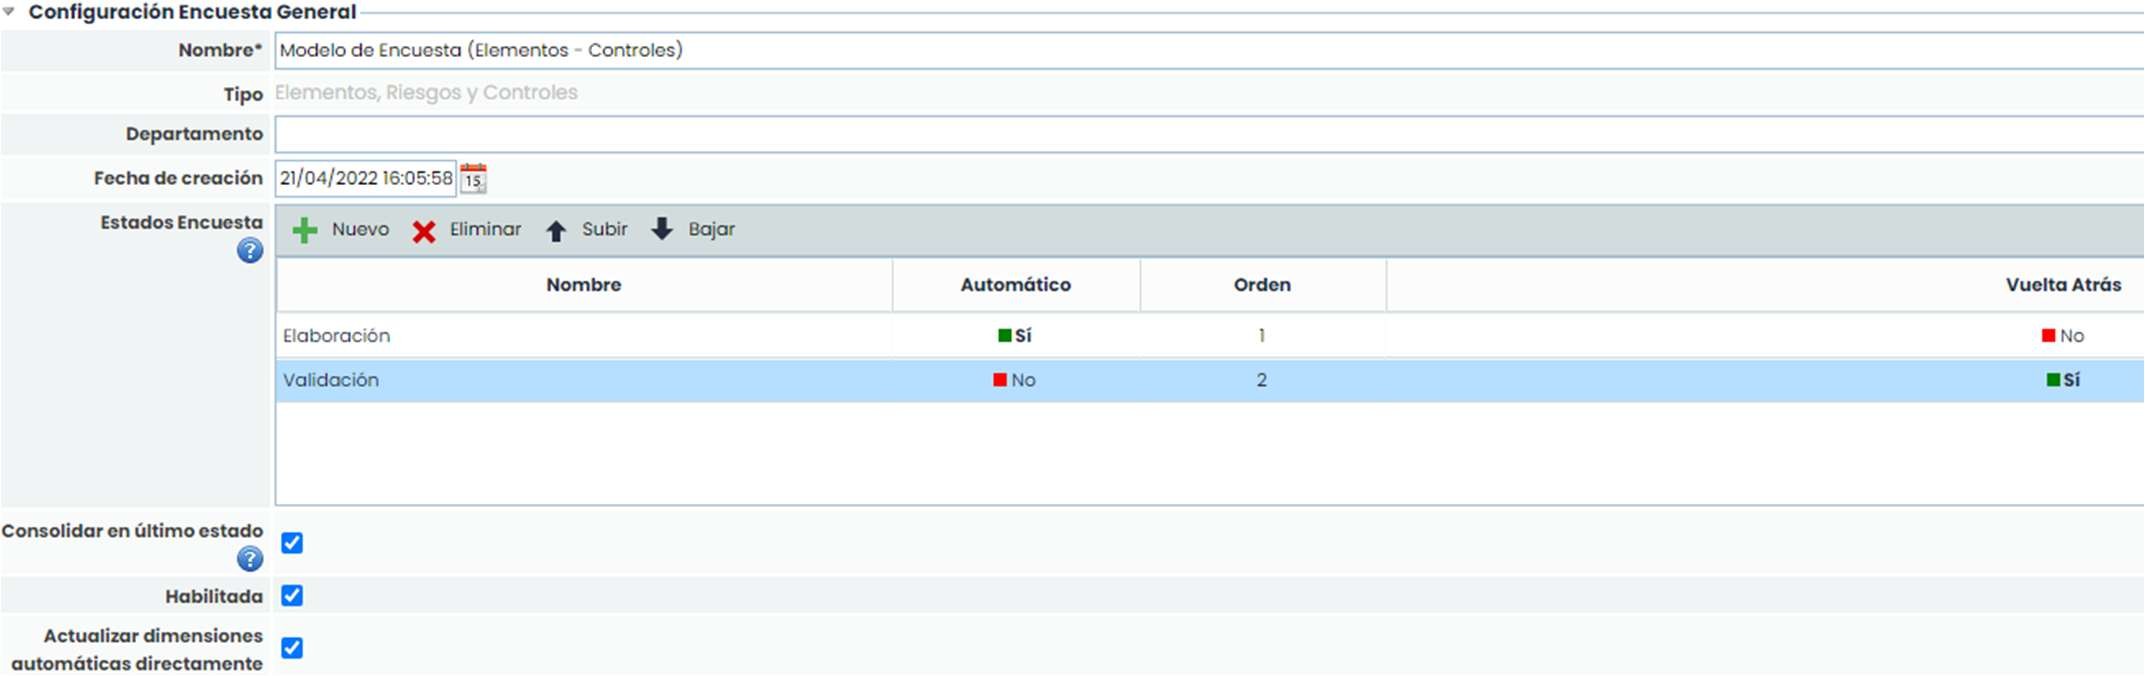
Within the survey model, you can configure aspects such as the name, department, or creation date, as well as indicate whether the model should be enabled for use and whether you want to “Consolidate in the last state,” meaning that from the last state of the workflow, the survey data can be directly consolidated into the final analysis.
It is also possible to use states in the survey. Using these states allows different people to fill in or validate information entered in previous states. You can move from one state to another automatically by marking the indicator (automatic check) and also move back to a previous state in the same way, by marking the corresponding indicator (rollback check).
In the “Survey Type” section, you must choose what type of model you want to create. In this case, the selected survey type is the most comprehensive as it contains all three combinations: Items, Risks, and Controls.
Next, two sections are displayed that allow its configuration.
First, the “Additional Configuration” section is displayed, where you can choose which options you want to include in the survey:

By default, implemented controls are marked so that this type of controls is displayed in the survey.
To unmark this type of control, another type must be marked; therefore, it can only be unmarked when the option for treatment plans is also marked, which are controls that are under study and improvement and have not yet been implemented.
When treatment plans are marked, actions are also marked by default; it is not possible to mark treatment plans without actions.

Actions can also be included for implemented controls and evidence in the survey for both implemented controls and treatment plans.
In this way, when completing the survey and evaluating a control, or creating a new one, the actions of that control can be indicated, and its evidence can be attached.
Secondly, the “ Taxonomy” section (Types / Risk Grouping), where you can select its configuration. You can choose whether it should be visible and editable in the survey. It is also possible to indicate the order in which it should be displayed.

In the following sections, the specific configuration for Items, Risks, and Controls is shown.
In the “Item Survey” section, the dimensions configured in the item inventory are displayed, indicating the type of dimension and whether it is manual or automatic. The user can configure the following options for each dimension:
-
Visible: Allows defining whether the dimension will be included in the survey or not by clicking on the cell.
-
Editable: Indicates whether the dimension can be modified in the survey or will only be visible in consultation mode.
-
Mandatory: Indicates the requirement to fill in a dimension when transitioning states, in case surveys with states are used.
-
Question: In the case of “Form” type surveys (explained later), it allows displaying an explanatory question instead of just the dimension name.
If a dimension is selected, it is possible to change the order in which it will appear. Using the “Move Up” and “Move Down” buttons, you can position it in the desired place.

With the “Update Dimensions” button, as indicated by the yellow message, the list of dimensions in the item methodology is updated in case new dimensions were added after the model's creation.
The settings for the previously existing dimensions are preserved; only the new dimensions created in the item methodology appear to be included in the survey.
When selecting a qualitative type dimension, the levels configured in Settings> Item Methodology are displayed for informational purposes in the lower table (“Item Levels”).

In the “ Risk Survey” section, the first step is to select which risk methodology you want to use in the survey.
It should be noted that to select this type of survey (Items, Risks, and Controls), the risk methodology must be associated with a control methodology where the control evaluation is calculated “per risk” and not globally.
When selecting the methodology, the dimensions configured in it are displayed, just like in the previous section with the items.
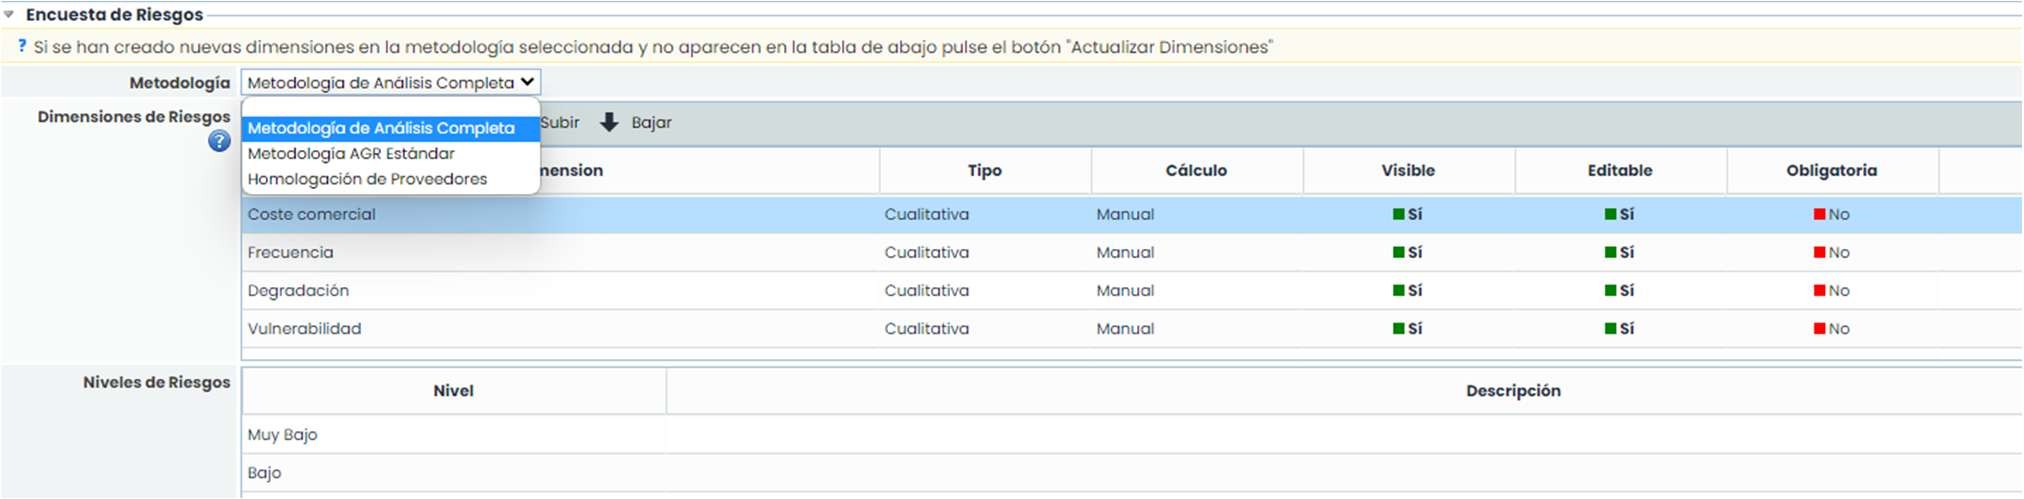
As indicated by the yellow message, pressing the “Update Dimensions” button updates the list of dimensions in the risk methodology in case new dimensions were added after the model's creation.
The settings for the previous dimensions that already existed are preserved; only the new dimensions created in the risk methodology appear to be included in the survey.
Finally, in the “ Control Survey” section, the control methodology associated with the selected risk methodology in the previous section is already marked.
As previously indicated, this methodology must have a control evaluation type by risk.
When selecting the methodology, the dimensions configured in it are displayed, just like in the items and risks sections.
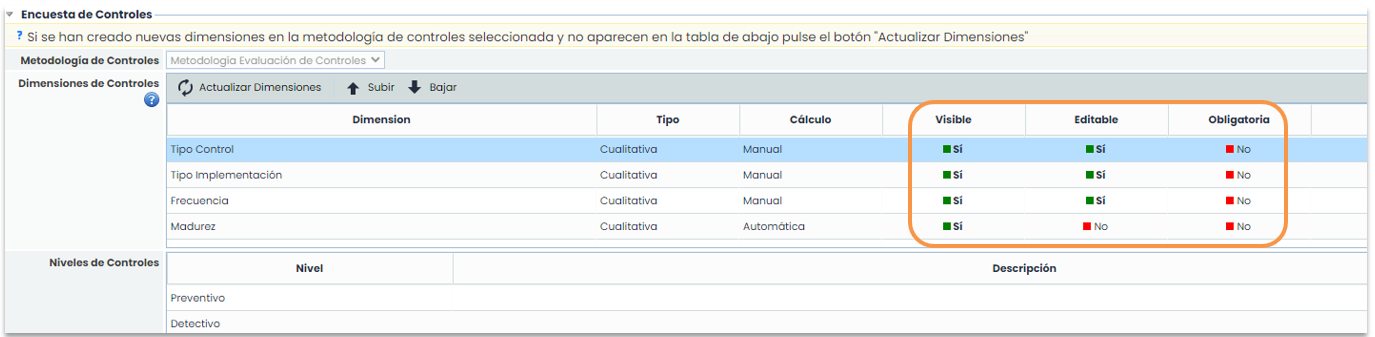
With the “Update Dimensions” button, as indicated by the yellow message, the list of dimensions of the control methodology is updated in case new dimensions have been added after the model's creation.
The settings for the previous dimensions that already existed are preserved; only the new dimensions created in the control methodology appear to be included in the survey.
In the “Attachments” section, you can attach the necessary files to the survey so that the recipient can consult them.
The available options are:
-
Select file: Allows searching and selecting a file from our file explorer.
-
Attach: Allows uploading the selected file.
-
Delete: Allows deleting a selected file in the “Associated Documentation” table.
-
Download: Allows downloading the selected file in the “Associated Documentation” table.
-
View: Allows viewing the selected file in the “Associated Documentation” table directly from the browser. Only files with the extensions .pdf, .jpeg, .jpg, .bmp, or .png can be viewed.

Survey Configuration
Once the survey model is configured, it can be used to configure as many surveys as required. To do this, go to the Management> Surveys option.
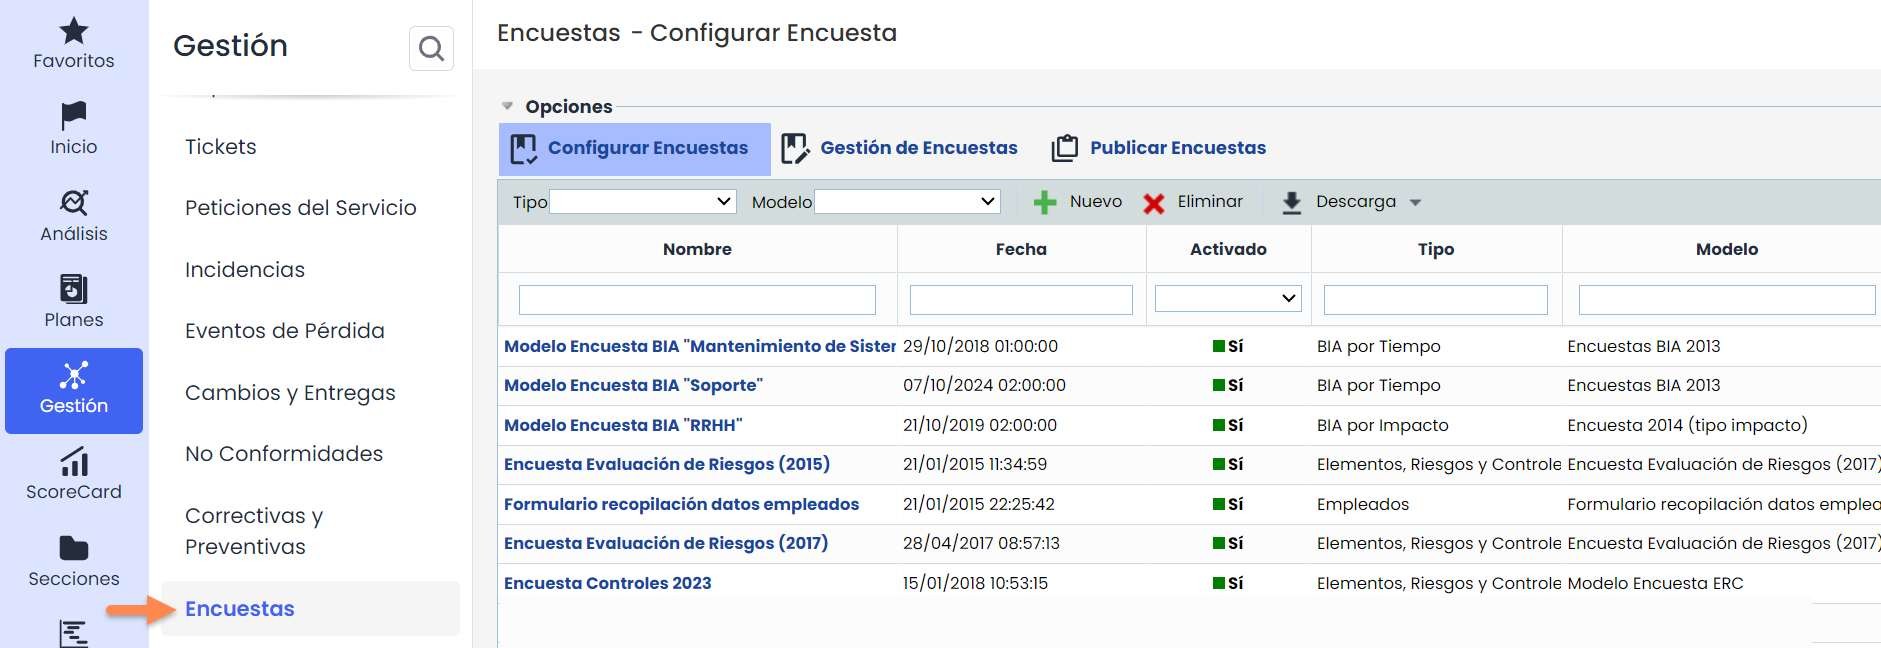
To create a survey configuration, you must filter by the survey type and then choose the desired template.
By clicking the “ New” button, a survey of the chosen type and model will be created. If you want to delete a survey configuration, you must click the “ Delete” button. Keep in mind that if a Configuration is deleted, all surveys created from this Configuration will also be deleted.
It is also possible to download the list of survey configurations in both Excel and PDF formats.

When accessing the survey configuration, a set of sections appears that allow its configuration.
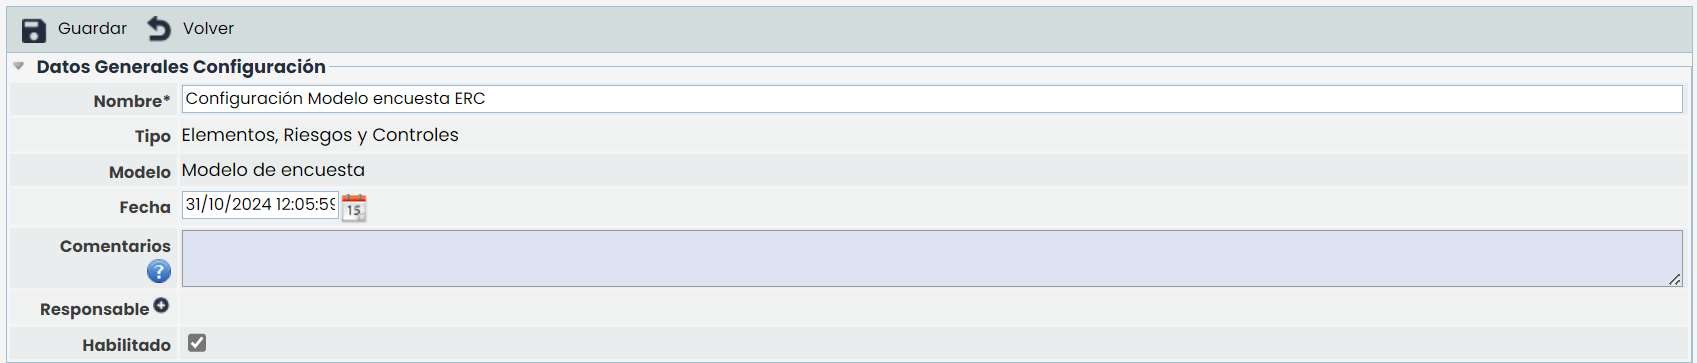
In the first section, “General Configuration Data,” you can identify the configuration name, view the survey type and model, change the date, and also enable or disable the “ Enabled” check, which indicates whether the Configuration can be used to generate new surveys.
If states (Workflow) have been included in the modeling, then the configuration also includes the “States” section to assign a responsible party to each state:

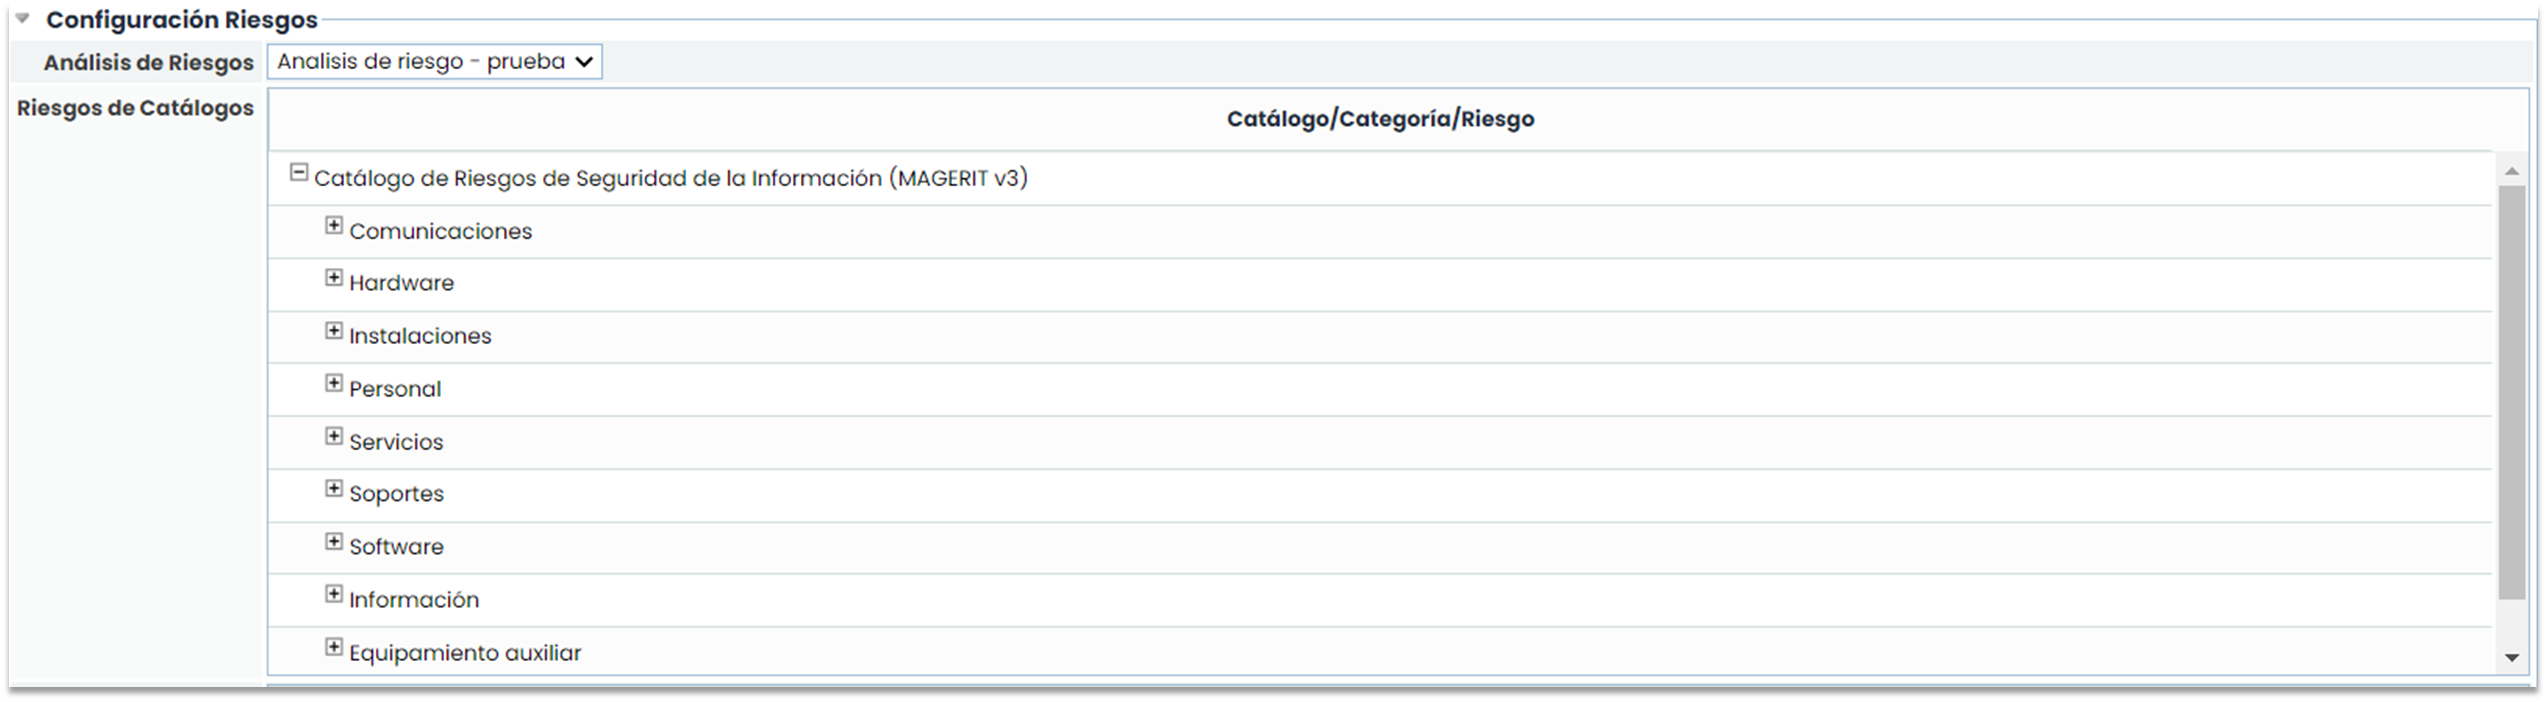
In the “Risk Configuration” section, information related to the selected survey type (Items, Risks, and Controls) appears.

You must select which risk analysis you want to conduct the survey on. The risk analysis list contains those analyses in GlobalSuite® that are configured with the same methodology associated with the survey model.
When selecting the risk analysis, the associated risk catalogs are displayed at the bottom for informational purposes.
Another aspect to configure is the selection of the Items you want to include, so the user receiving the survey can only evaluate the assigned items (in addition to adding new items).
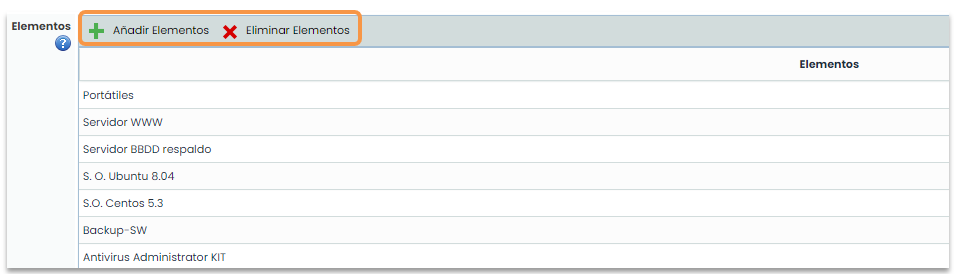
By clicking the “ Add Items” button, a pop-up window opens with all the items in the item inventory. Filters can be used, either by item name or category, as shown in the following image:
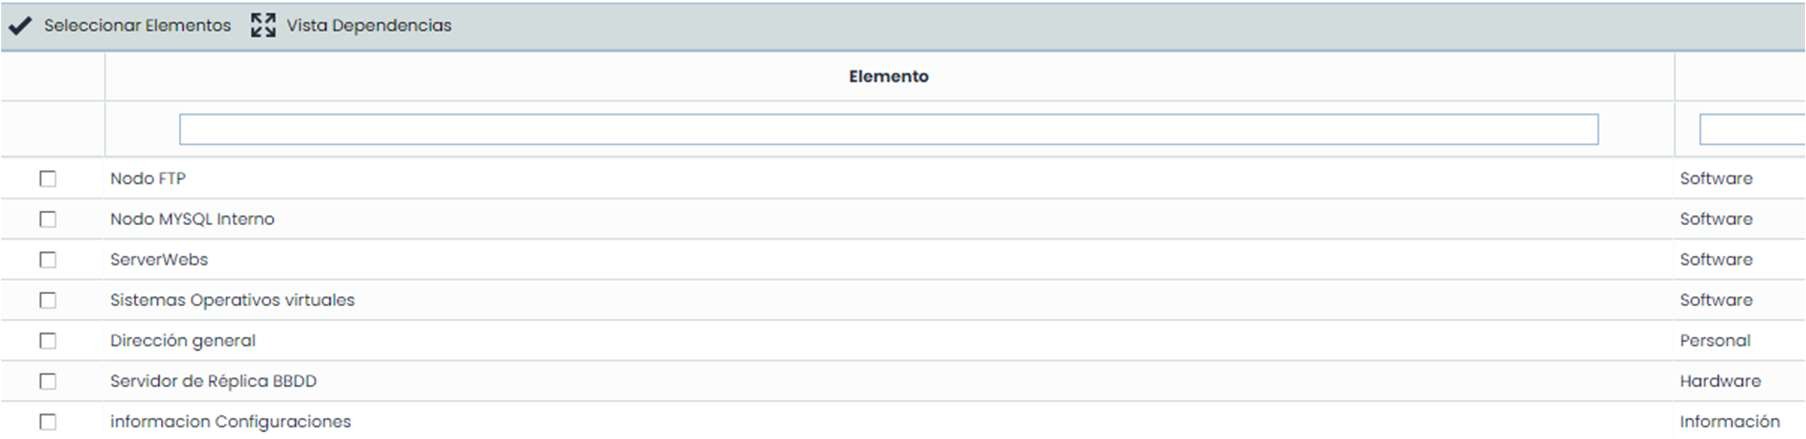
To select the items to include, you must check the box next to each item on the left side, and once selected, press the “Select Items” button.
With the “ Dependency View” button, the items are displayed in the item tree to see the relationships between them.

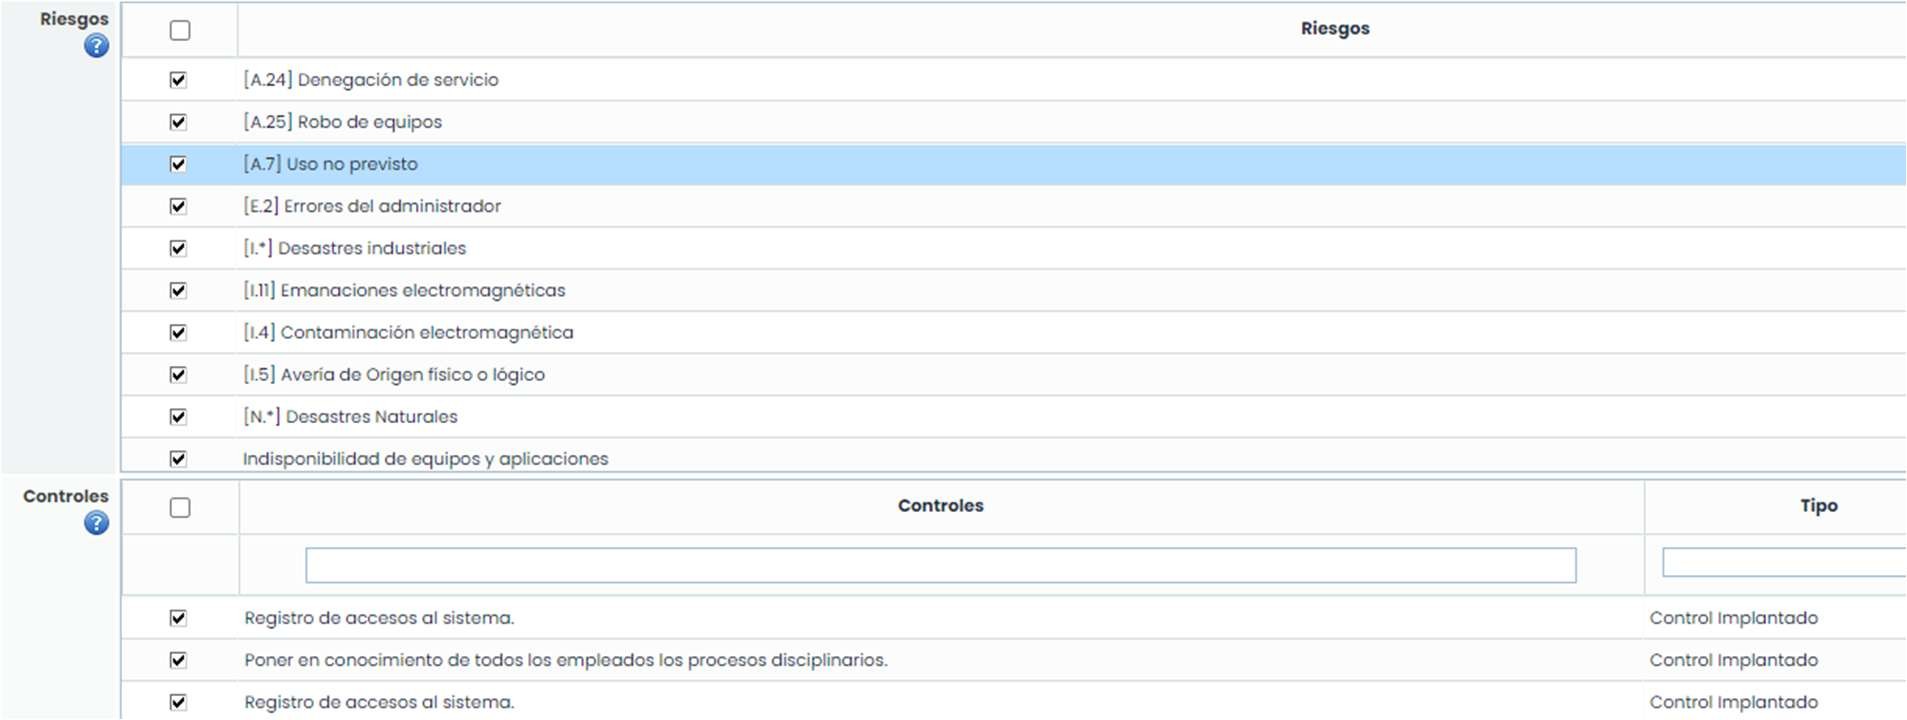
Once the items are added, the “ Risks” table is located at the bottom, showing the risks for each item. By default, all risks are enabled so the survey user can evaluate them, but it is possible to select only the risks you want to publish for each item.
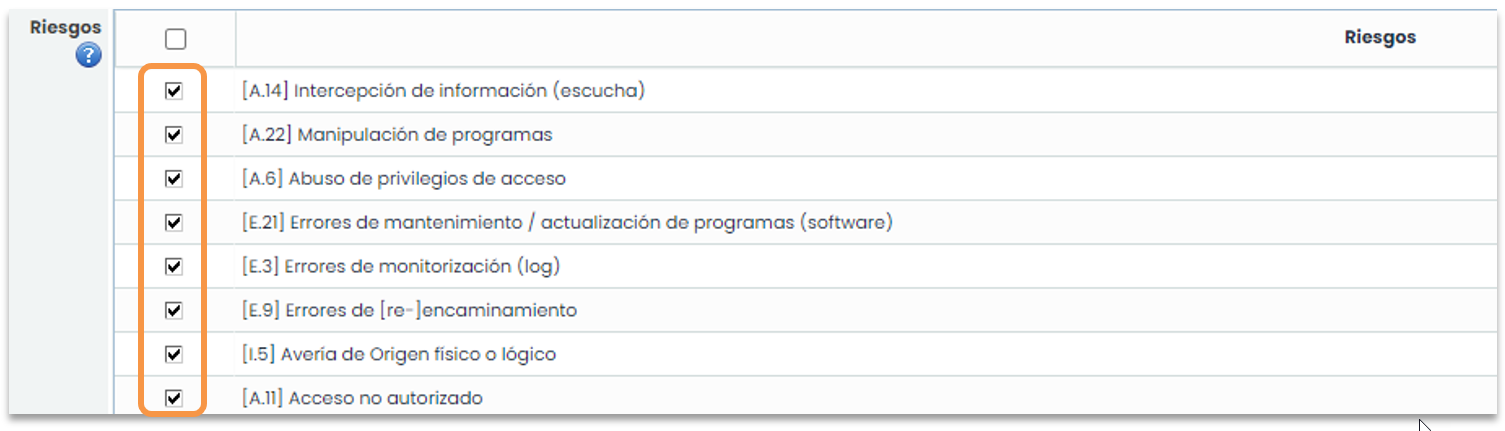
Finally, when one of the risks is selected, all the associated controls are displayed.
Once all the fields in the form are completed, click the “Save” button, and the configuration is ready to be used.
From the “ Attachments” section, you can add specific documents to the configuration itself. Additionally, you can view and/or manage documents inherited from the survey model.
