This tutorial explains, step by step, how to publish and manage surveys in GlobalSuite® once the survey model and structure have been configured.
This guide details the complete process of survey publication, from selecting the type and configuration to assigning recipients, opening and closing dates, and the automatic sending of notifications with access links.
It also explains how to use the Survey Management section to monitor received responses, apply filters and sorting, export information, review change tracking, and access the associated attachments for each survey.
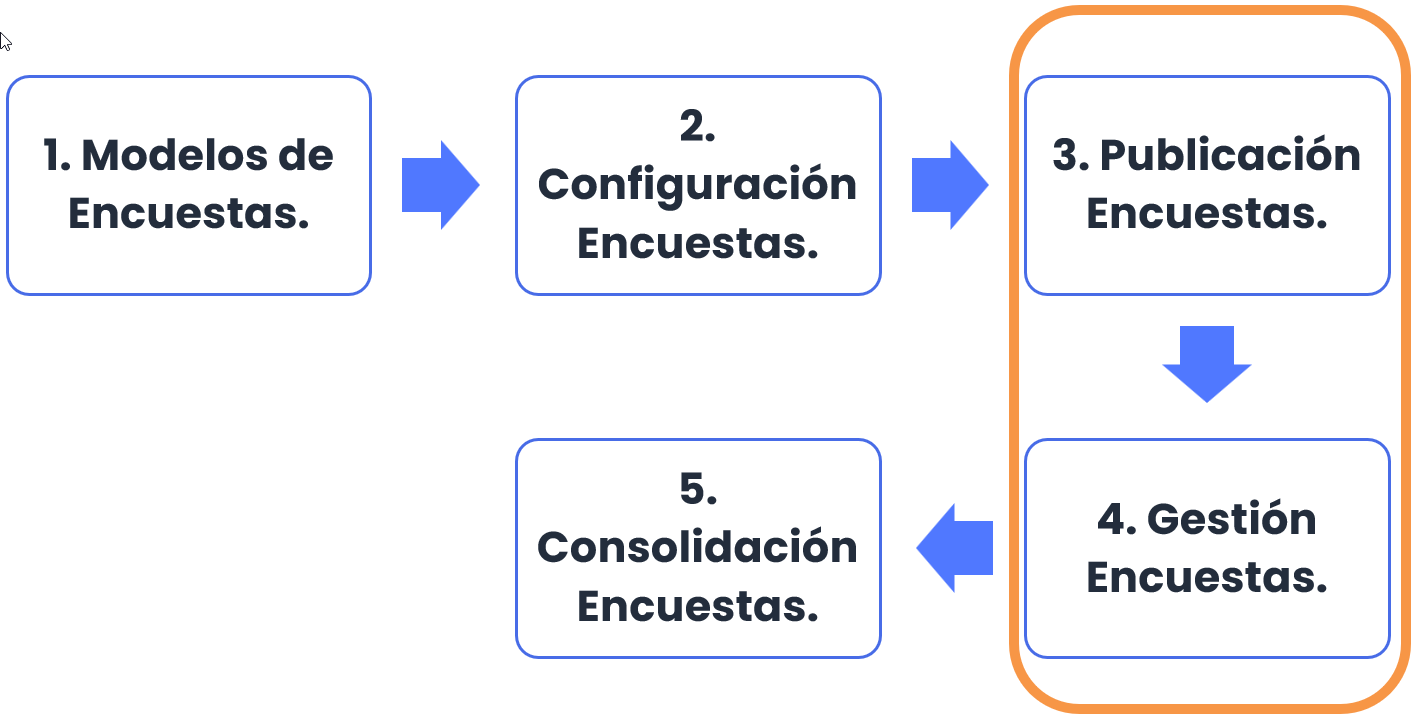
Phases for Conducting Surveys for Items, Risks, and Controls
This guide will explain phases 3 and 4 of the survey creation process.
Survey Publication
Once the survey model and its configuration have been set up, it is time to create the publication. To do this, go to the “Surveys” option located in the “Management” tab and select the “Publish Surveys” icon.
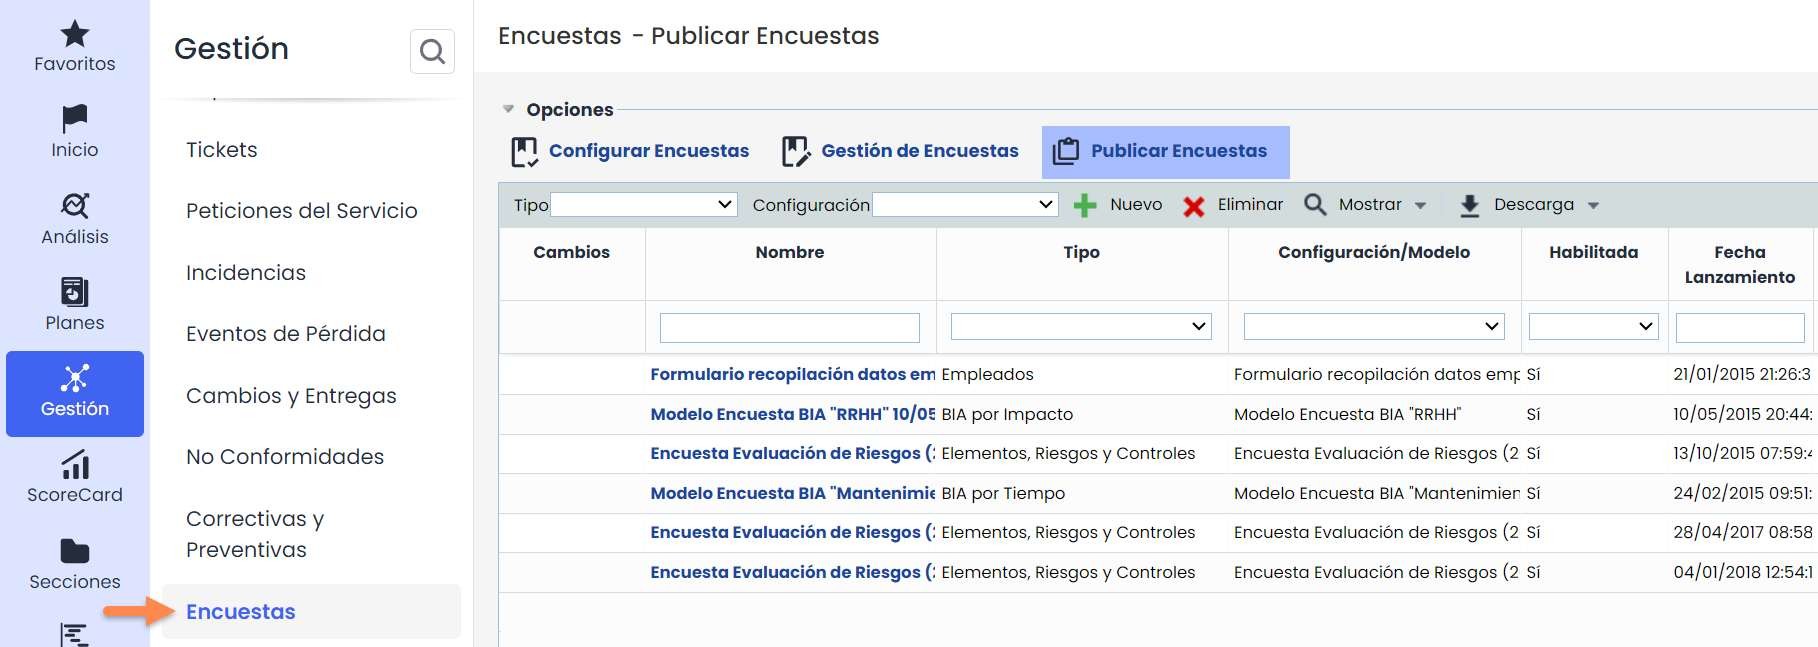
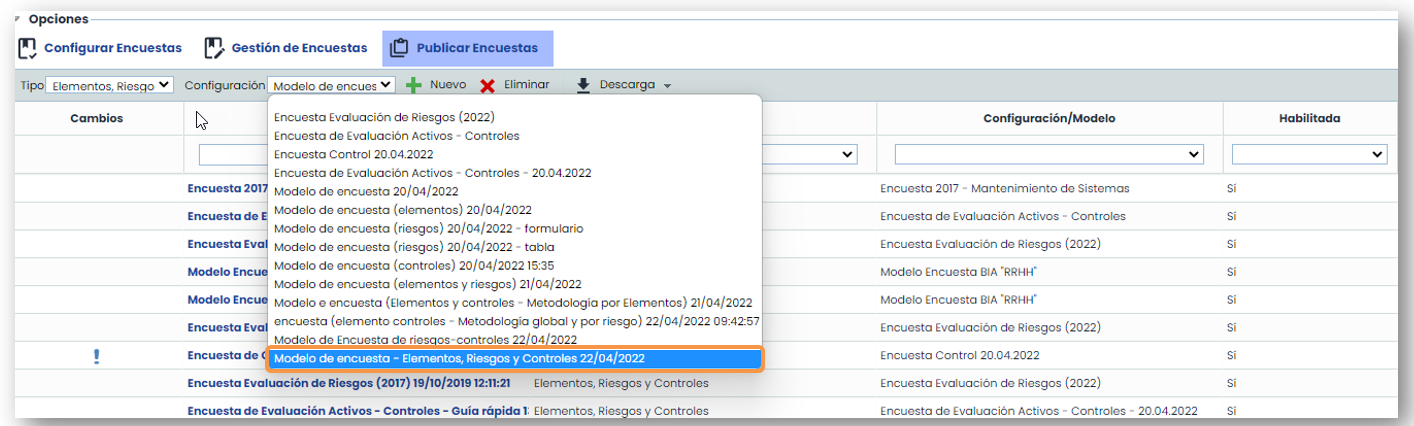
In this option, “ Publish Surveys”, you can configure the publication of the survey to the desired recipients. First, proceed in the same way as the configuration, that is, you must choose the Survey Type and Configuration, and click the “New” button.
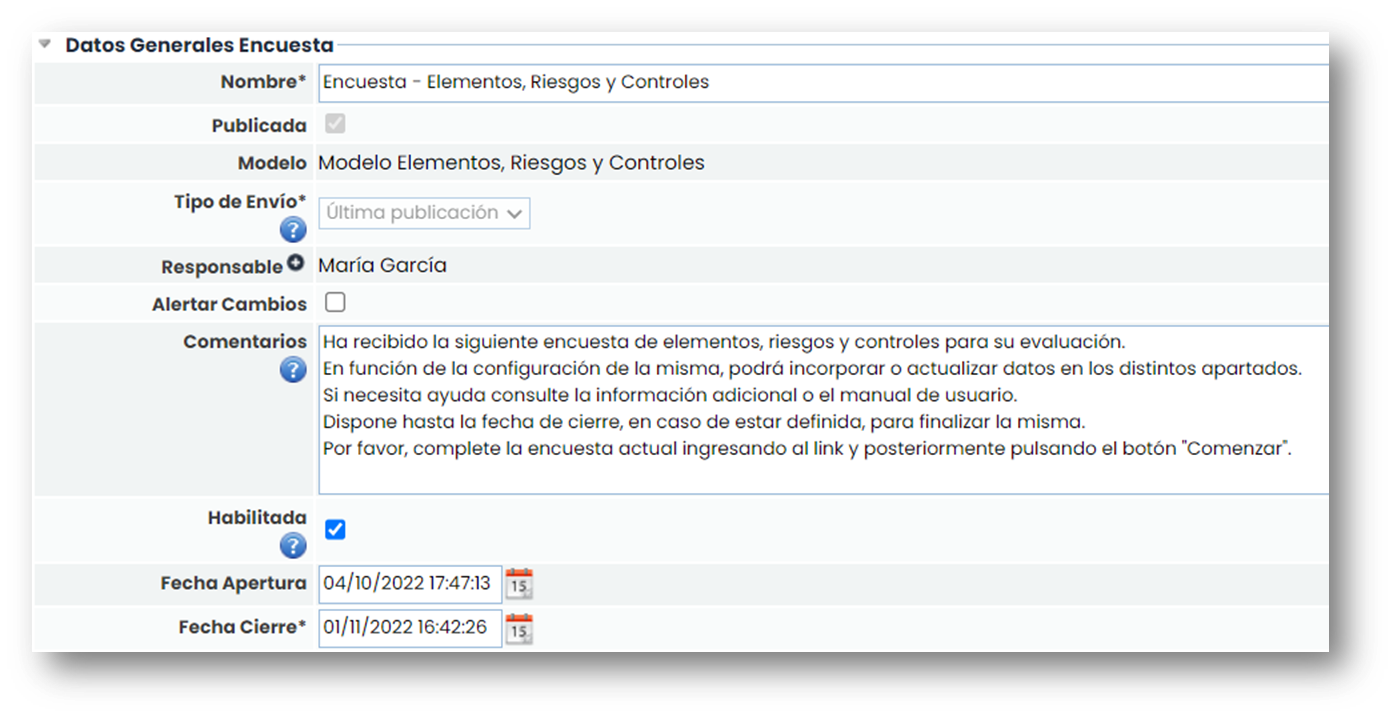
When entering a record, it allows the user to configure the publication. The most important attributes are:
-
Status: This option only appears when the survey has been configured by states in the modeling.
-
Delivery Type: allows you to select whether to send fields with information from other publications or with current information registered in GlobalSuite® regarding the Items, Risks, and/or Controls.
-
Responsible: Refers to the GlobalSuite® user in charge of receiving the survey responses.
-
Alert Changes: If selected, the responsible person will be notified via email of the changes made.
-
Comments: Allows you to enter text that is included both in the email received by each recipient and on the main page of the survey.
-
Enabled: Field that allows enabling the survey.
-
Opening Date: This is the start date of the publication, from which the surveys associated with the publication are available.
-
Closing Date: This is the closing date of the publication, after which the surveys associated with the publication are no longer available.
Once the above fields are configured, you will need to select the survey recipients. These recipients will receive an email with a link to access the survey. To access the link, the recipient does not need to have a GlobalSuite® user account.
To select the recipients, you can choose an employee already registered in the tool (button “Add Employees”) or a new employee (button “New”). In either case, a pop-up window is displayed to configure the recipients.
In this table, you can also delete (button “Delete”), alert via email (button “Send Reminder”).

When the “ Publish” button is clicked, the tool sends an email to the recipients with the survey link to complete it.
On the publication screen, the link received by each recipient also appears, so the responsible person can access the survey.
There is also a table with the survey tracking.
Once the publication is sent, click save, and the survey publication phase is complete.

Below is an example of an email received after a survey is published.
This notification includes the link to access the survey, the survey name, the creation date, the availability period (closing date), and the comments registered in the publication.
Once you access the link, you can verify that there is no menu like the one in GlobalSuite®.
At first glance, the general data of the survey, instructions for completing the survey, the option to select the language, and download attachments are displayed.
To complete the survey, you must click the Start button.
Survey Management
This option allows managing all surveys created in the survey publication. When the publication is made, all surveys sent to recipients are generated in this option.
Additionally, in this option, you can also create surveys without the need for them to be published. The creation of a survey works the same as the previous options. When accessing a survey, you can see the data currently saved.
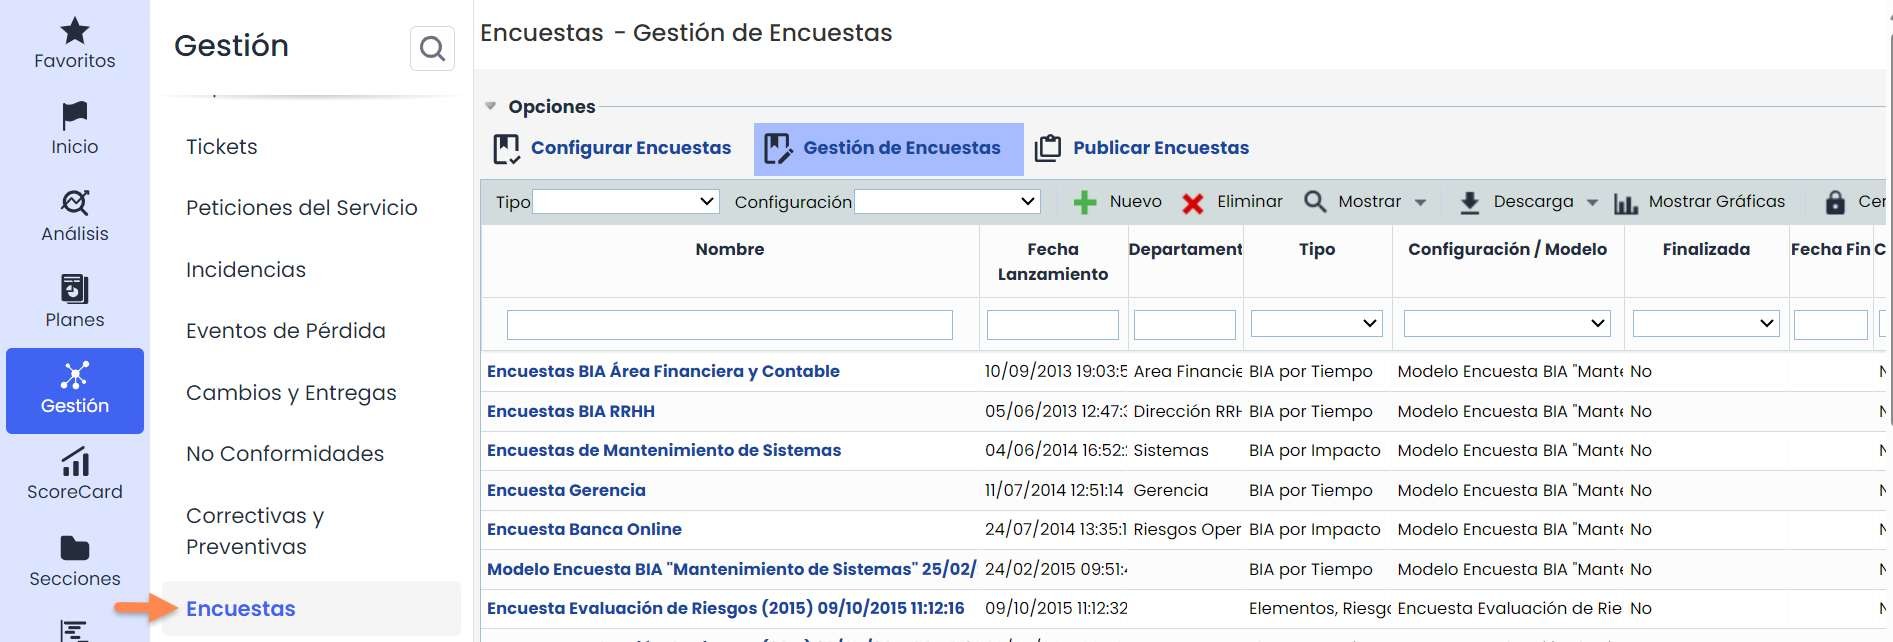
When accessing the survey through GlobalSuite®, you can also modify the data. It is possible to sort, filter, notify the responsible person via email, export the information, and finally, consolidate the changes (this option is explained in the specific consolidation guide).

Side Menu
From the side menu, you can access several options, which are detailed below:
-
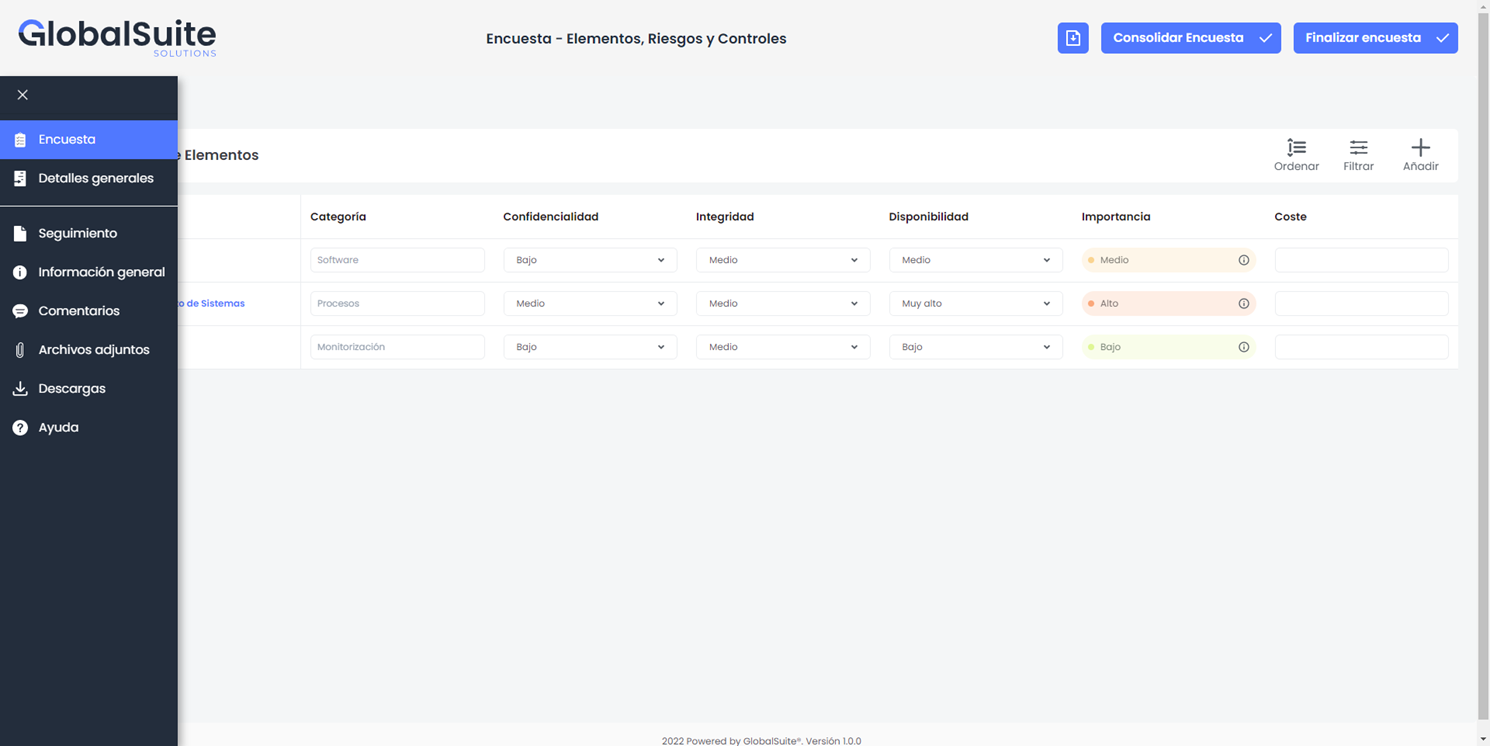
Survey: This is the first view that appears when accessing the survey. It shows the survey data according to its type.
-
General Details: The general data of the survey is displayed, such as: name, type, responsible person, email, department, sending date, and closing date. From this option, some data can be modified and saved.
-
Tracking: This section allows you to view the different changes made to the survey.
-
General Information: From here, you can view the information related to the survey type.
-
Comments: In this section, you can write/view comments.
-
Attachments: You can download the files that were attached when configuring the survey.
-
Downloads: This section allows you to view the download of the survey report.
-
Help: Allows access to the GlobalSuite® Manual.
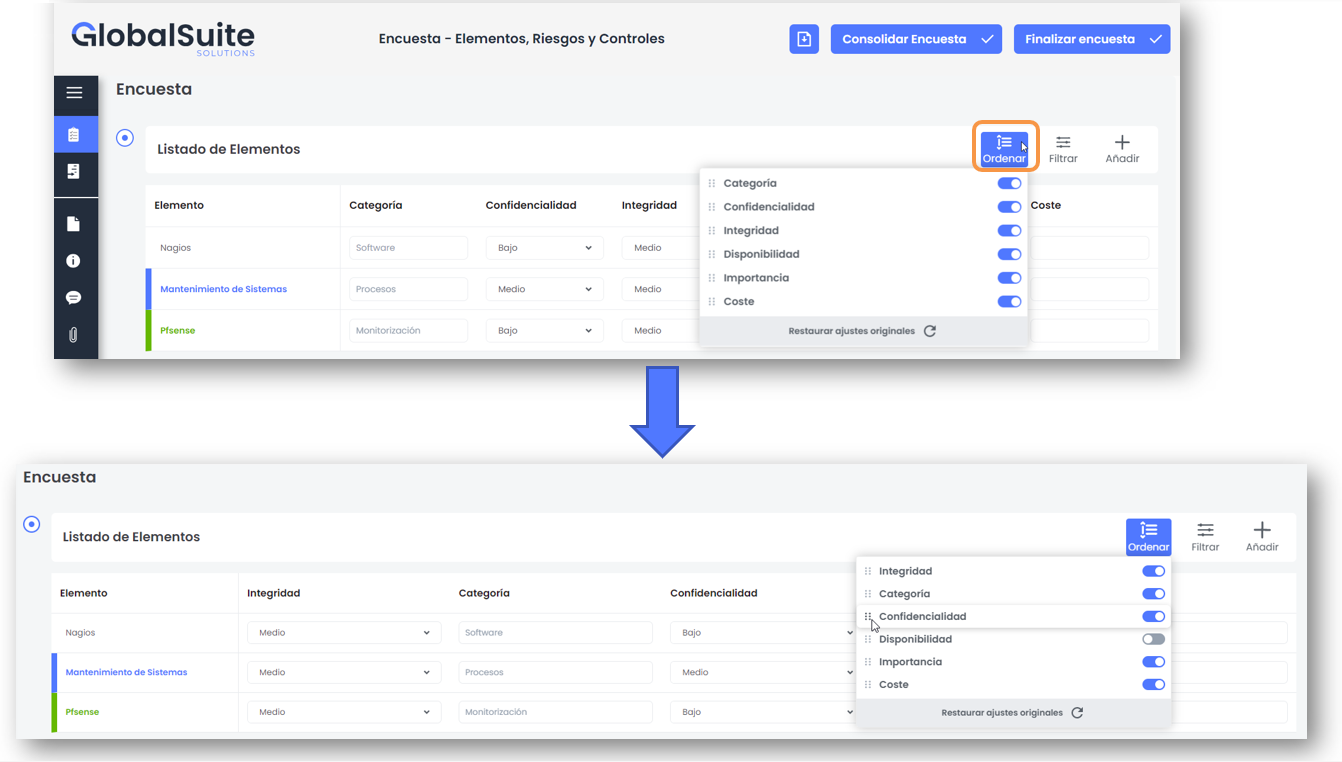
Sort
The “Sort” option allows you to show or hide the columns in the view and also arrange them in the desired location using the drag-and-drop functionality.
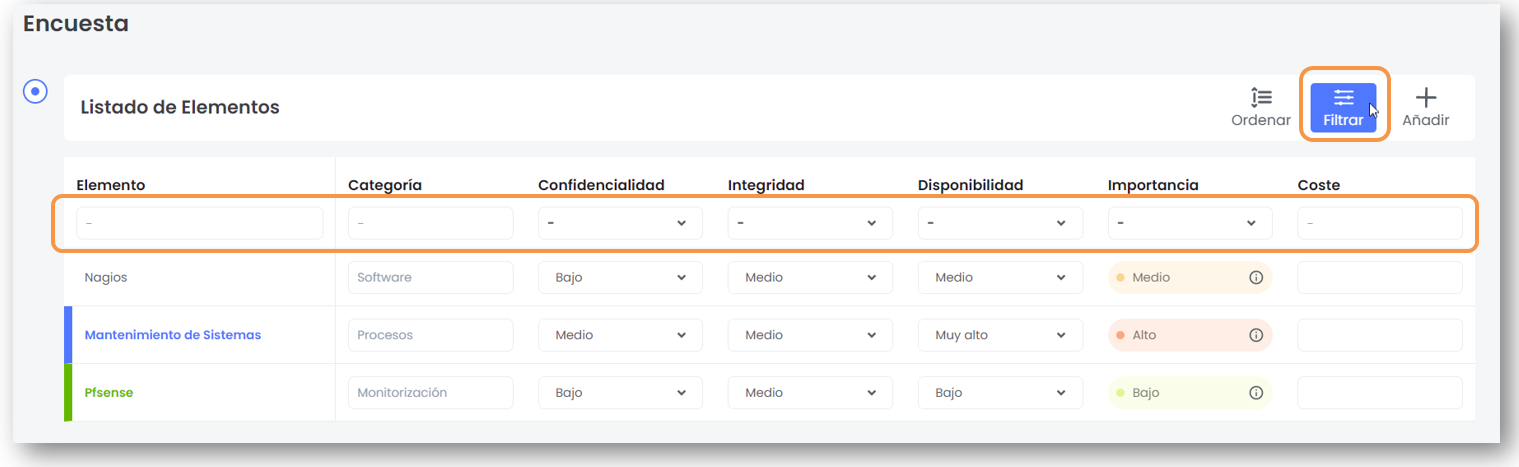
Filter
The “Filter” option displays the filtering fields in each column to adjust the view according to the respondent's needs.