This option allows defining the organization's committees responsible for managing different aspects of security, continuity, risks, etc.
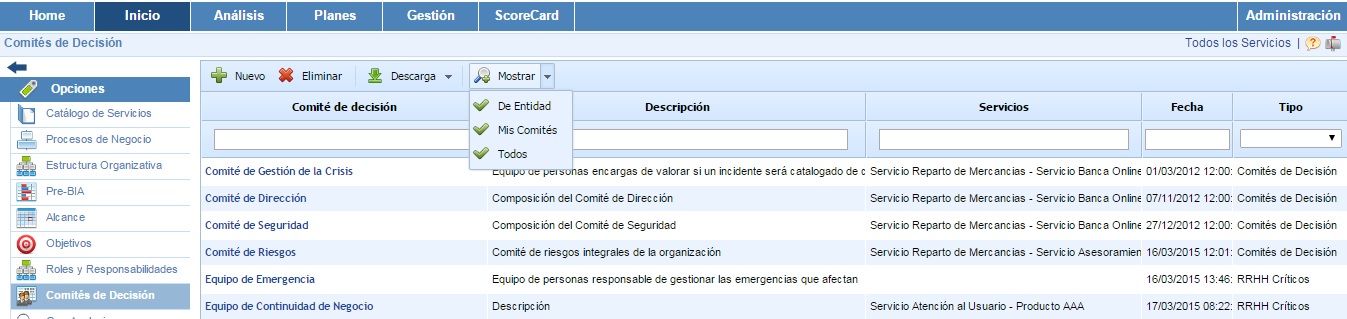
To create a decision committee, click the 'New' button, and a new entry will appear in the table. To delete a created committee, select the row or rows you want to delete and then click the 'Delete' button.
The 'Download' button allows downloading the list of committees in editable format (.xlsx) or in .PDF format.
The 'Show' button allows filtering the decision committees displayed in the table. Each option allows:
-
By Entity: Displays all decision committees of the entity you are working with. This is the default view when entering the option.
-
My Committees: Displays the decision committees where the user belongs.
-
All: Displays all defined decision committees, both of the entity you are working with and the entities below it.
To define the details of a decision committee, you must enter the form by clicking directly on its name.
The form allows performing the following actions:
-
Save: Allows saving all changes or modifications made in the form.
-
Back: The tool returns to the previous screen, where the list of all decision committees is displayed.
-
Download: Allows downloading the committee's information in editable format (.docx).
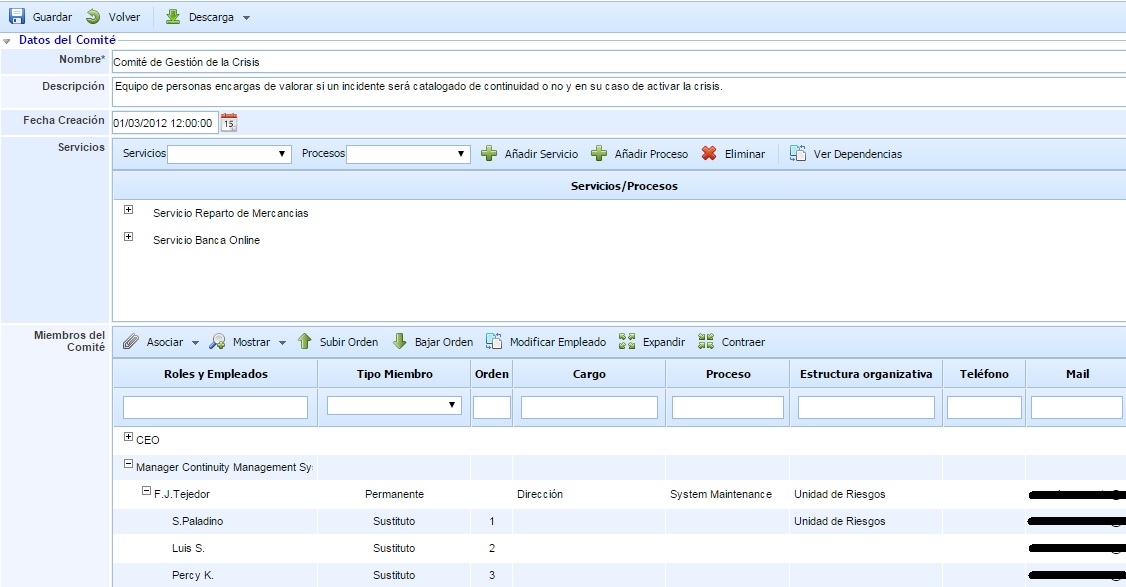
The form consists of the following information:
-
Name: Descriptive name of the committee that will appear in the initial Decision Committees table.
-
Description: Allows providing a more detailed description of the committee's function.
-
Creation Date: Identifies the creation date of the committee.
-
Services: Allows associating the committee with the organization's services and business processes. To associate a service, select the desired service from the dropdown and click the 'Add Service' button. To associate a process, select an already inserted service and a process from the dropdown, and click the 'Add Process' button. To delete a service or process from the table, select the service or process in the table and click the 'Delete' button.
-
Committee Members: This table allows associating employees who are part of the committee. The following section details its functionality.
-
Meetings: This table allows recording the meetings held by the decision committee. The following section details its functionality.
Committee Members
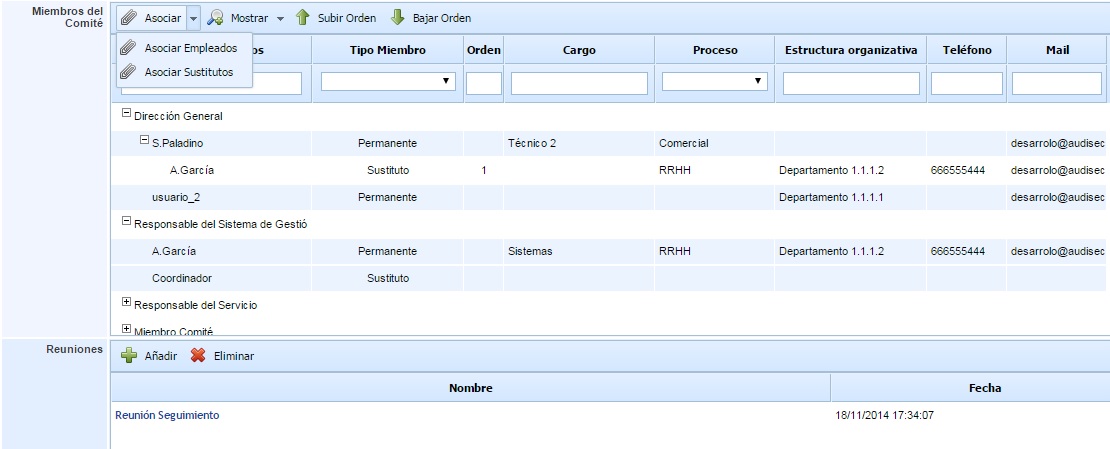
The committee members table allows associating employees registered in GlobalSUITE with the committee. This table allows associating permanent, substitute, and guest employees with the committee.
The available options to establish the committee's employees are:
-
Associate Employees: Clicking on this option opens a window with all the roles and employees defined in the 'Roles and Responsibilities' option. It also displays employees not associated with any role. Using the selection boxes on the right, employees can be associated with the committee. Once selected, click the 'Load Roles/Employees' button to add them to the committee.
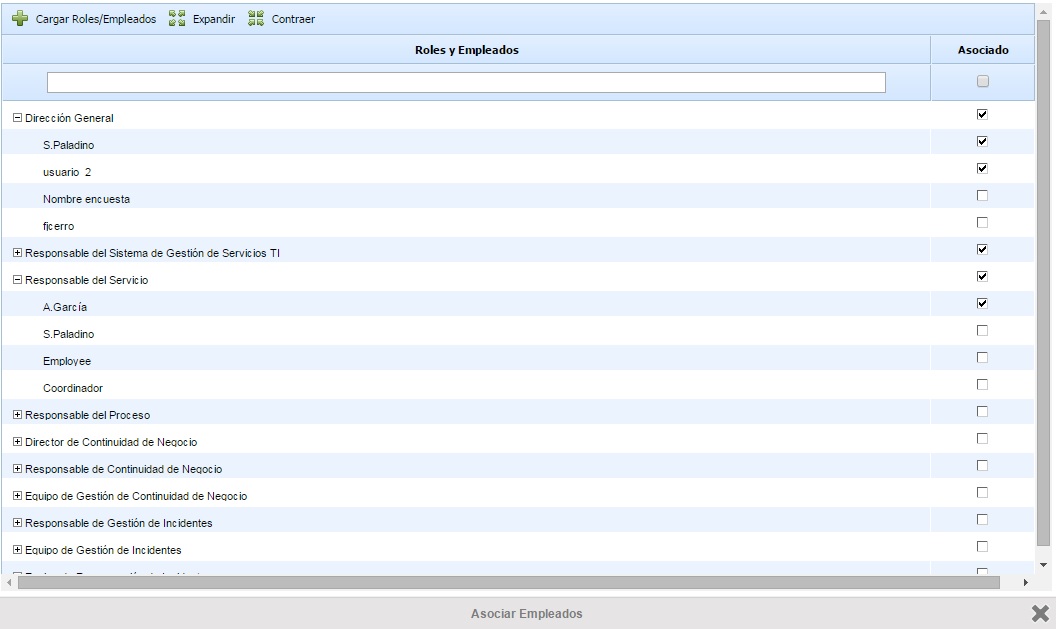
Employees added to the committee are registered by default as 'Permanent' employees. The type can be changed in the 'Member Type' column, allowing an employee to be defined as 'Substitute' or 'Guest'.
-
Associate Substitutes: This option allows associating substitute employees with a 'Permanent' type employee (substitute employees cannot be associated with 'Substitute' or 'Guest' types). To do this, select the employee and click the 'Associate Substitutes' button, displaying a table with all the organization's employees, allowing one or more substitute employees to be selected.
-
Show: This button allows filtering the table to show/hide substitute employees associated with permanent employees.
-
Move Up/Down: These buttons allow ordering the substitute employees associated with a 'Permanent' employee. To do this, select a substitute employee and click the corresponding button depending on whether you want to move them up or down.
Meetings
For the defined decision committees, meetings held can be recorded at the bottom. To do this, the 'Add' and 'Delete' buttons can be used to create or delete meeting minutes of the committee, respectively.
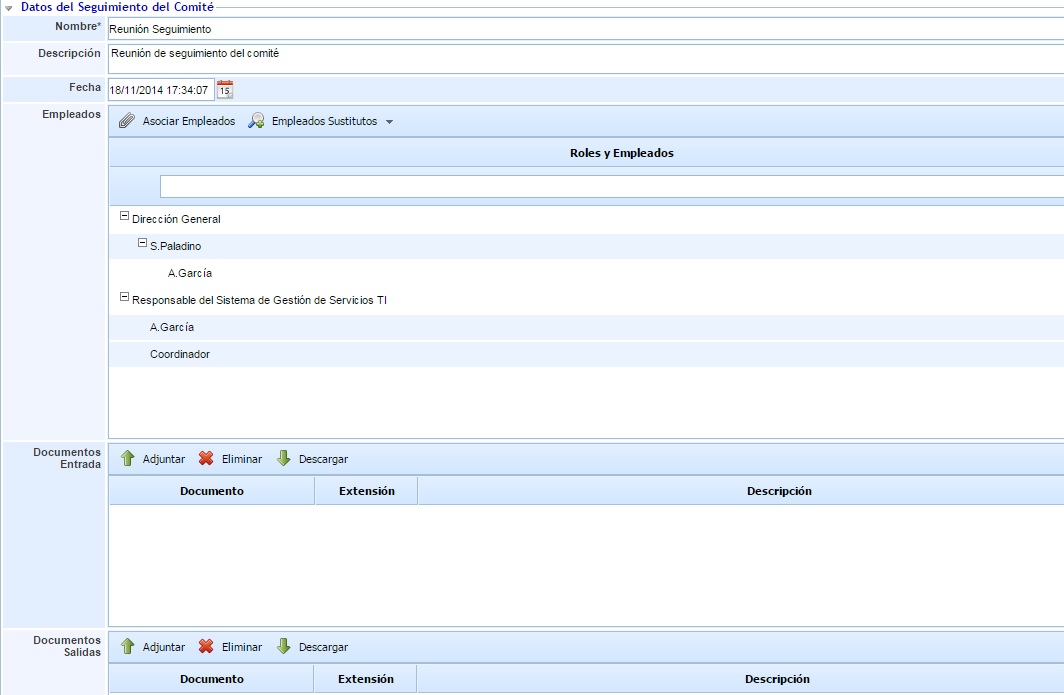
To access the details of a meeting, click on its name. Upon accessing, a form with the following information is displayed:
-
Name: Allows registering an identifying name for the meeting.
-
Description: Allows registering the meeting's description.
-
Date: Allows registering the meeting's date.
-
Employees: Contains the employees attending the meeting. By default, when creating a meeting, all employees who are part of the committee are selected. If an employee does not attend the meeting, the 'Associate Employees' button can be used to remove the association of these employees.
-
Input Documents: Allows attaching the documentation addressed in the meeting.
-
Output Documents: Allows attaching the documentation generated as a result of the meeting.
-
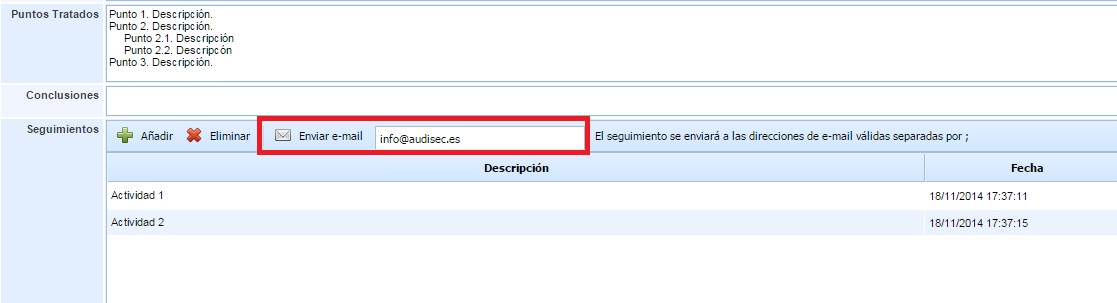
Discussed Points: Allows identifying the points discussed in the meeting, i.e., the agenda.
-
Conclusions: Allows recording the conclusions reached in the meeting.
-
Follow-ups: This table allows recording all actions requiring subsequent follow-up. These actions can be sent via email to one or more people by entering the email addresses in the upper white box and clicking the 'Send Email' button.