Types of users, roles, and user management
In this tutorial, you will learn how to configure users, roles, and profiles within GlobalSuite®. We will explore the different types of users, how to create and manage them, as well as how to establish company roles and understand the difference between users and employees.
Types of Users
In GlobalSuite®, there are two main role categories: Company Administrator and Company User
Company Administrator
By default, GlobalSuite® provides different company administrator roles with varying levels of permissions:
-
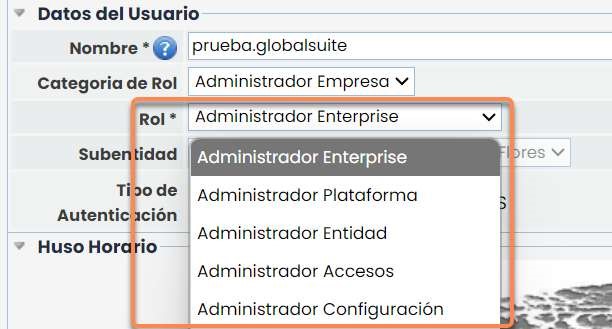
Platform Administrator: Of the presented profiles, this one has the highest permissions. It is similar to the next role, Enterprise Administrator, but as a platform administrator, new Enterprise Administrator users can be created.
-
Enterprise Administrator: Has all administrator permissions except for creating other Enterprise Administrator users.
These two administrator roles have permissions to:
-
Access any entity within the organization's structure.
-
Access all GlobalSuite options.
-
Similarly, they can consolidate information available in other entities.
-
Generate users that can be associated with any entity.
-
Make configurations based on the platform's customizable options, with the ability to propagate them to other entities generated at lower levels.
-
Configuration Administrator: An administrator profile that allows the configuration of the organization without access to information. Accesses the Administration section of GlobalSuite® for company configuration. Does not access user and role options. Does not access information from the company's management system.
-
Access Administrator: This profile allows the creation and management of users in GlobalSuite® and access to logs, without having access or administration rights to other options and data.
-
Entity Administrator (only if entities are included in the GlobalSuite® license): This profile has administrator permissions for certain entities but not from the top level as allowed by the Enterprise Administrator. Similarly, it allows entity management and actions for information propagation and consolidation but does not have permissions to generate users.
-
Company User
Other roles include company users, which are described below:
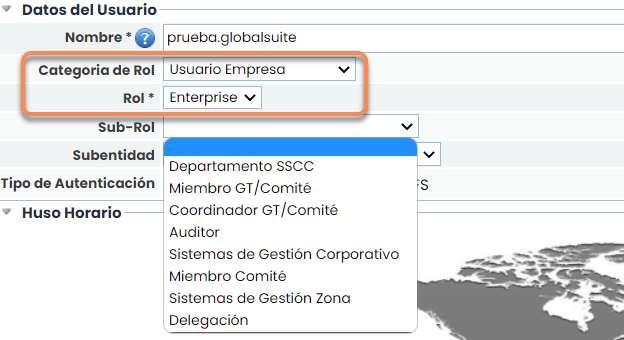
Entity: A user profile that will have access to their own entity as well as lower ones, allowing information propagation and consolidation between different entity levels, but will not have the administrative permissions of an Entity Administrator.
Enterprise: A user profile that will have access to all options but does not have access to the “Settings” menu, allowing only the use of the established GlobalSuite® configuration.
The selection of a specific profile will be made through the dropdown available in the Role Category option and then Role.
User Management
GlobalSuite® allows the creation of different types of users by establishing different roles and access profiles. The steps to create users are as follows:
Step 1. Access the Users Option
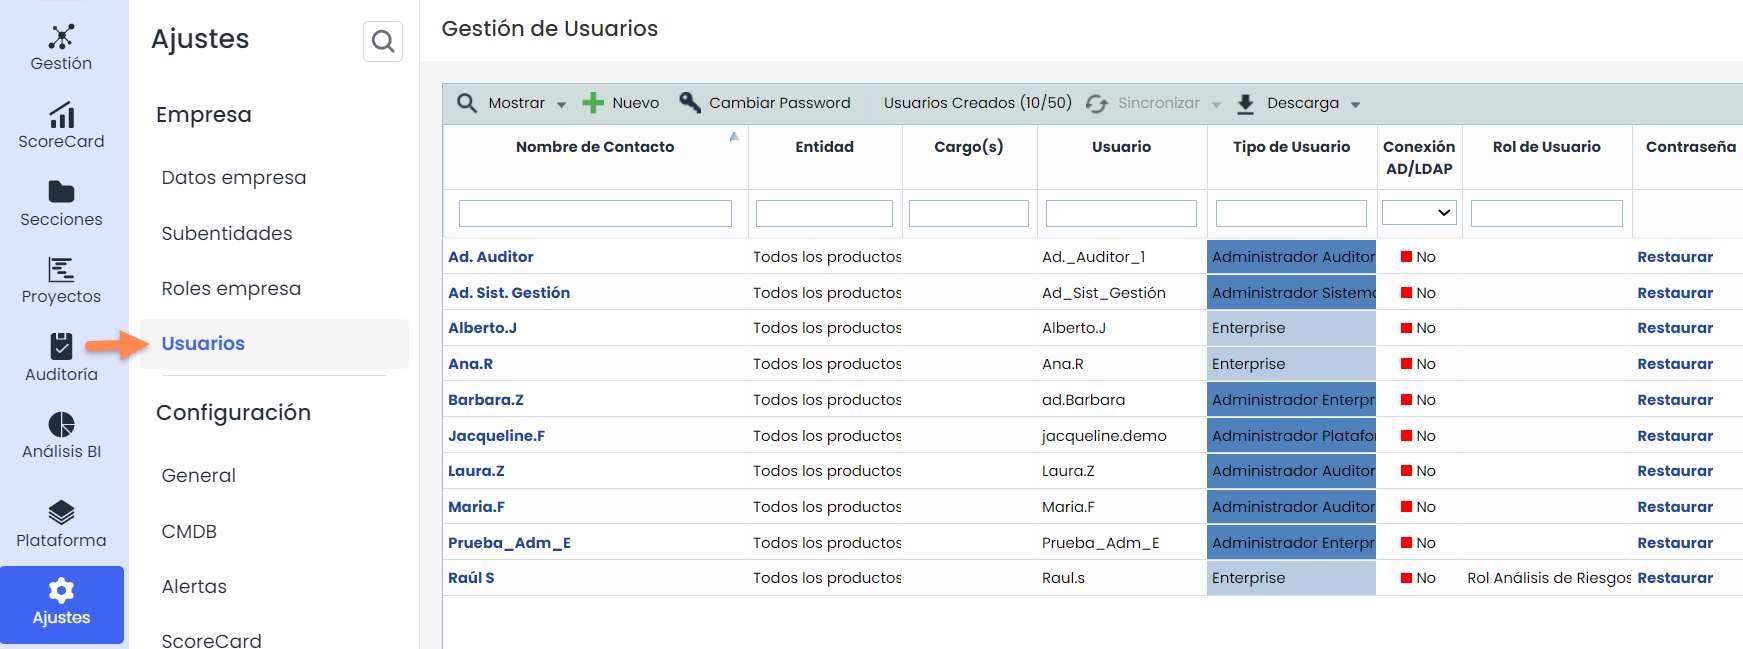
Through the Settings option in the main menu, you can access all platform and user configuration options. The “Users” option must be selected.
Step 2. Define new user information
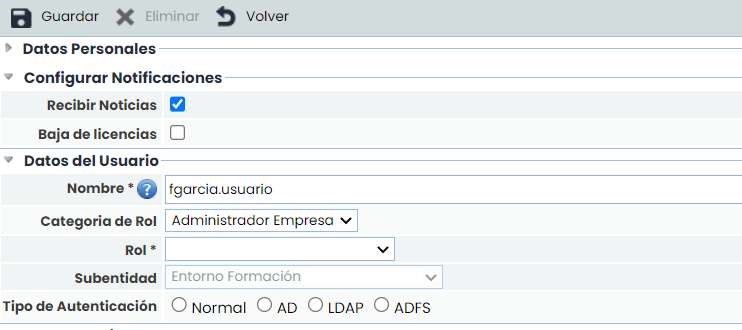
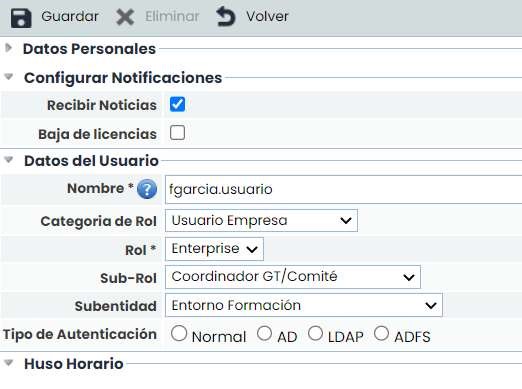
Proceed to define all the information associated with the new user. The sections of this user creation option correspond to:
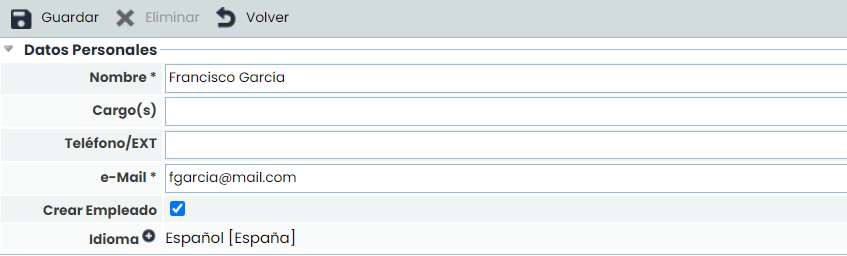
Personal Data: Allows determining all the information associated with the user, including mandatory fields such as the person's name and email. Notifications, password, and access link will be sent to the email. The Create Employee checkbox will be explained in the “Difference between employee and user” section. Additionally, the language definition is included.
-
Configure Notifications: Allows configuring notifications about GlobalSuite updates and the discontinuation of any contracted modules.
-
User Data: This section allows setting the username for platform access, as well as defining the Role Category, Associated Role, and Sub-Entity.
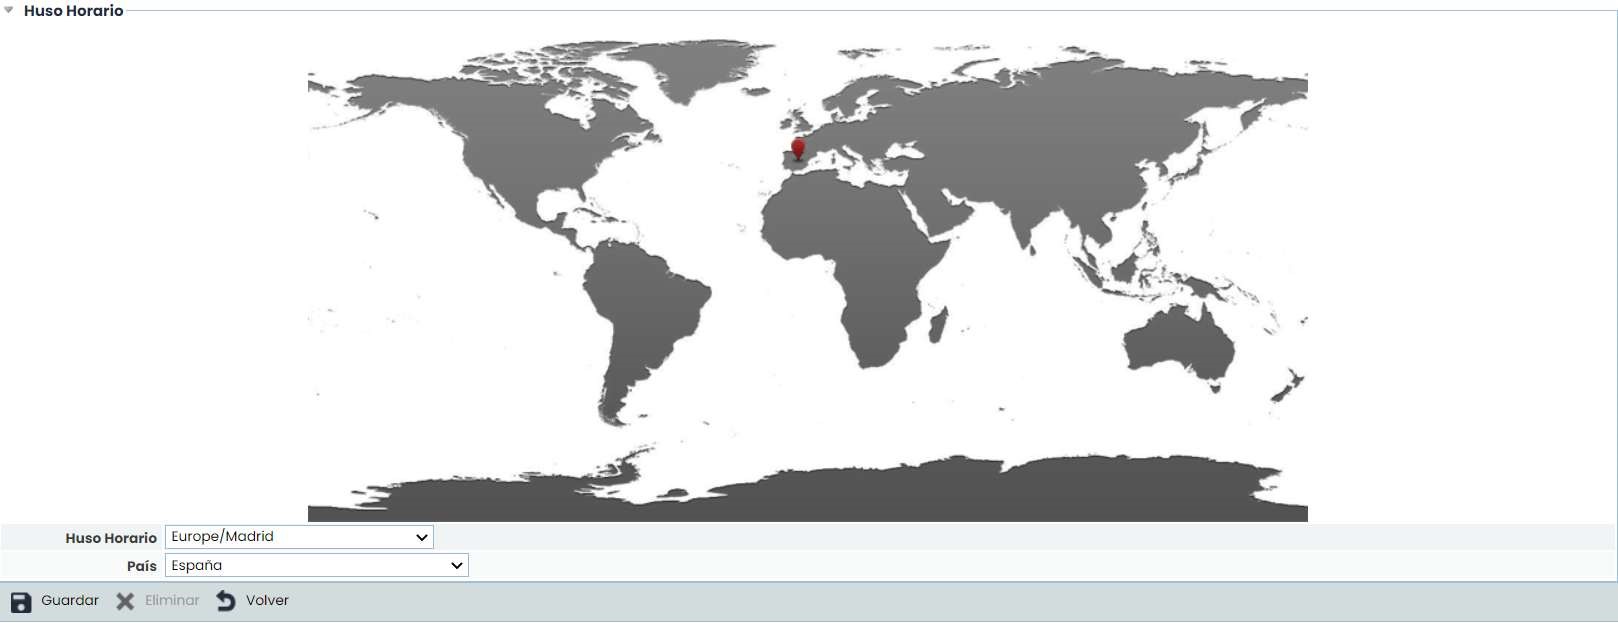
Time Zone: Allows setting the time zone associated with the platform and the user's country by clicking on the country on the map or selecting it from the Country dropdown.
Step 3. Assign profiles, roles, and others
To assign the appropriate permissions to each generated user, proceed to define the Role Category, Role, Sub-Role, and Sub-Entity. To do this, the following fields must be filled out:
-
Role Category: Allows differentiation between administrators and company users.
-
Role: Indicates the type of administrator or company user.
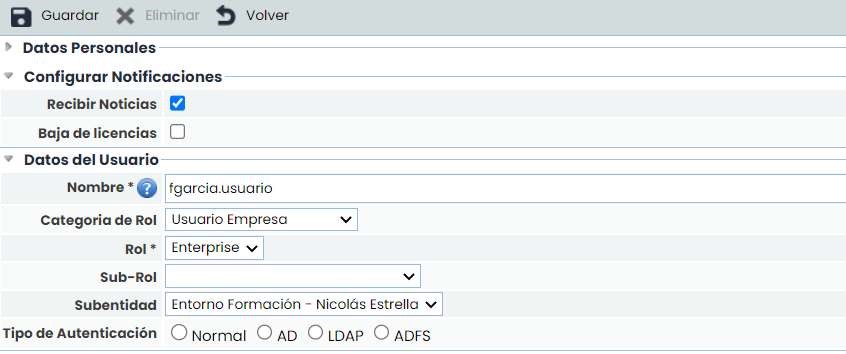
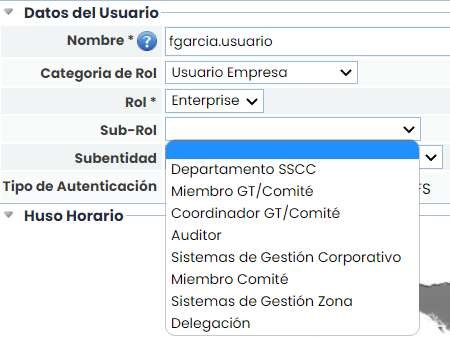
Sub-Role: Allows associating the sub-role that determines the access permissions of the generated user. The sub-roles that appear in the dropdown are those configured in GlobalSuite® (option “Company Roles,” which will be explained below). This sub-role is only applicable to Enterprise or Entity users.
-
Sub-Entity: Allows associating which entity the user will have access to (only appears in environments with multiple entities).
-
Authentication Type:
-
-
Normal: This is the manual authentication implemented in GlobalSuite.
-
AD: Uses the client's Active Directory user to access GlobalSuite.
-
LDAP: Similar to "AD," using the specific LDAP protocol.
-
ADFS: Allows access to GlobalSuite through a Federated Active Directory.
Authentication Type: To link a user via AD, LDAP, or ADFS, click the “related user” button. A window will open where the user must be selected and associated.
-
The “Dependent Users” table shows the users that the created user will have access to. This allows organizations with entities to provide a single user with access to multiple entities without needing to create a user for each entity or company with an Enterprise license.
-
The “Own Company Access” option allows marking whether the user is permitted access to their own company or, alternatively, will only have access to the entities they are related to, as displayed in the previous “Dependent Users” section.
Step 4. Save and send automated email
To finalize the user creation, click the save button, which will automatically send an email to the specified email address containing the following information:
-
Platform access address: Allows access to GlobalSuite®.
-
User: The user defined for accessing GlobalSuite®.
-
Password: The password is sent to the same email assigned during user definition.
This procedure ensures the confidentiality of the user's access data to the platform.
Password Restoration
-
Once users are created, if any access issues are detected or reported, the password can be restored from the main user screen, where GlobalSuite® displays the complete list of users with platform access. This can be done through the restore button available in the last column of associated information.
-
Once restored, GlobalSuite® will automatically send the password to the email associated with the user.

Additionally, to delete a specific user, access the user's configuration information by clicking on their name. Once accessed, select the “Delete” button, which will remove the user and all associated platform access permissions.
Company Roles
GlobalSuite® allows the management of each user through Access Roles, which can be configured to have different access permissions for each type of Role.
Step 1. Creation of Company Roles
GlobalSuite® allows the establishment of different types of access roles to ensure confidentiality in the use of platform options.
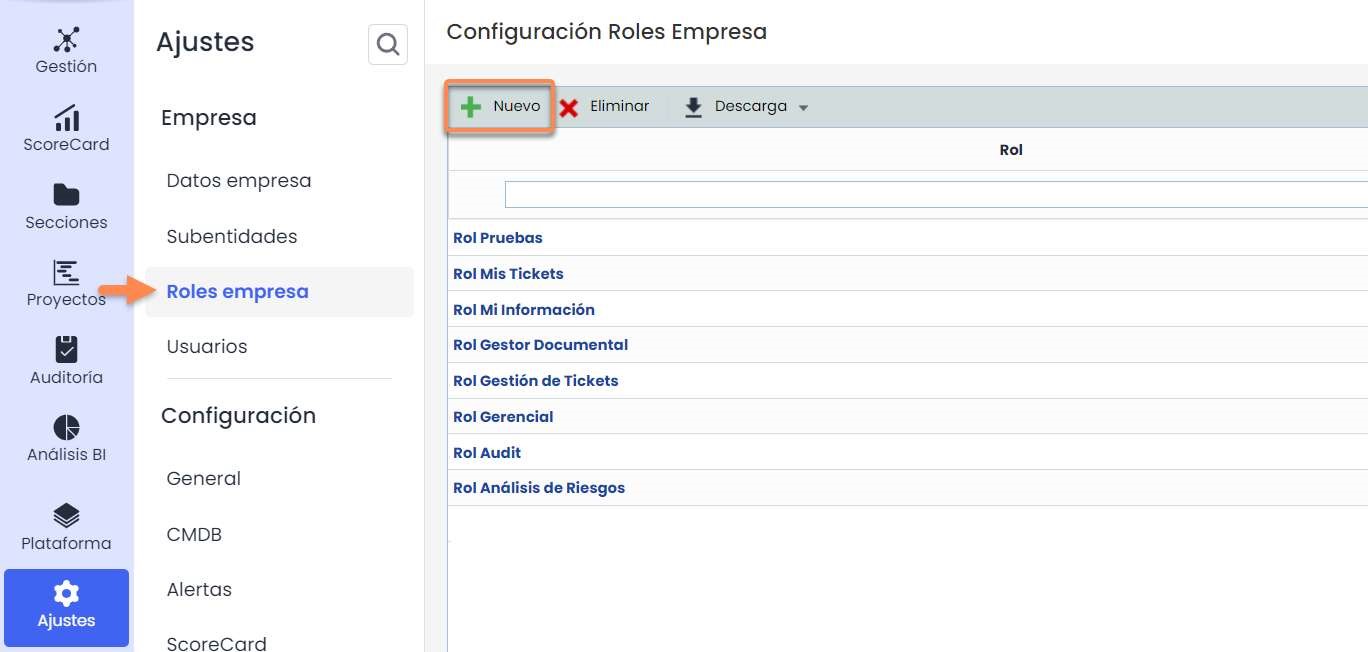
To manage Roles, go to Settings > Company Roles.
Step 2. Configuration of Company Role access
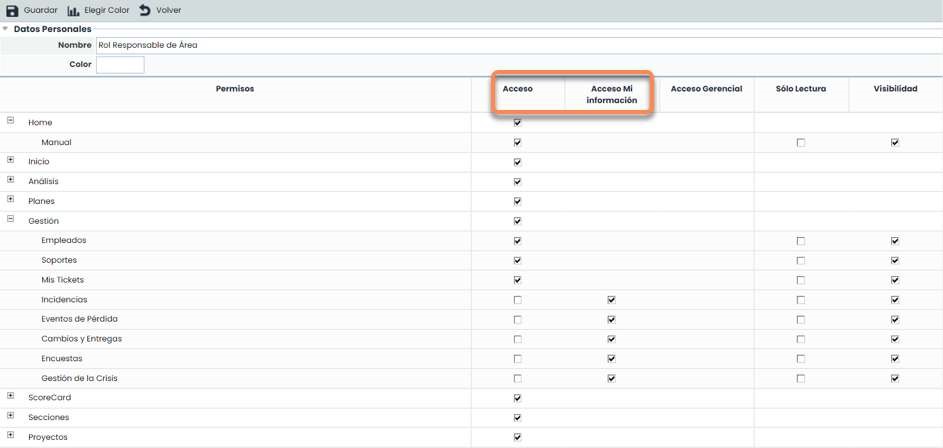
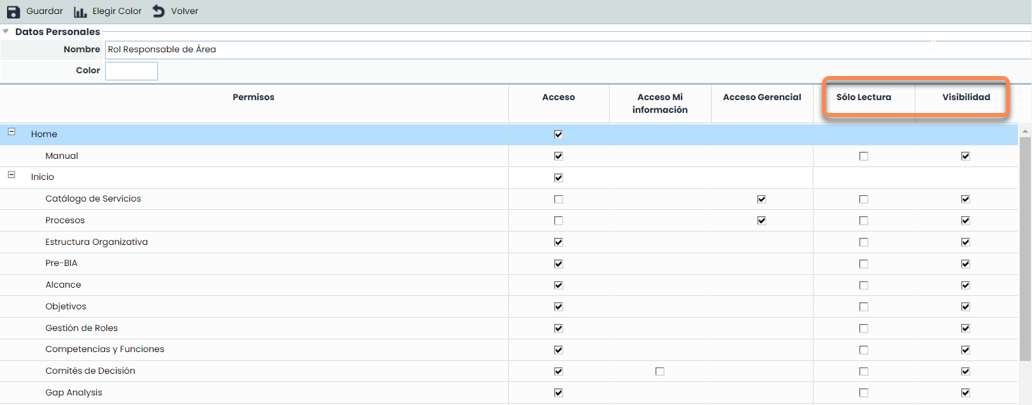
To determine the access permissions of the created Role, access the permissions screen where the following can be configured:
-
Access: By selecting the access column, the user with this role will be able to access all records and information of the selected option.
-
Access My Information: This permission allows access to the specified option but only to the records for which the user with this sub-role is responsible. Other records of that option will not be visible to the user.
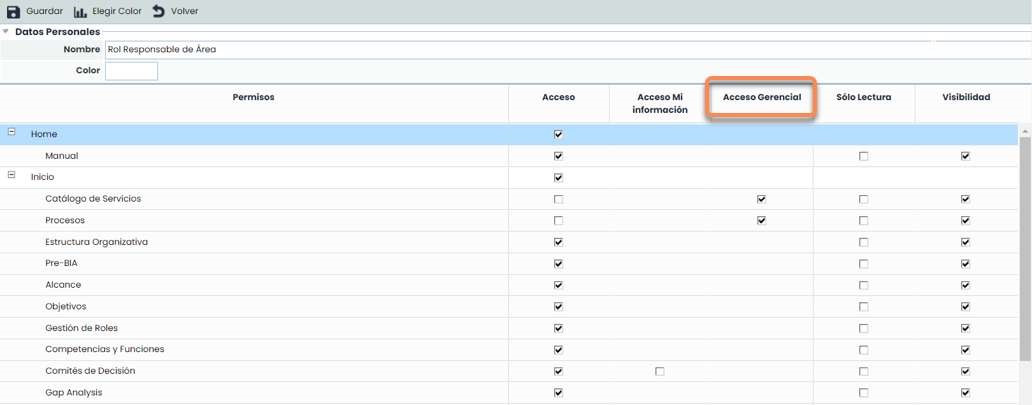
Managerial Access: This permission allows access to the specified option but only to elements dependent on the Services where the user-employee assigned this role is responsible.
Note: The dependencies of elements (processes, items…) with the services are displayed in the “Inventory” option.
Example: This permission allows limiting the view to all information dependent on a specific service, hiding information not directly related to it.
-
Read-Only: Allows defining access (regardless of type) to a specific option, but only in consultation mode.
-
Visibility: Allows using information from the selected option, even when management access to it is not granted. Example: From the “Inventory” option, an “Employee” can be assigned as responsible for an Item, but it is not desired for that user to have access to the “Employees” option. In this case, the “Employees” option will have the “Access” checkbox marked but not the “Visibility” checkbox.
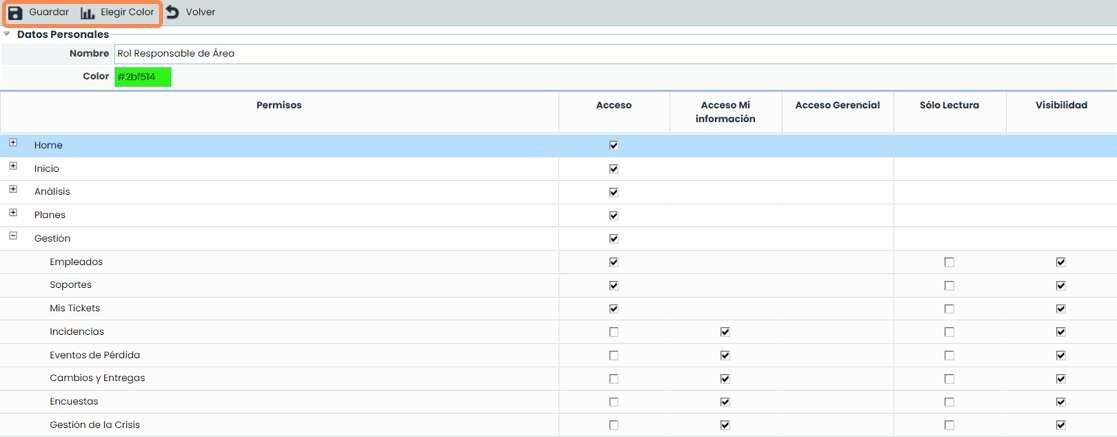
Step 3. Save the established Company Role
To finalize the creation of the established Role, save the configuration by clicking the save button.
Additionally, GlobalSuite® allows associating colors to facilitate the search and assignment of the Role to a specific user being configured. To do this, select the Choose Color option, displaying a color scale that allows associating them with the created Role.
Difference between Users and Employees
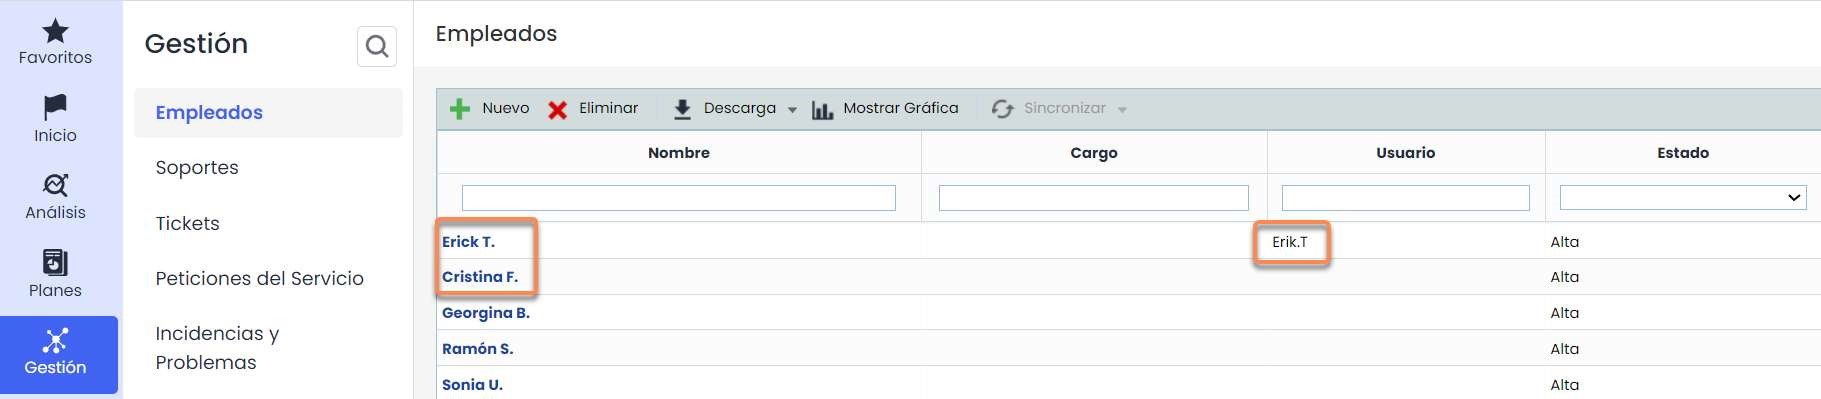
In GlobalSuite®, an employee is any person with a relevant role within the organization. They are managed through the Management > Employees option.
Users are the people who access GlobalSuite to manage information. They are managed through the Settings > Users option. As seen in this tutorial, users can be assigned a Company Role.
For the proper functioning of some options of these Company Roles (such as Managerial Access or Access My Information), it is possible to indicate that an employee corresponds to a user.
Users and employees can be linked in two ways:
-
The first and most recommended way is to do it when creating the user by checking the “Create employee” box, which will automatically create an employee in the management system and link it to this User.
-
The second option is, if the user has already been created without checking the previous box, a dropdown field called “User” will appear in the Management > Employees option to manually associate them within the form. This dropdown contains all users without an associated employee.