This option allows customizing the configuration of the CMDB in our IT Service Management System.
The customization of the CMDB is carried out in the two tabs initially displayed when nothing has been configured in the CMDB yet. The two tabs are as follows:
-
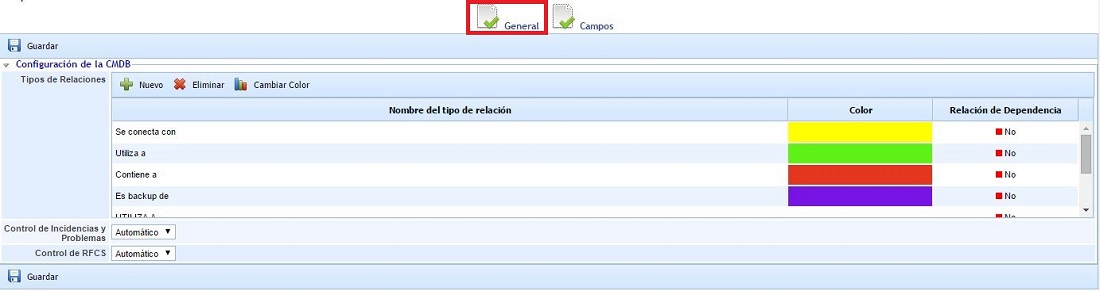
General: Allows customization of the "Relationship Types" and the automatic or manual control for "Incidents and Problems" and "RFCs".
-
Fields: Allows customizing all the fields or attributes to be registered in the CMDB.
The functionality of the "General" configuration of the CMDB is detailed below:
-
Relationship Types: Allows establishing the types of relationships that the CIs (Configuration Items) created in the CMDB section can have. To add or delete relationships, press the 'New' or 'Delete' buttons. Additionally, the color of the relationship can be modified by selecting the desired row and pressing the 'Change Color' button. The colors are displayed in the 'Relationship Graph' of GlobalSuite®.
-
Incident and Problem Control: GlobalSuite enables the control of incidents and problems for each of the CIs to be:
-
Automatic: (Recommended Option) All Incident and Problem records registered in GlobalSuite, where the affected configuration items are selected in the Incident or Problem itself, will be automatically related. This way, when consulting the information of a CI, all the Incidents and Problems it has been involved in can be viewed.
-
Manual: When the selected control is "Manual", GlobalSuite enables a text field in the CI form where the identifiers (IDs) of the Incidents and Problems the CI has been involved in can be specified. This configuration is typically used when the organization does not use GlobalSuite's Incident and Problem management, as the records are made in another system but need to establish this linkage between the CIs and the related Incidents and Problems.
-
-
RFC Control: GlobalSuite enables the control of RFCs for each of the CIs to be:
-
Automatic: (Recommended Option) All RFC records registered in GlobalSuite, where the affected configuration items are selected in the RFC itself, will be automatically related. This way, when consulting the information of a CI, all the RFCs it has been involved in can be viewed.
-
Manual: When the selected control is "Manual", GlobalSuite enables a text field in the CI form where the identifiers (IDs) of the RFCs the CI has been involved in can be specified. This configuration is typically used when the organization does not use GlobalSuite's RFC management, as the records are made in another system but need to establish this linkage between the CIs and the related RFCs.
-
The functionality of the "Fields" configuration of the CMDB is detailed below:

Initially, this option is empty, and if you want to keep the default configuration provided by the solution, it should remain as is. Otherwise, if you wish to customize the information about each configuration item, the first step is to press the Restore button.
IMPORTANT: Each time you press the "Restore" button, the CMDB configuration provided by GlobalSuite by default will be restored. If you had previously made a customization, it will be replaced by the original configuration, and the previous customization cannot be recovered.
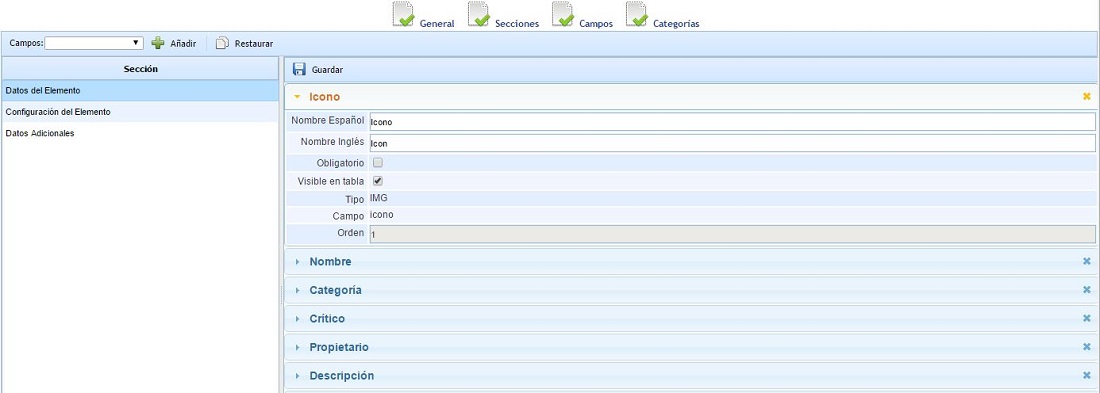
The first time the "Restore" button is pressed, the solution automatically loads the 3 sections that make up the information of a CI in the original configuration into the left table: "Item Data", "Item Configuration", and "Additional Data". Additionally, after pressing the "Restore" button, it can also be observed that the tabs in the "CMDB" option have been expanded, adding the "Sections" and "Categories" tabs to the "General" and "Fields" tabs.

In the "Fields" tab, you can click on any of the sections to customize the fields that each of them will contain. By clicking on the section, a list of fields is displayed on the right side of the window. Clicking on a field will show information about it, which varies depending on the type of field. Below is a detailed description of the information you can find in the different fields, which may vary depending on the type of field.
-
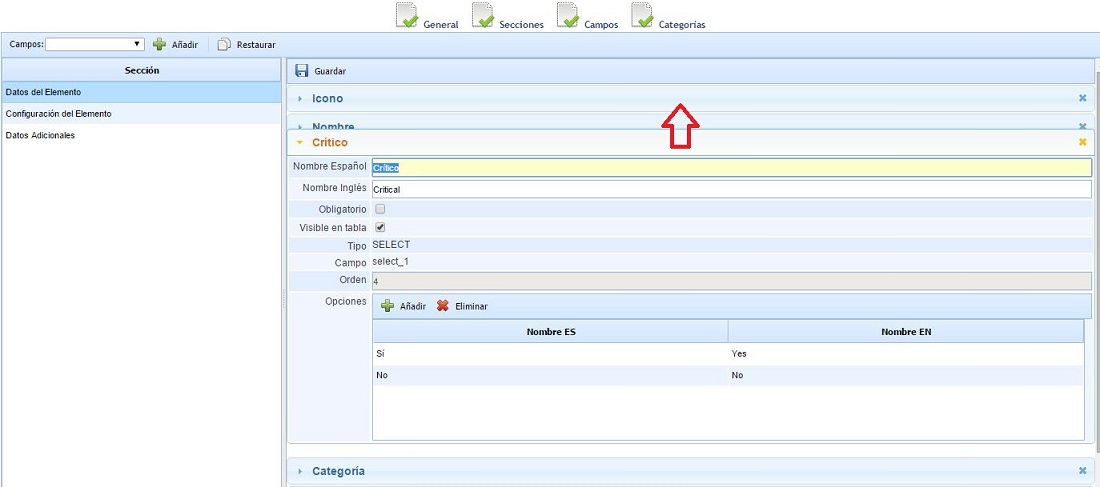
Spanish Name: Allows setting the label in Spanish for this field in the CI form. This label will be displayed when the user has Spanish configured in their profile.
-
English Name: Allows setting the label in English for this field in the CI form. This label will be displayed when the user has English configured in their profile.
-
Main: Attribute only available for INPUT type fields. Allows setting which field will be the main field of the CIs, which will then be displayed in the rest of the solution related to the CMDB. Only one field can be marked as Main.
-
Mandatory: If this checkbox is marked for the selected field, when registering the information of a CI, this field cannot be left empty and must be completed before pressing the "Save" button in the CI form.
-
Visible in Table: If this checkbox is marked for the selected field, this field will be visible in the initial table of the CMDB where the entire list of CIs is displayed.
-
Type: Provides information about the type of element. This field is for informational purposes only. GlobalSuite comes with a set of fields of each type created by default, and the type of an already created field cannot be changed.
-
Order: Displays a number corresponding to the order in which this field will be displayed in the CI form within the selected section. This field is for informational purposes only. To change the order of the field, you must select the header of the form for this field and drag the field to the desired position.
-
Options: Consists of a table to indicate the different options that the user will be allowed to select in that field of the CI form. Only available for SELECT type fields.
To create new additional fields for each of the sections, you must create the section where you want to create the field and then select the field type in the "Fields" dropdown, and then press the "Add" button. The types of fields to include are as follows:
-
TEXT: Allows creating a text field whose display area will be multiple lines of text.
-
INPUT: Allows creating a text field whose display area will be a single line of text.
-
DATE: Allows creating a date field.
-
SELECT: Allows creating a field with multiple options to select one of them.
-
CHECK: Allows creating a field with a checkbox to mark or unmark the option.
The "Sections" tab of the CMDB configuration allows adding new sections to the CI form, in addition to the 3 sections that come by default in the GlobalSuite configuration.
The options available in this window are as follows:
-
New: Allows creating a new section.
-
Delete: Allows deleting an existing section. You must first select the section and then press the "Delete" button.
-
Move Up: Allows increasing the order in which the section will be displayed in the CI form. You must first select the section and then press the "Move Up" button as many times as desired until placing the section in the desired order.
-
Move Down: Allows decreasing the order in which the section will be displayed in the CI form. You must first select the section and then press the "Move Down" button as many times as desired until placing the section in the desired order.

The table with the section information consists of 3 columns, detailed as follows:
-
Name ES: Allows setting the label for the section in Spanish.
-
Name EN: Allows setting the label for the section in English.
-
Expanded: Allows configuring the sections that should appear expanded by default when accessing a CI form (Yes option), showing all their fields, or the sections that should appear collapsed, showing only the section name and requiring a click on the name to view the fields included in that section (No option).
The "Categories" tab allows configuring the fields that each of the categories and/or classes of the Configuration Items in the CMDB will contain.
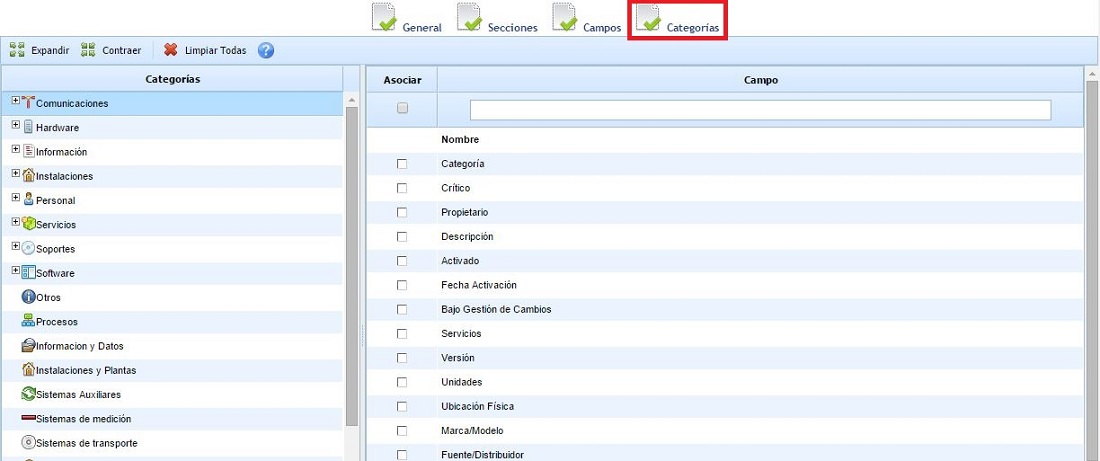
NOTE: If a category has all fields unselected, it will use the fields of the parent category, or if applicable, the company. Mandatory fields are shown in bold and will also be included in all categories.
To customize the fields of a specific category, you must select the category and then mark the required fields. Remember, if no field is marked, it will take the fields of the parent category or the default configured fields. It is not necessary to mark all fields in all categories, only in those categories you wish to customize.
If you want to restore the default configuration, you can press the "Clear All" button, which will remove all the details specified in the categories.