In this article, we discuss how to create, organize, and track projects in GlobalSuite®, defining work teams, tasks, and phases, configuring predefined templates, managing calendars and histories, and closing projects once completed.
Index
The Projects section is a transversal area, common to all GlobalSuite® modules, which can be accessed from any menu (Home, Start, etc.). Its function is to facilitate the organization, management, and tracking of projects.
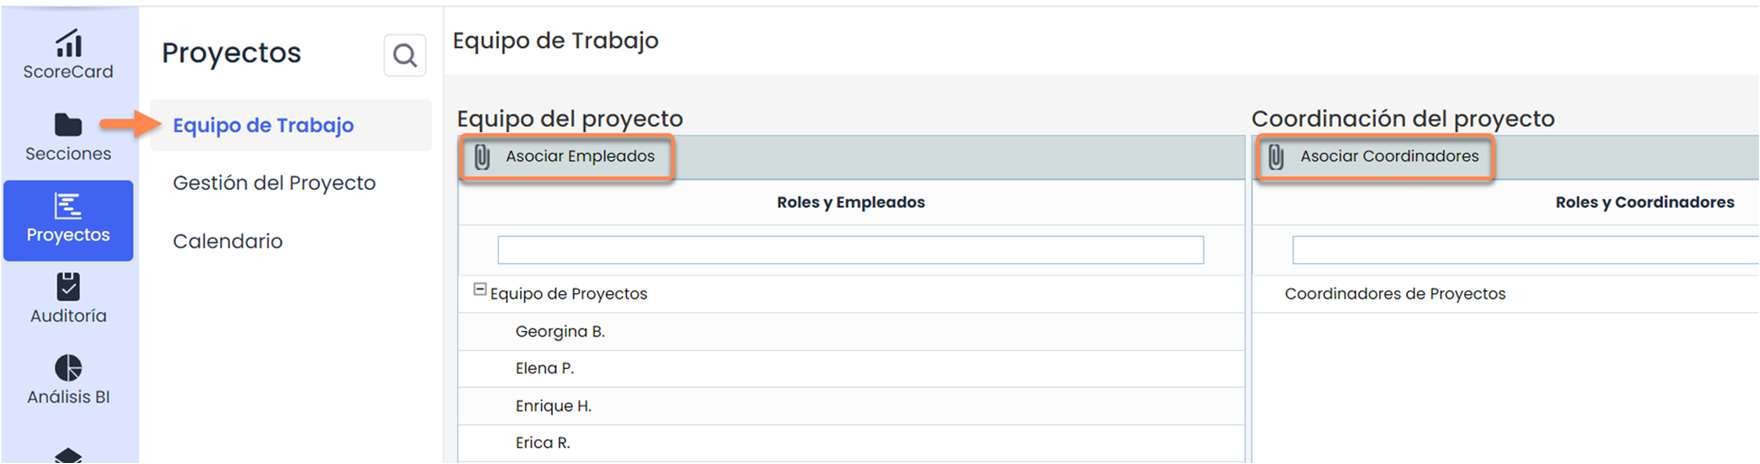
1. Work Team
This option allows defining work and coordination teams. The definition of both is done at the Roles level, so it will be necessary to
select existing roles, edit roles in Start > Role Management or define new roles in Settings > General Configuration > Role Configuration .
The employees added to the " Work Team", will be the ones who can be assigned to tasks within the Project.
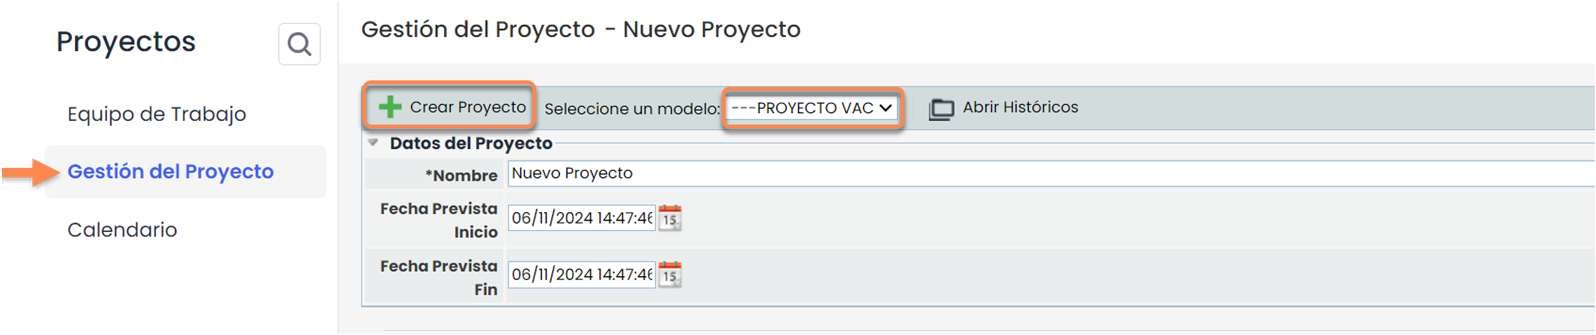
2. Project Management
On this screen, you can create and manage a project. When accessing for the first time, the project must be defined by specifying: name and expected start and end dates. Additionally, you will have the option to choose between creating an empty project to adjust it to the project's needs or selecting a preconfigured template (see point “ 3. Settings: Projects” in this guide). To start, go to Projects> Project Management , select a template and/or click directly on Create Project.
When creating a project, this section will show from that moment the template with the tasks to be completed or an empty workspace if no template has been selected. You can create new phases or tasks by first selecting the one they will depend on; delete the existing ones or mark them as completed (whenever a task is completed, all its subtasks will automatically be completed).
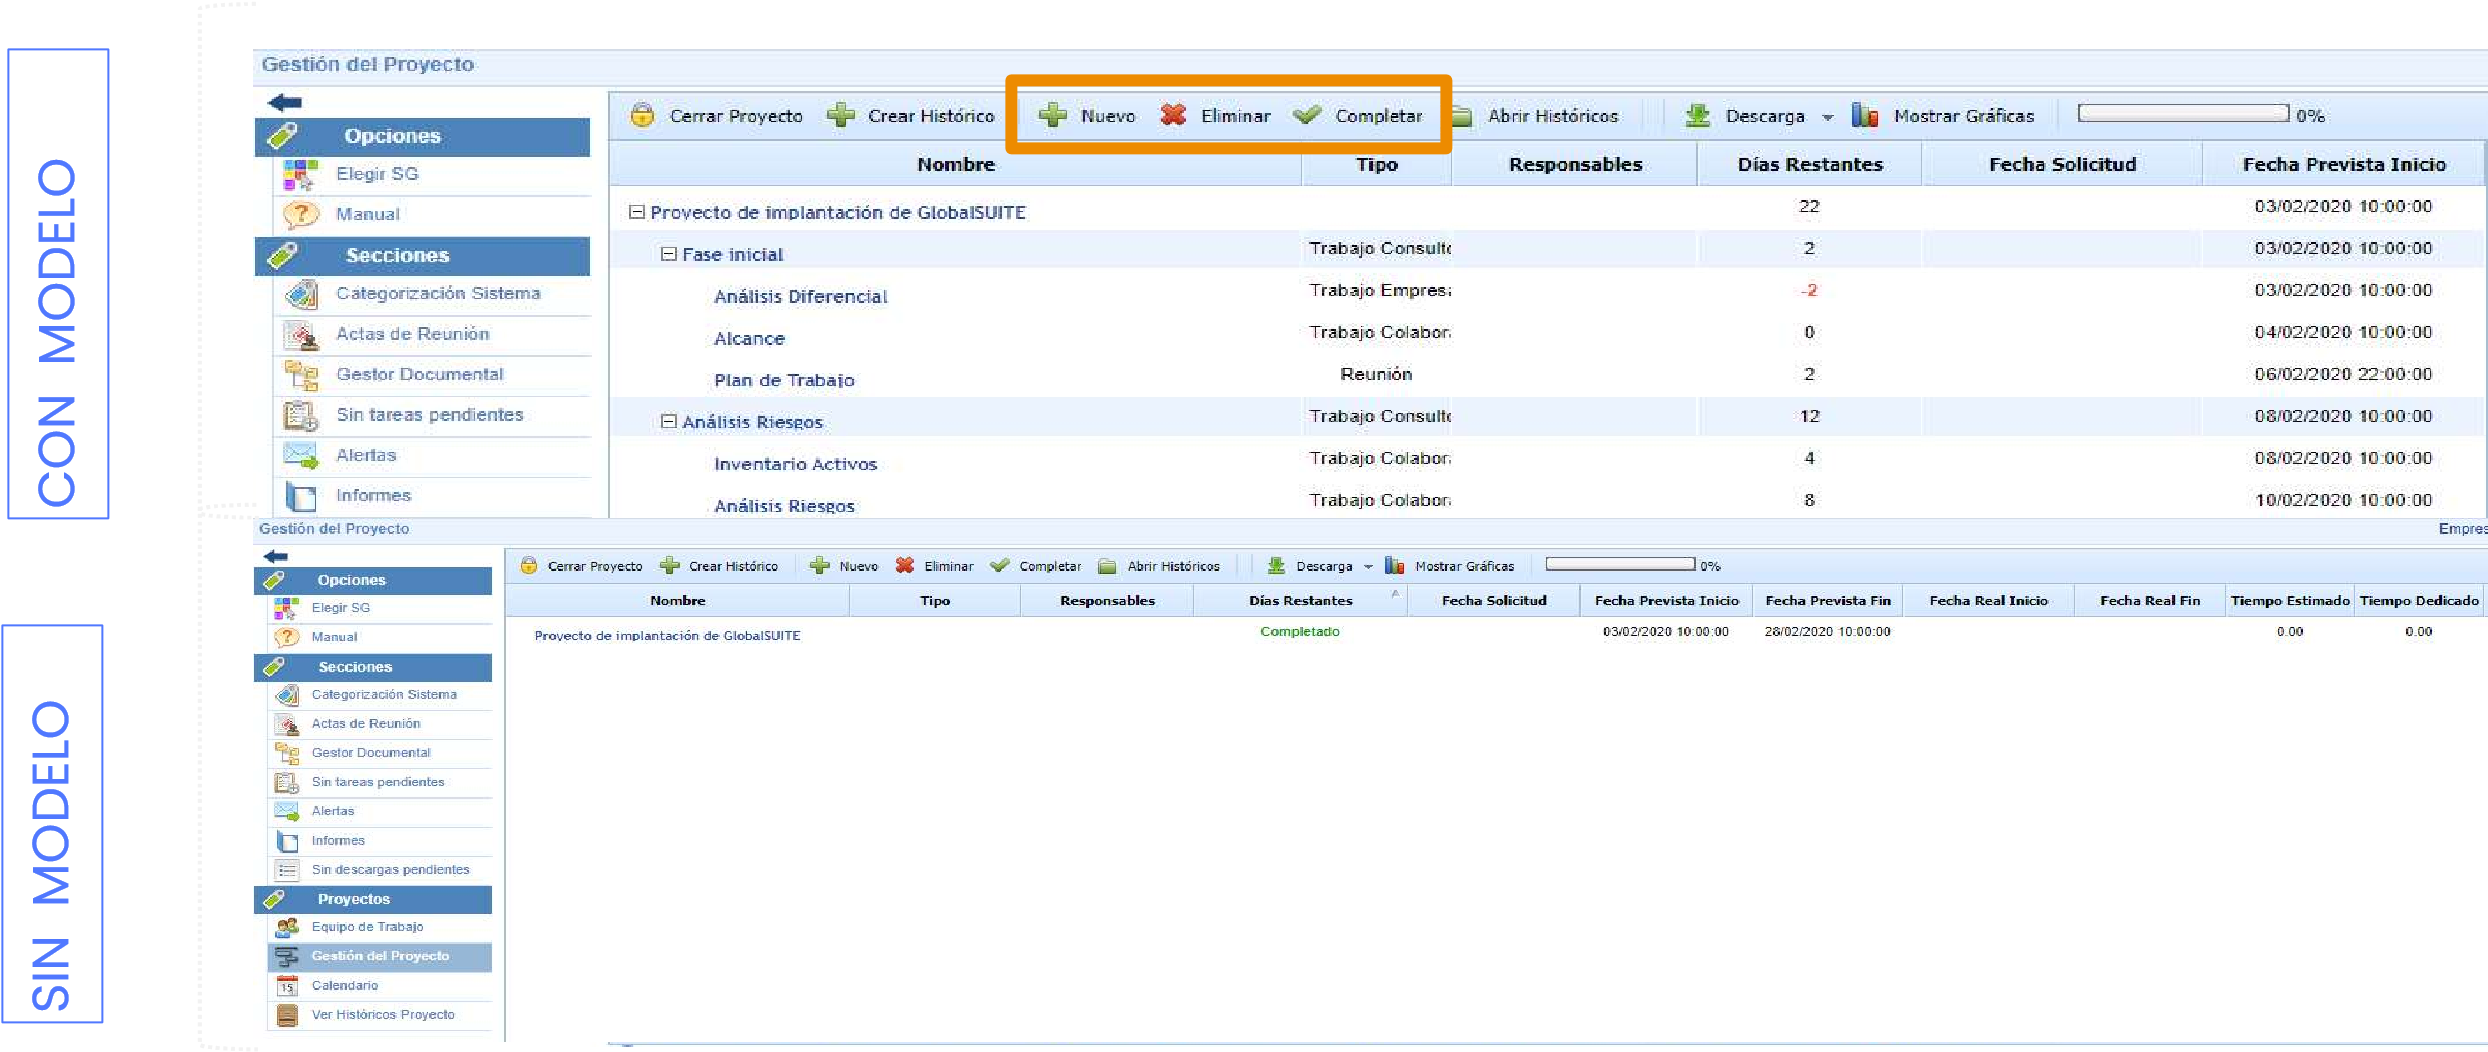
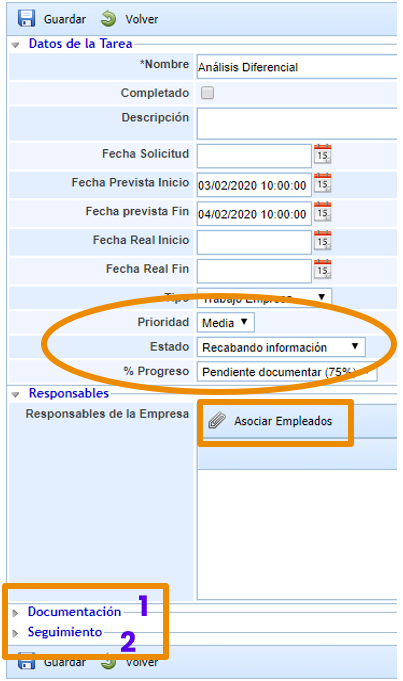
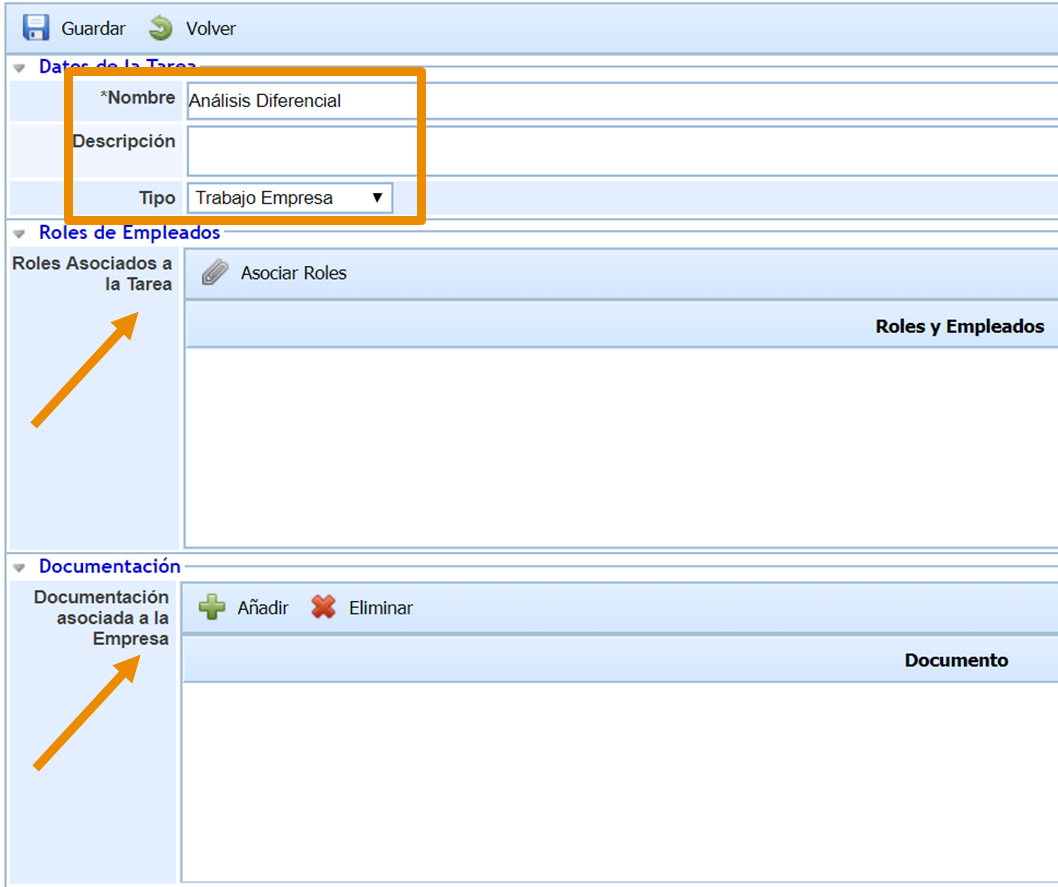
To edit a task, you must access its file by clicking on the name.
You can fill in all the visible fields in the “ Task Data” section, although the only mandatory one is marked with an asterisk (*).
The Priority, Status, and % Progress fields can be activated/deactivated, and the available options must be edited from Settings (see point “ 3. Settings: Projects ” in this guide).
You can also associate the task with employees registered in Management > Employees .
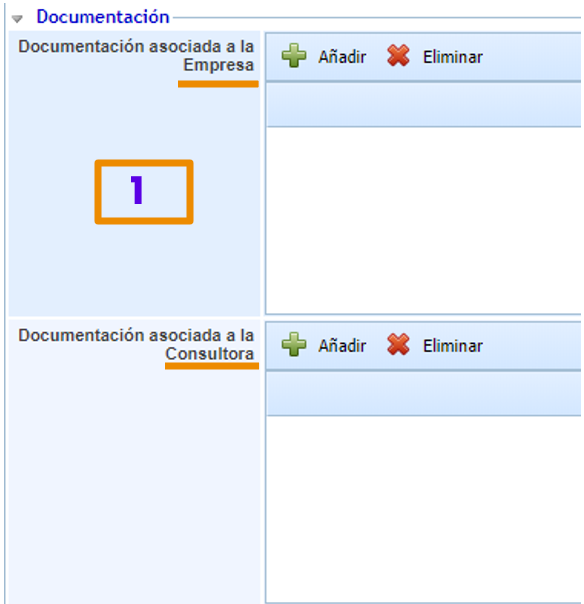
In the Documentation section, you can specify the documents available to carry out the task. There is the possibility to differentiate between documents provided by the company itself and those provided by the consulting company, if any.
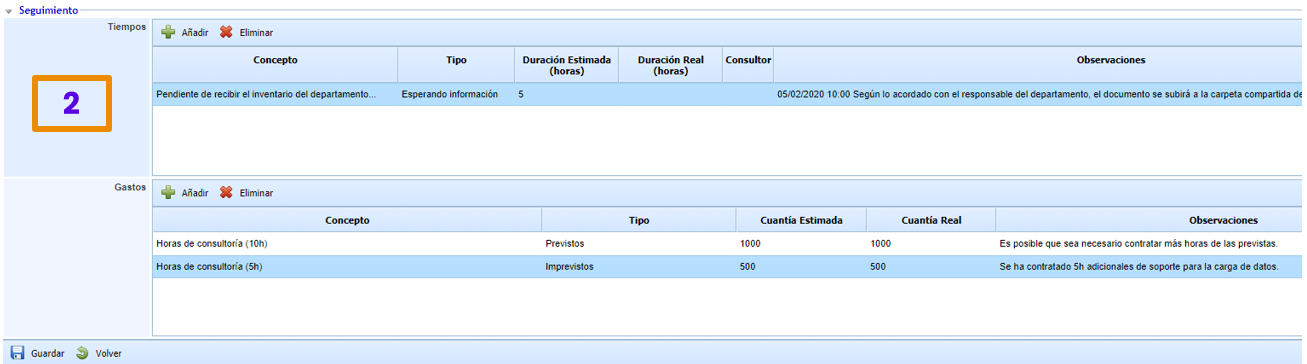
The fields in the Tracking section are optional and can be edited or hidden from Settings (see point “ 3. Settings: Projects” in this guide).
There is an option to report the time and expenses incurred while performing a task.
Returning to the Project Management list, you will see the changes made in the form.
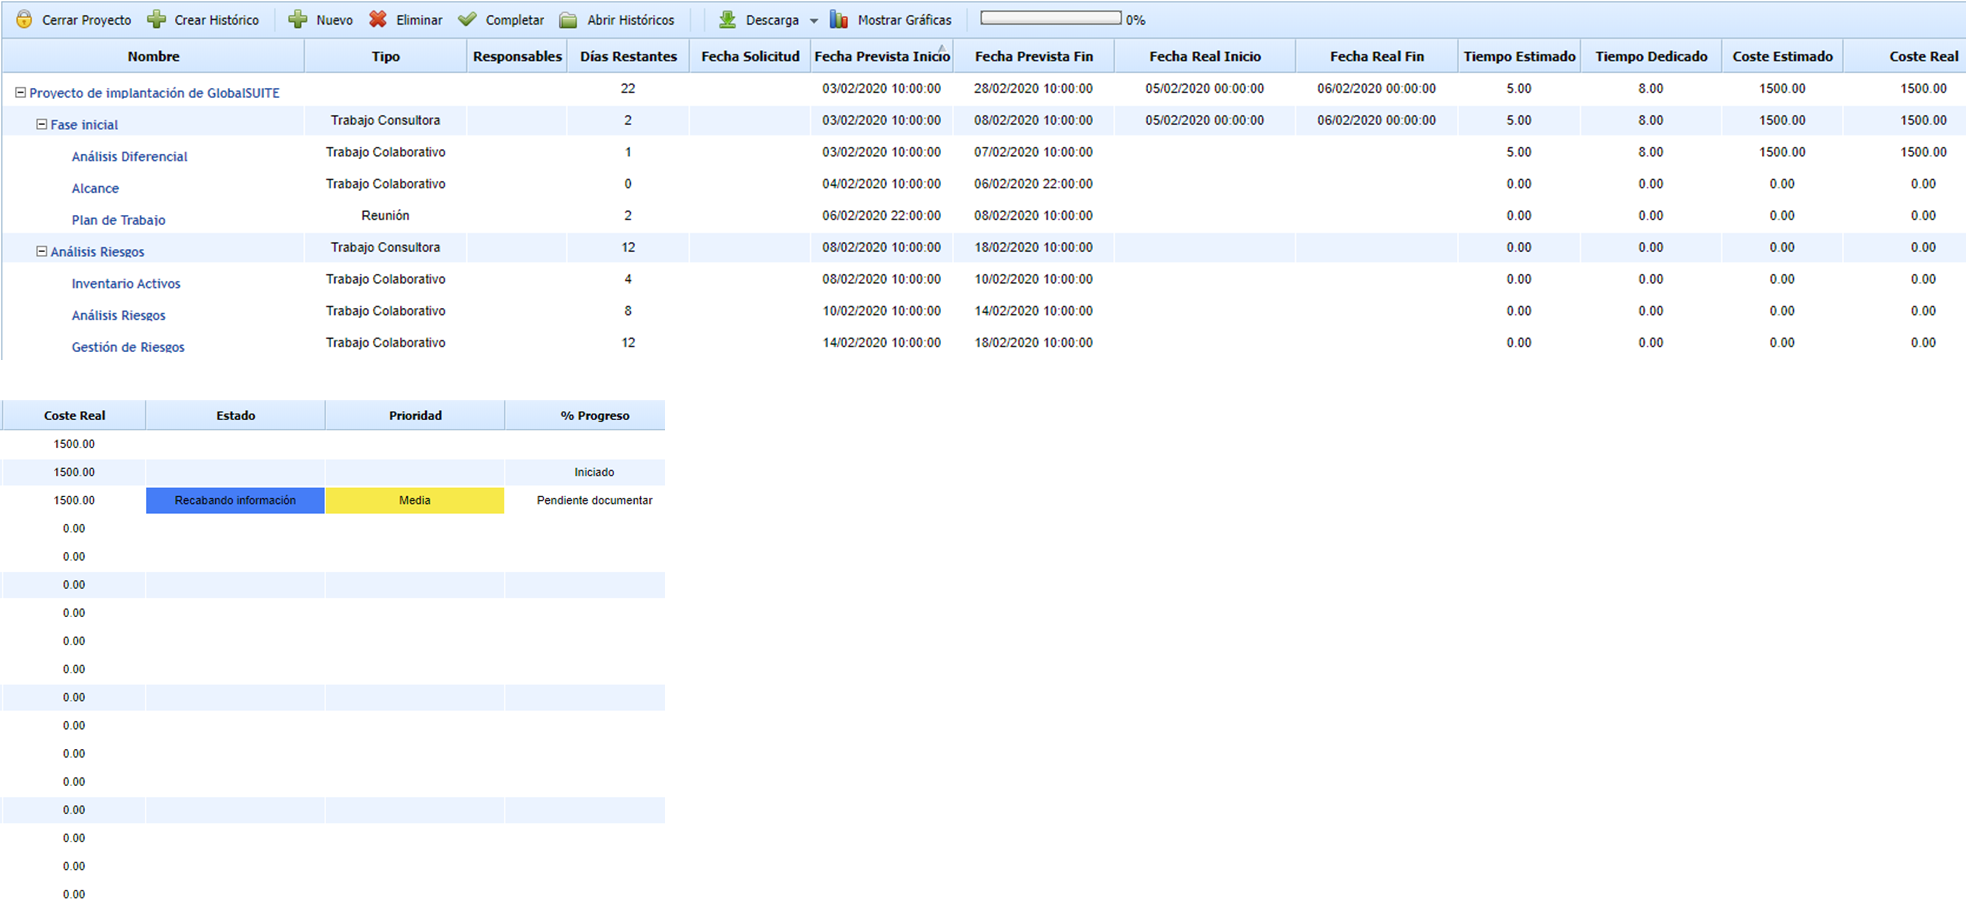
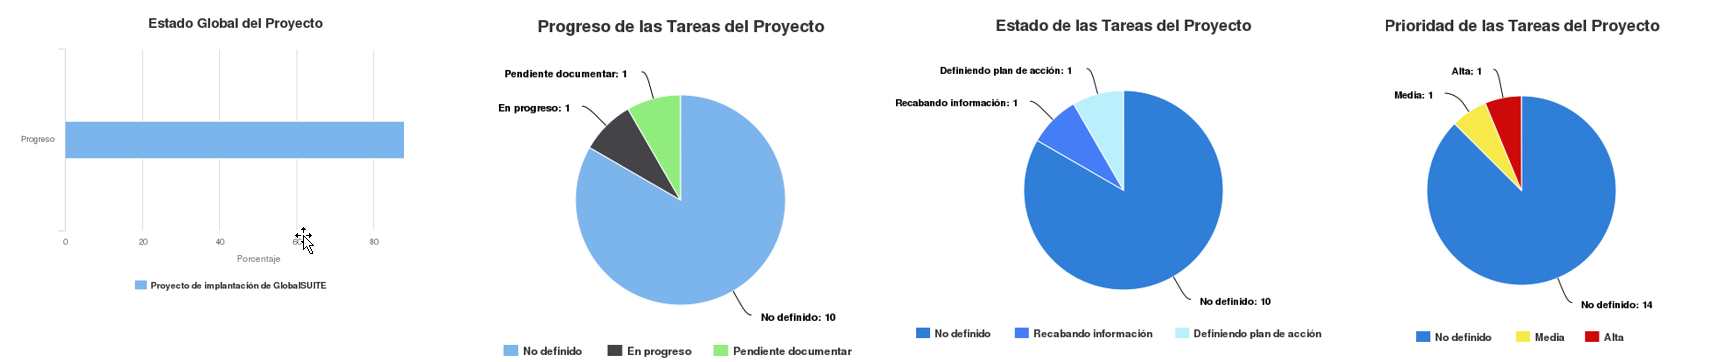
The available options also include Show Graphs and Download, which allow you to visualize the project's status and export the information in different formats.

Clicking on Show Graphs will display the status of the tasks.
The Download button will allow generating an Excel or PDF file with the project data displayed on this screen.
3. Settings: Projects
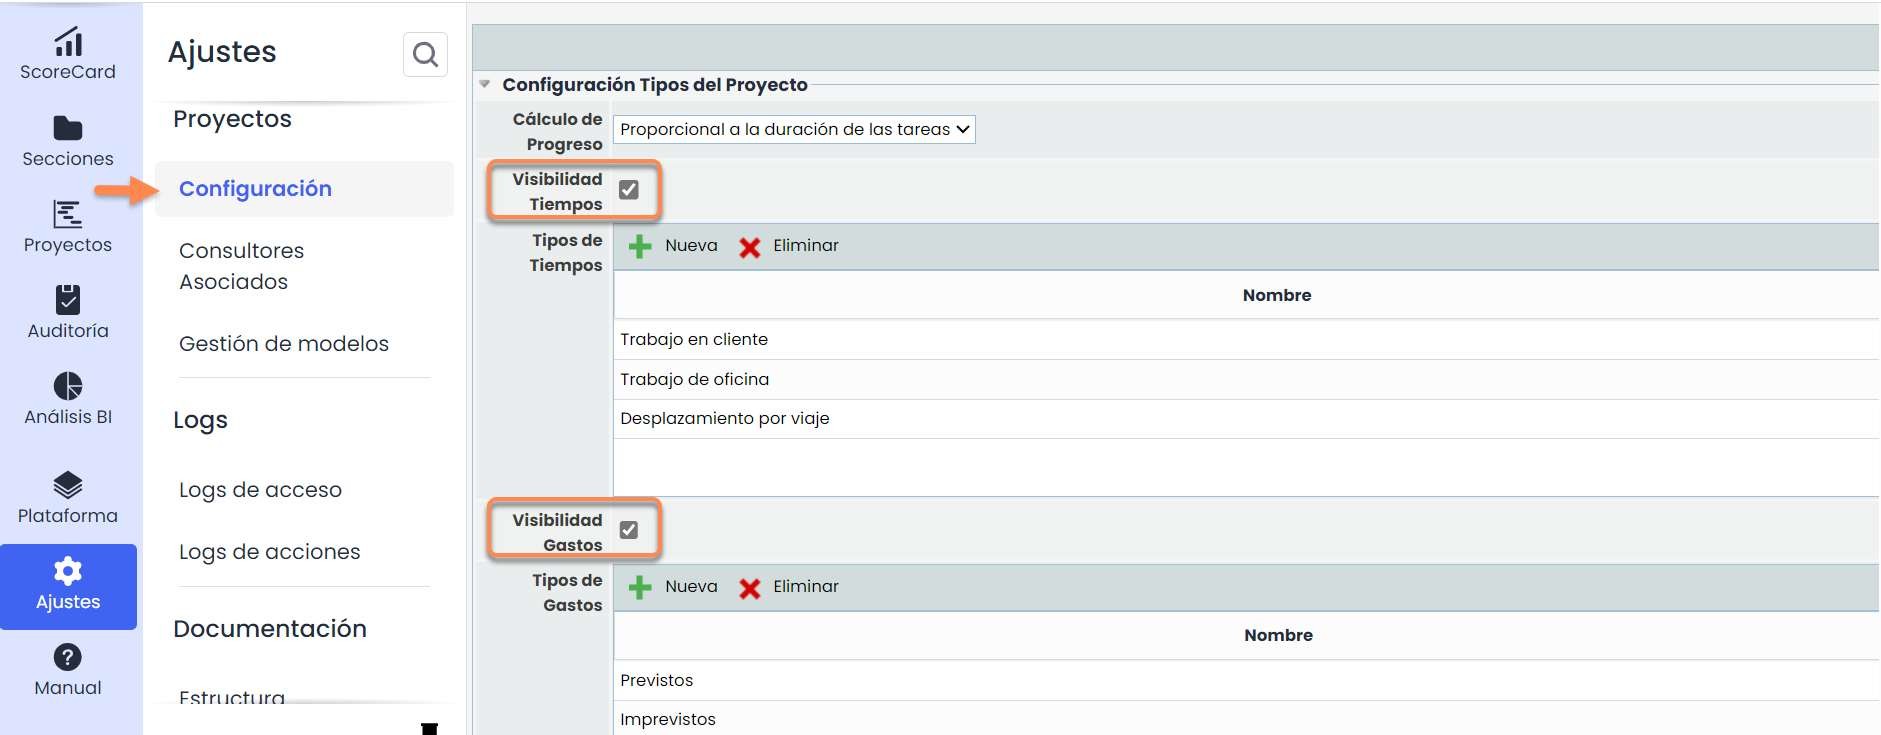
In the Settings section, you have the option to configure some of the fields in a project's task file and also to establish project templates.
Configuration
Whenever a checkbox is marked, the option will be available in the task file of a project.
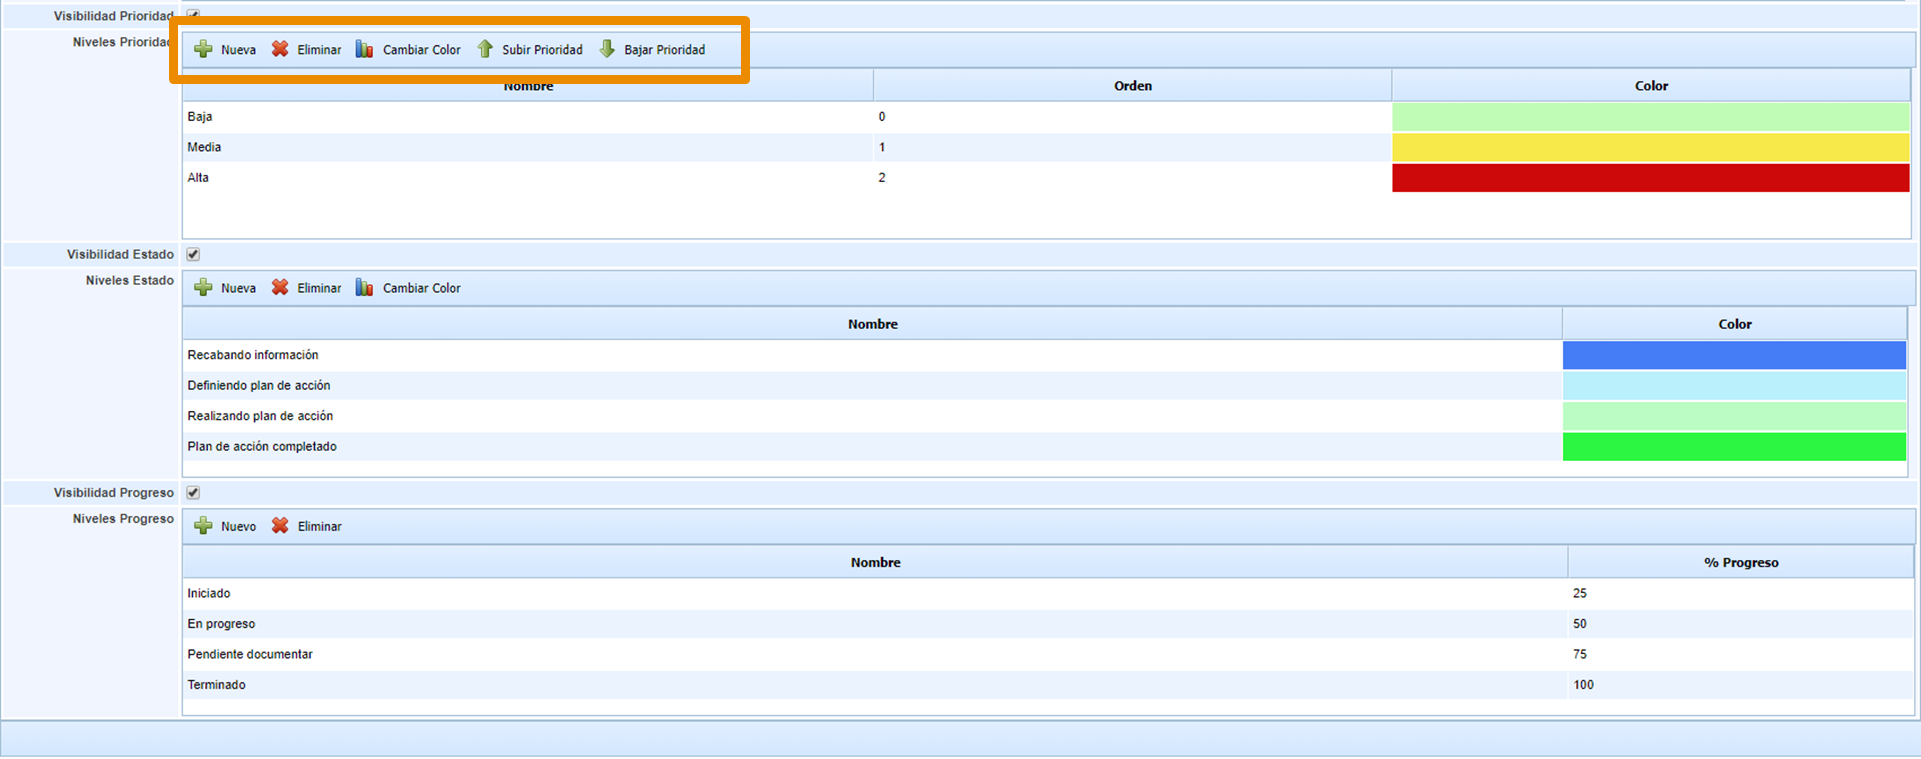
For active options, you must define the levels or types that can be selected when filling out the file. You can create new levels and/or types or delete existing ones, and/or assign them a color or change their priority levels when these options are available.
Template Management
In the template list, you can add some of the default ones (depending on the user type) or configure one from scratch by clicking on New.

Templates will serve as preconfigured guides and, in addition to saving time, will allow the creation of projects with similar structures.
To access the template, click on the name.
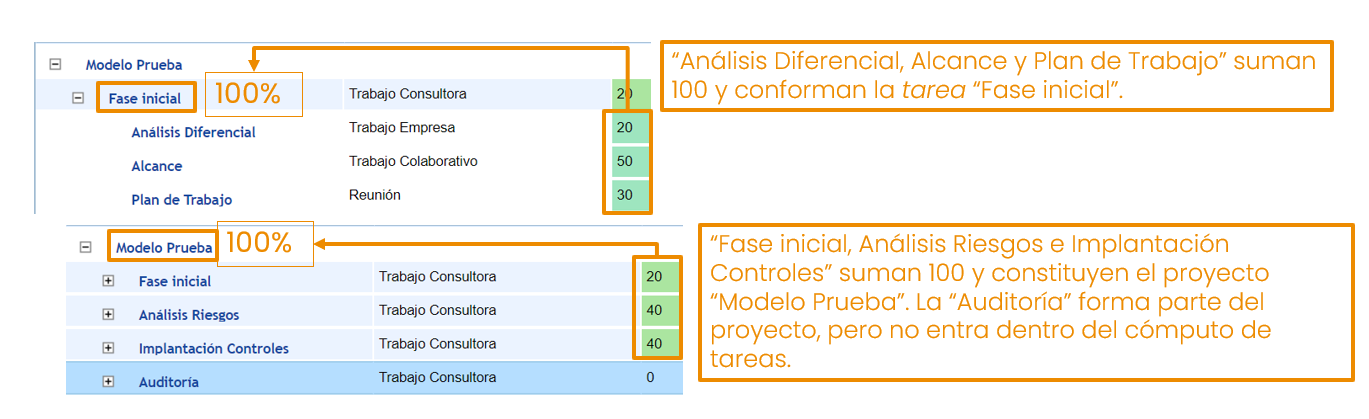
Once inside, you will see the task and subtask template, the type, and the duration expressed in %. You can add, move up or down tasks within the tree, as well as change the type and the percentage of duration by double-clicking on these fields. Note that the percentages of the subtasks must add up to 100%, and the percentages of the tasks must also add up to 100% with respect to the project.
Clicking on the name of a task/subtask will access its file, and you will have the possibility to preconfigure the type of task, roles and documentation associated. You can also edit the name and add a description of the task.
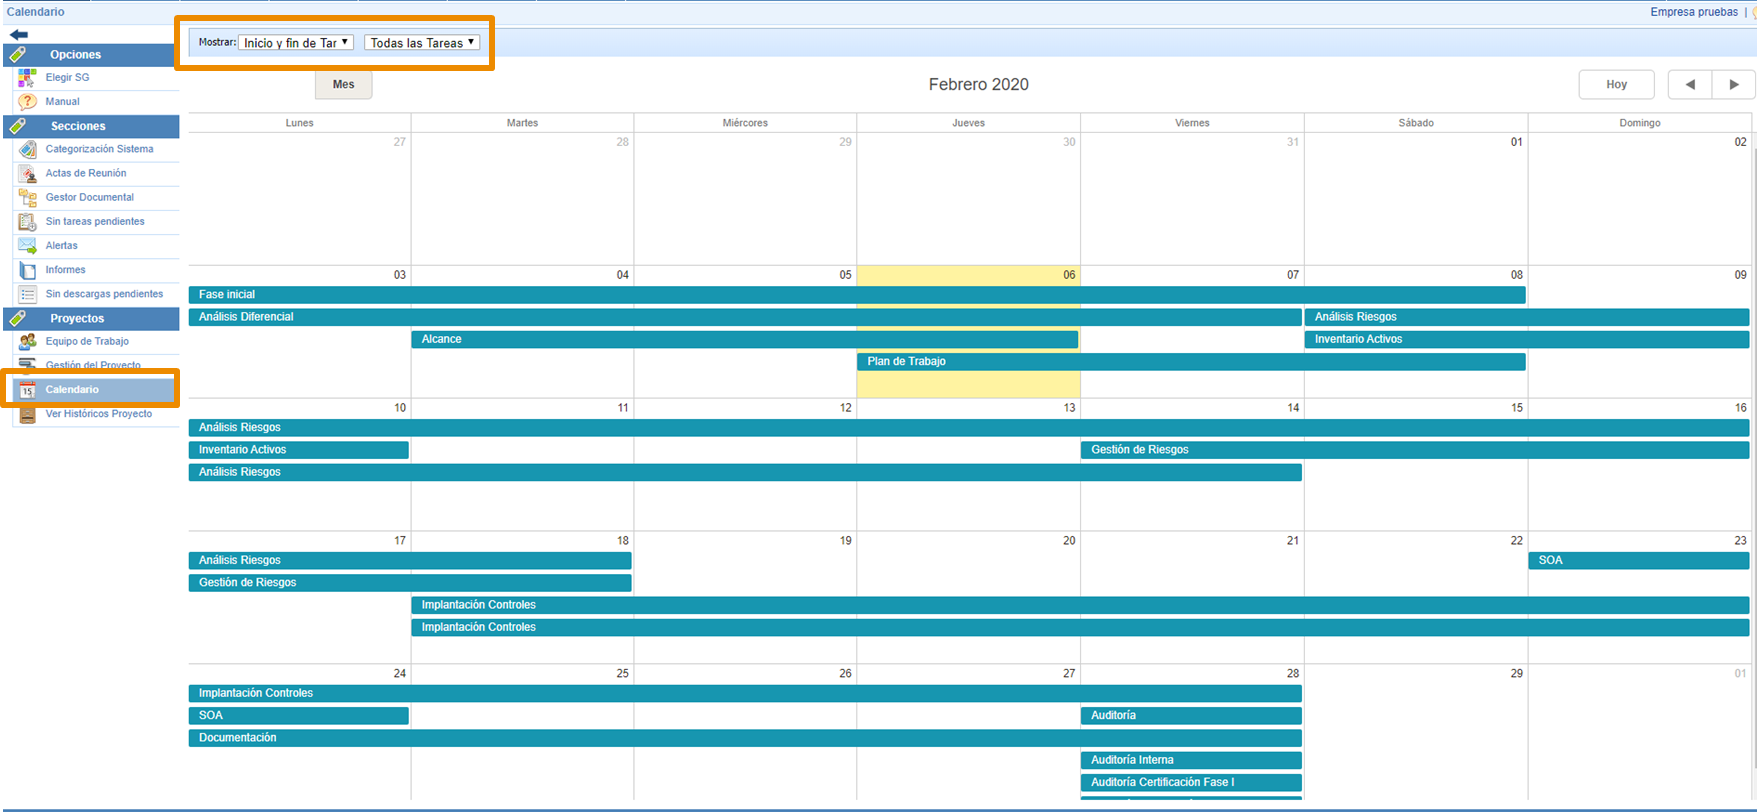
4. Calendar
In the Calendar section, you will see the scheduling of all tasks and can filter to display the start and end of each one, only the start, or only the end. Additionally, you can decide whether to view all project tasks or only those assigned to the user.
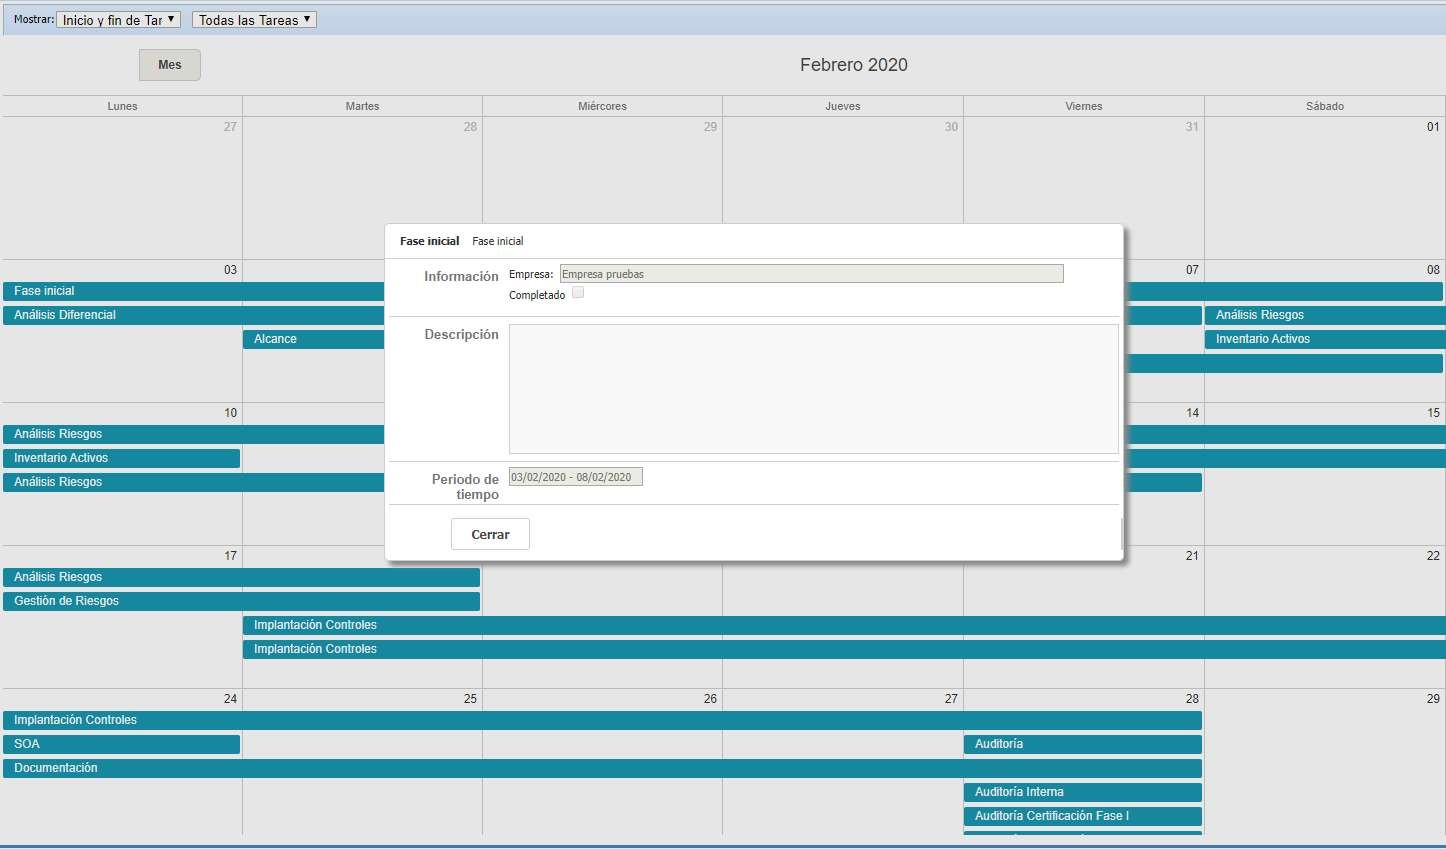
Double-clicking on a task will display a pop-up with its essential data.
5. Histories
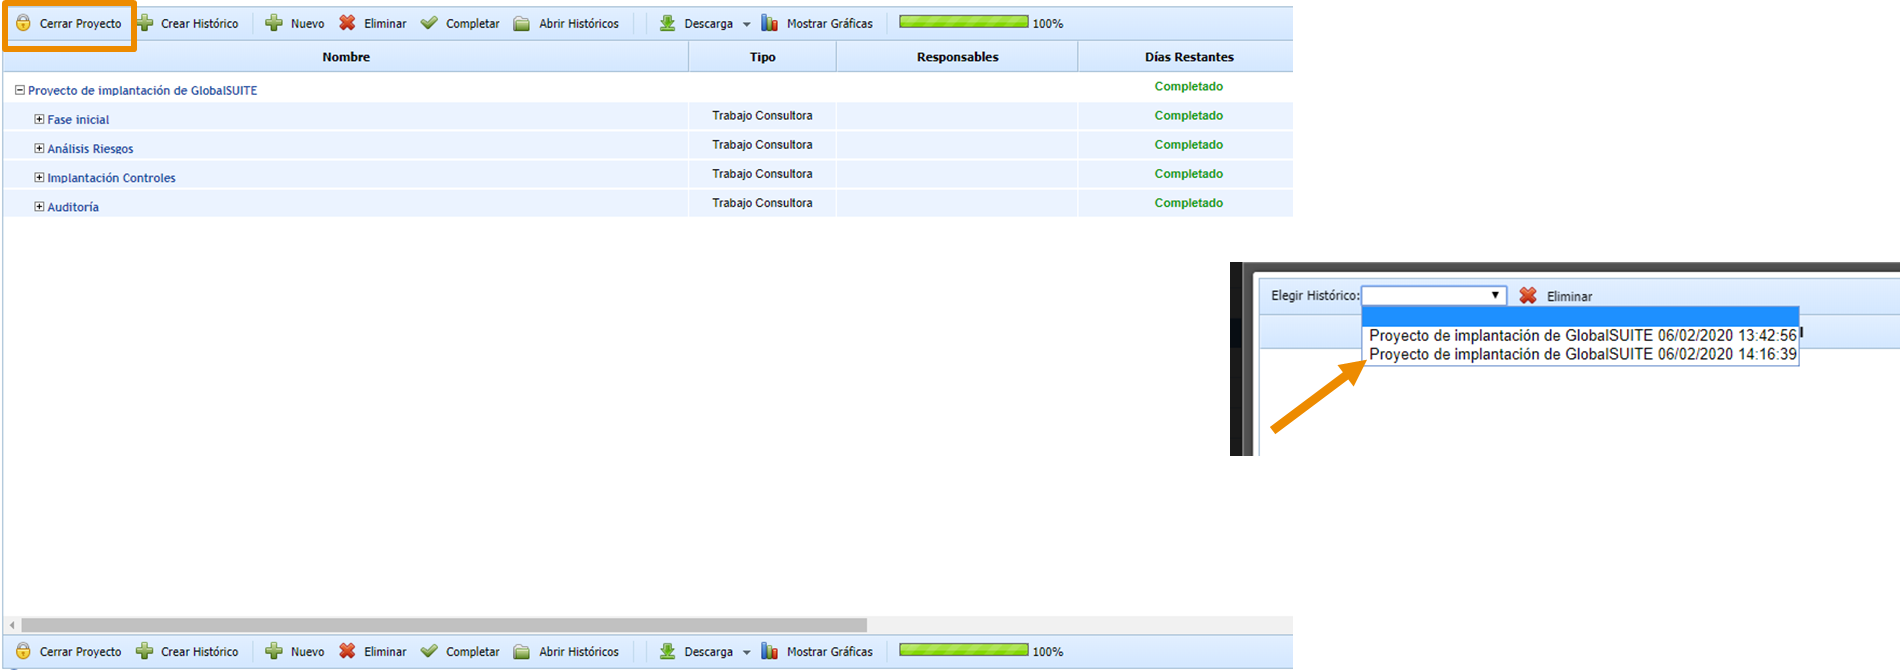
There is the possibility to create a snapshot of the state of a project at a given moment using the Create History button. This way, you can track the progress of the project's tasks. You can create as many histories as needed and consult them through the Open Histories button within the Project Management option.
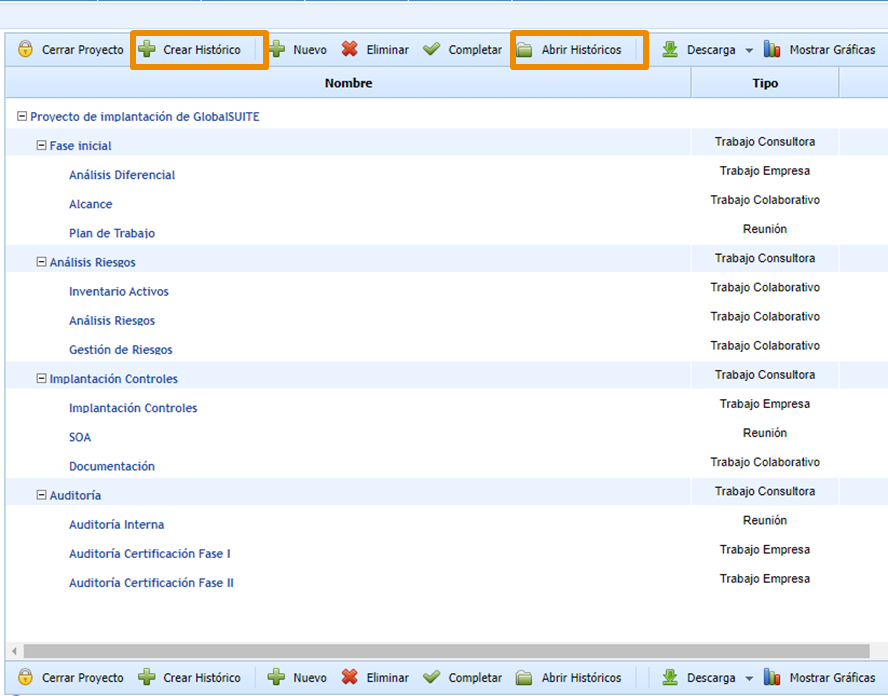
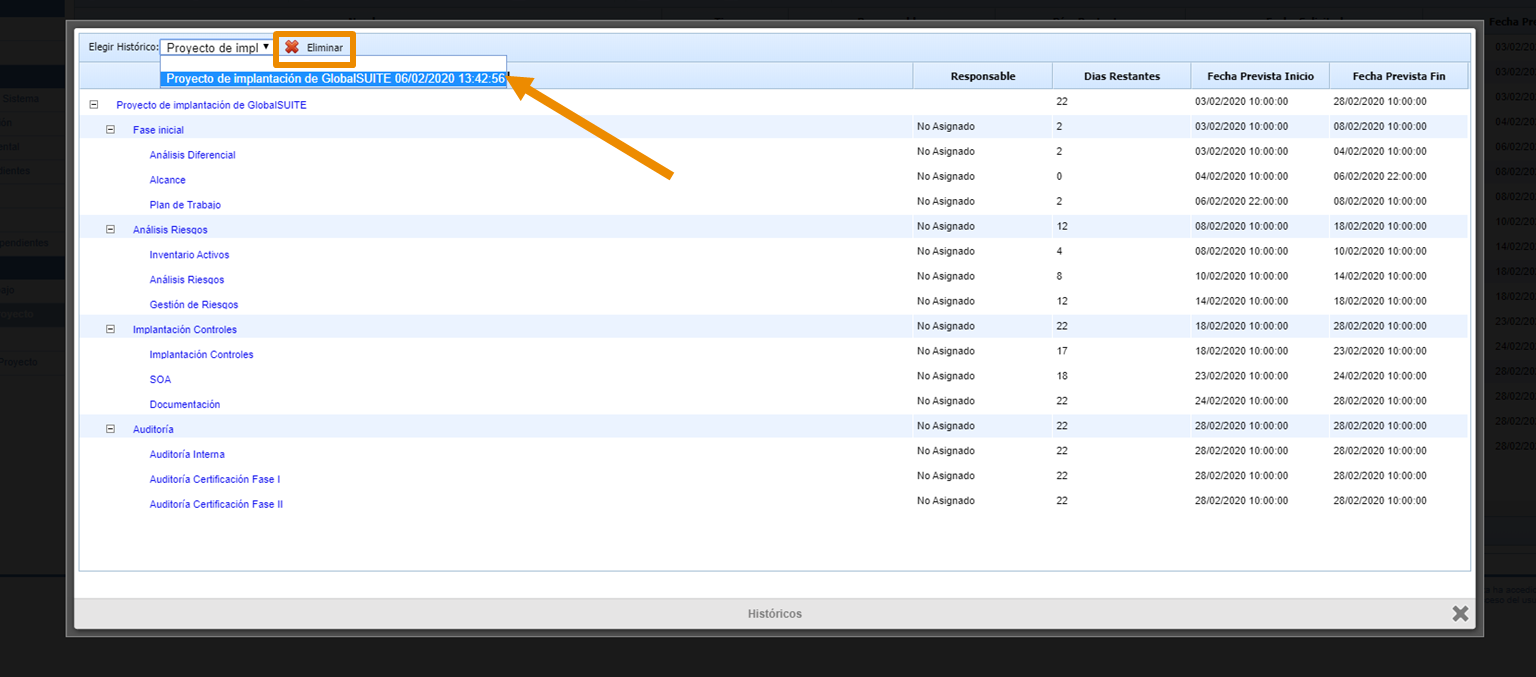
6. Project Histories
In both cases, a pop-up will appear. You must select the history you want to consult from the dropdown. Clicking on the different tasks will access their files. You can also delete the selected histories.
7. Project Completion
Once all the project's tasks have been completed, click on Close Project. It will be removed from the Project Management screen and will move to the history.