This tutorial explains, step by step, how to create and configure the item-risk surveys in GlobalSuite®.
This guide covers the phases related to the survey model and the configuration of item and risk surveys, detailing the process of selecting methodologies, the definition of visible, editable, and mandatory dimensions, the association of items and risks from the inventory, and the inclusion of attachments with reference documentation. It also describes how to enable statuses and consolidate the information for analysis within the management system.
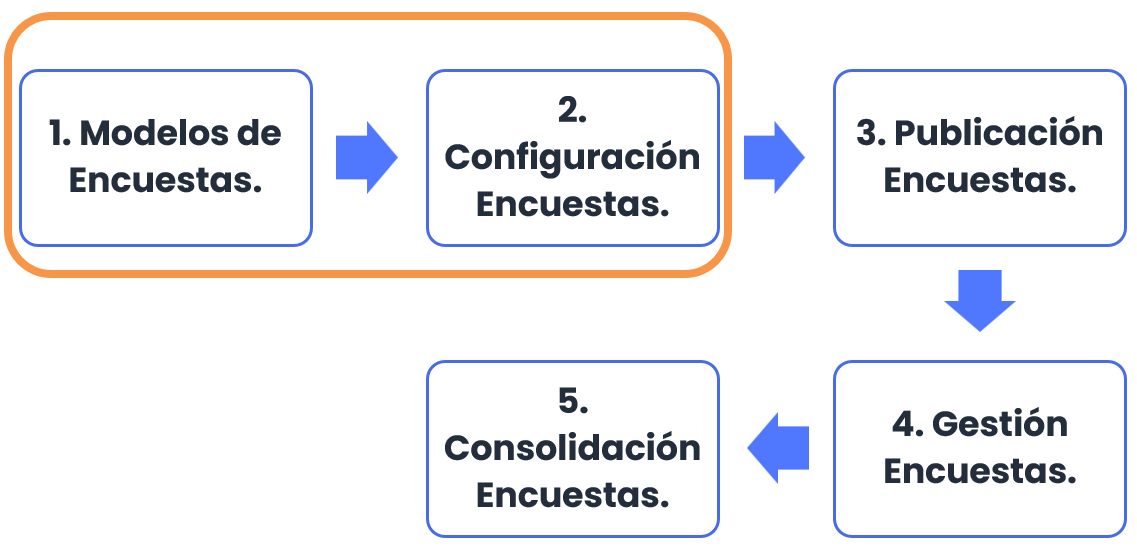
Phases for conducting Item-Risk Surveys
This guide will explain phases 1 and 2 of the survey creation process.
Survey Models
GlobalSuite® allows identifying and classifying the inventory of items, performing risk analysis, and evaluating the organization's controls through surveys sent to various responsible parties within the organization. To do this, the survey template to be sent must first be created. Multiple templates can be created and configured to adapt them to the organization's needs.
For this purpose, each survey template can be configured by indicating its type. There are three types of surveys that can be considered when creating a template:
-
Element Survey: Allows the identification of elements, their categorization, and classification.
-
Risk Survey: Allows the identification of risks for each item (including services and processes) as well as their evaluation according to the organization's methodology.
-
Control Survey: Allows the identification of the controls implemented in the organization as well as their maturity evaluation according to the corresponding methodology.
This guide will explain the operation of the “Item-Risk Survey” type.
To configure a survey model, you must be an Administrator user (Platform Administrator, Enterprise Administrator, or Configuration Administrator), as it is located in the Settings> Survey Models section.
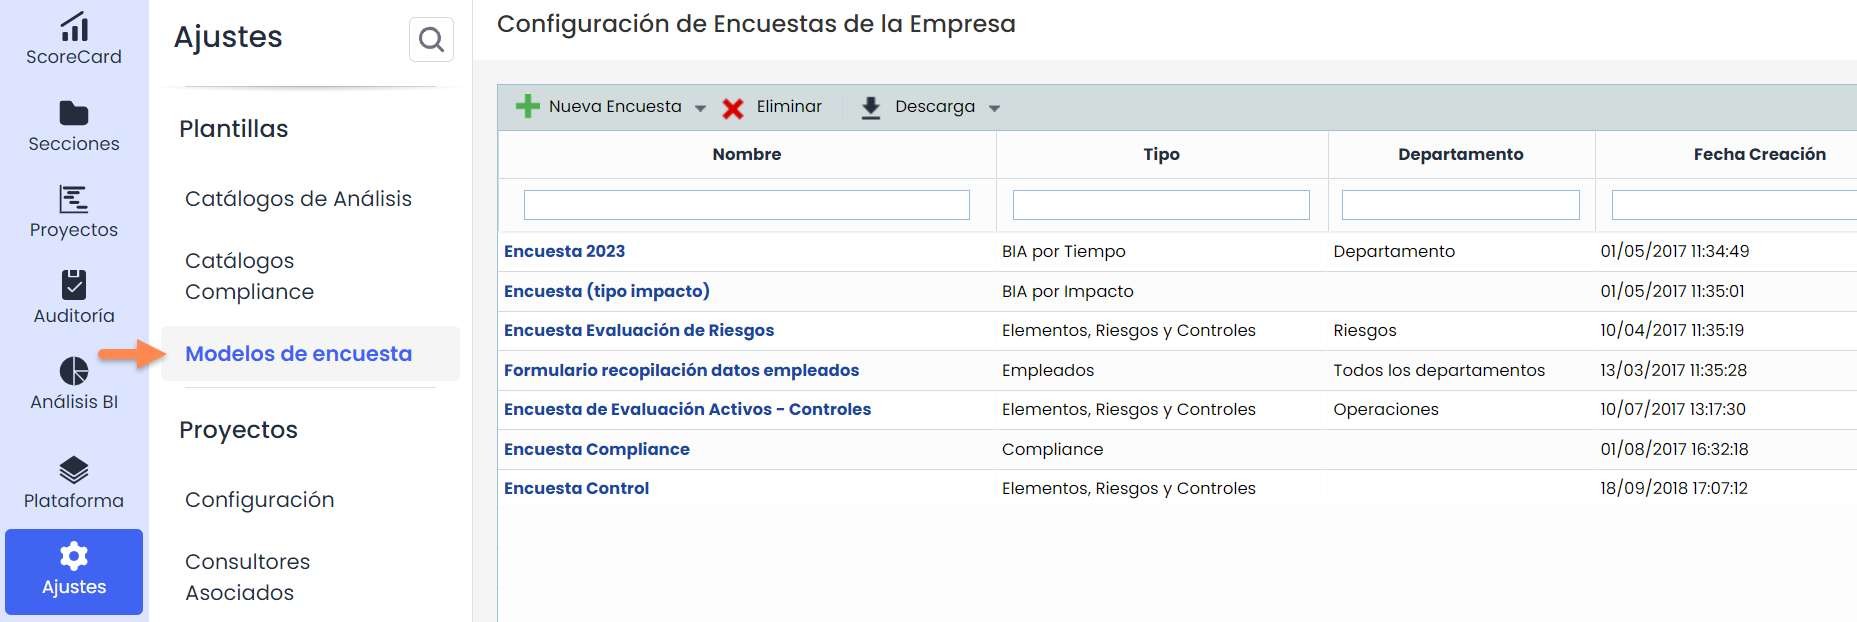
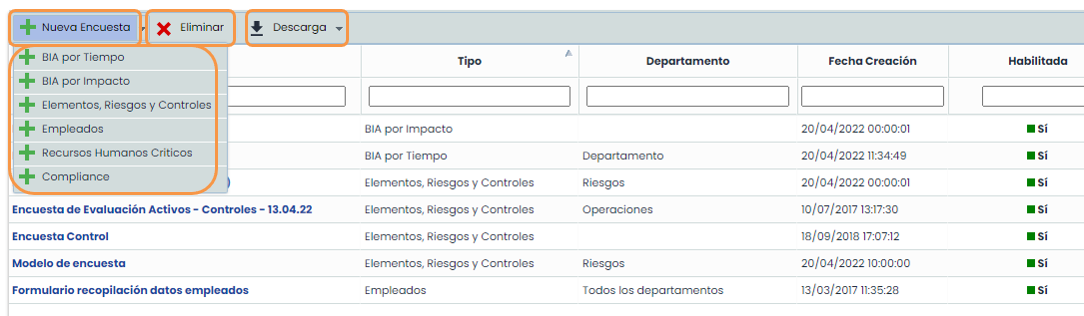
In this option, you must choose the type of survey model you want to create using the “ New Survey” button (in this case, the type “ Items, Risks, and Controls”). Additionally, in this option, you can delete models (button “ Delete”) and download a list of the configured models (button “ Download”).
The last column will show the templates that are enabled. Surveys can only be created from enabled templates.
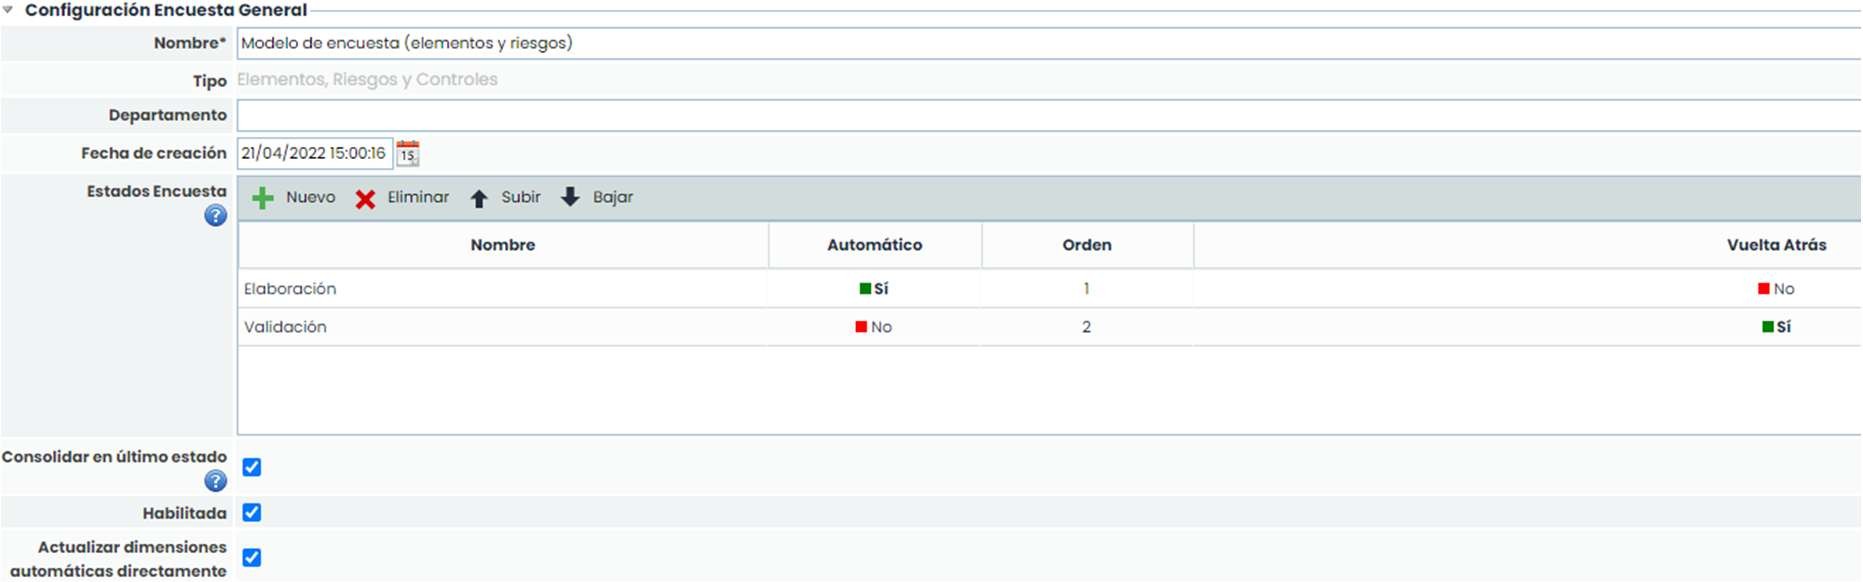
Within the survey model, you can configure aspects such as the name, department, or creation date, as well as indicate whether the model should be enabled for use and whether you want to “ Consolidate in the last state,” meaning that from the last state of the flow, the survey data can be directly consolidated into the final analysis.
It is also possible to use states in the survey. Using these states allows different people to fill in or validate information entered in previous states. You can move from one state to another automatically by marking the indicator (automatic check) and also move back to a previous state in the same way, by marking the corresponding indicator (rollback check).
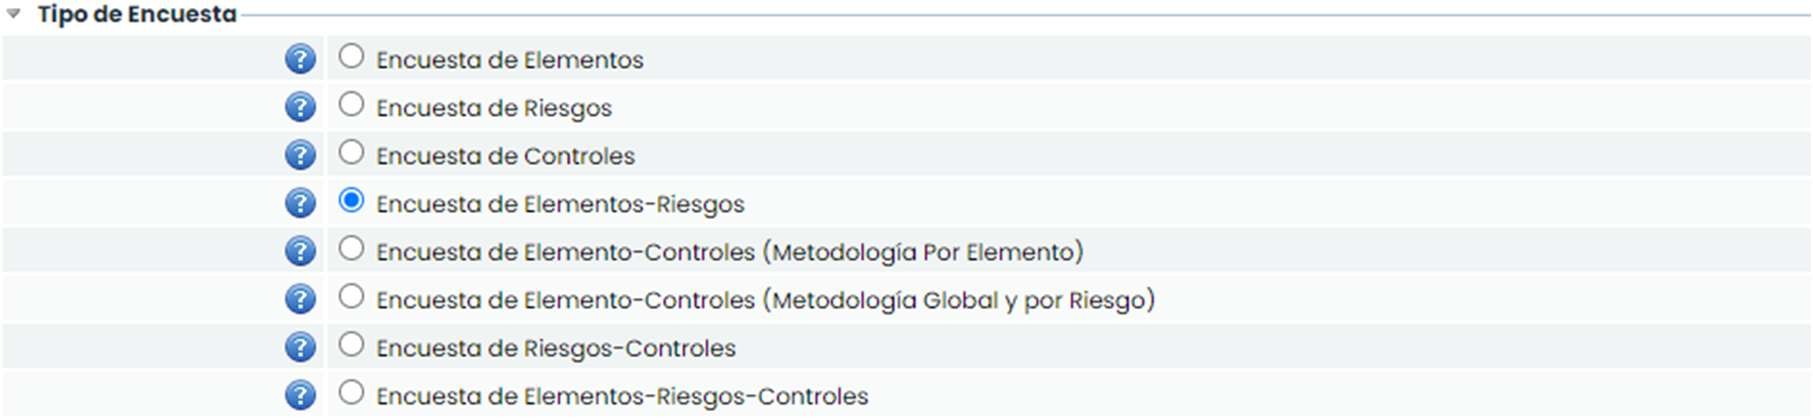
In the “ Survey Type” section, you must choose the type of model you want to create. In this case, the “ Item-Risk Survey” type will be selected.
Next, the “Taxonomy” section (Types / Grouping of Risks) is displayed, where its configuration can be selected. You can choose whether it should be visible and editable in the survey. It is also possible to indicate the order in which it should be displayed.

In the next section “ Item Survey”, the dimensions configured in the item inventory are displayed, indicating the type of dimension and whether it is manual or automatic.

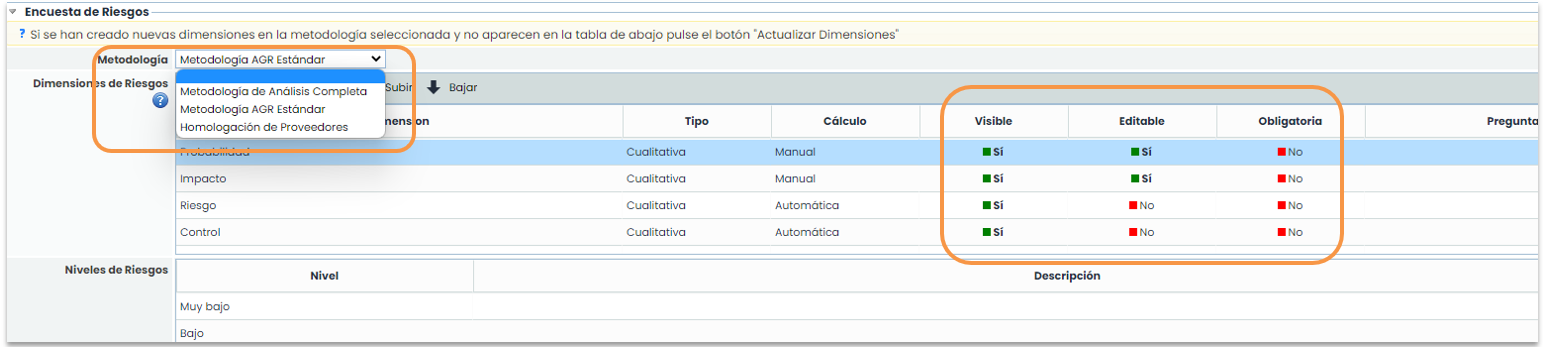
The user can configure the following options for each dimension:
-
Visible: Allows defining whether the dimension will be included in the survey or not by clicking on the cell.
-
Editable: Indicates whether the dimension can be modified in the survey or will only be visible in consultation mode.
-
Mandatory: Indicates the requirement to fill in a dimension when moving from one state to another, in case surveys with states are used.
-
Question: In the case of surveys of the "Form" type (to be seen later), it allows displaying an explanatory question instead of just the dimension name.
If a dimension is selected, it is possible to change the order in which it will appear. Using the “Move Up” and “Move Down” buttons, it can be positioned in the desired place.

With the “ Update Dimensions” button, as indicated by the yellow message, the list of dimensions in the item methodology is updated in case new dimensions have been added after the model was created.
The settings for the previously existing dimensions are preserved; only the new dimensions created in the item methodology appear to be included in the survey.
When selecting a qualitative type dimension, the levels configured in Settings> Item Methodology are displayed for informational purposes in the lower table (“Item Levels”).

In the last section “ Risk Survey”, you must first select which risk methodology you want to use in the survey. When selecting the methodology, the dimensions configured in it are displayed, indicating the type of dimension and whether it is manual or automatic. The user can configure the options just like with the item dimensions.
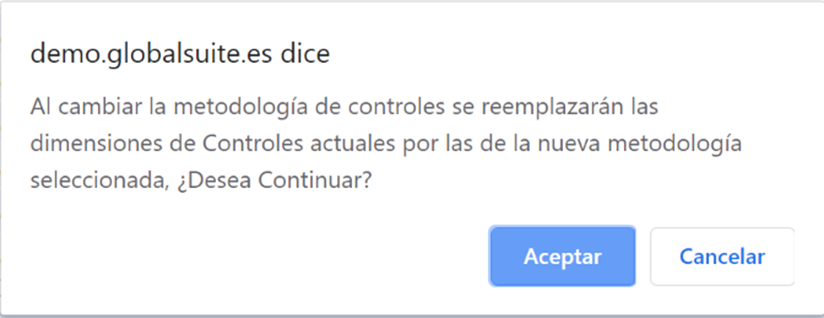
When selecting the methodology, an informational message is displayed indicating that the dimensions will be changed to those of the selected methodology.
In the “ Attachments” section, you can attach the necessary files to the survey so that the recipient can consult them.
The available options are:
-
Select file: allows you to search and select a file from your file explorer.
-
Attach: Allows uploading the selected file.
-
Delete: Allows deleting a selected file in the “Associated Documentation” table.
-
Download: Allows downloading the selected file in the “Associated Documentation” table.
-
View: Allows viewing the selected file in the “Associated Documentation” table directly in the browser. Only files with the extensions .pdf, .jpeg, .jpg, .bmp, or .png can be viewed.

Survey Configuration
Once the survey model is configured, it can be used to configure as many surveys as needed. To do this, go to the Management> Surveys option.
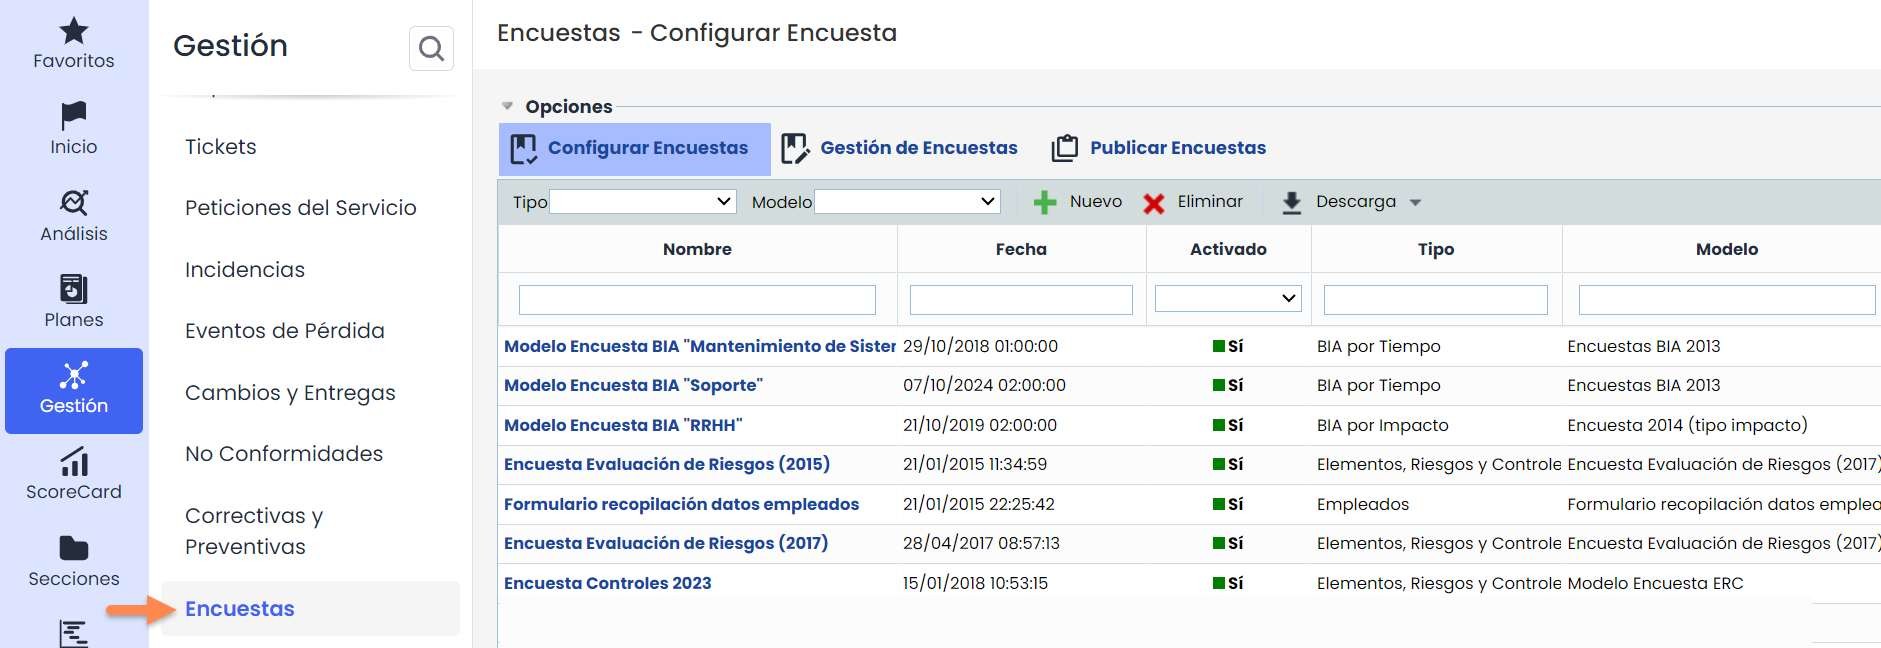
To create a survey configuration, you must filter by the survey type and then choose the desired template.
By clicking the “ New” button, a survey of the selected type and model will be created. If you want to delete a survey configuration, you must click the “ Delete” button. Keep in mind that if a Configuration is deleted, all surveys created from that Configuration will also be deleted.
It is also possible to download the list of survey configurations in both Excel and PDF formats.

When accessing the survey configuration, a set of sections appears that allow its configuration.
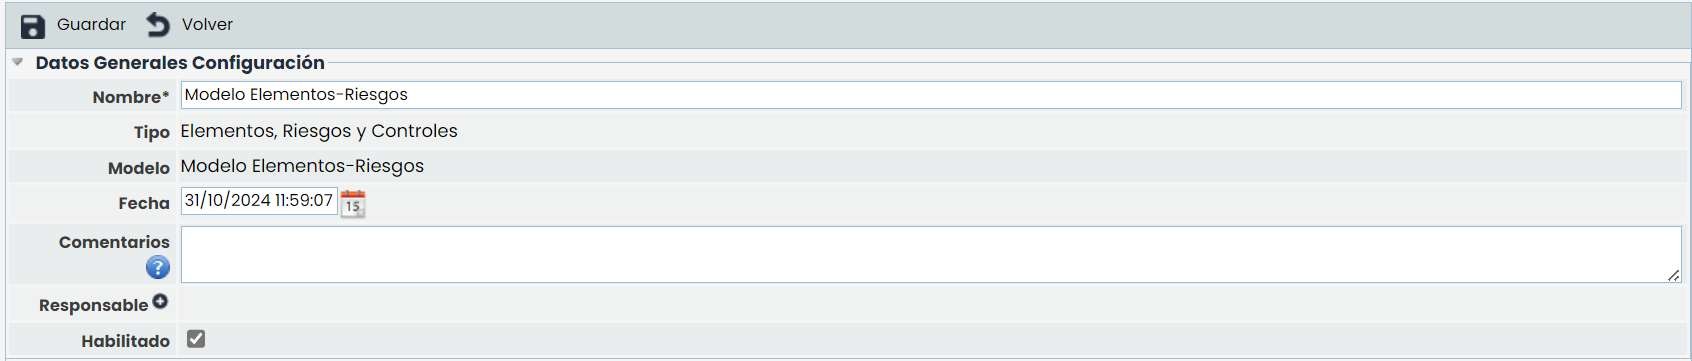
In the first section, “General Configuration Data,” you can identify the configuration name, view the survey type and model, change the date, and also enable or disable the “ Enabled” check, which indicates whether the Configuration can be used to generate new surveys.
If states (workflow) have been included in the modeling, then the configuration also includes the “States” section to assign a responsible party to each state:

In the “Risk Configuration” section, information related to Items and Risks appears. You must select the risk analysis you want to use in the survey. When selecting the analysis, the associated risk catalog is displayed for consultation if needed.

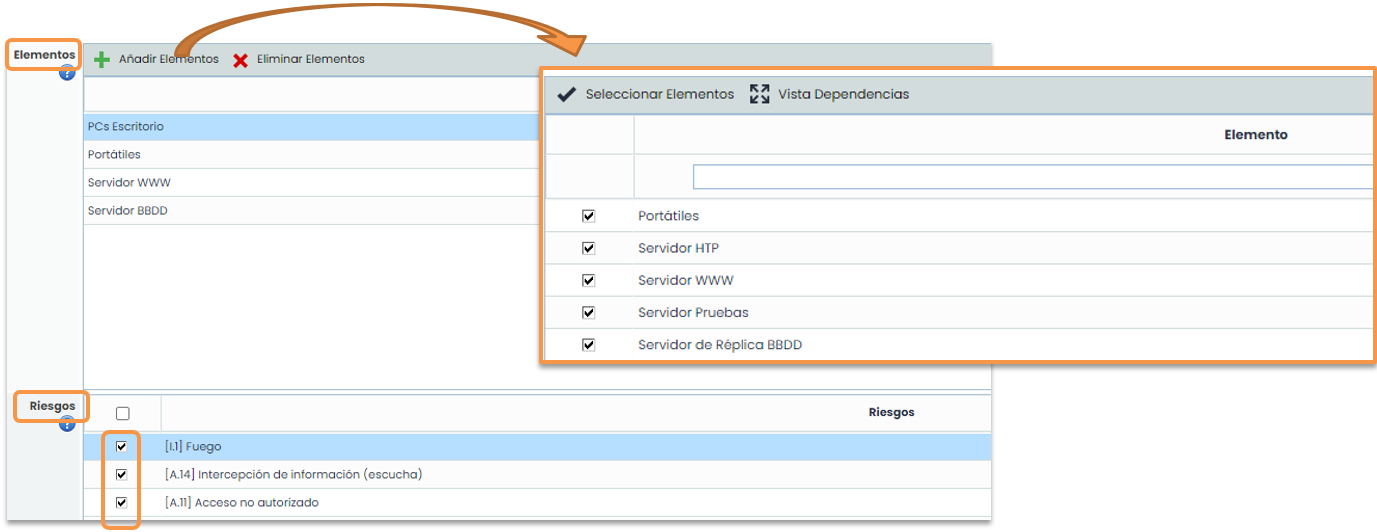
Once the analysis is selected, you must choose the items by clicking the “Add Items” button, for which you want to assess the associated risks.
When the added item is selected, the associated risks are displayed at the bottom. If you want to include these risks in the survey or not, you indicate this by checking or unchecking the box on the left.
Once all the steps of the form have been completed, click the “Save” button, and the configuration is ready to be used.
From the “ Attachments” section, specific documents can be added to the configuration itself. Additionally, inherited documents from the survey model can be viewed and/or managed.
