This tutorial explains, step by step, how to create, configure, publish, and consolidate surveys for items, risks, and controls in GlobalSuite®.
The objective is to demonstrate how to use survey templates to identify inventory items, analyze associated risks, and evaluate implemented controls within the organization. Additionally, it details the phases of configuration, publication to responsible parties, response management, and final consolidation of information for integration into the system's risk and control analyses.
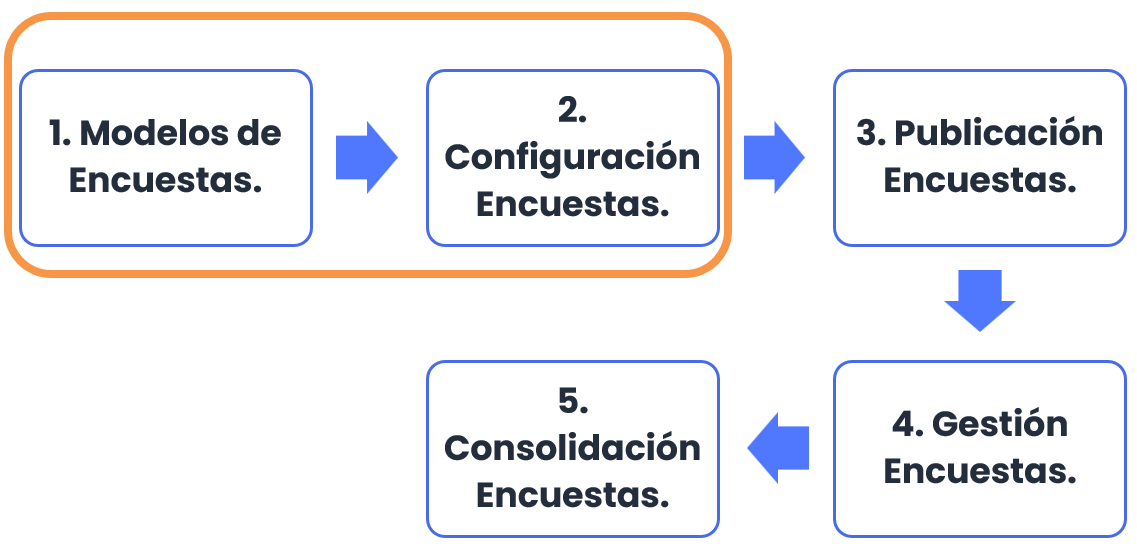
Phases for Conducting Surveys for Items, Risks, and Controls
Survey Templates for Items, Risks, and Controls.
Configure Survey Templates
GlobalSuite® allows identifying and classifying the inventory of items, performing risk analysis, and evaluating the organization's controls through surveys sent to various responsible parties within the organization. To do this, the survey template to be sent must first be created. Multiple templates can be created and configured to adapt them to the organization's needs.
For this purpose, each survey template can be configured by indicating its type. There are three types of surveys that can be considered when creating a template:
-
Item Survey: Allows the identification, categorization, and classification of items.
-
Risk Survey: Allows the identification of risks for each item (including services and processes) as well as their evaluation according to the organization's methodology.
-
Control Survey: Allows the identification of controls implemented in the organization as well as their maturity evaluation according to the corresponding methodology.
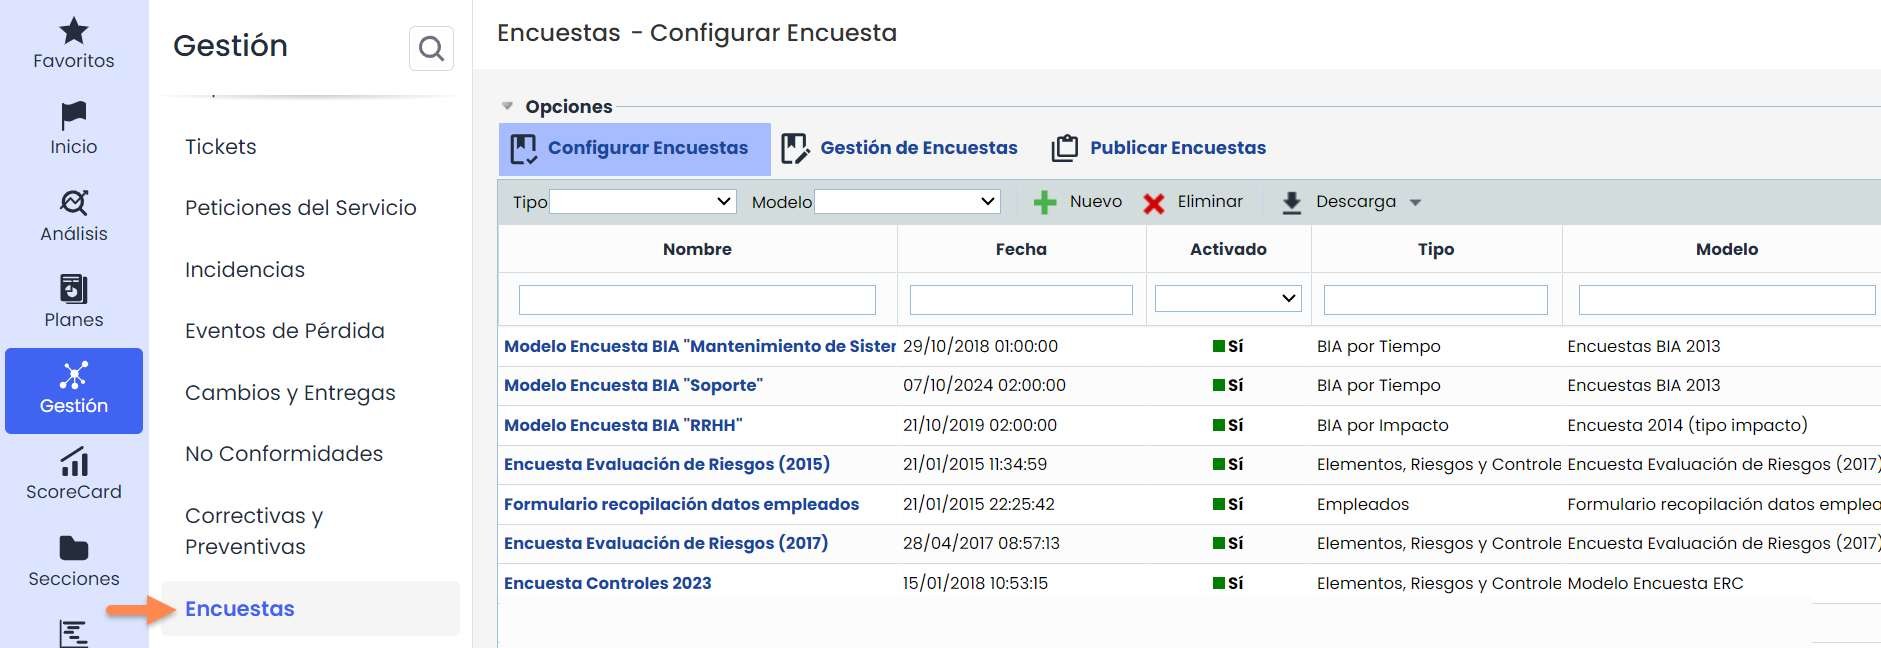
To configure a survey template, you must be an Administrator user (Platform Administrator, Enterprise Administrator, or Configuration Administrator), as it is located in the “ Settings” section. The option is called “ Survey Templates ”.
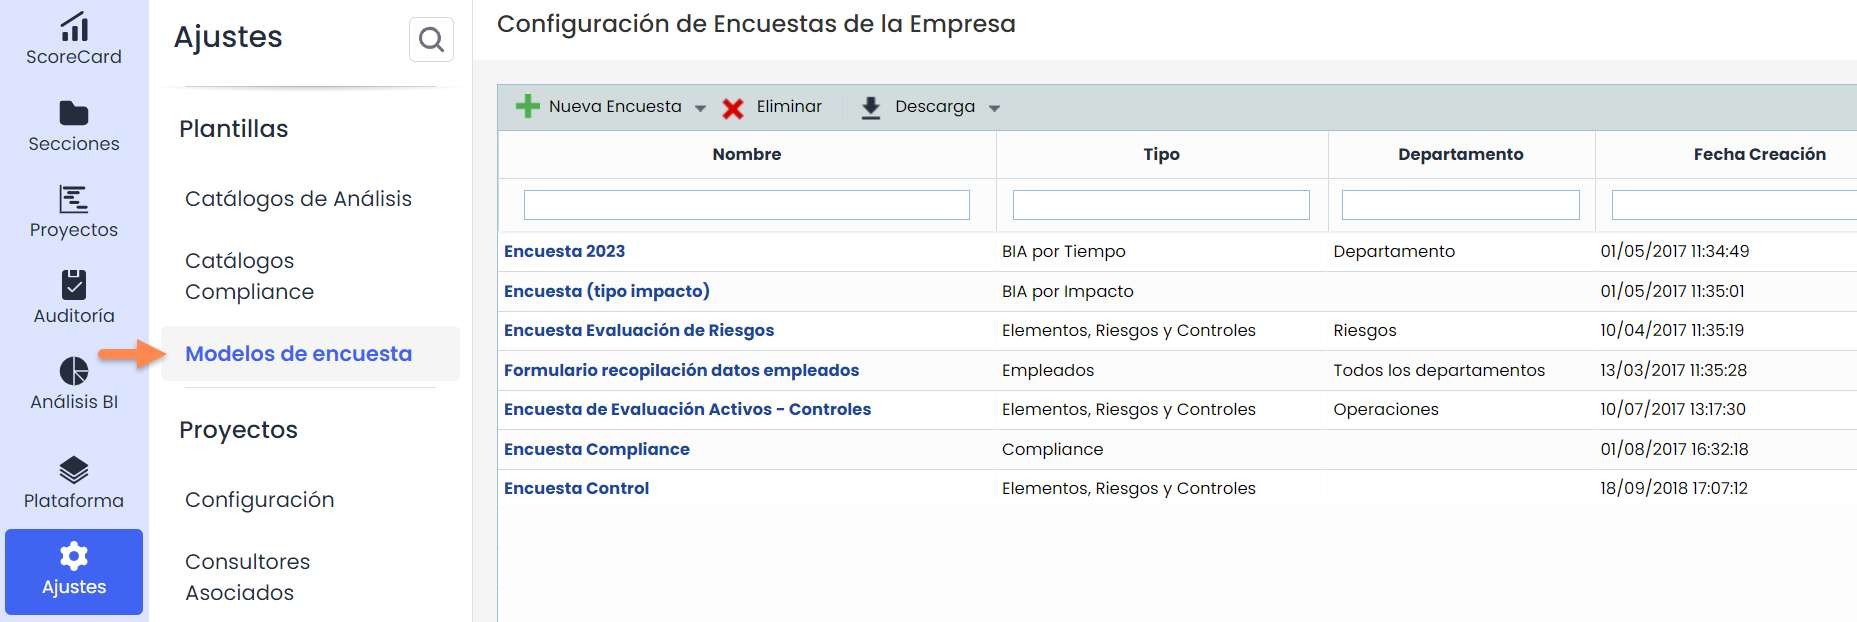
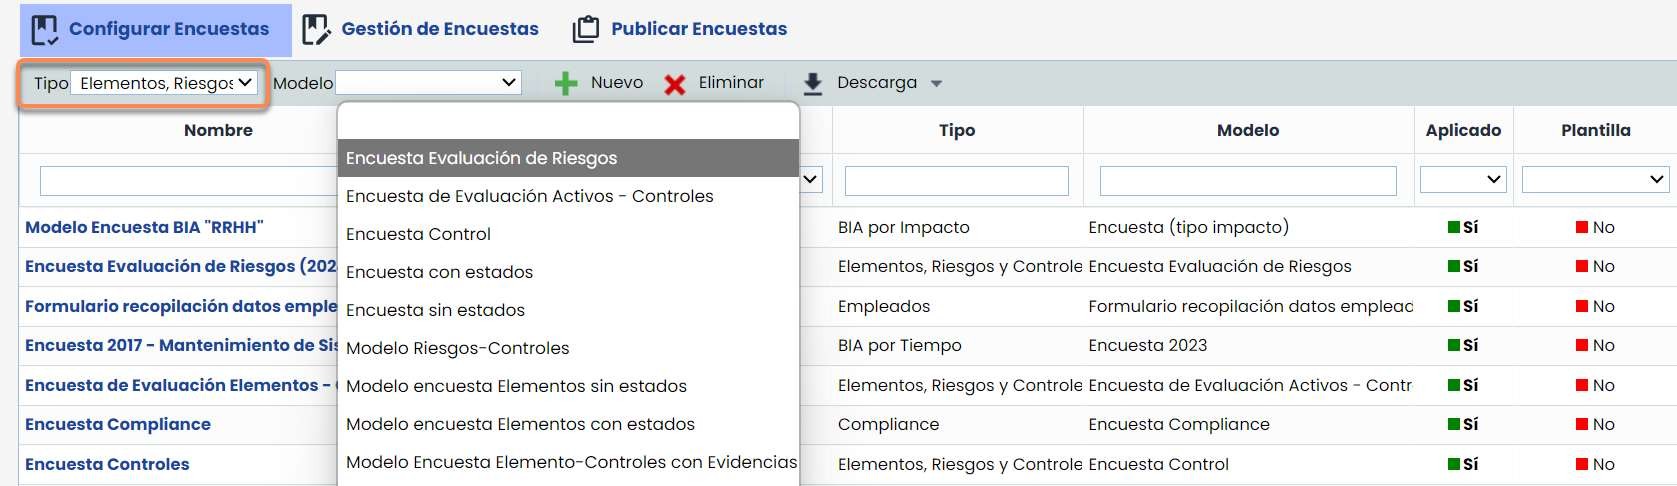
In this option, you must choose the type of survey template you want to create using the “ New Survey” button (in this case, the type “ Items, Risks, and Controls”). Additionally, in this option, you can delete templates (button “ Delete”) and download a list of configured templates (button “ Download”).
The last column will show the templates that are enabled. Surveys can only be created from enabled templates.
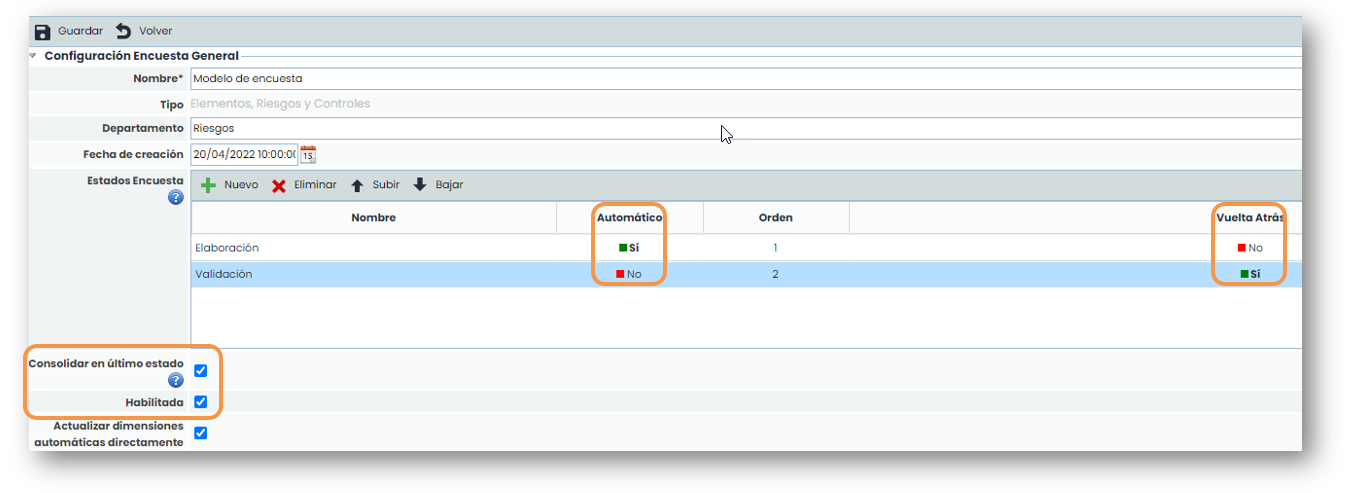
Within the survey template, you can configure aspects such as the name, department, or creation date, as well as indicate whether the template should be enabled for use and whether you want to “ Consolidate in the last state,” meaning that from the last state of the workflow, the survey data can be directly consolidated into the final analysis.
It is also possible to use states in the survey. Using these states allows different people to fill in or validate information entered in previous states. You can move from one state to another automatically from the survey itself if the “Automatic” indicator is marked, and you can also move back to a previous state in the same way if the “Rollback” indicator is marked.
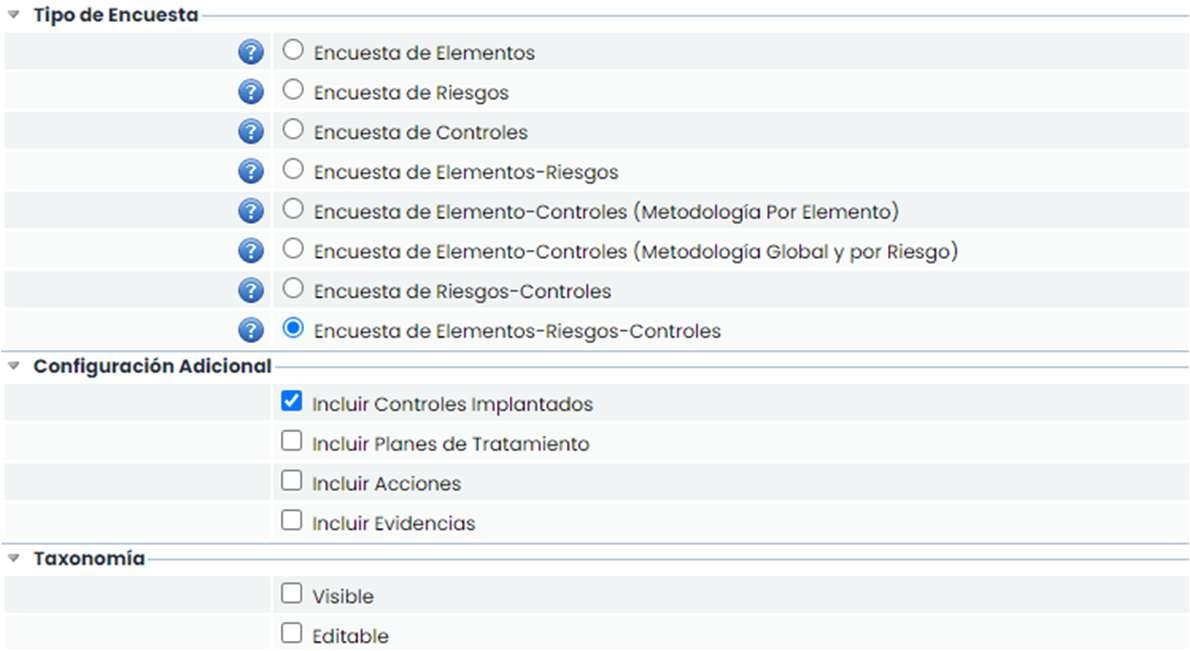
In the “ Survey Type” section, you must choose the type of template you want to create.
-
If a survey type containing Risks is selected, the “ Taxonomy” section appears, allowing you to view the Types/Grouping of Risks in the surveys.
-
If the survey type contains Controls, the “ Additional Configuration” section appears, allowing you to edit actions and attach evidence.
-
For this example, the selected survey is the most comprehensive as it contains all three combinations: Items, Risks, and Controls.
If a dimension is selected, it is possible to change the order in which it will appear. Using the “ Move Up” and “ Move Down” buttons, you can position it in the desired place.

With the “ Update Dimensions” button, as indicated by the yellow message, the list of dimensions in the item methodology is updated in case new dimensions have been added after the template's creation. When this button is pressed, the following message is displayed:
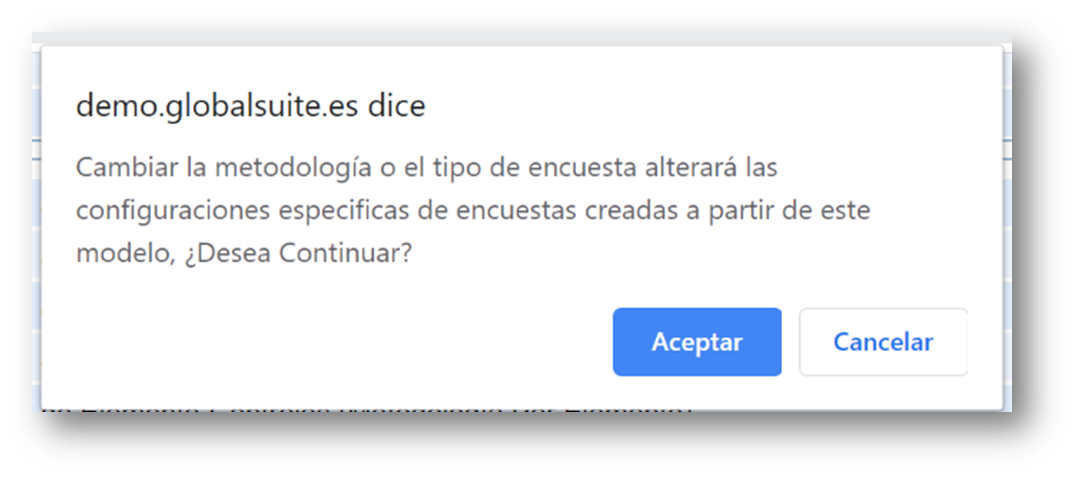
The settings for the previously existing dimensions are preserved; only the new dimensions created in the item methodology appear to be included in the survey.
If the survey type includes Items, a section appears that allows its configuration. The dimensions configured in the item inventory are displayed, indicating the type of dimension and whether it is manual or automatic. The user can configure the following options for each dimension:
-
Visible: Allows defining whether the dimension will be included in the survey or not by clicking on the cell.
-
Editable: Indicates whether the dimension can be modified in the survey or will only be visible in consultation mode.
-
Mandatory: Indicates the requirement to fill in a dimension when moving from one state to another, in case surveys with states are used.
-
Question: In the case of surveys of the "Form" type (to be seen later), it allows displaying an explanatory question instead of just the dimension name.

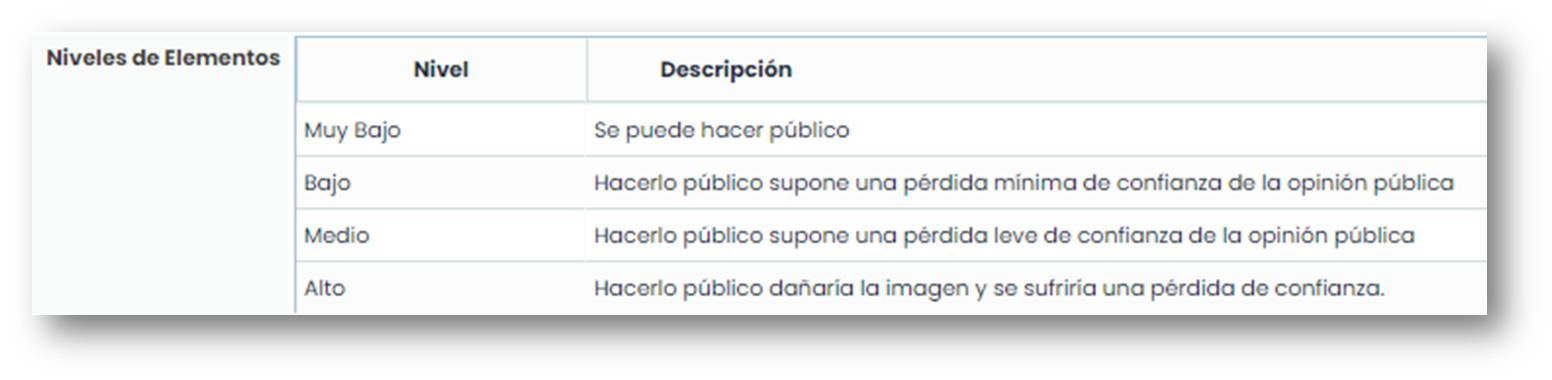
When selecting a dimension, the table below (“Item Levels”) shows the levels configured in Settings for informational purposes.
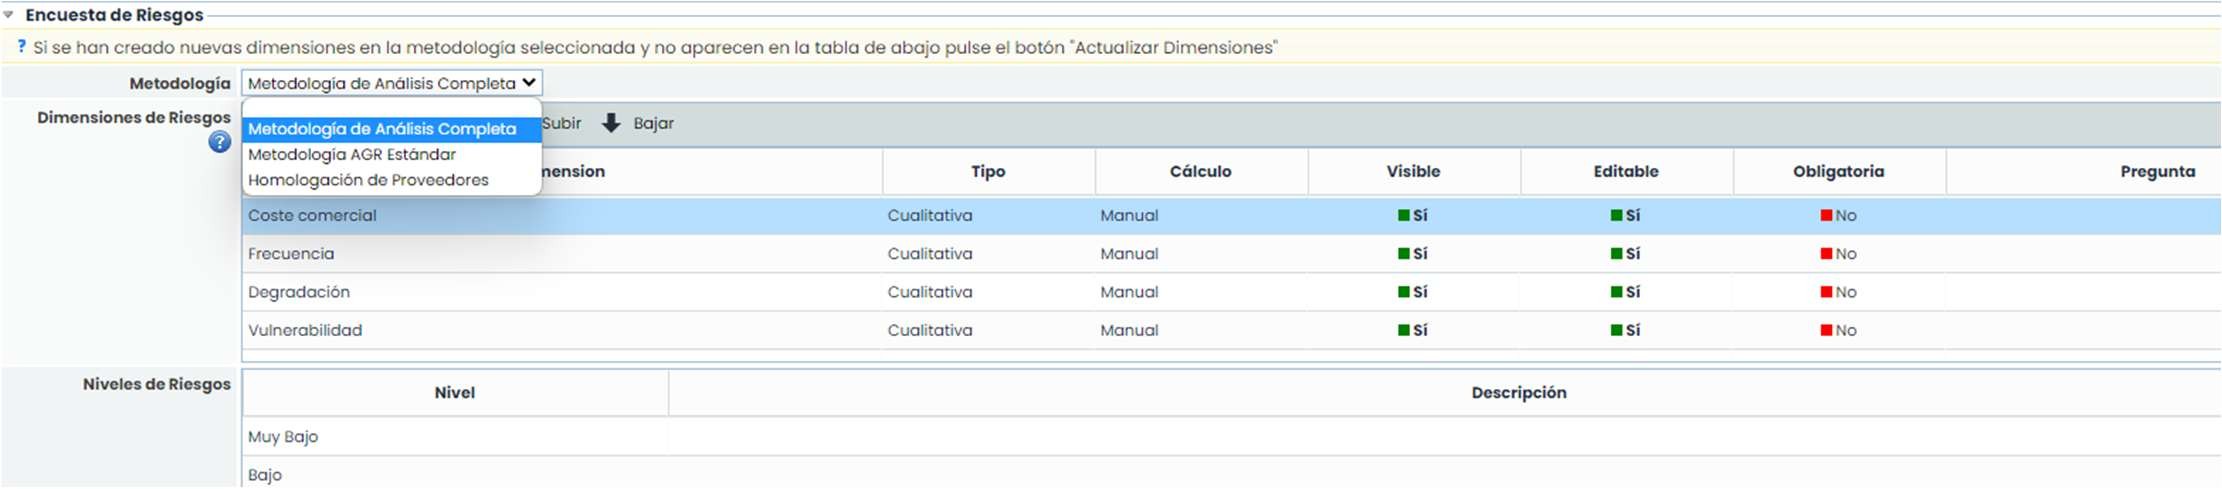
If the survey type includes Risks, a section appears that allows its configuration.
First, you must select which risk methodology you want to use in the survey. When selecting the methodology, the dimensions configured in it are displayed, indicating the type of dimension and whether it is manual or automatic. The user can configure the following options for each dimension:
-
Visible: Allows defining whether the dimension will be included in the survey or not by clicking on the cell.
-
Editable: Indicates whether the dimension can be modified in the survey or will only be visible in consultation mode.
-
Mandatory: Indicates the requirement to fill in a dimension when moving from one state to another, in case surveys with states are used.
-
Question: In the case of surveys of the "Form" type (to be seen later), it allows displaying an explanatory question instead of just the dimension name.
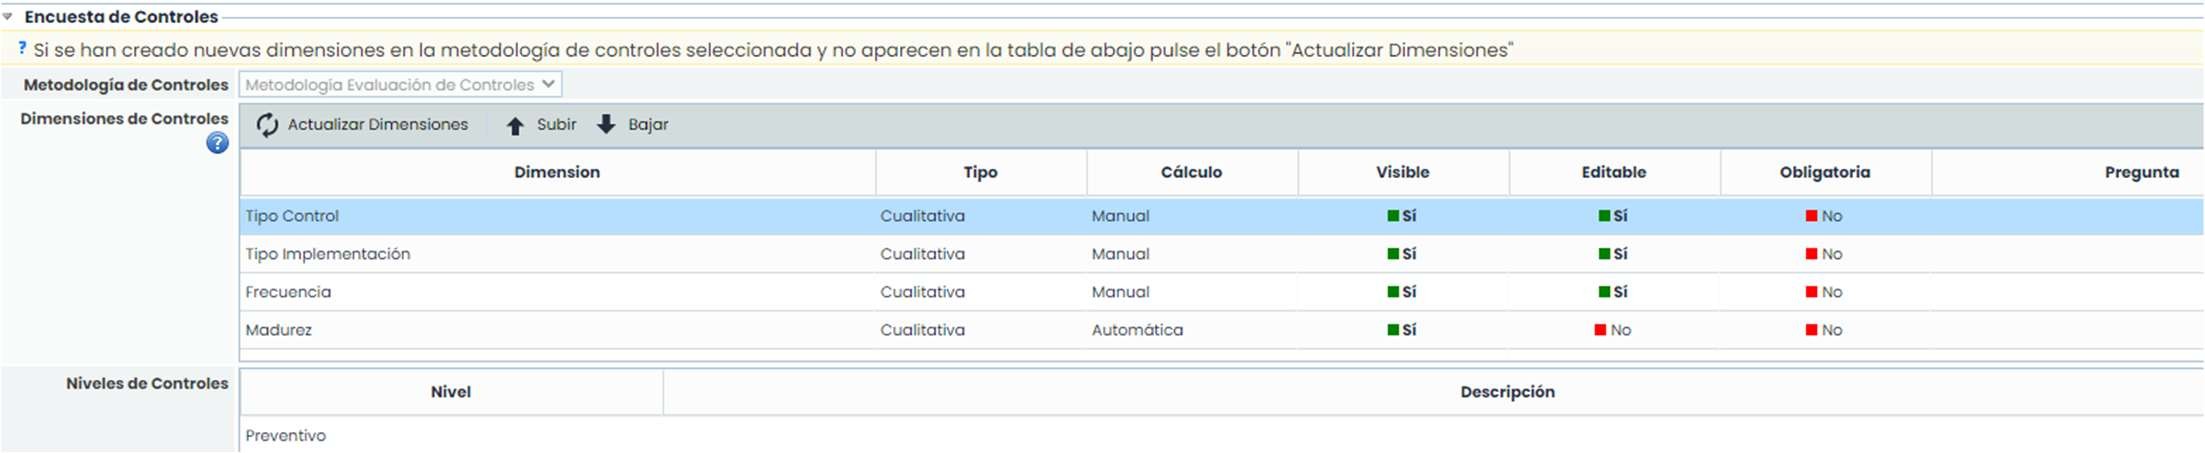
If the survey type includes Controls, a section appears that allows its configuration.
First, you must select which control methodology you want to use in the survey. When selecting the methodology, the dimensions configured in it are displayed, indicating the type of dimension and whether it is manual or automatic. The user can configure the following options for each dimension:
-
Visible: Allows defining whether the dimension will be included in the survey or not by clicking on the cell.
-
Editable: Indicates whether the dimension can be modified in the survey or will only be visible in consultation mode.
-
Mandatory: Indicates the requirement to fill in a dimension when moving from one state to another, in case surveys with states are used.
-
Question: In the case of surveys of the "Form" type (to be seen later), it allows displaying an explanatory question instead of just the dimension name.
In the “ Attachments” section, you can attach the necessary files to the survey so that the recipient can consult them.
The available options are:
-
Select File: Allows searching and selecting a file from your file explorer.
-
Attach: Allows uploading the selected file.
-
Delete: Allows deleting a selected file in the “Associated Documentation” table.
-
Download: Allows downloading the selected file in the “Associated Documentation” table.
-
• View: Allows viewing the selected file in the “Associated Documentation” table directly from the browser. Only files with the extensions .pdf, .jpeg, .jpg, .bmp, or .png can be viewed.

Configuration of Surveys for Items, Risks, and Controls.
Once the survey template is configured, it can be used to configure as many surveys as needed. To do this, go to the “ Surveys ” option located in the “ Management” tab.
To create a survey configuration, you must filter by the survey type and then choose the desired template.
By clicking the “ New” button, a survey of the chosen type and template will be created. If you want to delete a survey configuration, you must click the “ Delete” button. Note that, if a Configuration is deleted , all surveys created from this Configuration will also be deleted.
It is also possible to download the list of survey configurations in Excel format.
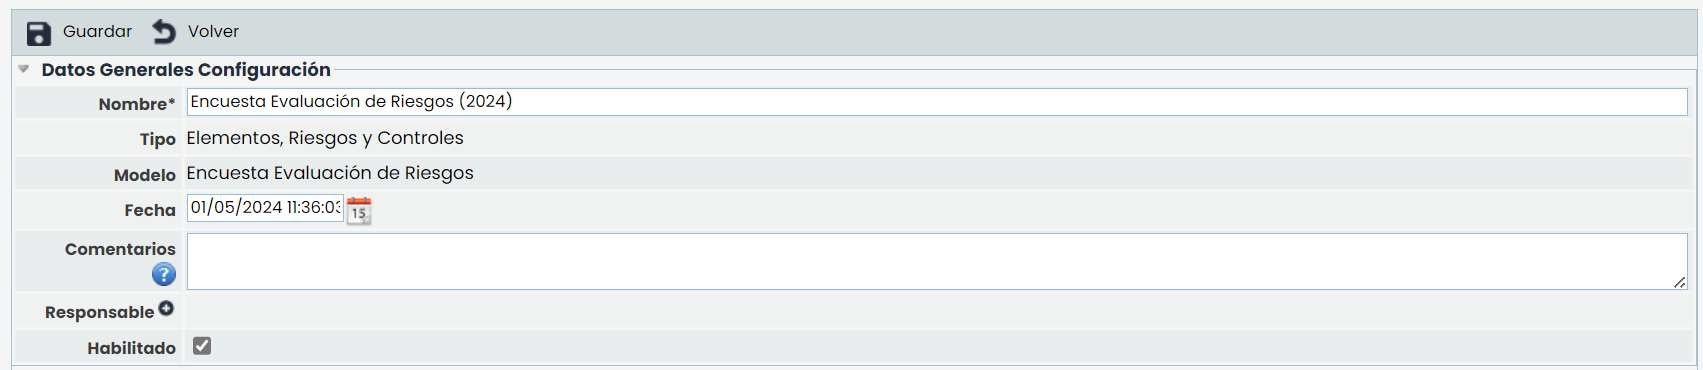
When accessing the survey configuration, a set of sections appears that allow its configuration.
In the first section, “General Configuration Data,” you can identify the configuration name, view the survey type and template, change the date, and also enable or disable the following indicator:
-
Enabled: Allows indicating whether the Configuration can be used to generate new surveys.
If states (Workflow) have been included in the modeling, then the configuration also includes the “States” section to assign a responsible party to each state:

In the “Risk Configuration” section, information related to the selected survey type (Items, Risks, and Controls) appears.
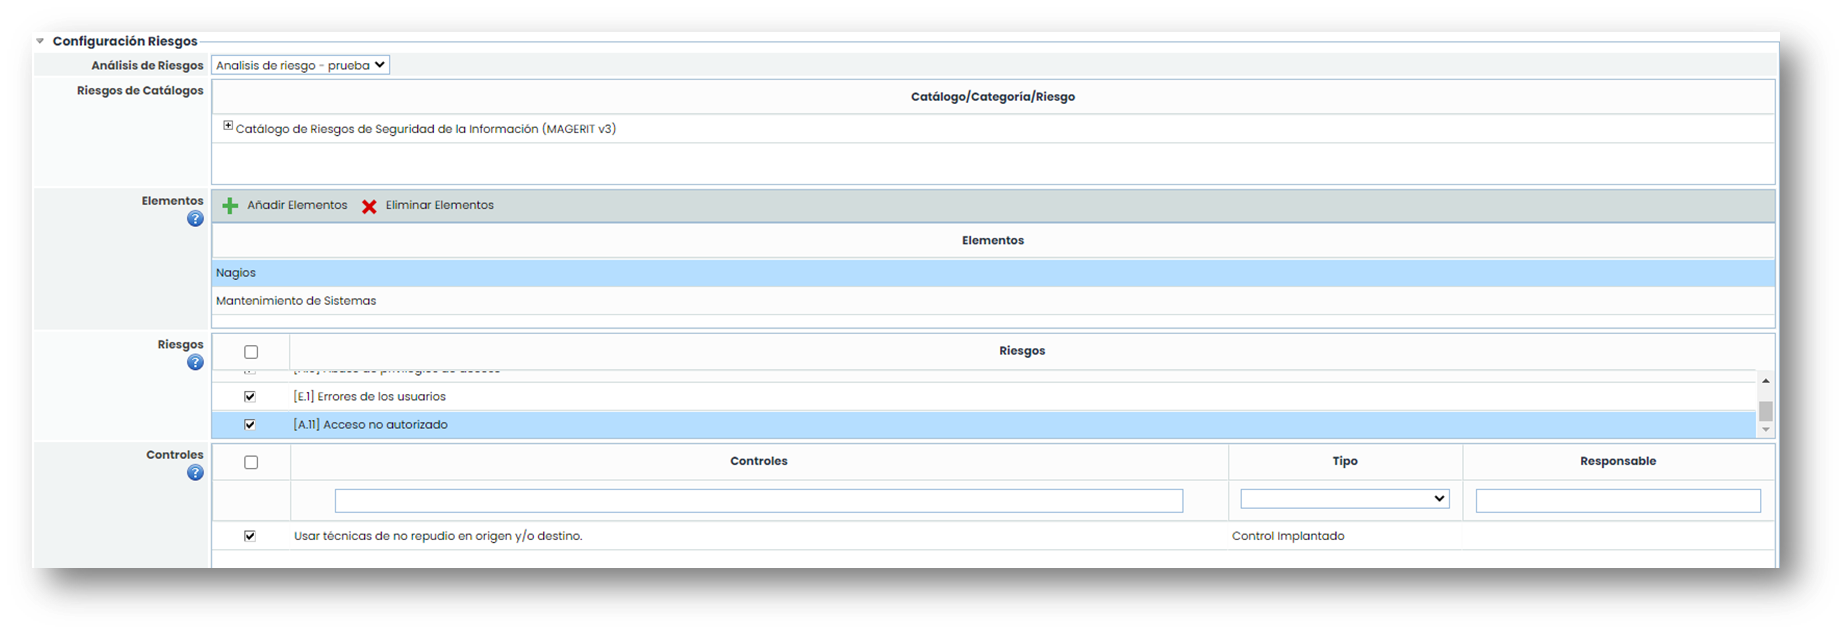
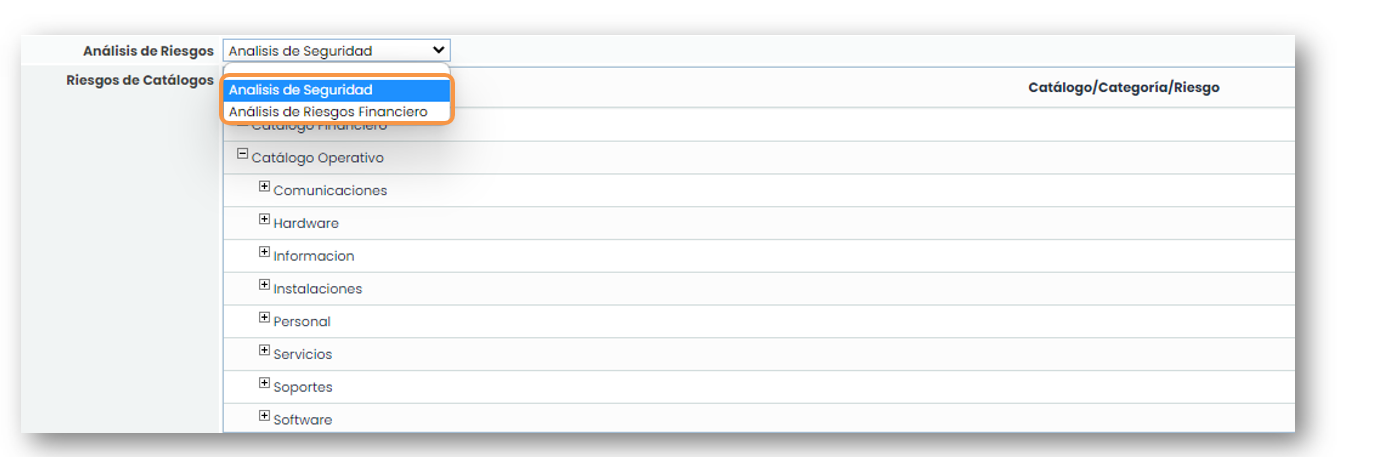
For risk surveys, you must select which risk analysis you want to conduct the survey on. The list of risk analyses contains those analyses in GlobalSuite® that are configured with the same methodology associated with the survey template.
When selecting the risk analysis, the associated risk catalogs appear at the bottom. You can indicate which catalogs will be available to the user, as well as the risks to be considered. This way, a subset of the risks in a catalog can be incorporated into the survey.
Another aspect to configure in a survey is the selection of the Items to
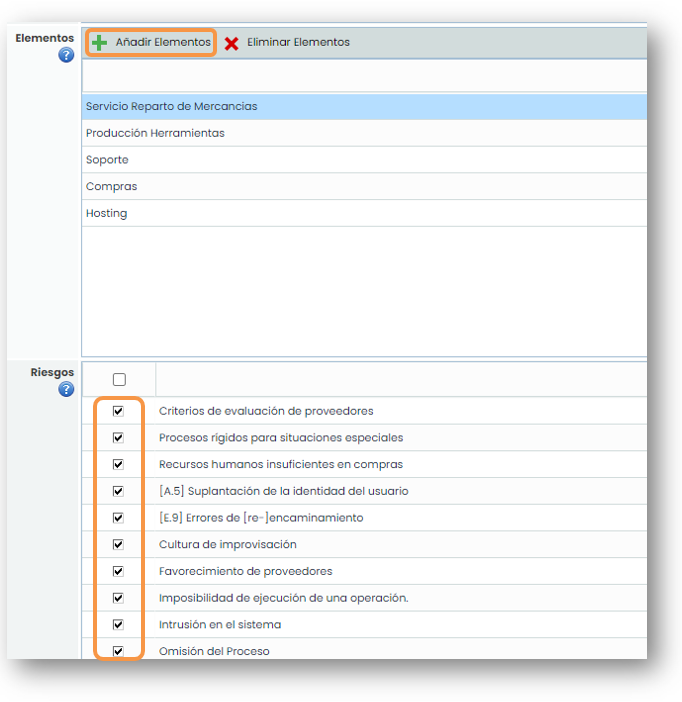
be incorporated so that the user receiving the survey can only evaluate the assigned items (in addition to adding new items). To do this, you must click the “ Add Items” button, which opens a pop-up window allowing you to select the desired items.
Once the items are added, the “ Risks” table at the bottom shows the risks for each item. By default, all risks are enabled so that the survey user can evaluate them, but you can select only the risks you want to publish for each item.
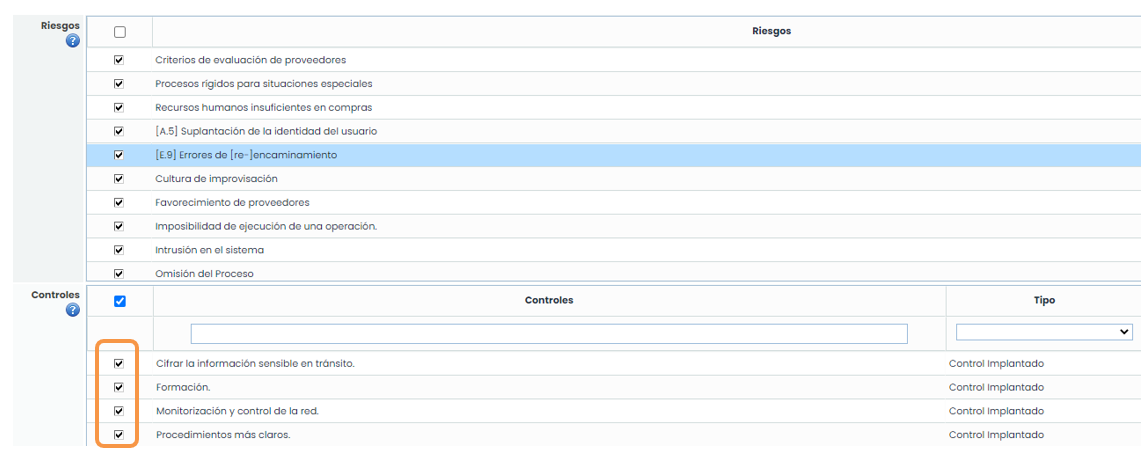
For surveys that include Controls, you must also select the risk analysis you want to use for the survey.
If it is a survey that also includes Risks, the risk analysis will be the same for both cases; however, if it is a survey of only Controls, you must select which risk analysis you want to use for the survey.
When selecting the risk, all associated controls are displayed.
From the Attachments section, you can add specific documents to this particular configuration and also view the documents inherited from the template, which can also be deleted for this configuration.

Survey Publication.
In the “ Publish Surveys” option, you can configure the publication of the survey to the desired recipients. First, you must proceed in the same way as the configuration, that is, you must choose the survey type and Configuration, and click the “ New” button.

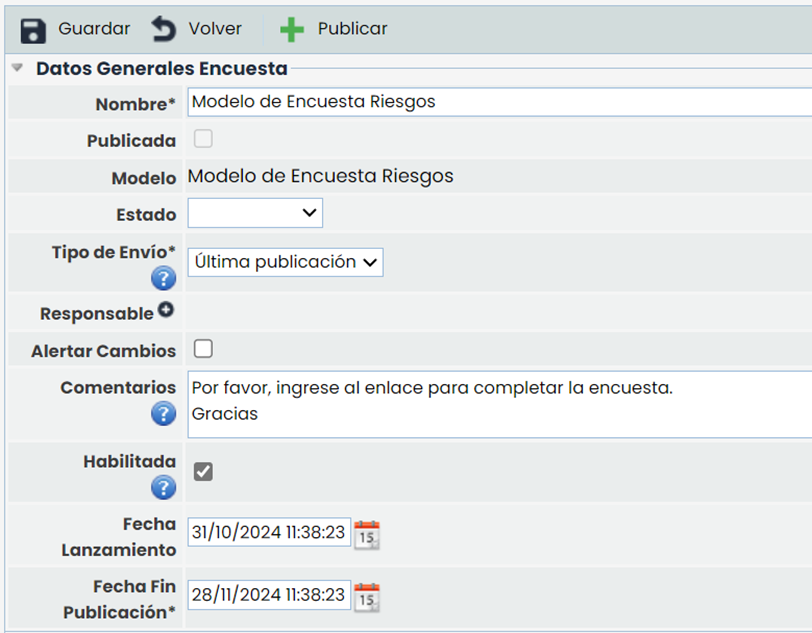
When entering a record, the user can configure the publication. The most important attributes are:
-
State: This option only appears when the survey has been configured with states in the modeling.
-
Send Type: Only applies to BIA surveys. For an item-risk-control survey, the information recorded in GlobalSuite at the time of sending the survey is always sent.
-

Responsible: Refers to the GlobalSuite user responsible for receiving the survey responses.
-
Alert Changes: If selected, the responsible party will be notified via email of any changes made.
-
Comments: Allows entering text that is included both in the email received by each recipient and on the survey's main page.
-
Enabled: Field that allows enabling the survey.
-
Opening Date: This is the start date of the publication, from which the surveys associated with the publication are available.
-
Closing Date: This is the closing date of the publication, after which the surveys associated with the publication are no longer available.
Once the above fields are configured, you must choose the survey recipients. These recipients will receive an email with a link to access the survey. To access the link, the recipient does not need to have a GlobalSuite® user account.
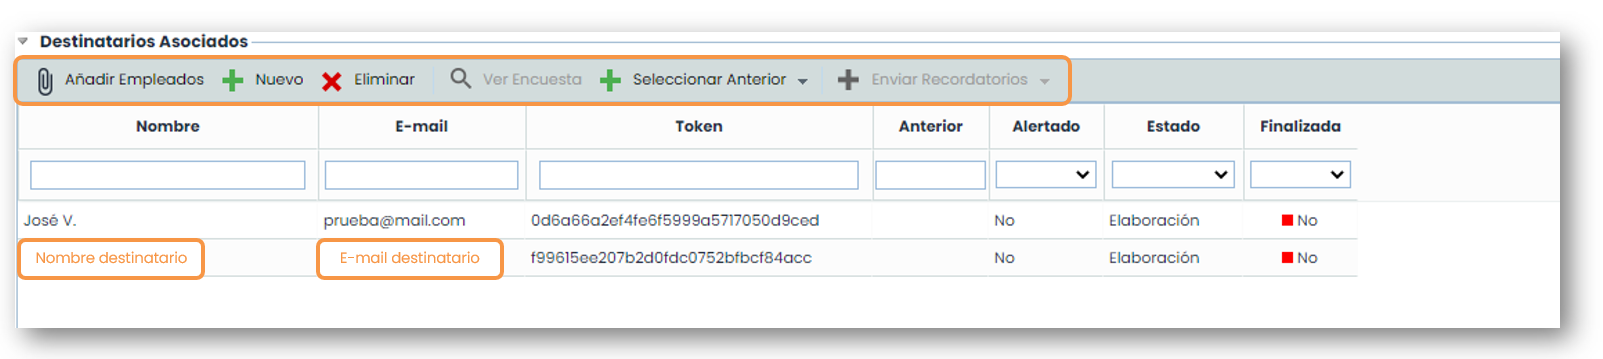
To choose the recipients, you can select an employee already registered in the tool (button “ Add Employees”) or a new employee (button “ New”). In either case, a pop-up window is displayed to configure the recipients. If working with a survey with states, the recipient of the first state will appear by default.
In this table, you can also delete (button “ Delete”), alert via email (button “ Send Reminder”), and create a survey from a previous survey (button “ Select Previous”).
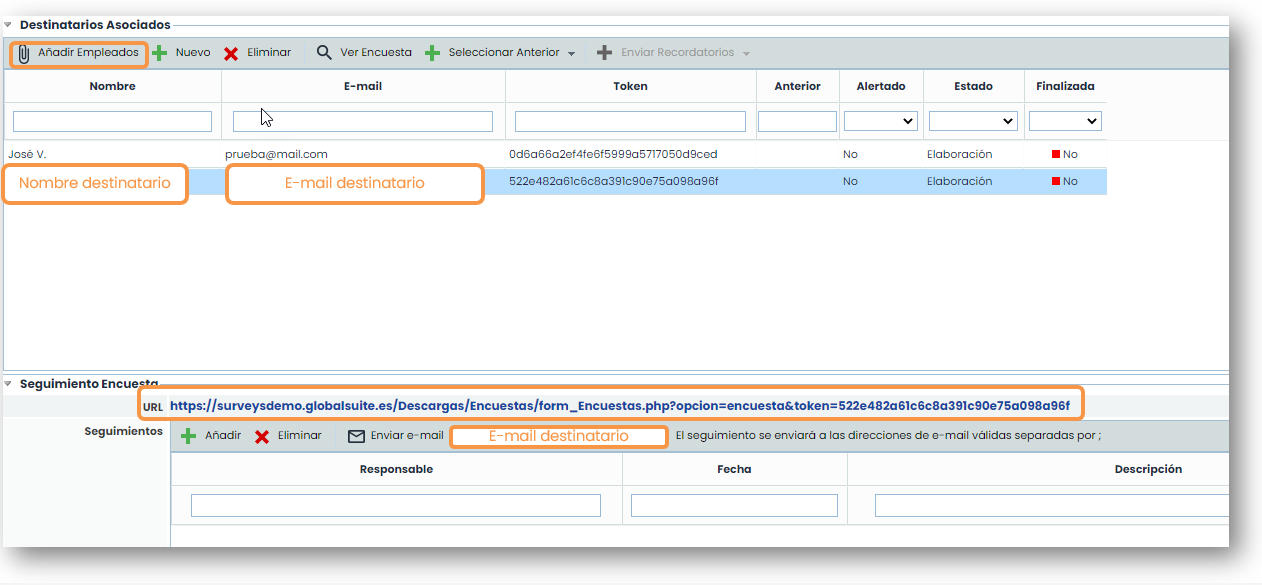
When the “ Publish” button is clicked, the tool sends an email to the recipients with the survey link to complete it.
On the publication screen, the link received by each recipient also appears, so the responsible party can access the survey. There is also a table with the survey follow-ups.
Survey Management
This option allows managing all surveys created in the survey publication. When the publication is made, all surveys sent to recipients are generated in this option.
Additionally, in this option, you can also create surveys without the need for them to be published. The creation of a survey works the same as the previous options. When accessing a survey, you can see the data currently saved.

Survey Consolidation
Surveys for Items, Risks, and Controls can be consolidated from the survey itself if the corresponding option is marked and from the Inventory, Risk Analysis, and Control Management options, respectively.
For more information, you can consult the specific guide on consolidating surveys for Items, Risks, and Controls.