This tutorial explains, step by step, how to perform risk management in GlobalSuite® once the analysis is completed.
This guide details how to access the Risk Management option to plan the treatment of identified risks, define controls and corrective actions, monitor treatment plans, and finally execute risk projection and simulation.
Additionally, it explains how to create and associate controls, establish responsibilities, deadlines, and costs, link evidence, and monitor the implementation of actions. It also describes how to generate reports, apply filters by acceptable risk level (ARL), and consolidate monitoring information within the complete risk management cycle.
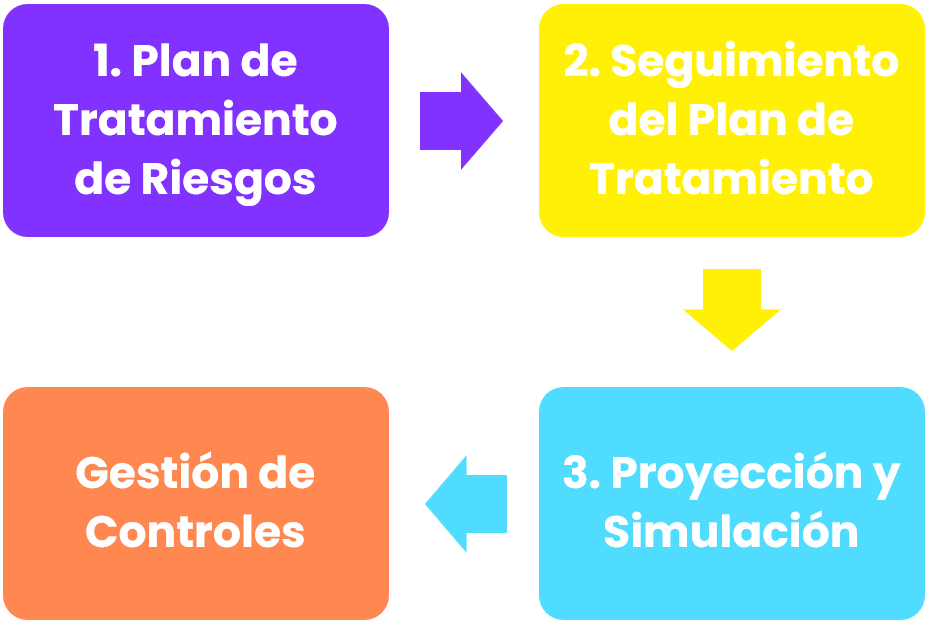
Phases for Risk Management
Risk Management
To carry out the management of identified risks, GlobalSuite® provides the “ Risk Management” option, where a list of all risks to be treated is displayed, associated with their corresponding elements, as well as the treatment plans to be applied to them.
The list of risks to be treated (accessible within a particular risk analysis) depends on the Acceptable Risk Level (ARL) defined in the Risk Analysis. Specifically, it is defined in the “ General Information” tab.
The objective of risk management is to associate different types of controls or treatment actions to the identified risks, allowing for the minimization of those levels.
Once all controls or treatment actions are identified, their monitoring can be carried out, keeping the process status updated.
Step 1
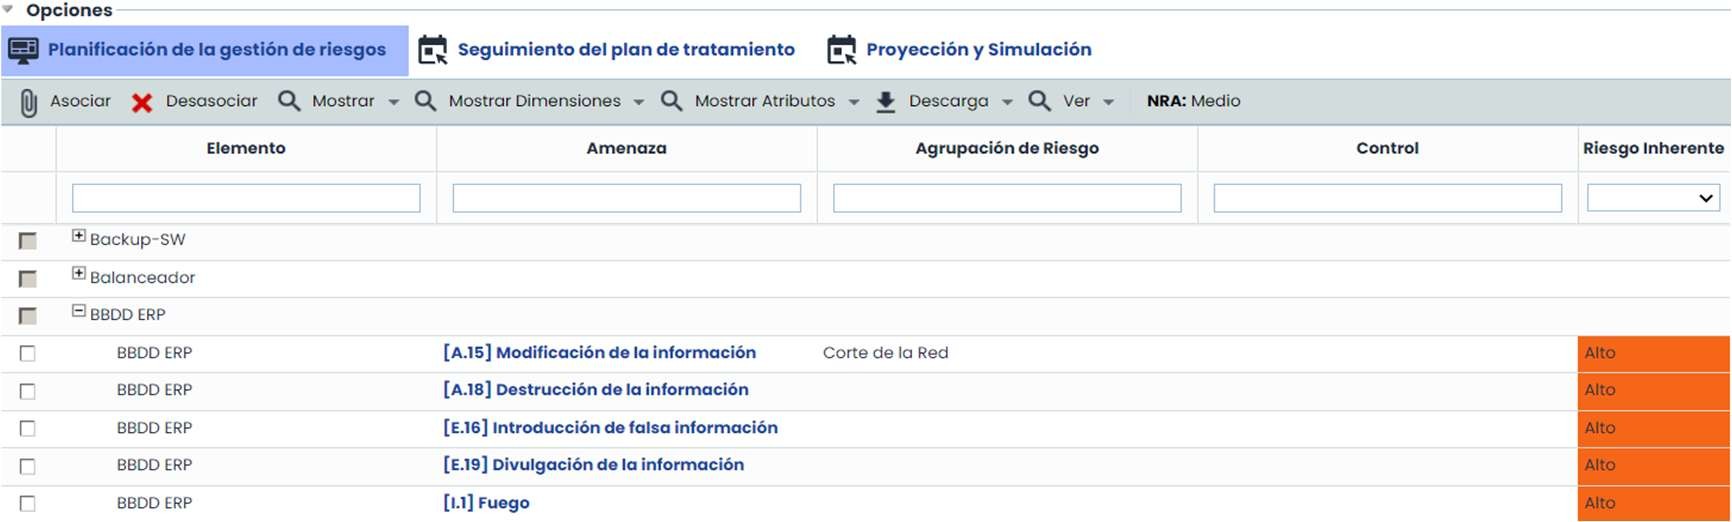
To access Risk Management, click on the “ Risk Management” option, available in the “ Analysis” tab. Upon accessing after selecting the risk analysis, GlobalSuite® displays the “ Risk Management Planning” tab.
At the top of this tab, a list of elements and associated risks with a risk level higher than the acceptable level (ARL) appears. Apart from the risks shown by default (those exceeding the ARL), other risks can also be viewed by clicking the Show button (“Show All”).
Additionally, GlobalSuite® contains two additional tabs to monitor the treatment plan and project risks after the implementation of controls.
Step 2
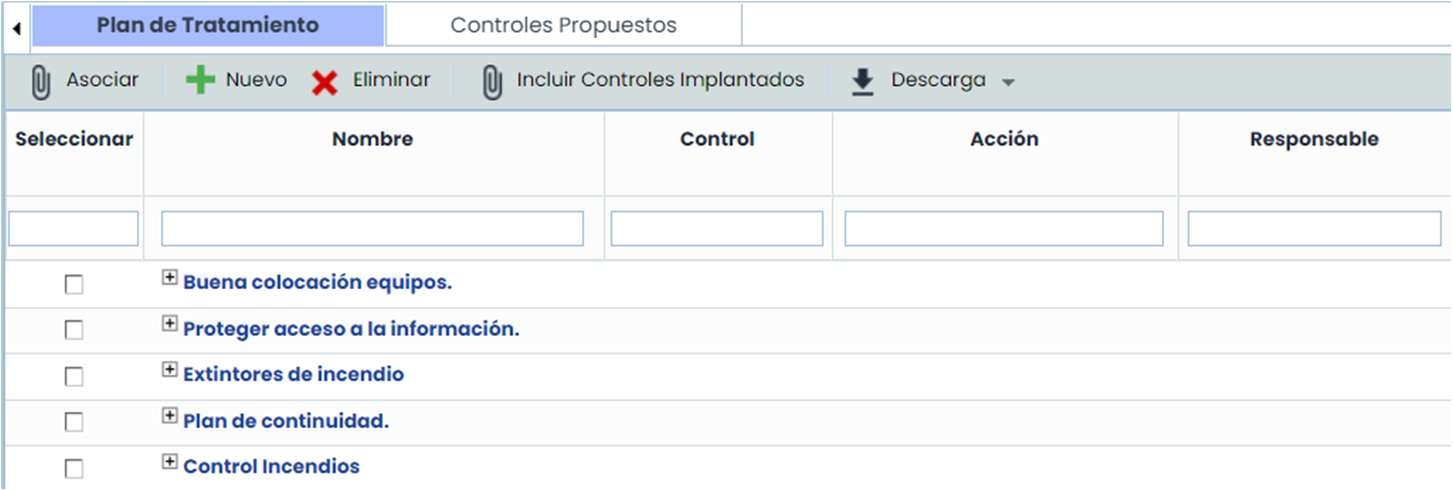
The definition of the Risk Treatment Plan is carried out in the “Risk Management Planning” tab. To do so, there are two main sections, the upper one showing risks and risk levels, and a lower one for establishing controls. In the lower section, there are two main tabs:
-
Treatment Plan: Allows generating new controls or treatment actions to be subsequently associated with the risks identified in the upper level.
-
Proposed Controls: Provides a list of controls proposed by GlobalSuite® based on the defined catalogs. The proposed controls depend on each risk.
Step 3
The establishment of controls and treatment actions can be done by clicking the “ New” button. Clicking it opens a new line, from which a form for the complete definition of the control can be accessed by clicking directly on its name. Once accessed, a complementary window appears, where its options are organized into the following sections:
-
General Data: Allows describing the plan through the following data:
-
Name, control, action, resources, comments, and observations: descriptive fields.
-
Responsible (internal, from the employee list) or Other responsible (text) for the implementation.
-
Deadline: expected completion date of the plan. Based on this date, Alerts can be sent.
-
Costs derived from the implementation (numeric field).
-

-
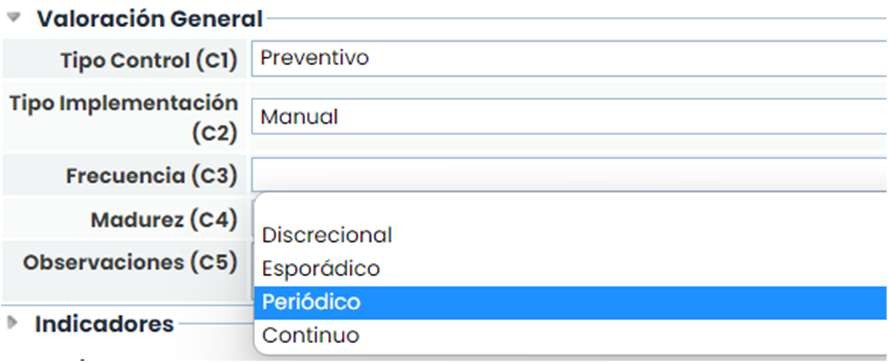
General Assessment: Allows assessing the dimensions of the plan configured to be displayed in the treatment plan.
-
Indicators: Allows associating one or more indicators defined in the ‘ScoreCard/Indicators’ section.

-
Actions: Allows establishing the tasks necessary for the implementation of the control or treatment action.
-
Deadline: expected completion date of the action. Based on this date, Alerts can be sent.
-
End Date: actual date when the action was completed.
-

-
Risks: Allows consulting the risks treated by the defined plan (control).

-
Affected Elements: Allows consulting the elements that will be impacted by the defined control.

-
Evidence: Allows associating one or more pieces of evidence to the treatment plan being defined. To do so, through the "Associate Evidence" button, a pop-up window containing all the evidence registered in the "Evidence Management" option of the Analysis menu is accessed. One or more pieces of evidence from the list can be associated.

-
Automatic Notifications: It is possible to set notifications by meeting a series of requirements.
Step 4
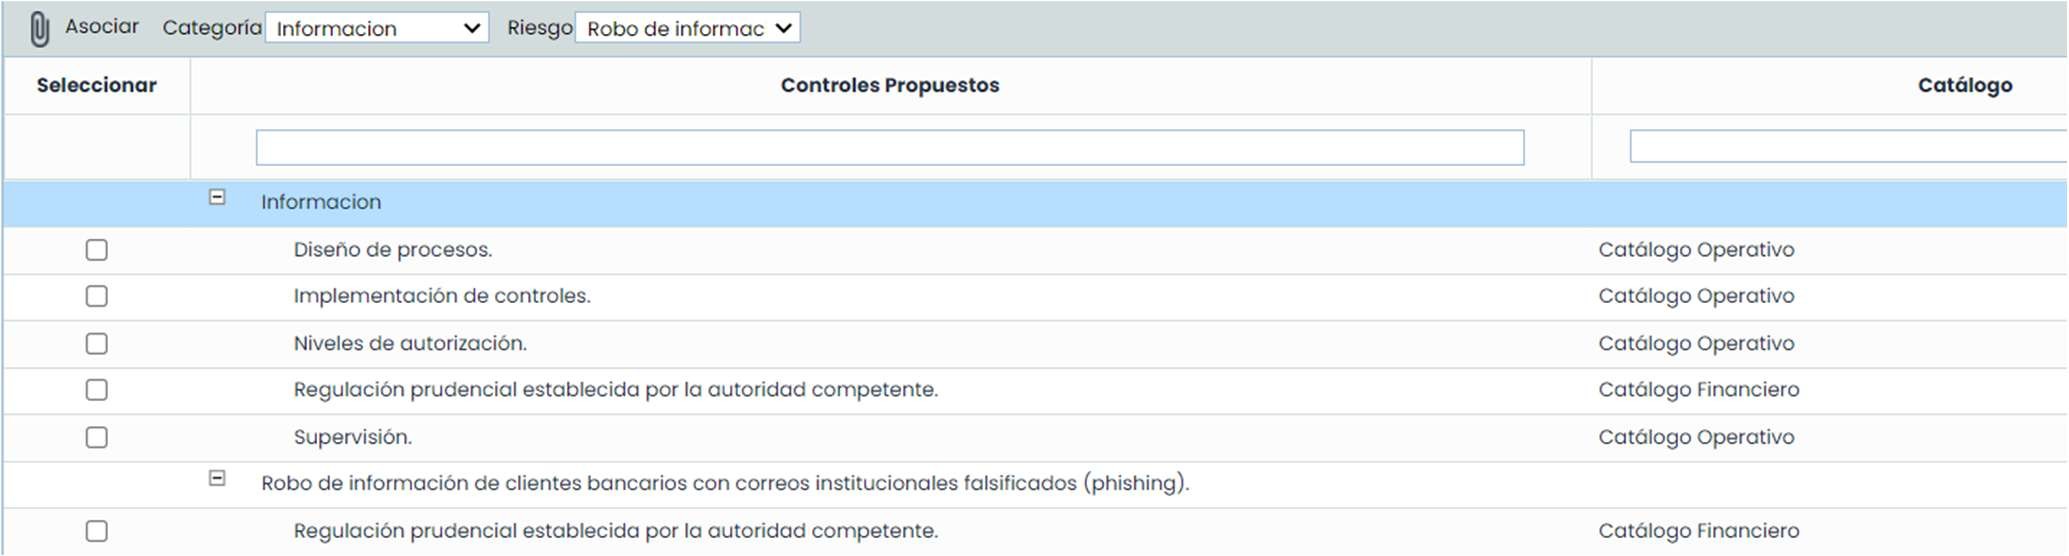
In the lower tab “ Proposed Controls”, GlobalSuite® allows associating controls and treatment actions concerning the organization's risk and vulnerability catalogs.
To select the controls, it is necessary to determine both the “ Category” of the element and the “ Risk” corresponding to it. This selection can be made through dropdown lists or by directly selecting the risk at the top.
Step 5
Complementary to the previous points, GlobalSuite® offers several options that allow executing other tasks. These options are displayed at the top of the “Risk Management” option:
Associate and Disassociate: Allows associating controls as well as the corresponding disassociation between them and the risks.
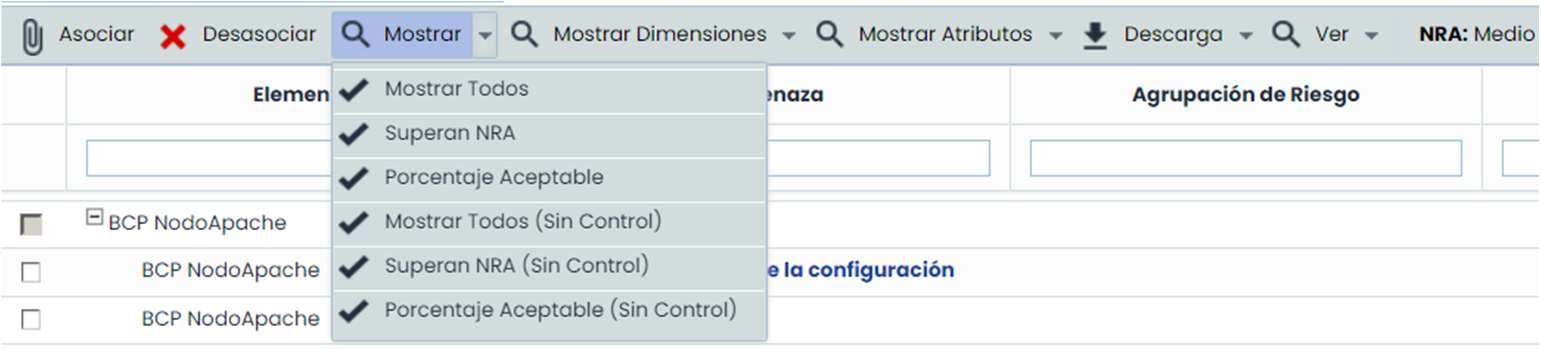
Show: Allows filtering the risks to be displayed at the top of the option. To perform the filtering, it provides different types of characteristics to carry it out.
-
Show All: Displays all analyzed risks.
-
Exceed ARL: Displays risks that exceed the acceptable risk level.
-
Acceptable Percentage: Displays risks that do not exceed the level established for treatment.
-
Show All (Without Control): Displays all risks without established controls.
-
Exceed ARL (Without Control): Displays risks that exceed the allowed level and do not have a control established for their treatment.
-
Acceptable Percentage (Without Control): Displays aspects without associated control that do not have operational controls associated.
-
Show Dimensions: Allows selecting the quantitative/qualitative dimensions to be displayed in the table, both for Elements, Risks, or Controls.
-
Show Attributes: Allows selecting the textual dimensions to be displayed in the table, both for Elements, Risks, or Controls.
-
Download: Allows downloading the list of defined risks and controls in an Excel report.
-
Dependencies: Displays the dependencies of the selected elements.
Step 6
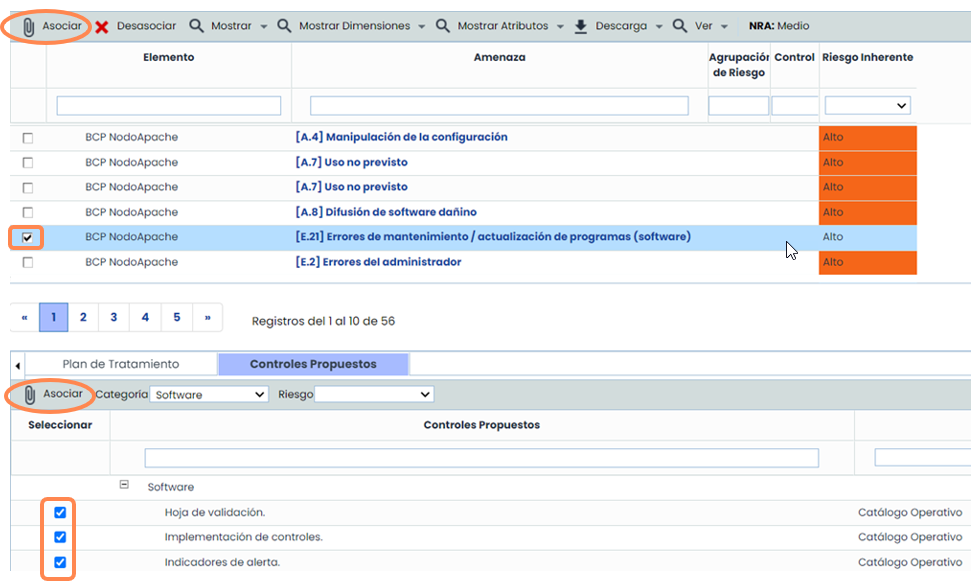
To associate controls with risks, it is necessary to select both the control, in the lower option, and the risk associated with the element, available at the top.
Once both options are selected, it is necessary to click on the “ Associate” button, so that the established control will be automatically linked at the top, and this control can be consulted at a level lower than the risk being treated.
Step 7. Monitoring the Treatment Plan
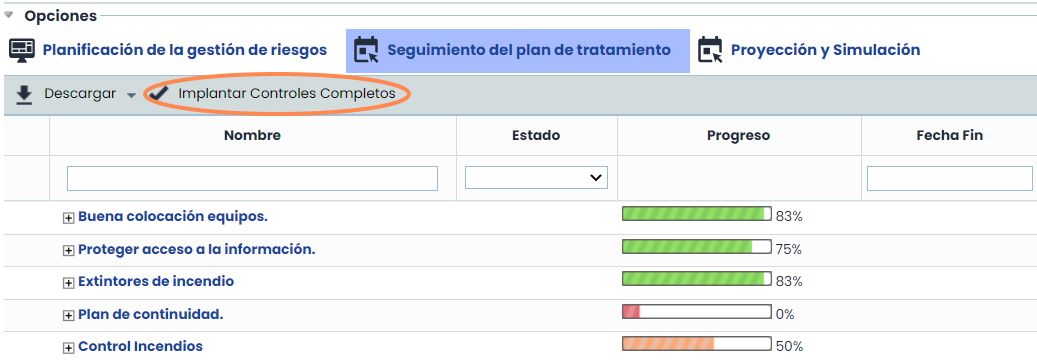
By accessing the “ Monitoring the Treatment Plan” tab, it is possible to monitor each of the controls. To indicate the progress of a control, it is necessary to update the status of each of the control's actions, and the Progress bar will be updated.
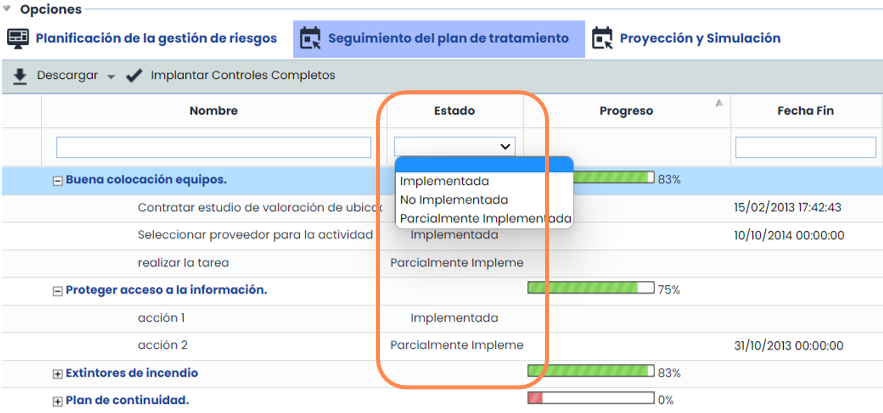
The statuses are configurable through Settings > Methodologies > Elements :

In the “ Monitoring the Treatment Plan” view, in addition to allowing the assessment of treatment plans and proposed controls by changing the status of the actions they comprise, it also offers the possibility of downloading the report in docx format and implementing the complete controls.
Proposed controls or treatment plans without actions appear already completed at 100%.
Once the actions of a control or plan are completed at 100%, using the “Implement Complete Controls” button, it is possible to move the completed controls to the system's control list as implemented controls, and therefore, the actions they had are deleted as they have been completed.
For this reason, it is recommended to create a history before implementing the controls to avoid losing the information of the actions.