This tutorial explains, step by step, how to create and configure the recovery plans in GlobalSuite®, within the Business Continuity module.
This guide details the process to define public and private recovery sequences, create and configure the associated tasks and subtasks, establish dependencies and responsibilities, and associate the sequences with the continuity plans.
Additionally, it explains how to define the activation criteria, configure the recovery plan reports, customize the document sections, and generate previews or reusable templates for other plans in the organization. The images and examples in the document show how to hierarchically organize tasks and generate dynamic reports with customized formatting.
Phases for the initial configuration of the Continuity System
1. Introduction
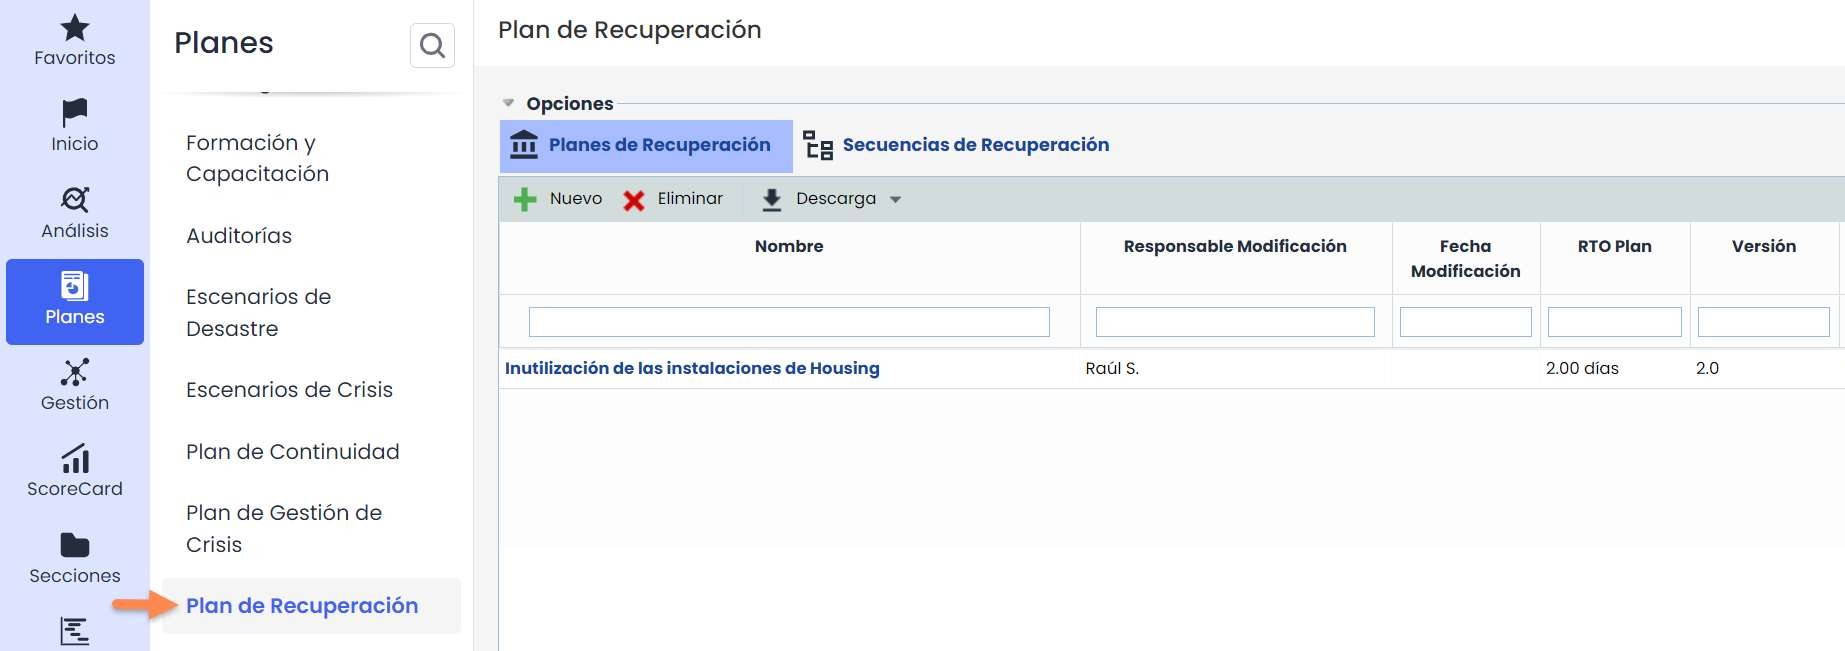
The definition of recovery plans is carried out in Plans > Recovery Plans . This option will allow you to formally define the different recovery plans that can be associated with the continuity plans of the management system.
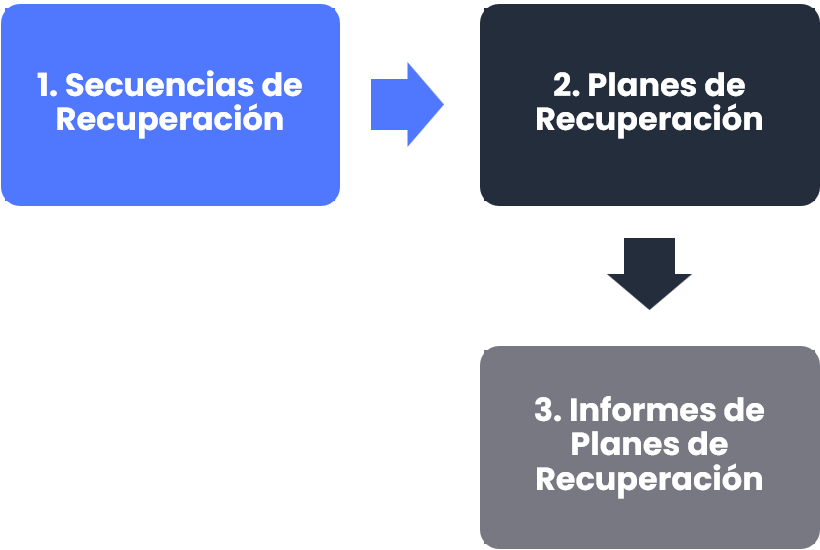
The recovery plans will consist of Recovery Sequences. A Recovery Sequence is a set of tasks that determine the execution of an action. There are two types of Sequences:
-
Public: Sequences that can be shared and reused in more than one recovery plan. They are defined once and can be used in all plans.
-
Private: Sequences that will only be used in one plan and are not visible for reuse in multiple plans.
2. Recovery Sequences – Public
In this option, public recovery sequences will be defined. Later, we will see private recovery sequences.
These public sequences will be defined once and can be used in all recovery plans. They serve as a set of tasks that can be repeated in the different plans of the organization.

Step 1: Task Creation
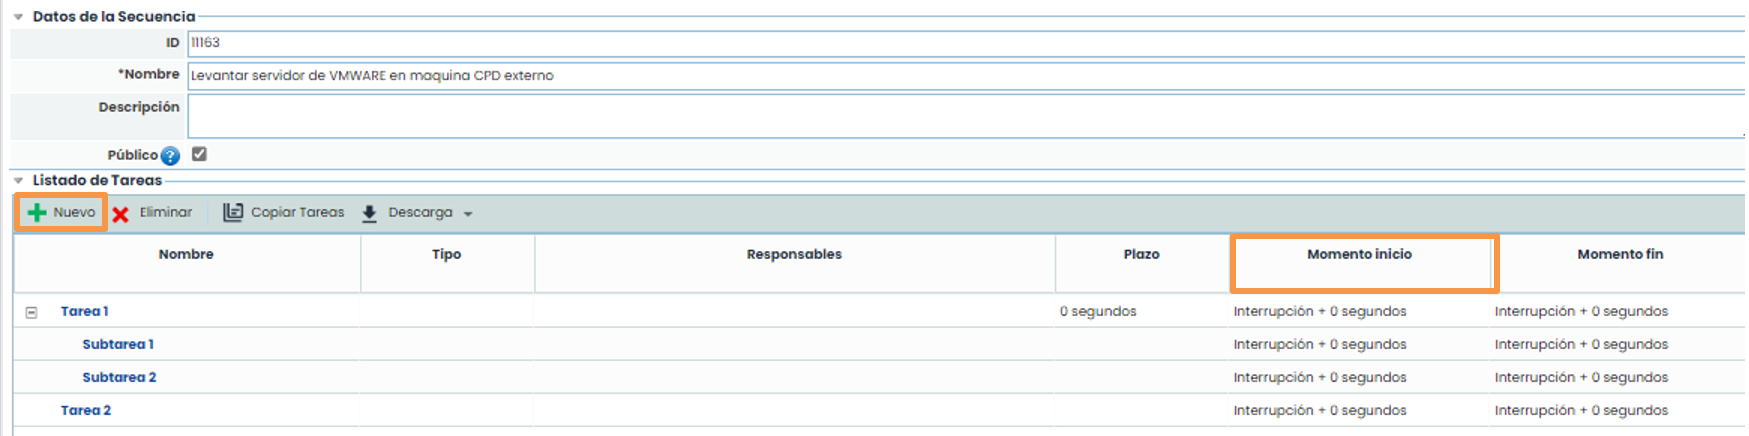
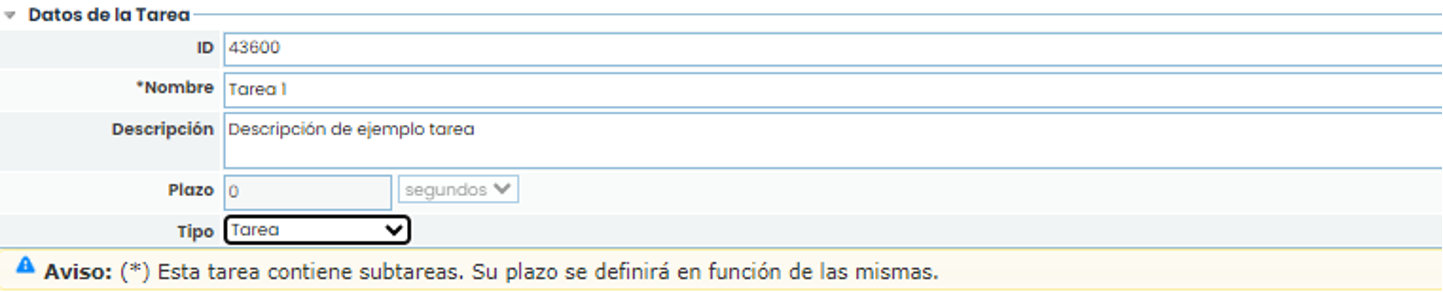
Within a sequence, the description of the sequence, the tasks to be performed, the responsibilities for the tasks, and the deadlines for these tasks will be specified. These tasks can be configured as a tree with unlimited depth, meaning each task can have subtasks. The tasks will have a name, a type, responsibilities, a deadline, a start time, and an end time.
To create a new main task, you must click the “ New” button, which will create the task with all default attributes. Tasks will be ordered according to their Start Time.
Step 2: Task Configuration.
By selecting the link of the task name, we can define its attributes (name, description, deadline, and type).
In addition to the task data, there are other attributes that will be defined in this form (responsibilities, previous and subsequent tasks, documentation, subtasks, etc.).
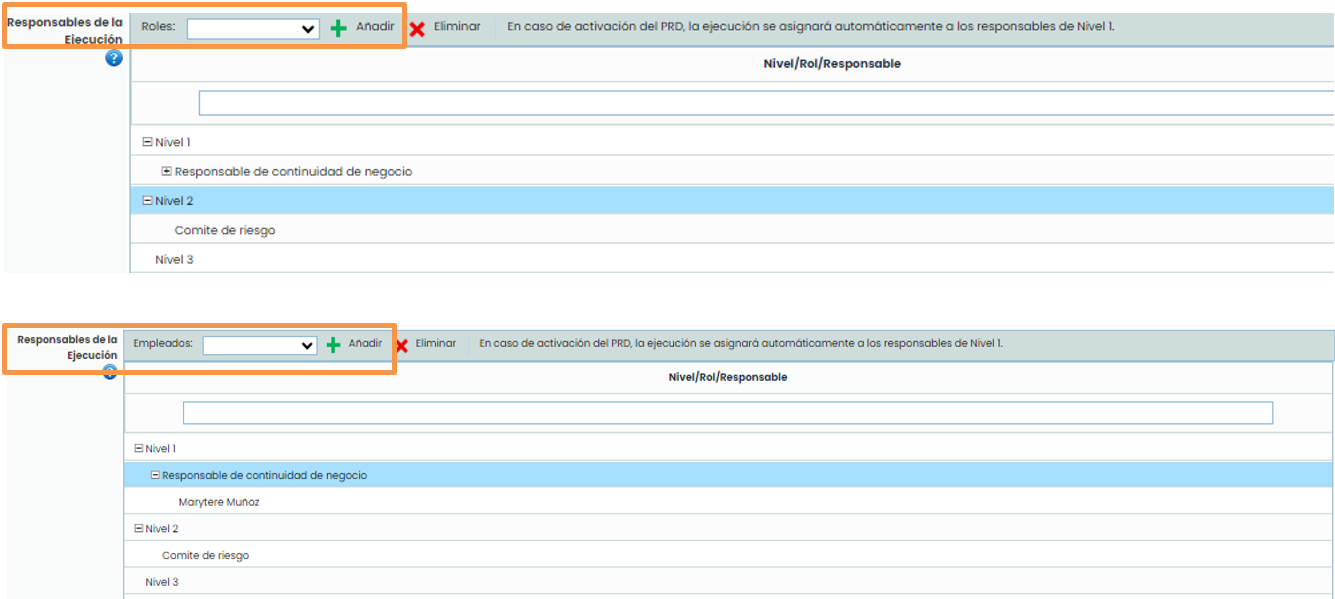
To define the responsibilities, three levels of responsibilities can be chosen. The person responsible at level 1 will be the main one, and the others will be alternatives. Additionally, a role or an employee can be chosen; if a role is chosen, the responsibilities will include all employees in that role.
To insert a responsibility, you must select a level in the table, then a list of existing roles will load in the dropdown called Roles. You must select a role and click Add. Then, you must select the added role at the desired level, and the dropdown called Employees will now load with the employees related to that role.

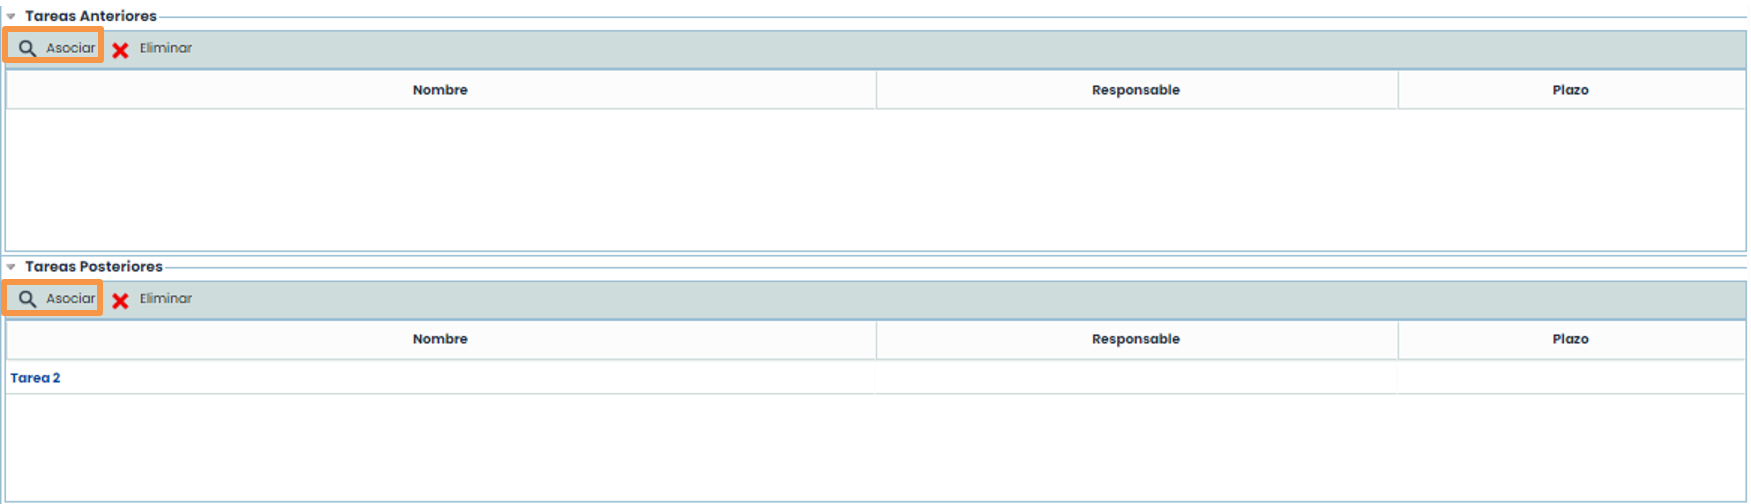
In addition to defining responsibilities, within the task, you can upload documentation that evidences this task. You can also define previous or subsequent tasks, as well as their subtasks. The previous and subsequent tasks will mark the precedence of the tasks to be performed, so the deadline for each task will be calculated based on this precedence.
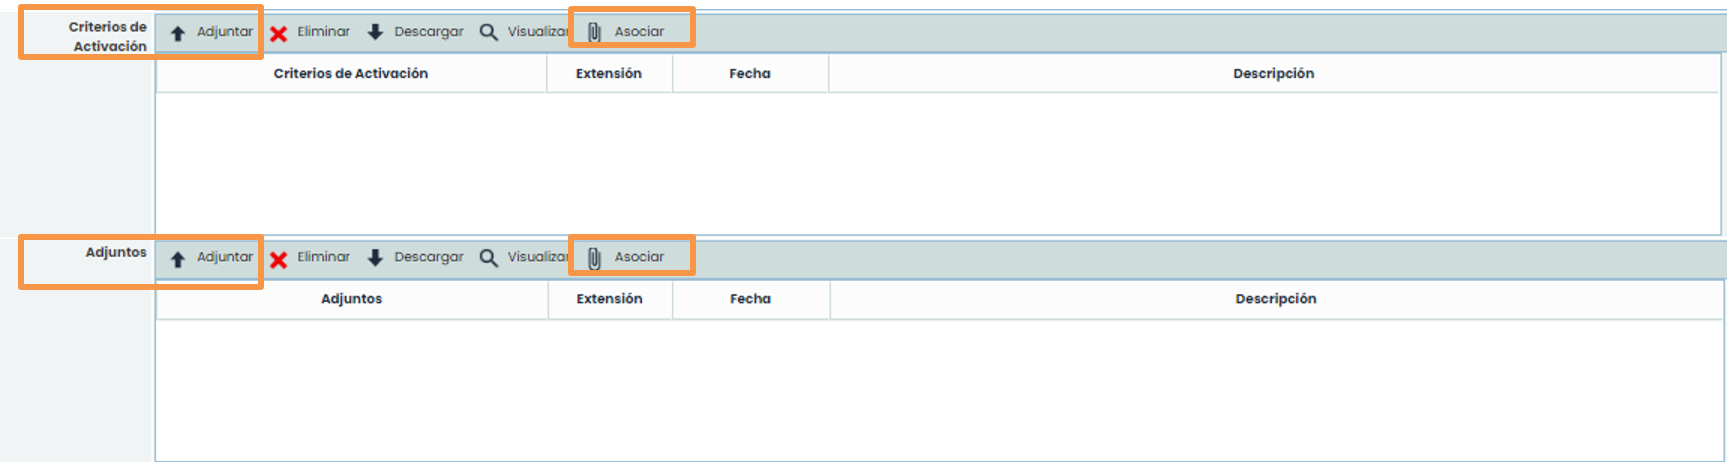
To upload documentation, you must click the “ Attach” button, which will open a window to choose the file.

Step 3: Task Associations.
This step is very important for the plan to be perfectly configured, as it will define the structure of the plan with the dependencies between tasks and calculate the start and end time of each task, thus forming a path of actions to be performed, marking the flow of tasks in the recovery plan.
To do this, you must click the “ Associate” button in any of the tables. A pop-up window will open with the tasks available to associate.
Step 4: Subtask Creation.
To create subtasks, you must click the “ New” button. The tasks will be created with default attributes.
To change these attributes, you must click the link, and you will access the form of the created subtask. This form will be the same as that of the parent task, so the same attributes explained earlier can be associated. Additionally, you can also create subtasks for this task.

Once subtasks have been created, the deadline for the parent task cannot be changed. This deadline will be calculated based on the deadlines of the subtasks.
Step 5: Result
Once the previous and subsequent tasks, subtasks, and deadlines for all of them have been defined, the system will calculate the time dependencies, resulting in a tree of tasks ordered according to their execution time.
In this way, you can clearly see the steps to follow in the plan.

3. Recovery Plans
Once the public sequences have been defined (they can be shared among the different plans).
In the Recovery Plans option, a list of the different plans in our management system will appear. By clicking on the name, the application will load the specific form for the plan.

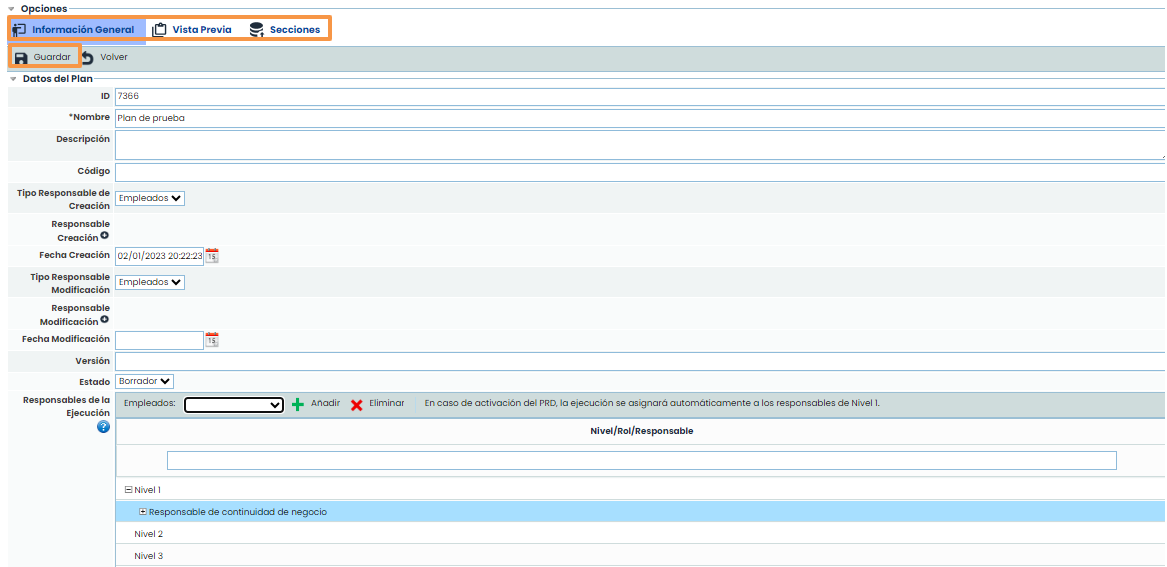
Step 1: General Configuration
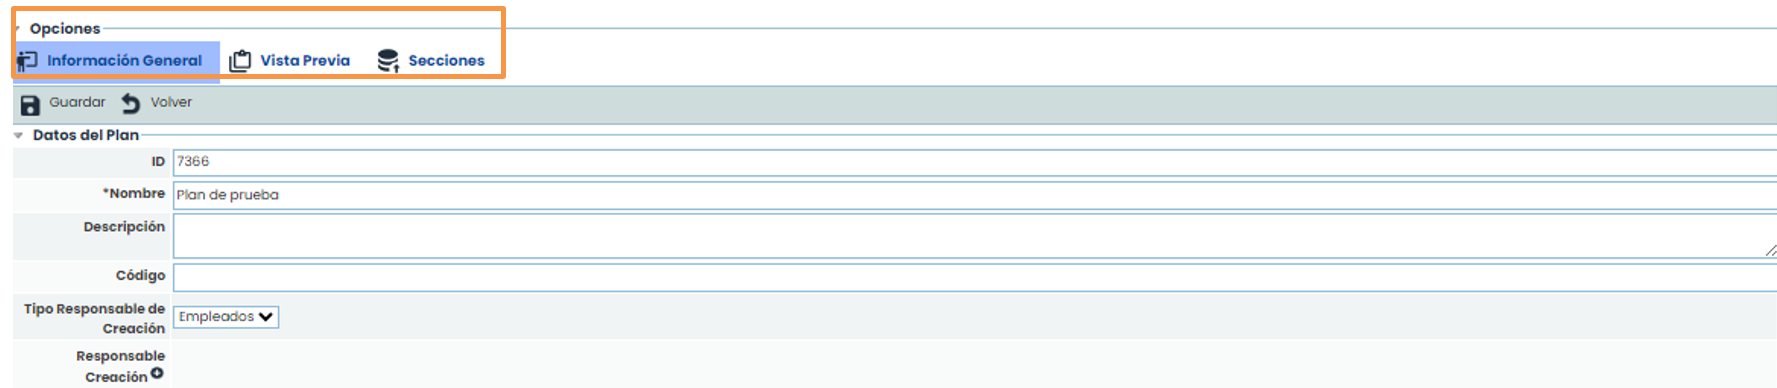
Within the form, there will be three submenus: Preview (you can view the report creation), General Information (form for defining the plan), and Sections (option where the report is generated).
In the General Information option, the general data of the plan will be defined. To save them, you must complete the data and click the “ Save” button.
Step 2: Association
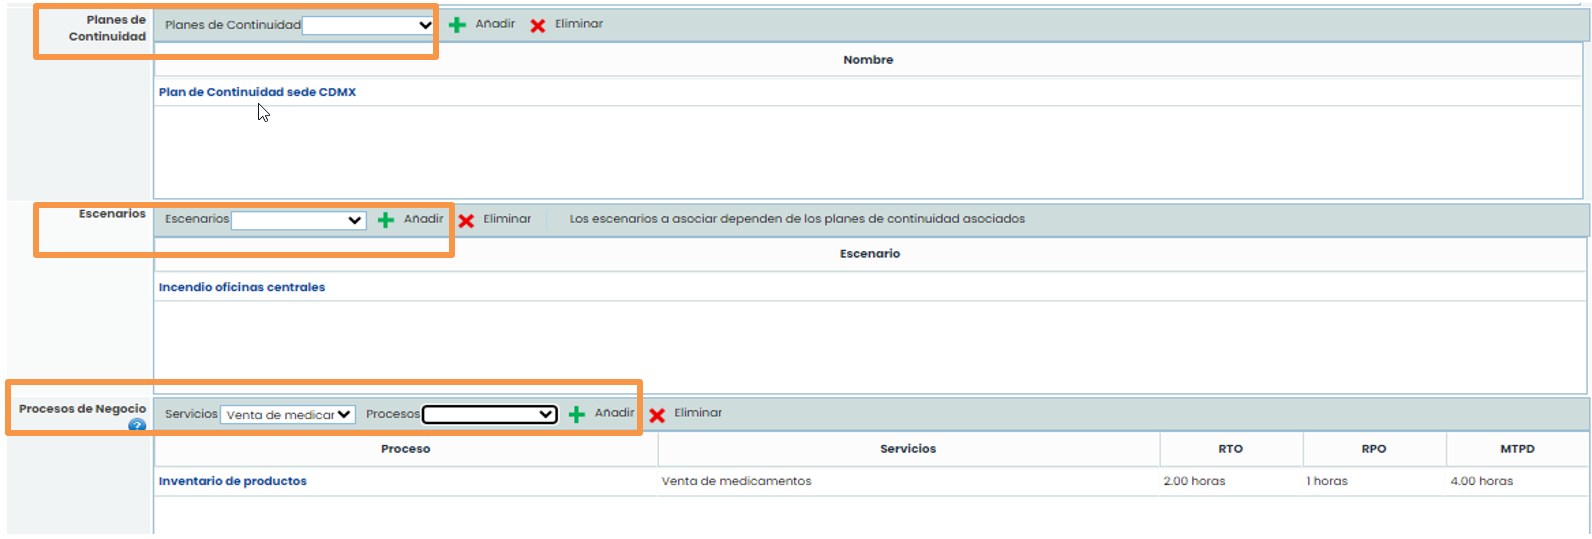
Once the general data of the plan has been configured, the continuity plans referenced by this recovery plan can be associated. Additionally, disaster scenarios and the organization's processes that the plan will attempt to recover can be defined.
-
Continuity Plans: The list will show the plans defined in the Continuity Plans option. Choose one and click Add to include it.
-
Scenarios: The scenarios associated with the continuity plans can be chosen. Select from the list and click Add.
-
Business Processes: Select the service from the dropdown to filter the processes dependent on the service. Choose the process and click Add. The processes that can be chosen are those associated with the scenarios.
Step 3: Configuration of Responsibilities
Employees and roles will be inserted to identify a start sequence in case of activation of the recovery plan. To add a new level of calls, you must click “ Add”. You can choose the role, and then by clicking on the created level, you can click on Employee and so on until reaching the desired level.
Step 4: Activation Criteria
The activation criteria of the plan can also be chosen through the section called Activation Criteria. The necessary criteria can be attached with the “ Attach” button and associated through the “ Associate” button. Similarly, documents considered necessary can be attached in the section called Attachments with the “ Attach” button and associated through the “ Associate” button.
Step 5: Sequence Selection
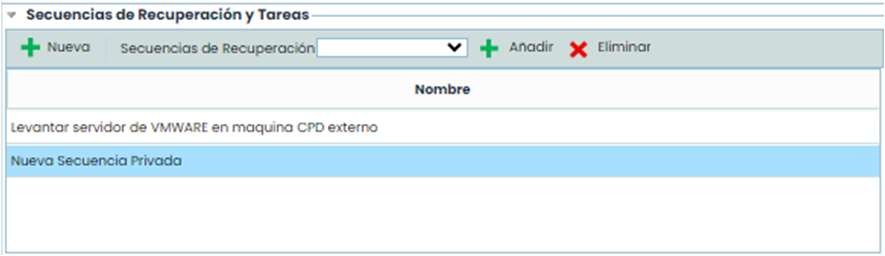
In the Sequences option, you can choose the public sequences that form the plan or the private sequences that will be created specifically for this plan. If you click the “ New” button, a private sequence will be created to add the plan's tasks. If you choose the sequence from the dropdown, it will automatically associate the sequence with the plan.
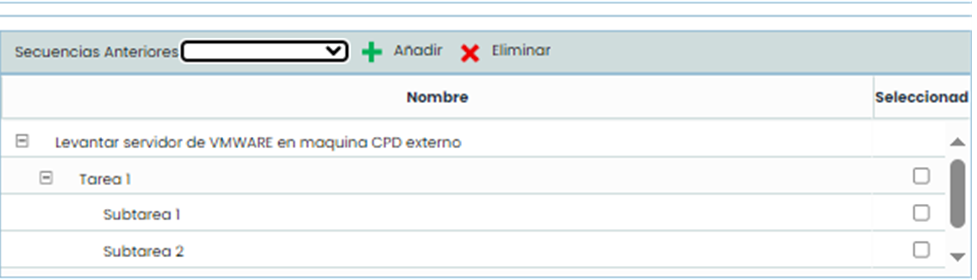
After choosing the sequences, you can associate the dependencies between them. In the table below, you can select which sequences precede the chosen one. By clicking on the sequence, you must mark the task that will allow starting the next sequence.
Step 6: Report Format Definition
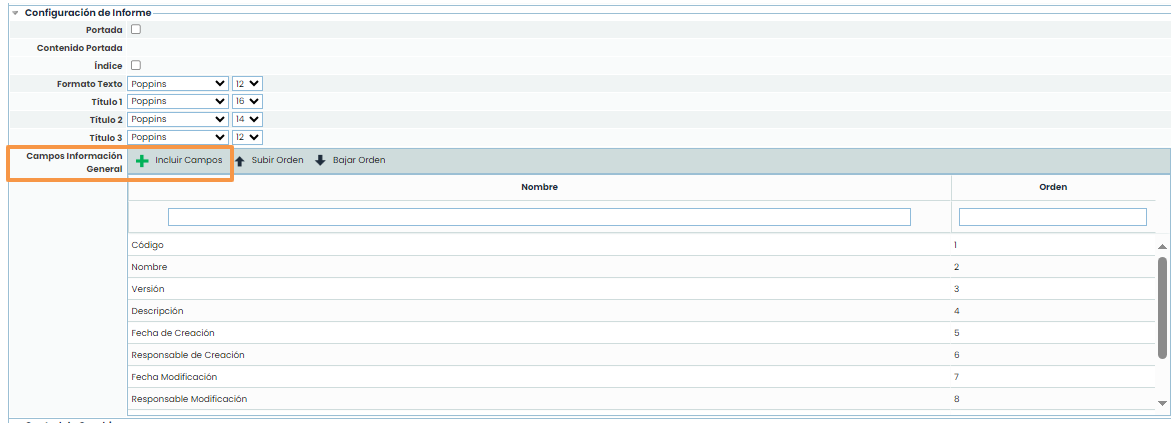
Finally, within the plan, you can configure the general format of the report. The font type and size can be configured, as well as the static elements of general information of the recovery plan. With the “ Include Fields” button, you can add and remove the general elements of the plan.
Recovery Sequences – Private
To generate private sequences, define them in the plan using the “ New” button instead of selecting one from the Recovery Sequences dropdown. As with public sequences, you can create private sequences by unchecking the “ Public” checkbox, as long as the sequence is previously assigned to a specific recovery plan.

Recovery Plan Report
Once the data is defined, the related report will be created.
In the Sections option, the sections that the document will have are defined. In each section, all the necessary elements can be added.
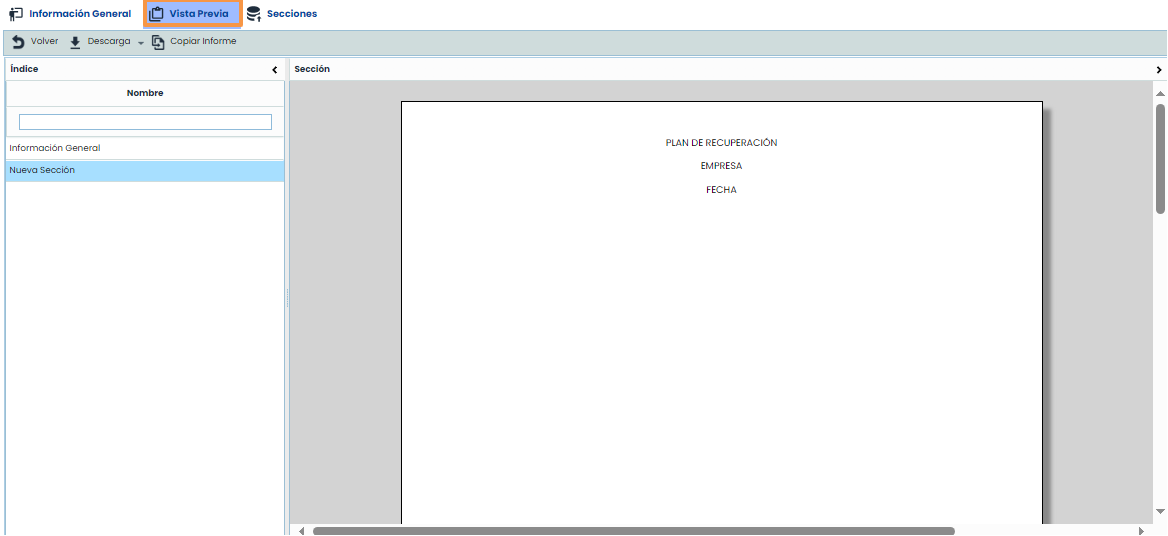
In the Preview option, you can view the created report.
In the Information option, there is a form for defining the plan.
Step 1: Section Configuration
To create sections, you must click “ New”. To modify the section, select the section from the table and click the “ Edit Section” button. If you double-click on the name, you can modify the section's name. You can also order the sections to appear organized in the report using the “ Move Up” and “ Move Down” buttons. Finally, you can also associate permissions to choose the users who can edit it.
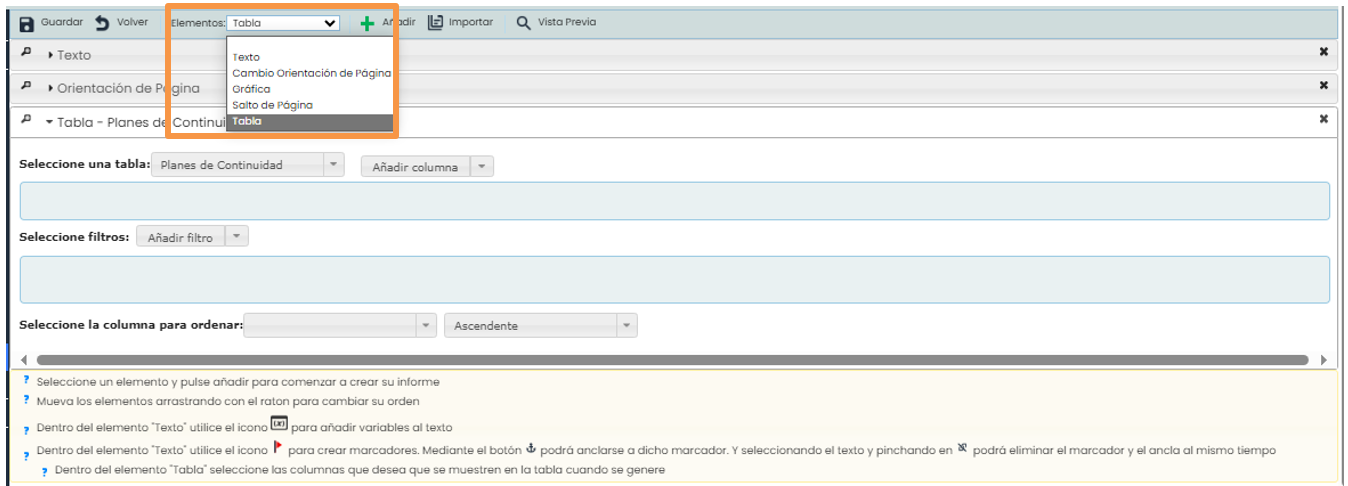
By clicking the “ Edit Section” button, you can choose the elements that the section will contain. In the elements dropdown, you can add all the necessary ones to format and add content to the report. The result of the report will be the sum of the different sections, and within the section, the sum of the elements.

The elements that can be added are:
-
Text: You can add text boxes to write additional data to the plan information.
-
Page Orientation: You can change the page orientation of the documents (horizontal or vertical).
-
Page Break: Adds a page break. The next element will start on a new page, thus applying a format to the document.
-
Chart: You can add any chart available in the entire application.
-
Table: You can choose any type of information from the application and specifically from the recovery plan. In the dropdown Select a table, you must choose the desired table. Then, in the dropdown on the right, you must choose the desired columns and the required order. By selecting the column name, they will be included. With the table, columns, and order, the report is 100% configurable.
Step 2: Preview
Finally, in the Preview menu, you can see the overall result of the report and a button to download the report.
Additionally, you can copy the structure of this report to all recovery plans that need it. This way, it is only necessary to create the template once and copy it to the organization's plans.