Connection with SAML 2.0
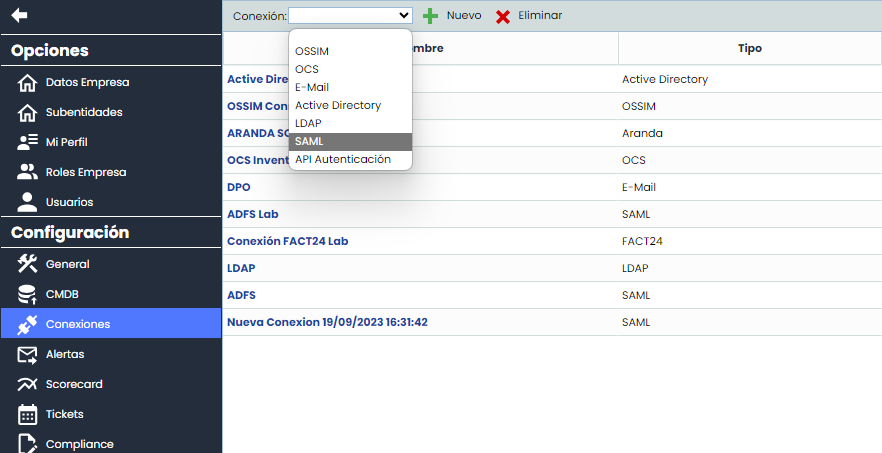
To access the SAML connection screen, you need to go to the GlobalSuite® Settings section, specifically in the “Connections” option (as shown in the image). This option is accessible to Platinum, Gold, Consulting, Consulting Administrator, Platform Administrator, Enterprise Administrator, and Configuration Administrator users.
This screen has several columns described below:
-
Name: Contains the name of the connection, which is used to identify it.
-
Type: Contains the type of connection, in this case, it will be SAML.
-
Host: In this case, it will be empty.
-
User: It is not necessary, so it appears empty.
-
Enabled: Indicates whether a connection is enabled or not.
The SAML connection form consists of different fields, which are described below.
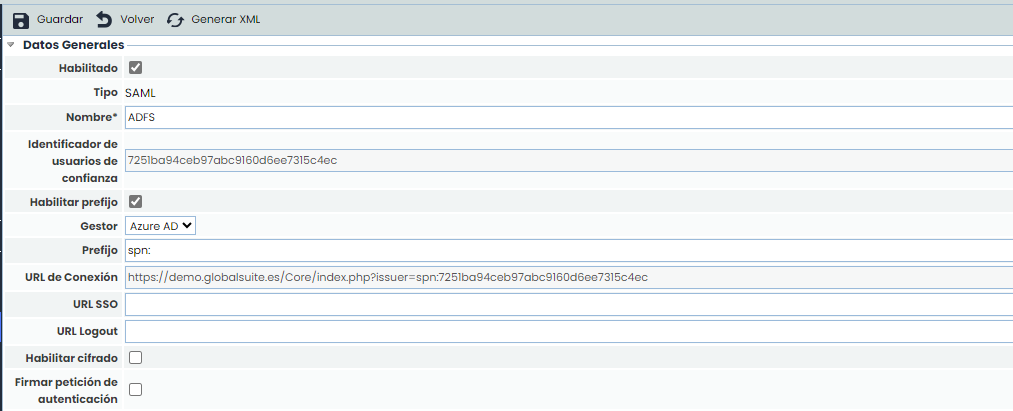
First, there is the “General Data” section:
-
Enabled: Indicates that this SAML connection is enabled. Two SAML connections cannot be activated at the same time.
-
Type: Indicates the type of connection (in this case, SAML).
-
Name*: This is a mandatory field and indicates the name of this connection to be used in other options of the tool.
-
Trust Identifier: It is generated automatically. It indicates the trust string established between the SAML server and GlobalSuite®, and it must be unique.
-
Enable Prefix: Allows activation in case you want to customize and add a prefix to the connection, as some services require a specific structure.
-
Manager: Allows selecting which IdP server will be configured, enabling the choice between ADFS, Azure AD, Google, Other.
-
Prefix: A default prefix is proposed that will go in the connection URL depending on the manager: ADFS (Empty), Azure AD (spn:), Google (https://), Other (empty). This prefix is editable.
-
-
Connection URL: Automatic URL that must be accessed to log in to GlobalSuite® via SSO through the SP Initiated method.
-
SSO URL: When configuring a connection using the SP initiated SSO method, the IdP service URL where authentication via SAML2 is performed must be entered.
-
Logout URL: Address to which a user with ADFS authentication is redirected when they log out. If left empty, it will redirect to the GlobalSuite® login view.
-
Enable Encryption: SAML connection configuration that allows the parameters received from the IdP to be encrypted.
-
Sign Authentication Request: Indicates that, using the SP initiated SSO configuration, the authentication request made to the IdP will be signed.
Secondly, there is the "Roles" section:

-
Role: Allows selecting the default role type for users created with the first access.
-
Sub-Role: In addition to the general role, a specific Company Role can be specified, among those configured.
-
Create Employee: If this field is checked, when a user is created with the first access, the associated employee will also be created with the same data.
Initially, roles can be obtained directly from the IdP server. If no role data is received or the received data is incorrect, the roles configured in this section will be used.
Thirdly, there is the “IDP Certificate” section. In this section, a file with the crt extension must be uploaded, containing the certificate. This certificate must be the same one used to sign the calls from the SAML server for the configured trust relationship.

ADFS Server Configuration with SAML 2.0
The SAML 2.0 connection service URL that must be entered in the server configuration is:
https://Domain_Name/Core/Adfs/trust.php
Where Domain_Name is the access URL to GlobalSuite®.
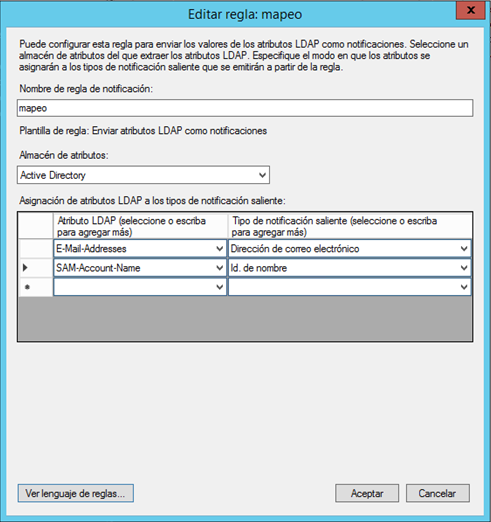
In the ADFS server configuration, it must be indicated that the data to be passed in the request are at least:
-
Name ID (nameidentifier)
-
Email Address (emailaddress)
If you want to send the role configuration to create new ADFS users, you must use the claim called role:
http://schemas.microsoft.com/ws/2008/06/identity/claims/role
IMPORTANT: The role name sent from the ADFS server must match one of the roles configured in GlobalSuite®.
For more information on ADFS server configuration, you can access:
ADFS Authentication with SAML 2.0
There are two types of authentication with ADFS:
-
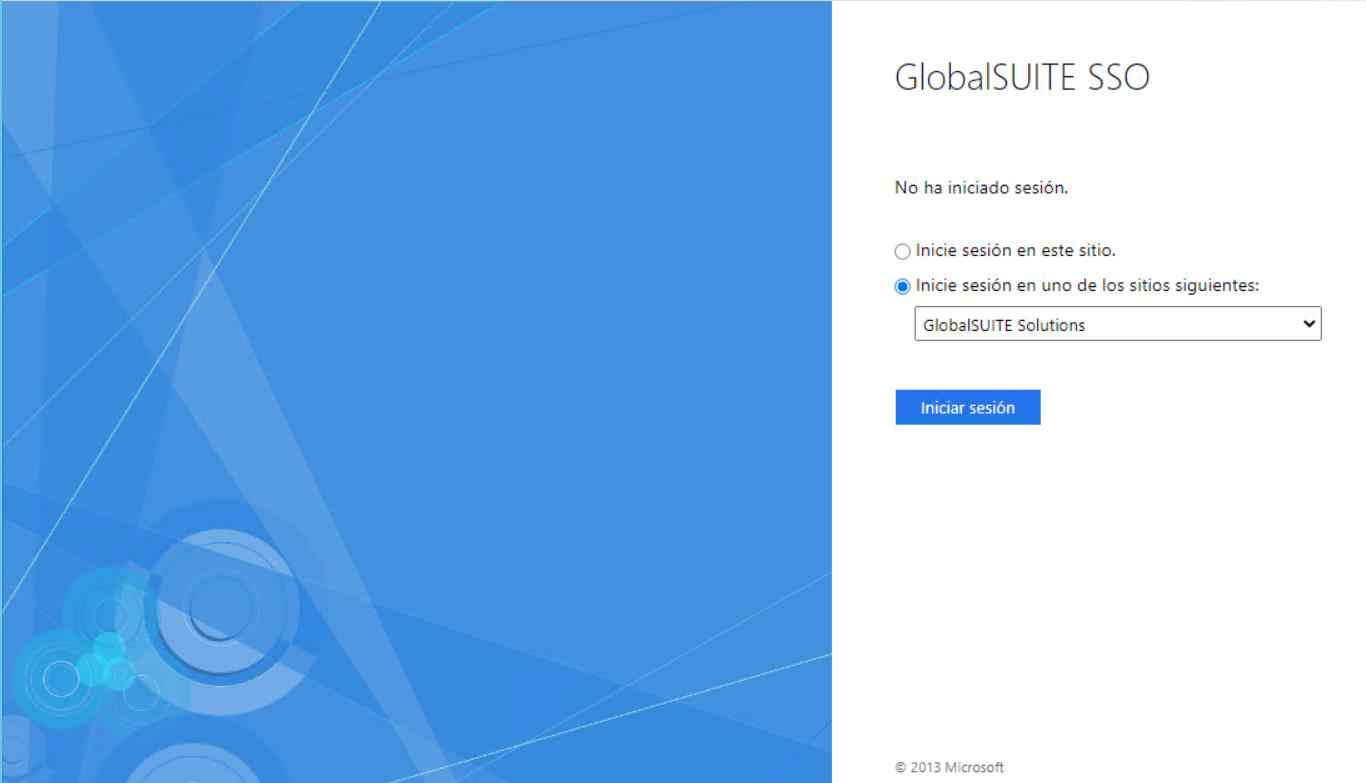
IDP initiated SSO, the authentication process is initiated by the IdP. The user has a list of “corporate applications,” selects the one corresponding to GlobalSuite®, and starts authentication. Below is a sample image of this application form.
-
SP initiated SSO, the authentication process is initiated by GlobalSuite®. To use this method, you must access a specific URL. This URL is formed by concatenating the GlobalSuite® URL with the text: ?issuer=trust identifier, where the trust identifier is the code generated in the connection and can be found in the field with the same name. See section 1 of this document.
An example URL is:
https://sg.globalsuite.es/Core/index.php?issuer=a443c212c23af8ea8a107af75345
Authentication with ADFS has the following particularities:
-
If the user is accessing the tool for the first time through ADFS, a user will be automatically created with the username provided in the SAML request, along with the rest of the mapped attributes.
-
If the username already exists in GlobalSuite® and is not the same as the one created in the first connection, an error message will be displayed.
Azure AD Configuration with SAML 2.0
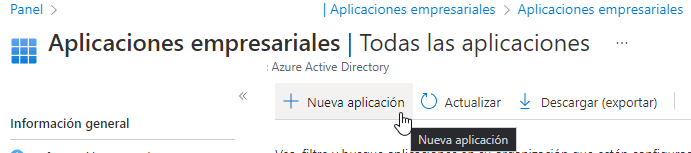
To configure GlobalSuite® as an authorized application in Azure, you need to go to “Enterprise Applications” and click on New Application.
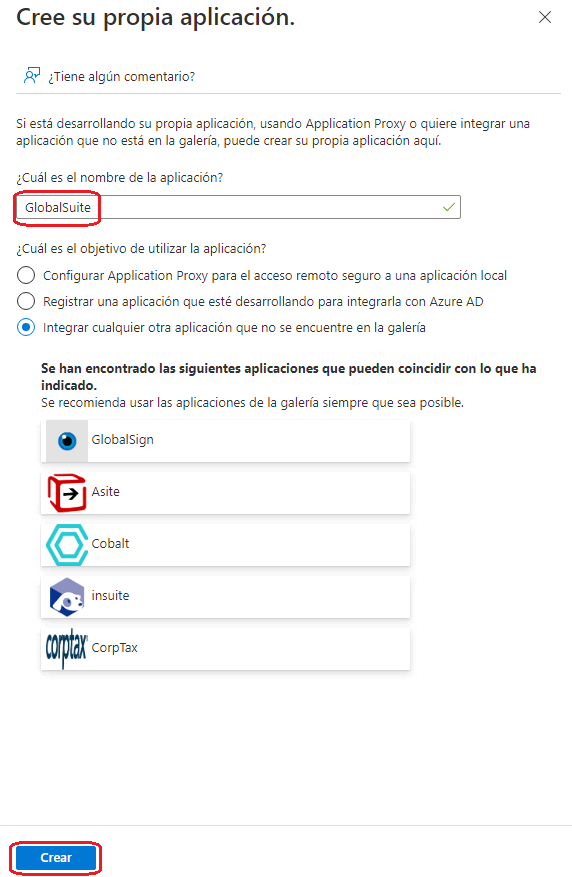
Next, you need to click on Create your own application.

Enter a name for the application and click “Create.”
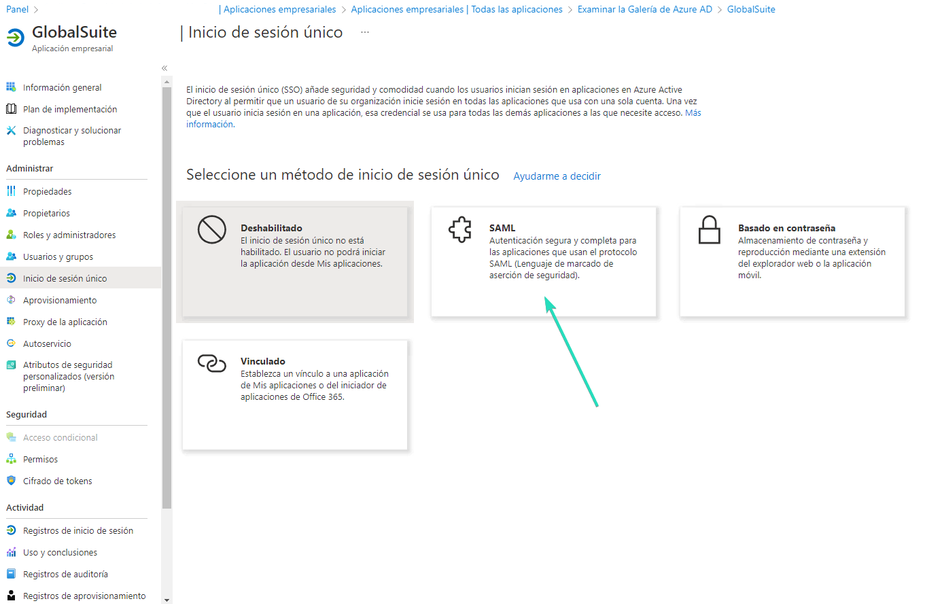
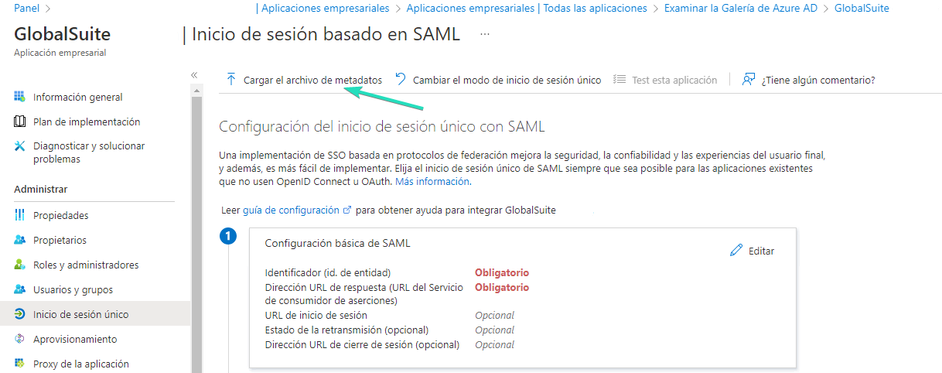
Go to the “Single Sign-On” option to configure the connection, selecting SAML:
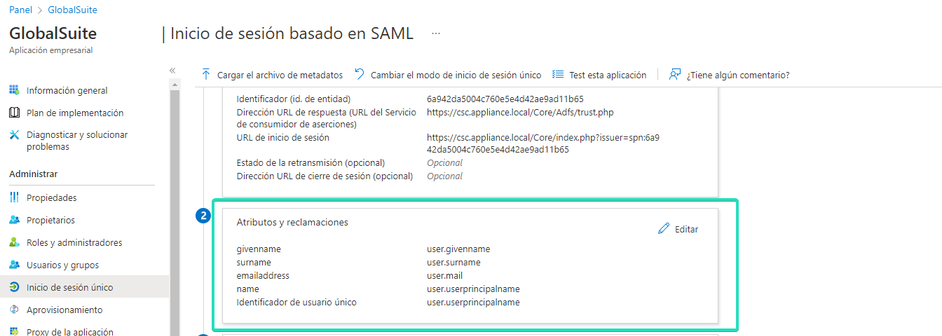
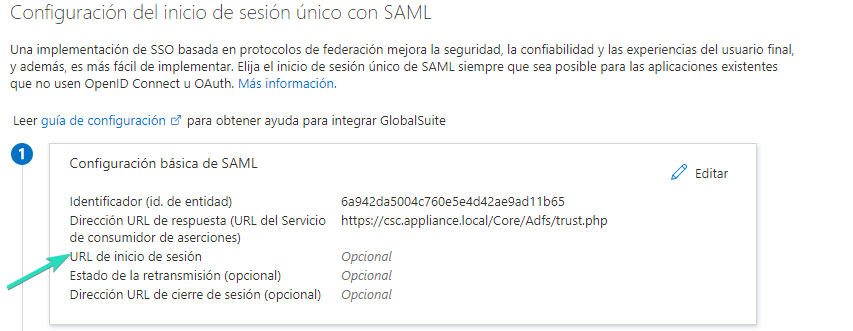
In the “Single Sign-On” option, you can upload the metadata obtained from GlobalSuite® (which is obtained with the Generate XML button). After uploading it, if it is correct, the mandatory configuration fields will be completed.
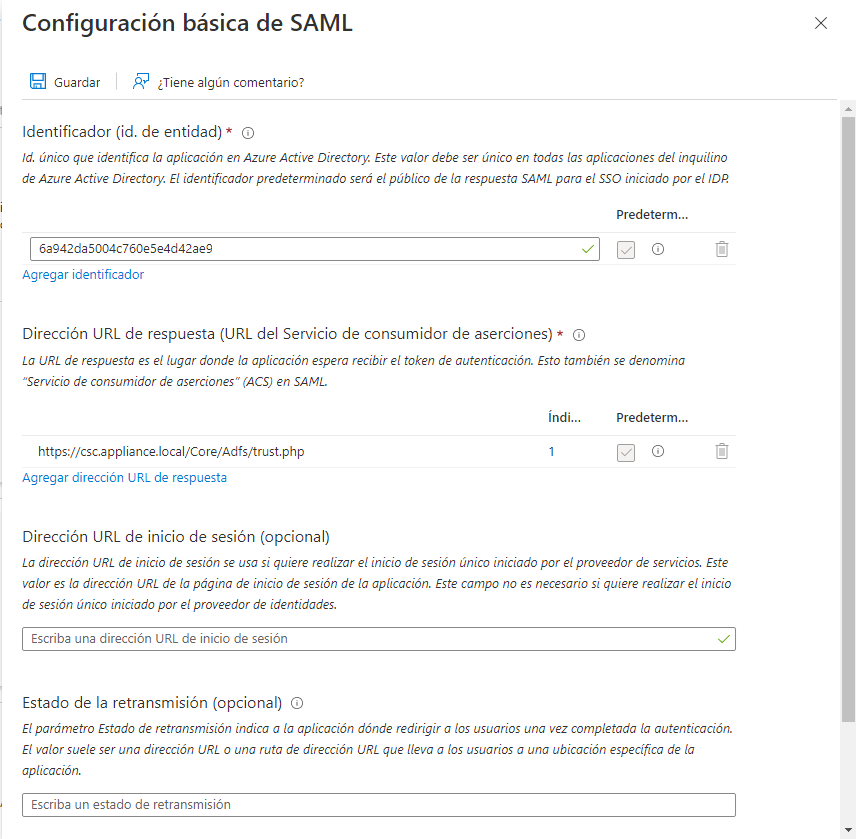
By clicking Edit, you can include the unique trust identifier and the GlobalSuite® URL:
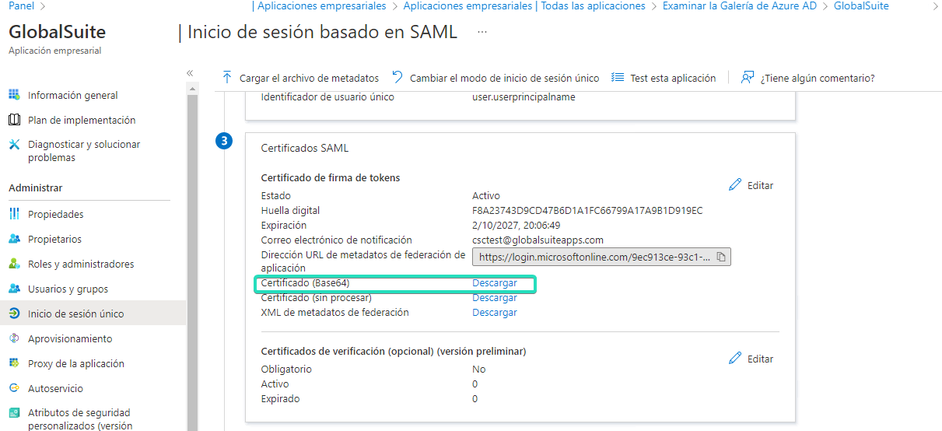
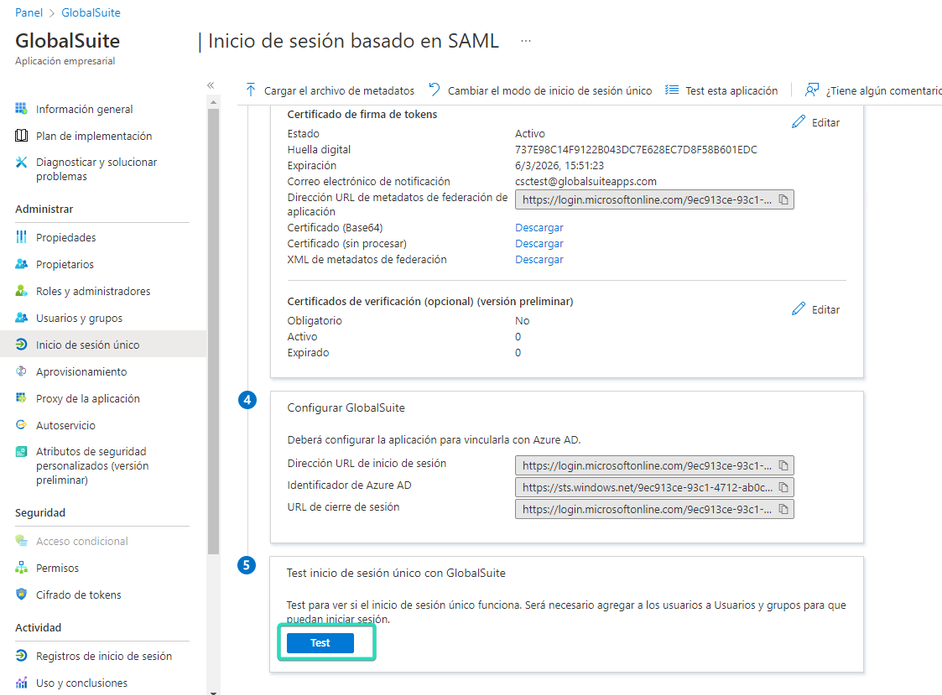
The certificate will be downloaded, encoded in base64, to be uploaded to the GlobalSuite® connection.
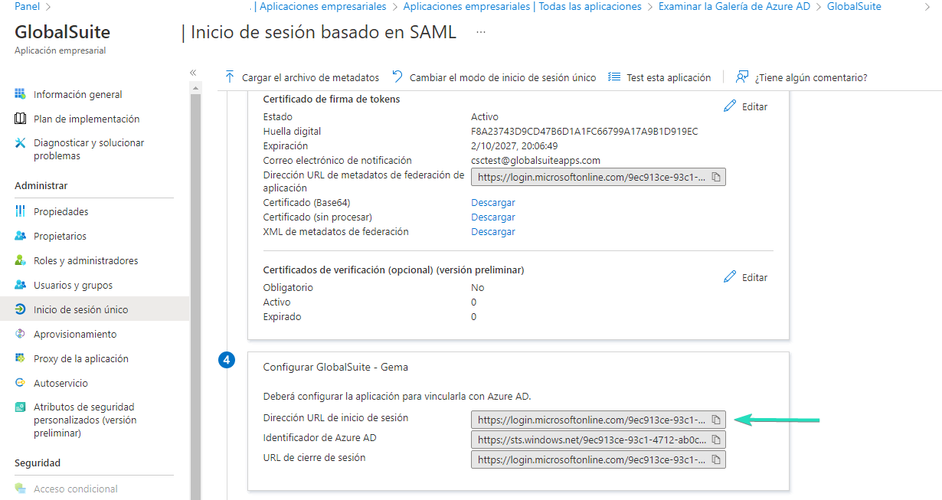
The SSO URL that must be requested to upload to GlobalSuite® is the following:
Next, you need to authorize the users who will have access to the application, from the “Users and Groups” option, and the "Add User or Group" button.
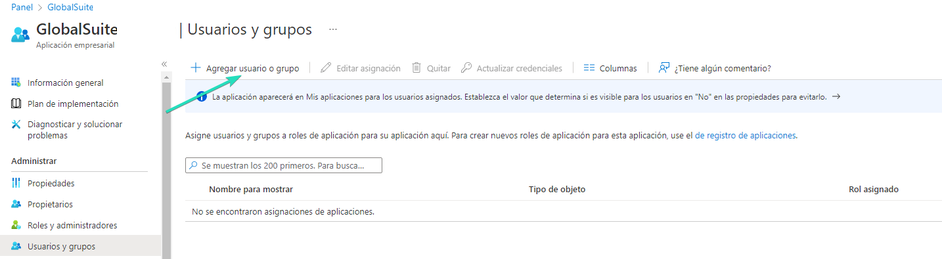
Once the authorized users and/or groups are configured, you can test access to the application, which can be accessed directly with the SP initiated mechanism URL.
This will take you to the portal, and the service terms acceptance for the user will be presented (mandatory on the first access). Once accepted, the user will have access to the tool according to the default configured role.
If the client uses the IdP initiated mechanism, the login URL provided can be configured in this option:
If you want to customize any of the default parameters mapped by Azure AD and sent to the application (GlobalSuite) to create and grant user access, it can be done from this section: