The purpose of this guide is to see which elements need to be configured or parameterized in GlobalSuite to synchronize an email account with any of the Ticketing options. It is very useful for sending user information and having it directly registered as tickets in the tool. The tickets that can be synchronized are all those available in the tool and will depend on the modules available.
To automatically register incoming emails as tickets in GlobalSuite®, you must first activate external connections, configure the IMAP account, and define field mapping. This synchronization can be applied to different ticketing modules, depending on the licenses available in your company.
They will be the following:
-
Tickets
-
Service Requests
-
Incidents and problems
-
Loss Events
-
Rights
-
Changes and deliveries
-
Announcements
-
Claims
-
Non-Conformities
-
Corrective and Preventive
To synchronize an email, any of the ticketing options is linked to an email account, and all emails received in that account will appear as a new record upon synchronization. To configure this option in a company, go to Settings and within the “Company Data” option, check that the External Connections module is activated. If it is not, you must contact CSC (Customer Support Center).
Configure the email connection (Step 1 of 3)
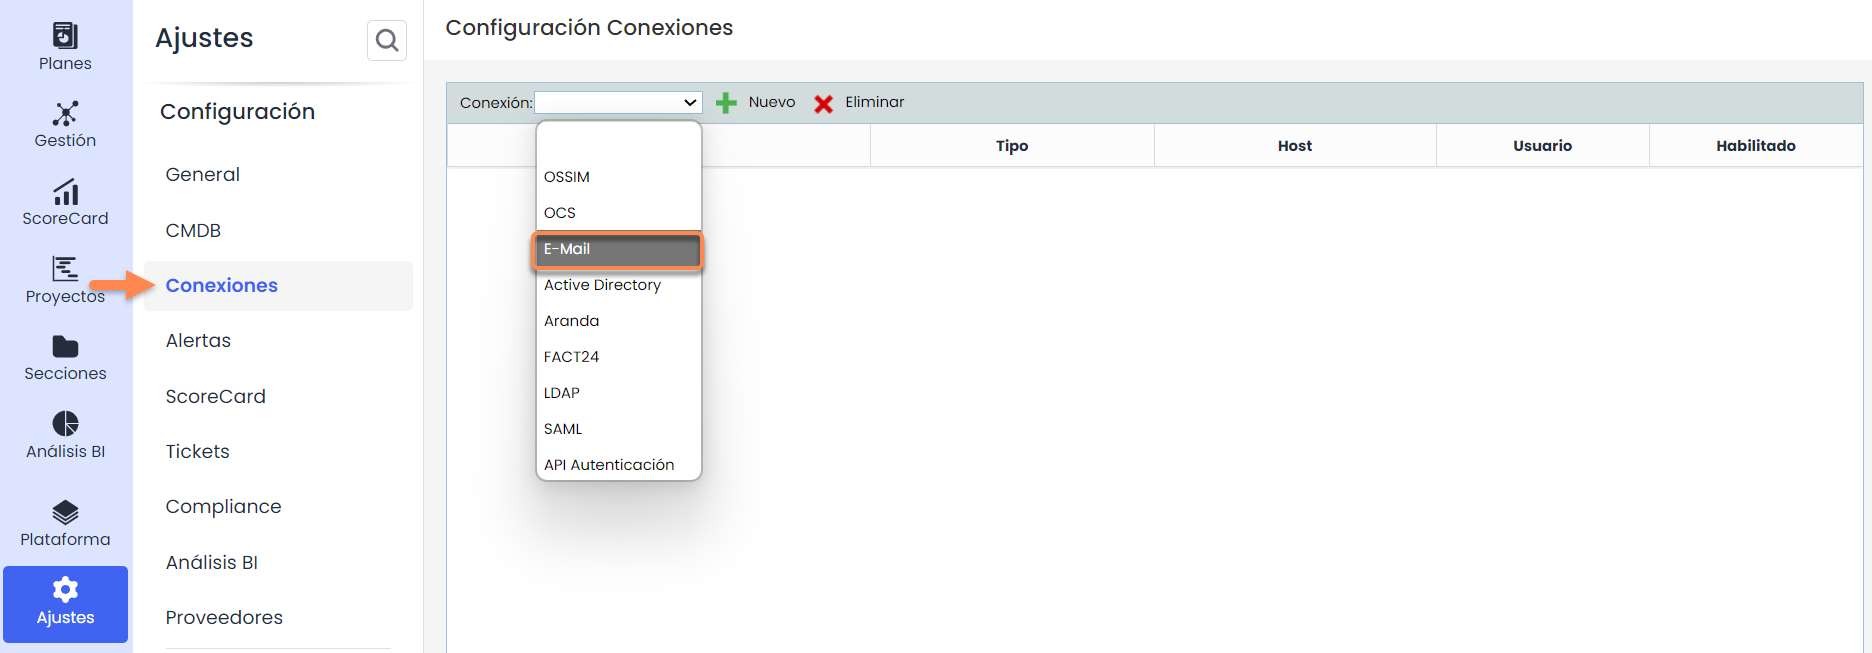
This license allows you to configure an email connection when accessing Settings > Connections . Among all the available connections, you must select Email.
In this case of an Email account, you must configure the New Connection by clicking the blue link to access its details.

The first thing to do once you access the details to configure is to activate the Enabled checkbox. Once the Enabled checkbox is activated to modify the Connection, you will be able to incorporate the necessary values for synchronization.

These values to be configured are the following:
-
Name: Name of the connection
-
User: email or email address to be synchronized, for example, if it is for Data Protection, it could be DPO@company.com or whatever is necessary.
-
Server Name / IP*: In this case, the Server will be imap.gmail.com
-
Port: 993
-
Mail Protocol: IMAP
Finally, in the “Connected with…” section, you must decide which Ticketing options you want this email synchronization to have.

Enable IMAP in the email account (Step 2 of 3)
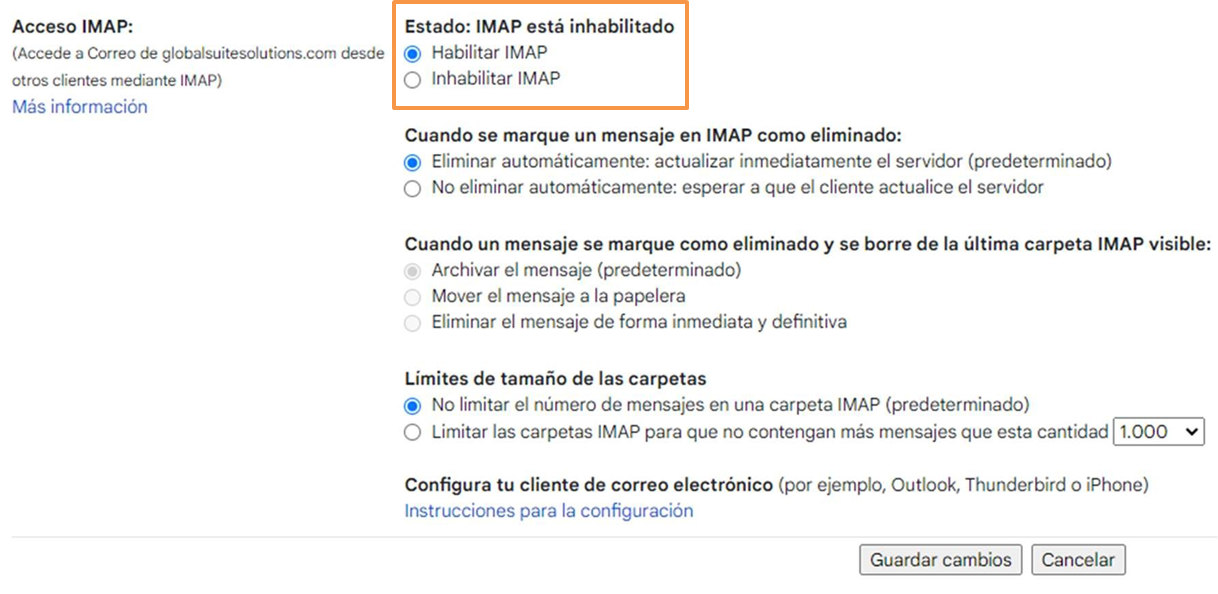
For IMAP or POP3, in the case of Gmail emails, IMAP must be used. To do this, go to the email account, within the Settings section, there is a tab called “Forwarding and POP/IMAP” that you need to access. After that, you must click “ Enable IMAP” and then click the Save button at the bottom. After saving, it will appear in green.
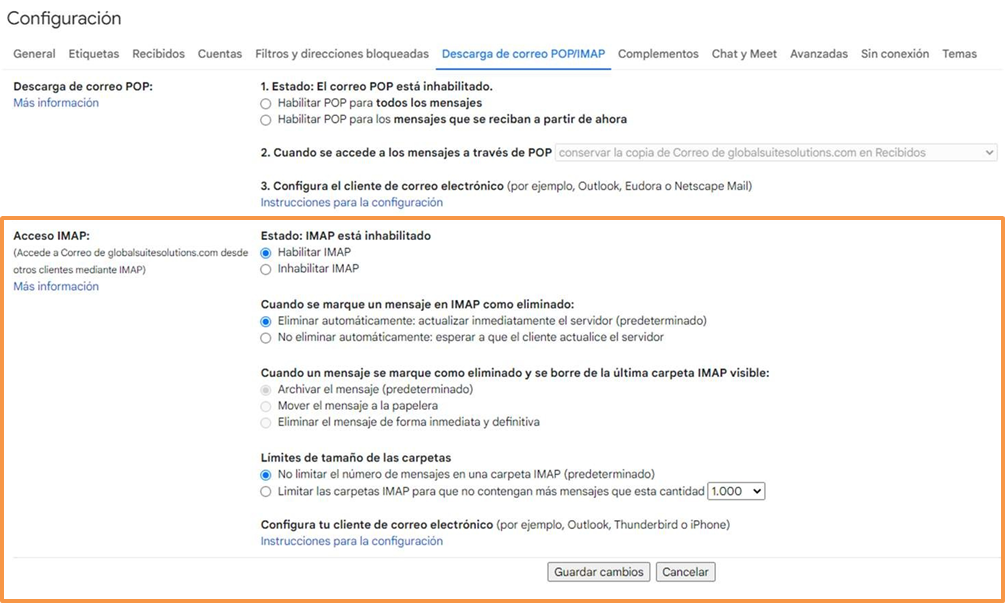
Some other options can be configured, such as these configuration elements if desired. The important thing is that IMAP is enabled to receive those emails or notifications.
Map fields and execute synchronization (Step 3 of 3)
The third step would be to specify in the ticket configuration marked in the Connection, which fields can be synchronized and to which fields they correspond within the ticket form.
This is done in the configuration within Settings > Tickets , where in the internal menu of the option, there is one called Email that is used to configure the synchronization fields with the email.
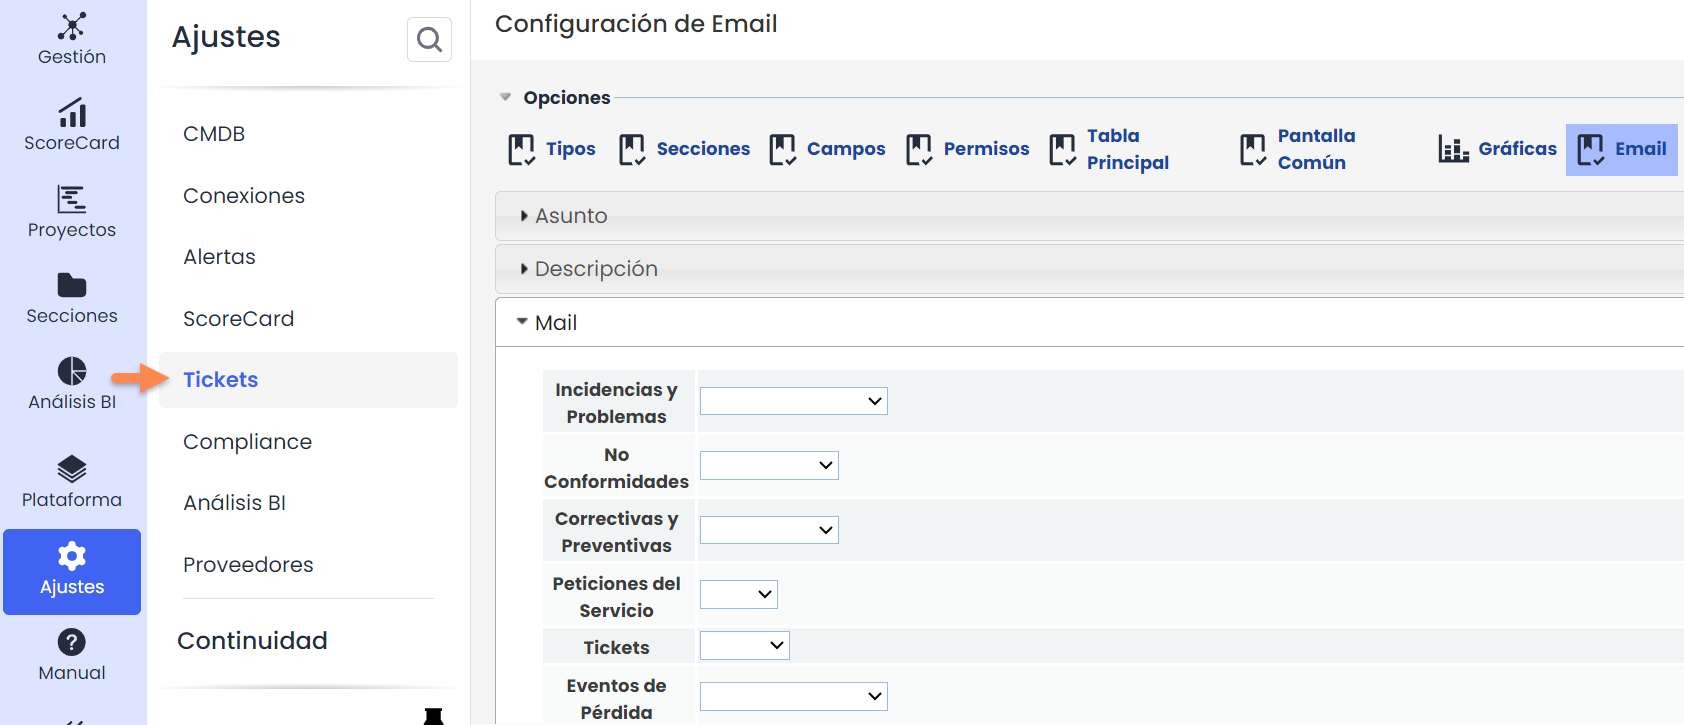
In the Email option, the following fields can be configured to ensure proper synchronization.
In each of the tickets you want, these 3 fields Subject, Description, and Mail can be parameterized by matching each of them with the fields already created for each ticket.
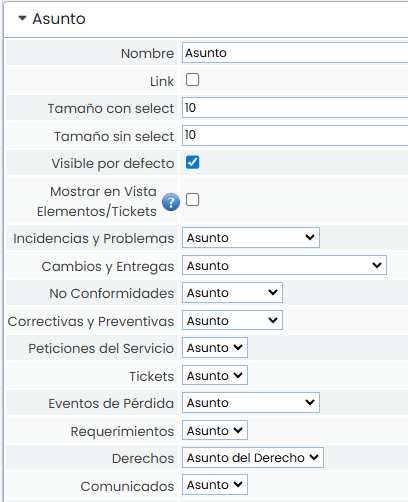
Subject, would be the subject of the email. In the screenshot, for all cases, for example, it has been named Right Name. However, you can select any type of INPUT field that exists in the created ticket if desired.
The second field within the 3 options that can be mapped is the Description field, which must be matched or mapped with its corresponding TXT Text type field.
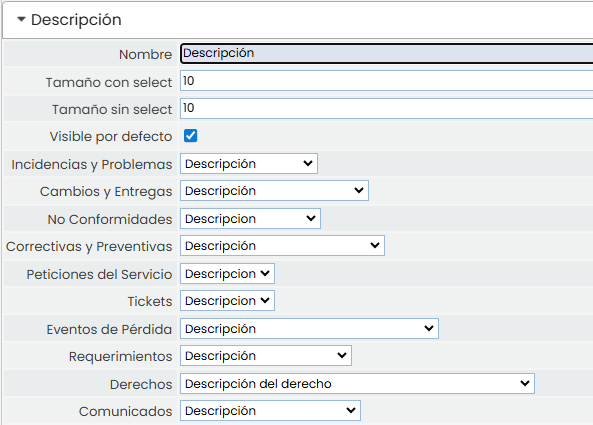
Description, which would be the actual content of the email. In the screenshot, for the Rights case , for example, it has been named Right Description. However, you could select any type of TEXT field that exists within the ticket.
The third field within the 3 options that can be mapped is the Email field, which must be matched or mapped with its corresponding Input Email type field.
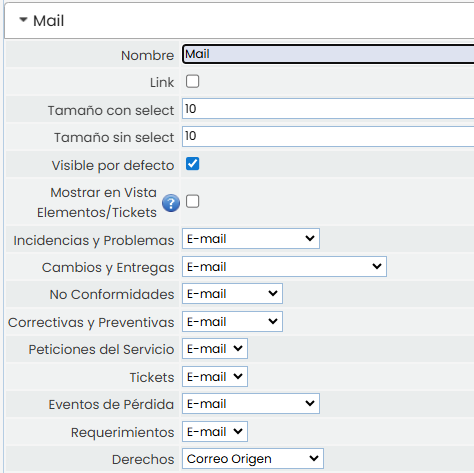
Mail, which means the origin email, i.e., the person sending the email. You must specify for which ticket or tickets you want to synchronize and which fields they are linked to. For example, if you want to synchronize in Rights, the Mail is mapped with the “Origin Email” field that the ticket has.
Synchronization
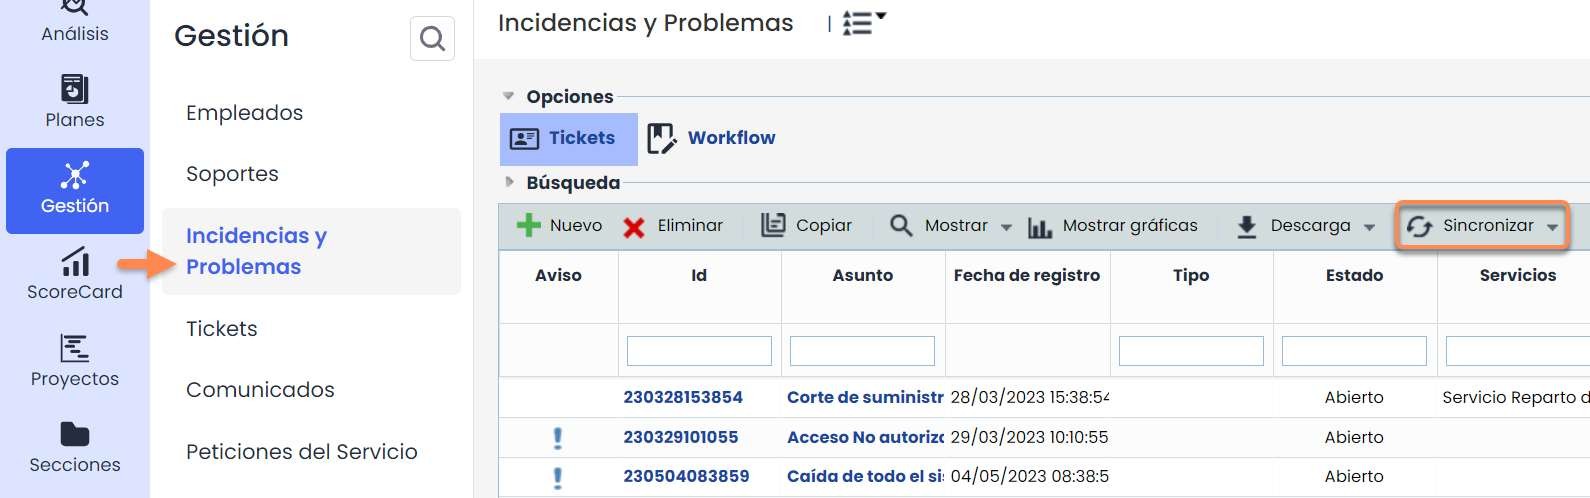
The Synchronize button will only be visible in the options enabled in the Settings > Connections (First step).
For this, only from the ticket that has been enabled will the Synchronize option appear as follows:
The tool will read the emails, so as configured, it will take the origin email, the email subject, and its text or description, and through the synchronize button, it will include them in the tool automatically.
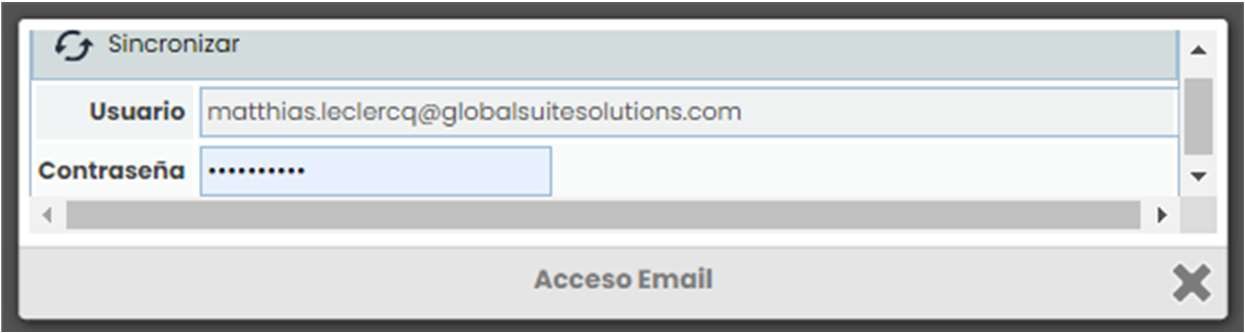
To do this, from the Management/Ticket option, you must go to the specific configured ticket, go to synchronize, and click the desired connection from those configured. In this case, it will be called GMAIL EMAIL Connection.

Once you access the connection, you will need to enter the Email password and click the Synchronize button to access its information. Once done, the email information will be loaded, and those emails will have been included as tickets.
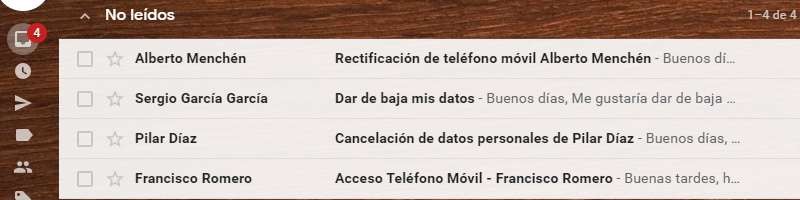
After this step, the Unread emails in the email will have been synchronized. The configured fields of Name, Subject, and Mail will have been loaded.

In some cases, for this last synchronization process to occur, an additional step is necessary. This is required for Gmail. It involves accessing this link to enable access for less secure apps, as Google sometimes does not allow email data retrieval: https://support.google.com/accounts/answer/6010255?p=lsa_blocked&hl=es&visit_id=637159142840464317-172962183&rd=1
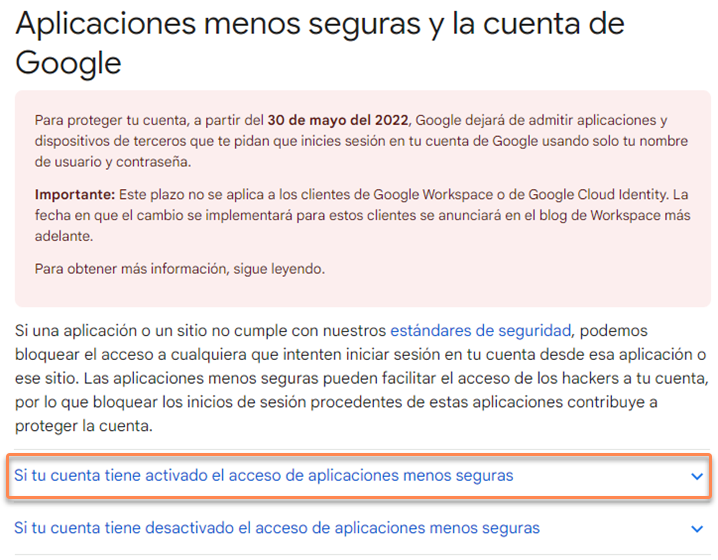
Within the option, you must click the link for “Access for less secure apps.”
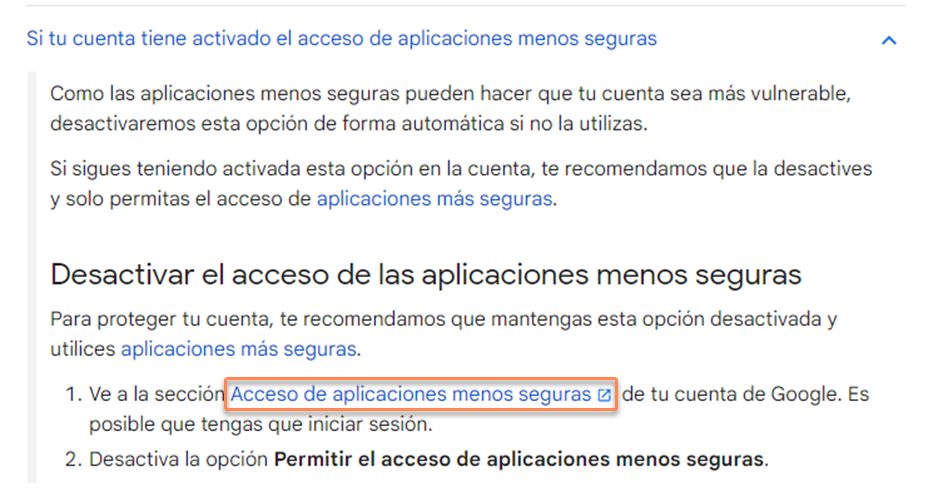
And once inside, you must Allow access for less secure apps: YES. After this activation, you should be able to synchronize the email in the tickets.
