In this article, we will address how to activate the workflow functionality for tickets, create states and sections, associate responsible parties, and define the flow between states to validate a complete workflow ready for use in the Ticketing options.
Ticketing Options with Workflow
GlobalSuite® allows the generation of workflows in its Ticketing options, so that each of these options can be managed through a workflow previously configured by the user.
The specific Ticketing options that allow creation and management through workflow are as follows:
-
Service Requests.
-
Incidents and Problems.
-
Changes and Deliveries.
-
Claims.
-
Non-Conformities.
The following pages will show the configuration possibilities offered by the Ticketing workflow functionality.
-
Corrective and Preventive Actions.
-
Requirements (Audit Management).
-
Security Breaches (Data Protection).
-
Rights (Data Protection).
-
Communications (Data Protection).
Phases for Configuring Ticket Workflows
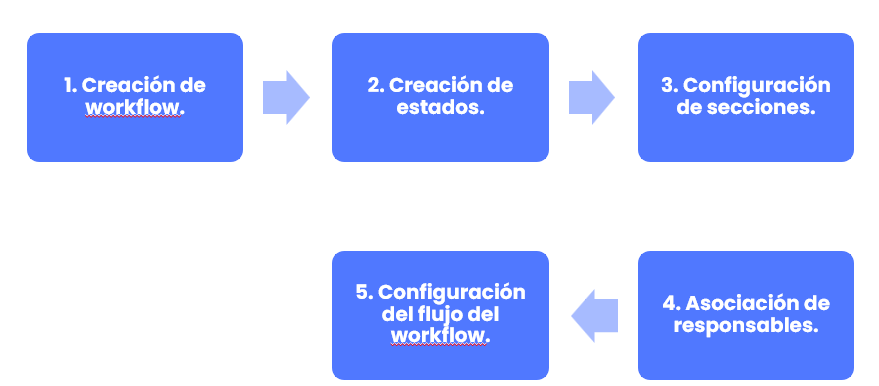
Step 1. Workflow Creation
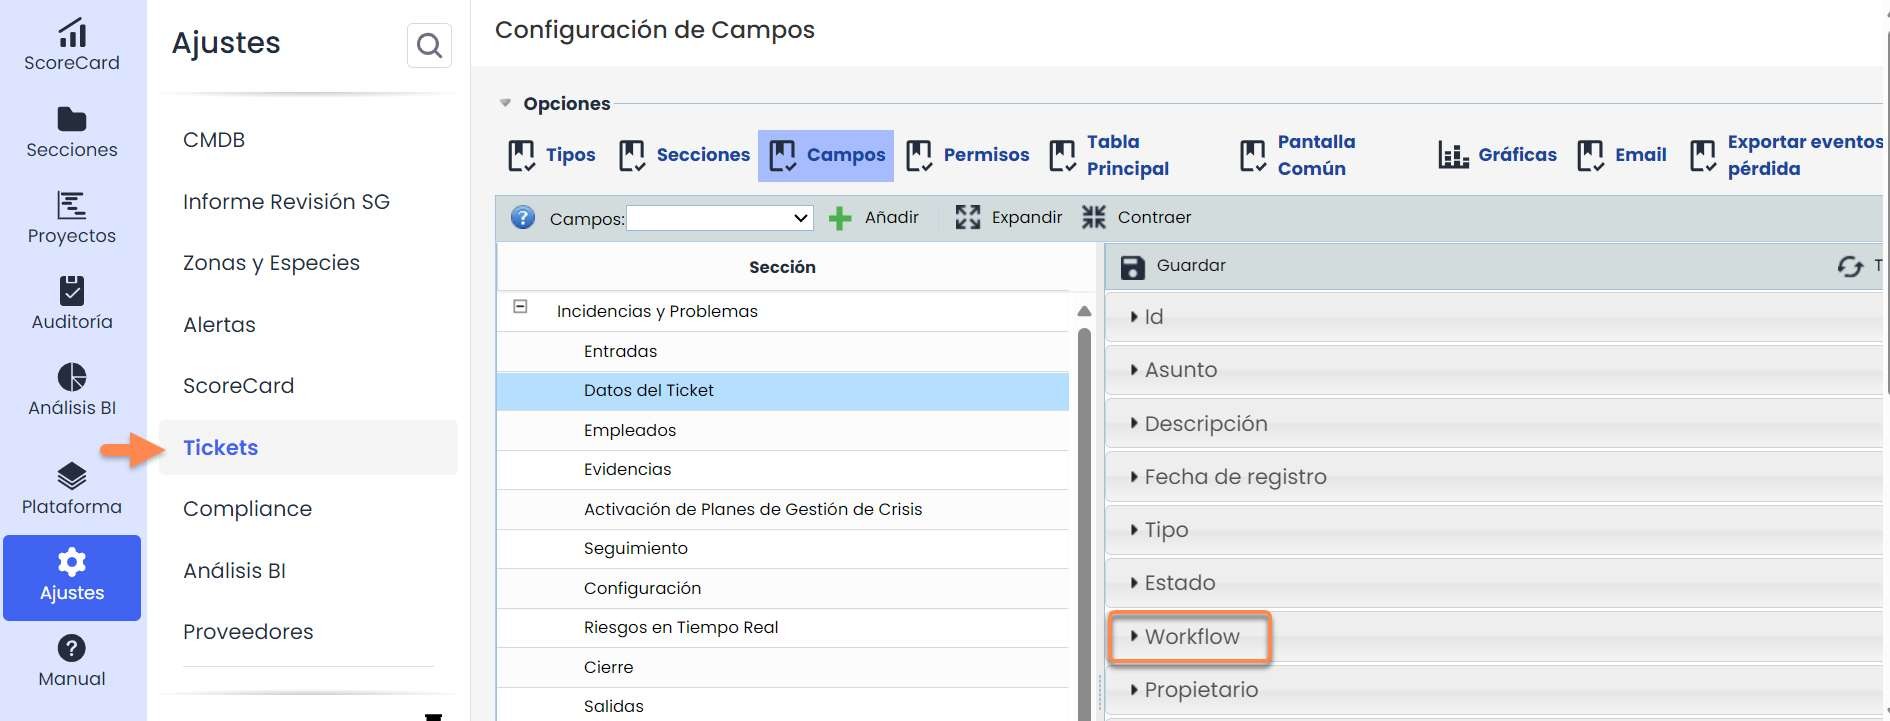
The first step to use this option is to activate the Ticket Workflow functionality in a company.
To do this, the Workflow field must be added to the type of Ticket where it is to be used. This is done in Settings, in the Ticket Configuration .
In the fields section, the sections of the ticket to be used are displayed, and in one of them, the Workflow field is added and saved.
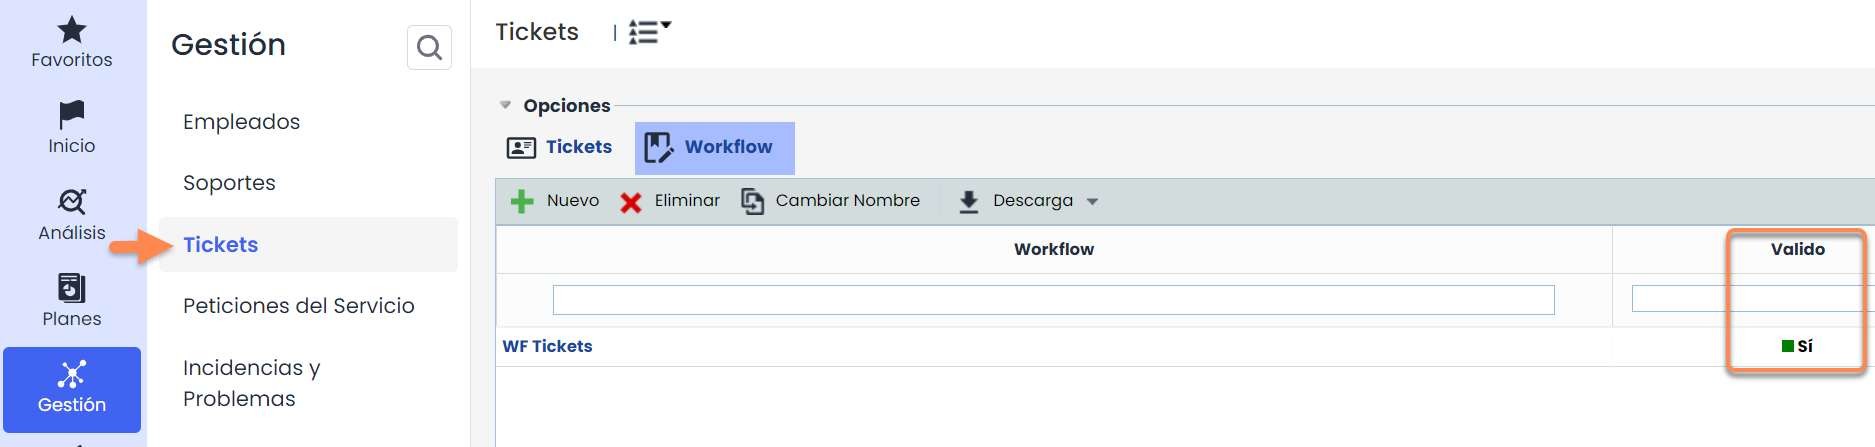
When accessing the workflow functionality, a list of existing workflows for that option appears. In the table, it can be observed whether the workflow is valid or not; a workflow is valid when all the states that compose it have assigned responsible parties and a valid state flow that allows reaching the final states.
Through the buttons “ New” and “ Delete”, workflows can be created and deleted from the table, and the “Rename” button allows assigning a name to the workflow. The assigned name appears in the ticket management form for identification.
Step 2. State Creation
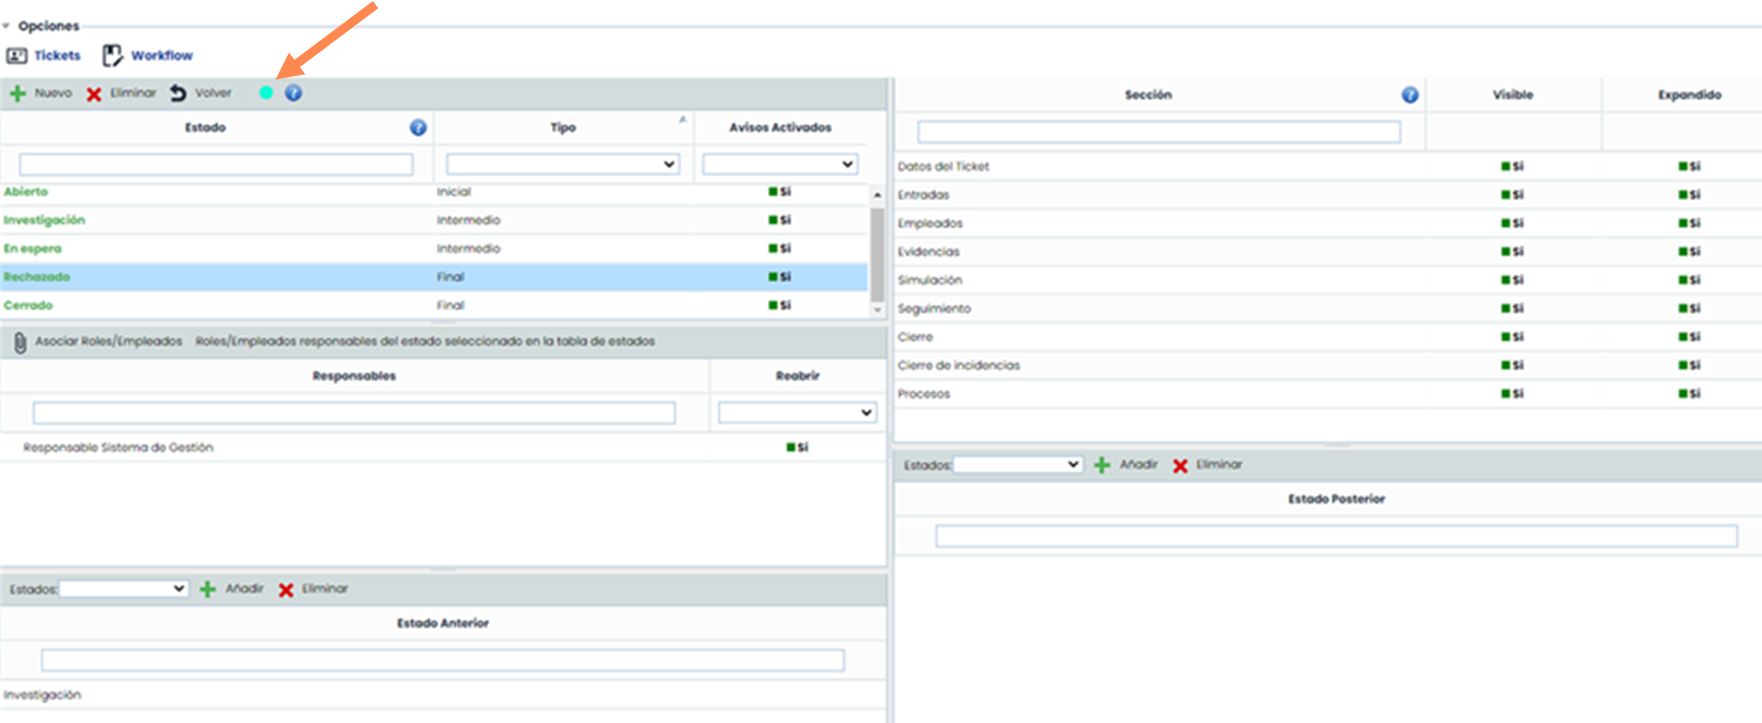
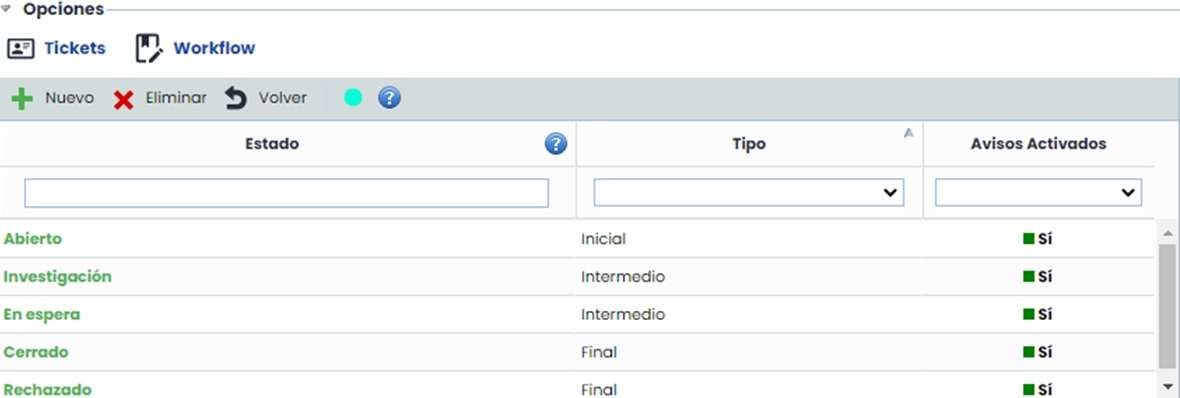
When accessing a workflow, a configuration form composed of several tables is displayed.
When generating a new workflow, it is created with a set of default states proposed by the tool. The default states are created unconfigured, so none are valid. When a state is not valid, it is marked in red. The conditions that must be met for a state to be considered valid are defined in the help icon of the states table.
New states can be created or deleted through the buttons “New” and “Delete”. The name of a state can be changed by double-clicking on one of them. Additionally, states must have a defined type, with three possibilities:
-
Initial. First state assigned to a ticket.
-
Intermediate. States through which a ticket passes. There can be several.
-
Final. Final state of a ticket. There can be several.
There is also the option to notify employees associated with the state by default or not. For this, there is a third column called “Notifications Enabled,” where “Yes” or “No” must be selected depending on whether or not you want to notify those employees.
Step 3. Section Configuration
The upper right table is used for configuring the sections of the ticket form. Specific section configuration is allowed for each state of the workflow, so it is necessary to select a state beforehand.
When selecting a state, all the sections of the ticket form appear in the table on the right. By default, all sections are visible, editable, and presented expanded for the selected state.
-
To hide a section, you must click on the value “Yes” so that it changes to “No” in the “ Visible” column.
-
To ensure a section is not displayed expanded, you must click on the value “Yes” so that it changes to “No” in the “ Expanded” column.
-
To configure a section as not editable, you must click on the value “No” so that it changes to “Yes” in the “ Read Only” column.

Step 4. Association of Responsible Parties
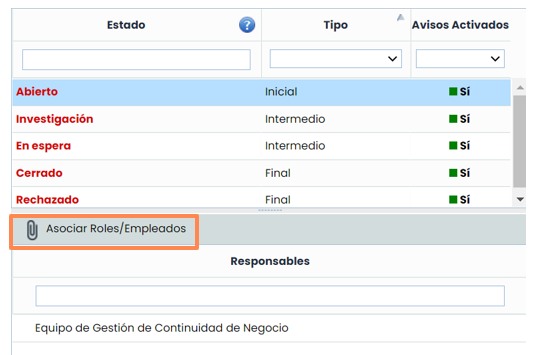
Each of the workflow states must have at least one responsible party assigned. The associated responsible parties for a state can be used for their assignment to the ticket when it is in that state.
-
To assign responsible parties to a state, you must first select the desired state. After this, the roles/employees assigned to the state appear in the responsible parties table.
-
Through the button “ Associate Roles/Employees,” responsible parties can be assigned to the state.
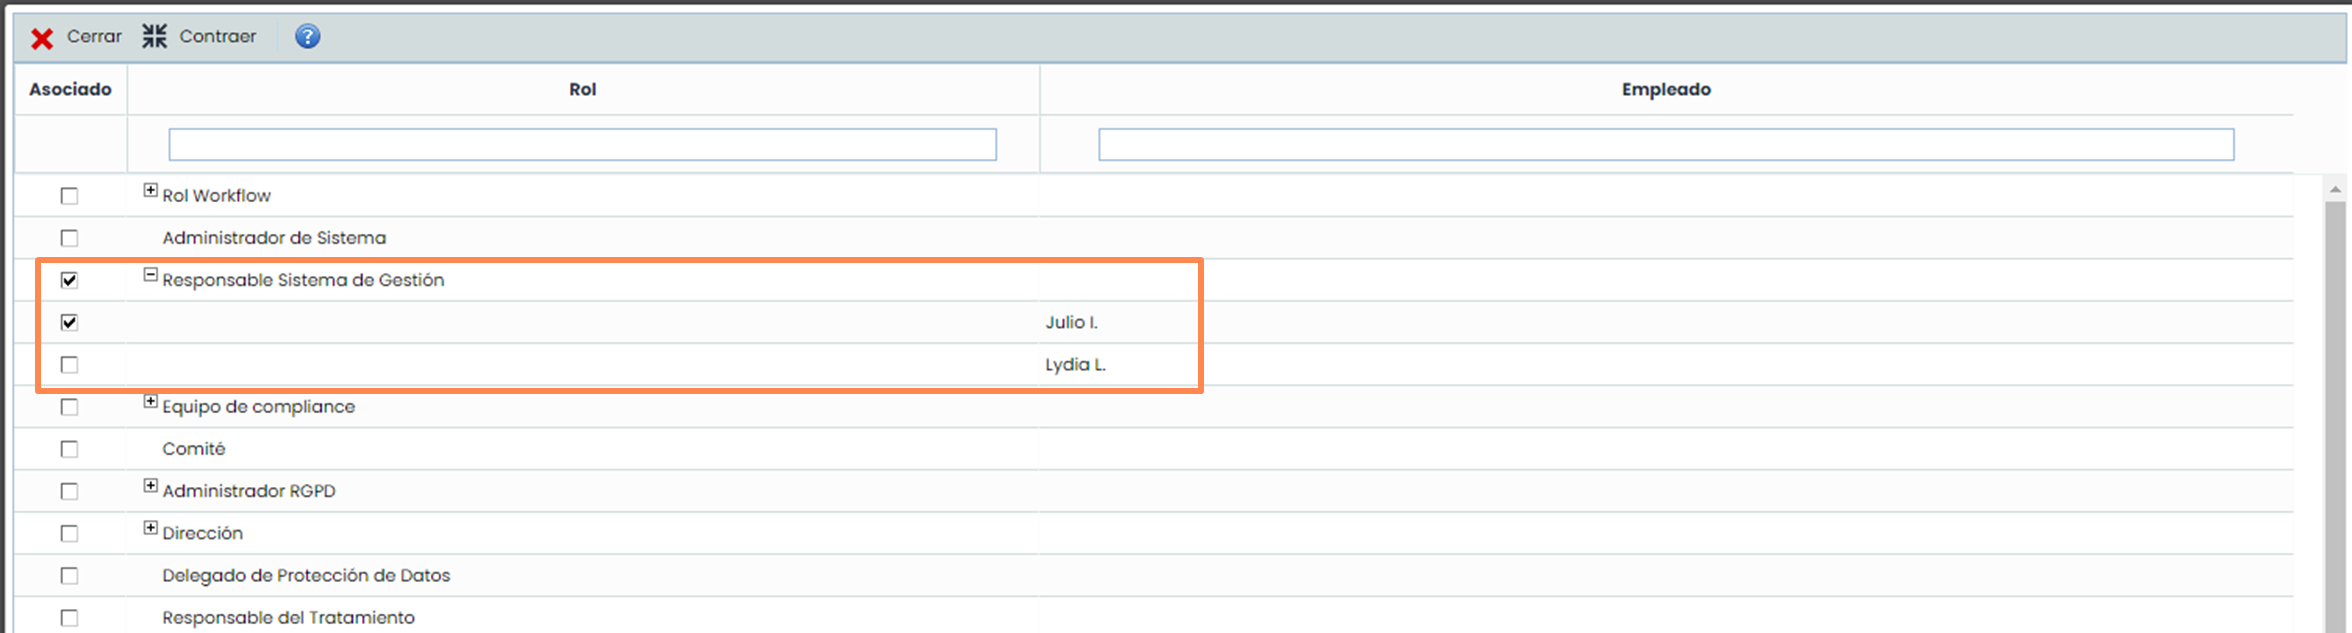
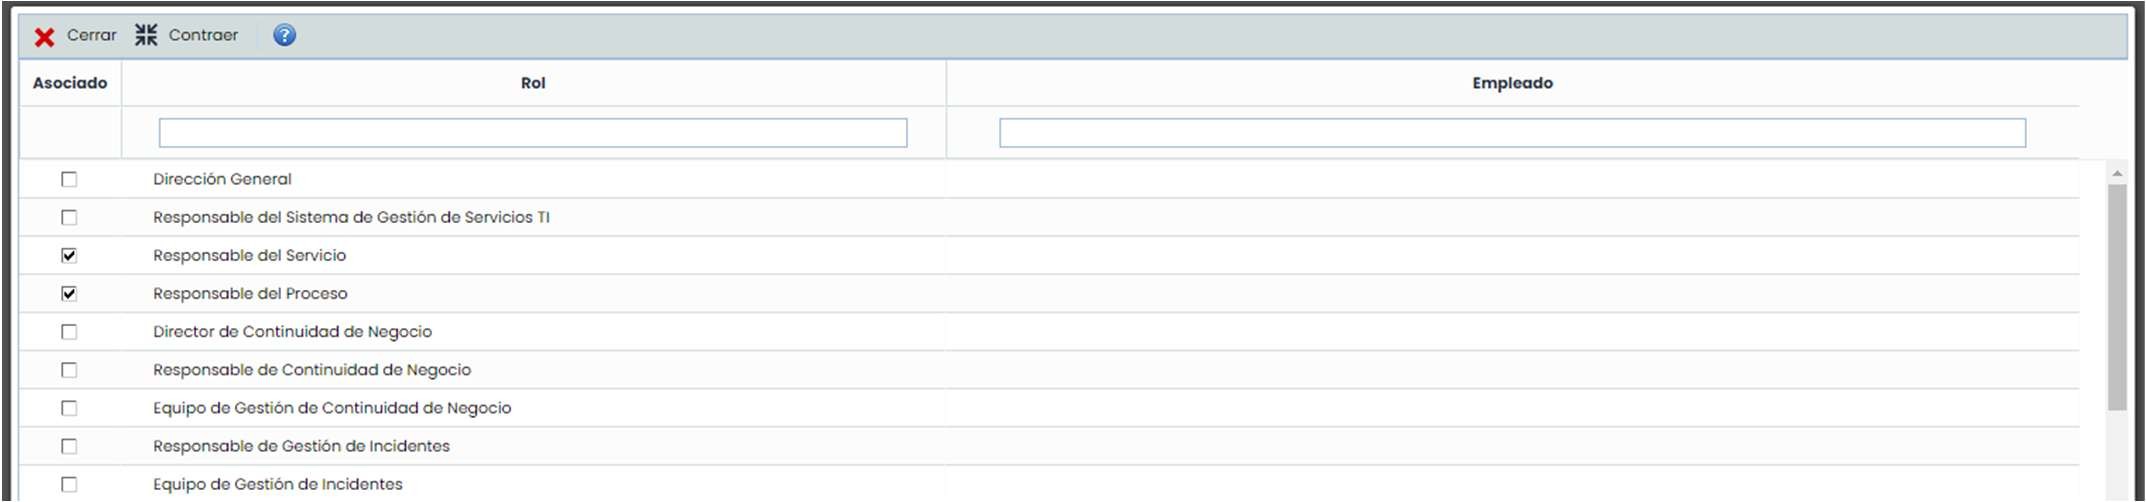
When clicking the “Associate Roles/Employees” button, a pop-up window appears that allows the assignment of responsible parties to the state. The assignment is made through the organization's list of roles and employees, so it is necessary for the responsible parties to be assigned to at least one role in the organization.
The assignment of both an employee and a complete role is allowed. In the latter case, all employees of the role can be assigned to the ticket state. The employees that appear are those associated with a user in the tool.
Companies with entities can configure an additional aspect in the workflows concerning the association of responsible parties from higher-level companies. This allows associating a ticket with a role belonging to a higher-level entity than the one where the ticket is registered.
In this type of company, a new table appears in the workflow configuration window. This table allows selecting the roles of the higher-level entity that are responsible for a specific state. The functionality described in the previous steps is the same for this table, except that in the role assignment window, only roles can be selected, and specific employees cannot be selected.
Step 5. Workflow Flow Configuration
The final step to configure a ticket workflow is the creation of its flow. For this, there are two tables at the bottom that allow indicating, for each workflow state, the previous and subsequent states. It is necessary to select a workflow state in the table located at the top left.

-
Previous State: Given a state selected in the states table, it allows selecting those ticket states that are prior to the selected state.
-
In the image: it is only possible to reach the state being configured from the “Open” state.
-
Subsequent State: Given a state selected in the states table, it allows selecting those ticket states that are subsequent to the selected state.
-
In the image: the state being configured can only transition to the “On Hold” and “Resolved” states.
Final Result
After completing the previous steps for each of the states in a workflow, a valid GlobalSuite® workflow is achieved, allowing its use in the Ticketing option where it has been configured.
The workflow configuration window will display a green dot at the top, indicating that all states are correctly configured. Whenever a state is incorrect, the dot will be red, and the workflow will not be considered valid.