In this article, we address how to create a ticket, assign it a workflow, associate responsible parties by status, and progress, close, or reopen it according to the flow definition; applicable to Service Requests, Incidents and Problems, Changes and Deliveries, Claims, and Non-Conformities.
Ticket Management with Workflow
Assigning a workflow to a ticket.
Ticketing Options with Workflow
GlobalSuite® has a Ticketing functionality composed of a set of options located in the “ Management” menu. These options allow managing different types of tickets based on their typology, but they all have one thing in common: they allow their management through workflow.
The specific Ticketing options that allow creation and management through workflow are as follows:
-
Service Requests.
-
Incidents and Problems.
-
Changes and Deliveries.
-
Claims.
-
Non-Conformities.
-
Corrective and Preventive Actions.
-
Requirements (Audit Management).
-
Security Breaches (Data Protection).
-
Rights (Data Protection).
-
Communications (Data Protection).
Phases for Ticket Management through Workflow
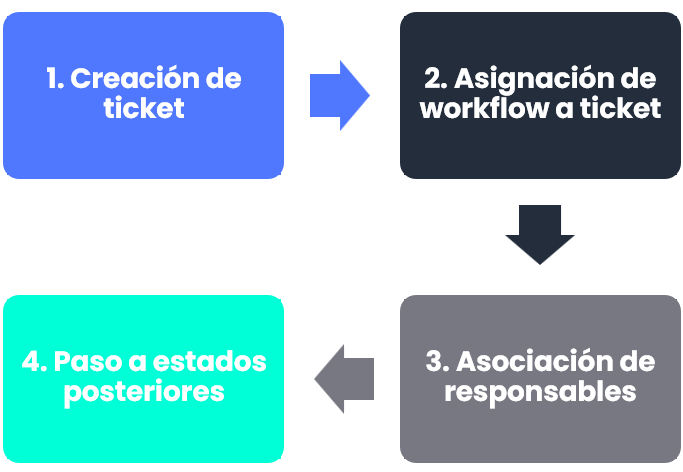
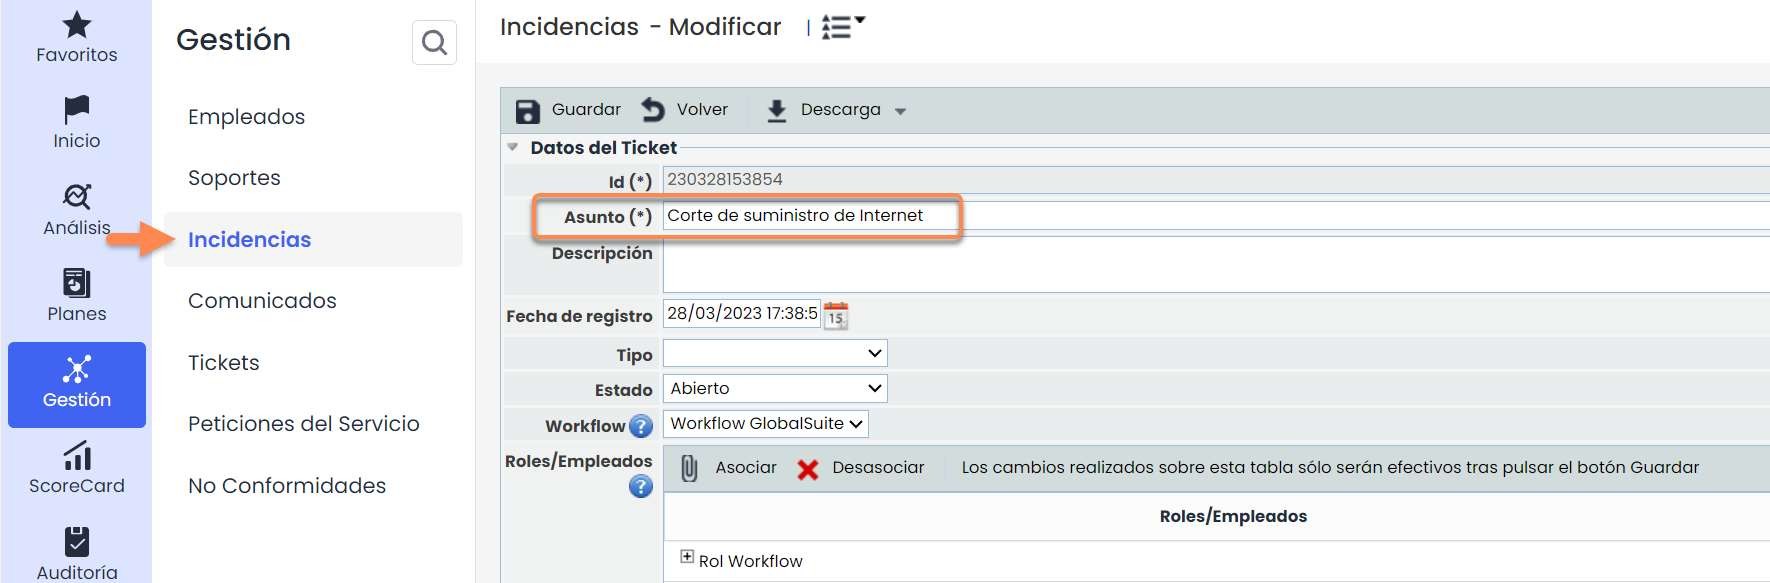
Step 1 - Ticket Creation
In any of the Ticketing options where a valid workflow exists , it is possible to create a ticket by assigning one of the designed workflows. To do this, click the new button and enter the form.
See Guide: Workflow Ticket Configuration
When creating a ticket, the first step is to indicate a subject and a description. For this example, a ticket has been created as shown in the image below.
Step 2 - Assigning a Workflow to a Ticket
The next step involves assigning a workflow to the ticket. In the “ Workflow” field, all valid available workflows are displayed. By selecting one of them, the “Roles/Employees” table shows the responsible parties assigned to the first state of the workflow.
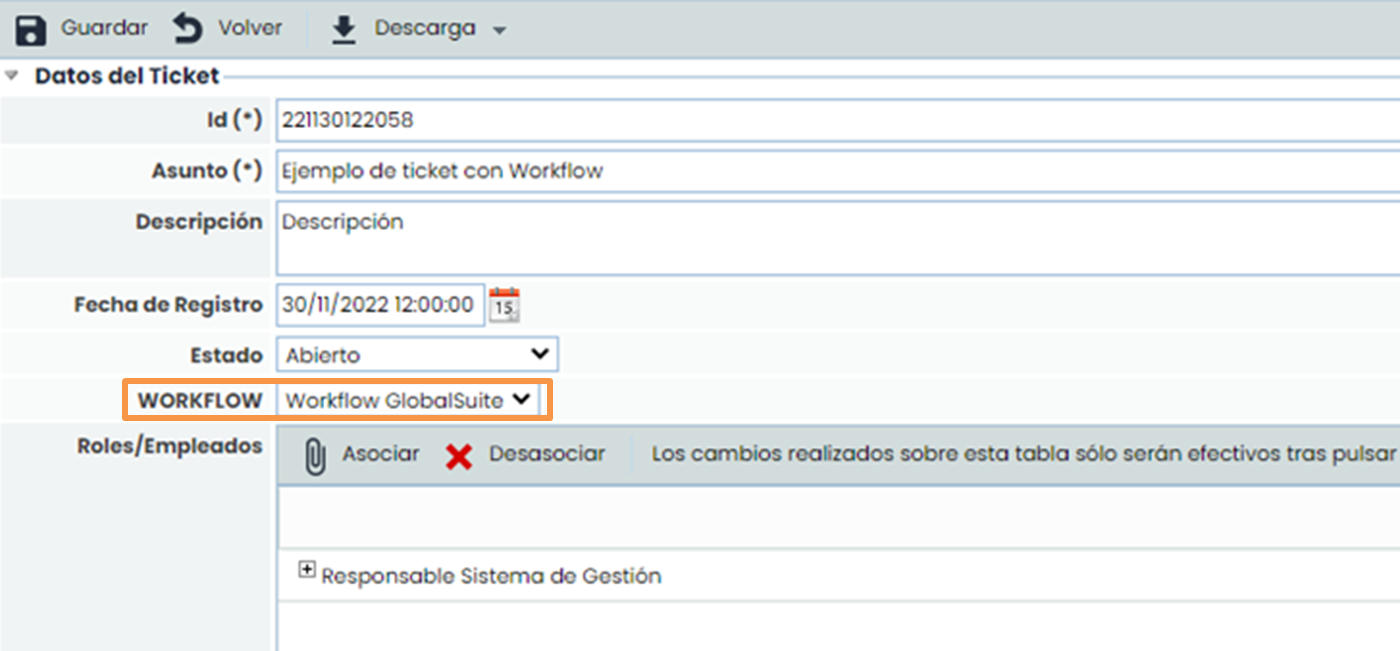
Step 3 - Associating Responsible Parties
In the “Roles/Employees” table, the responsible parties for the selected workflow state appear, in this case, “ Open”. If you want to associate more responsible parties than those configured by default for the state, you can use the “ Associate” button. Conversely, if you want to remove any of the responsible parties, you can use the “ Disassociate” button.
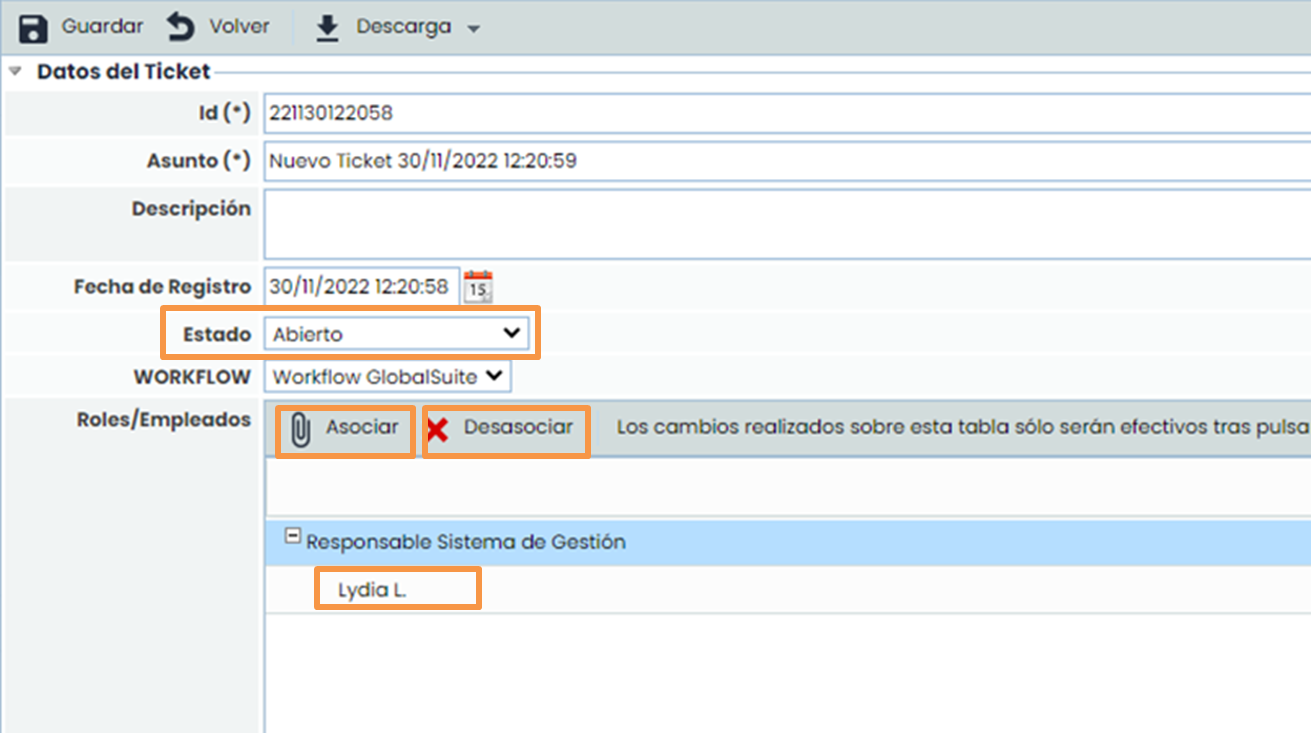
When saving the ticket with the above information, the assigned responsible parties receive an automatic notification via email. If you want any responsible party not to receive the automatic notification, you must indicate it in the “ Roles/Employees” table by clicking on the “ No” field in the “ Notify” column.
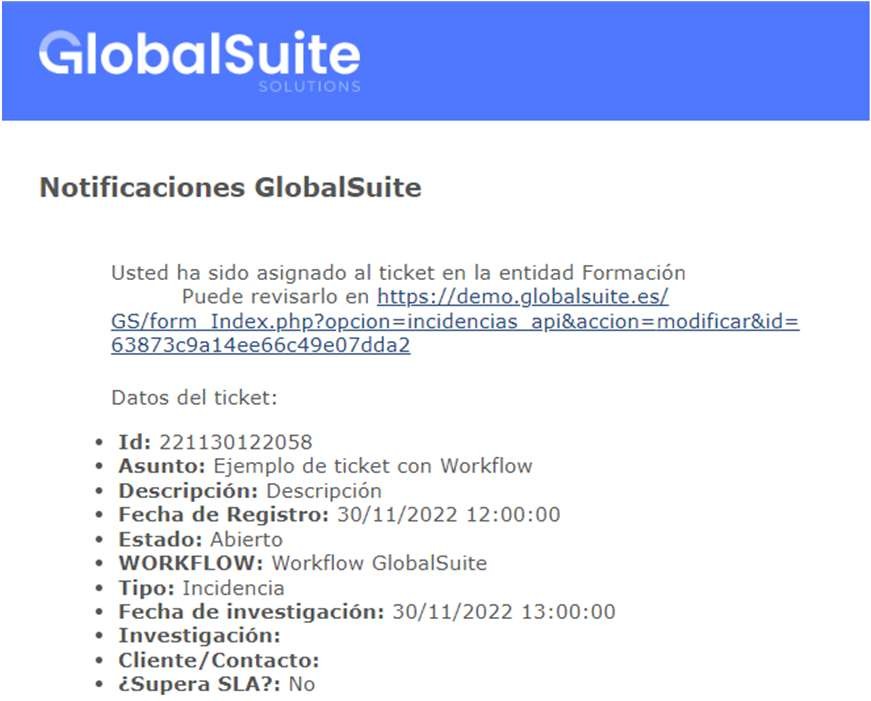
For this example, the received notification is as follows:
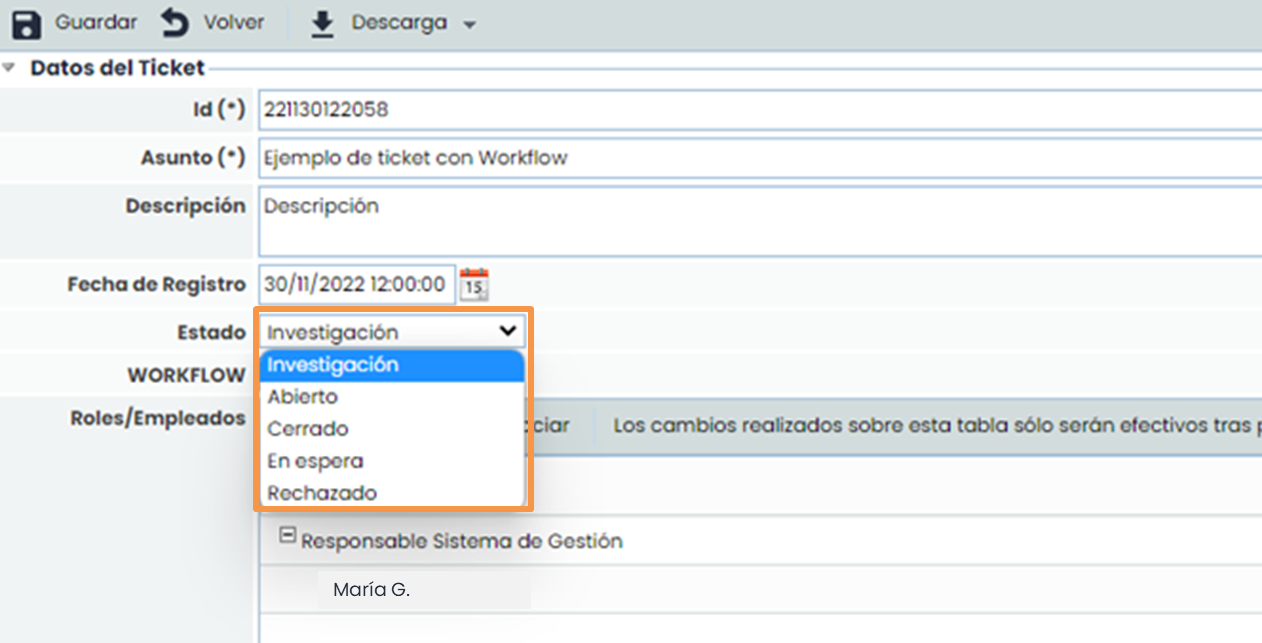
Step 4 - Changing the Ticket Status
A ticket can progress through the states of a workflow using the “ Status” field. By clicking on the dropdown list, the states that can be assigned to the ticket appear, depending on the current state of the ticket.
When changing the status of a ticket, the roles/employees assigned are updated with the specific responsible parties for the new state. You can use the “ Associate” button to associate more responsible parties. Conversely, if you want to remove any of the responsible parties, you can use the “ Disassociate” button. When saving the ticket with the changes made, the new responsible parties are notified via email of the ticket assignment.
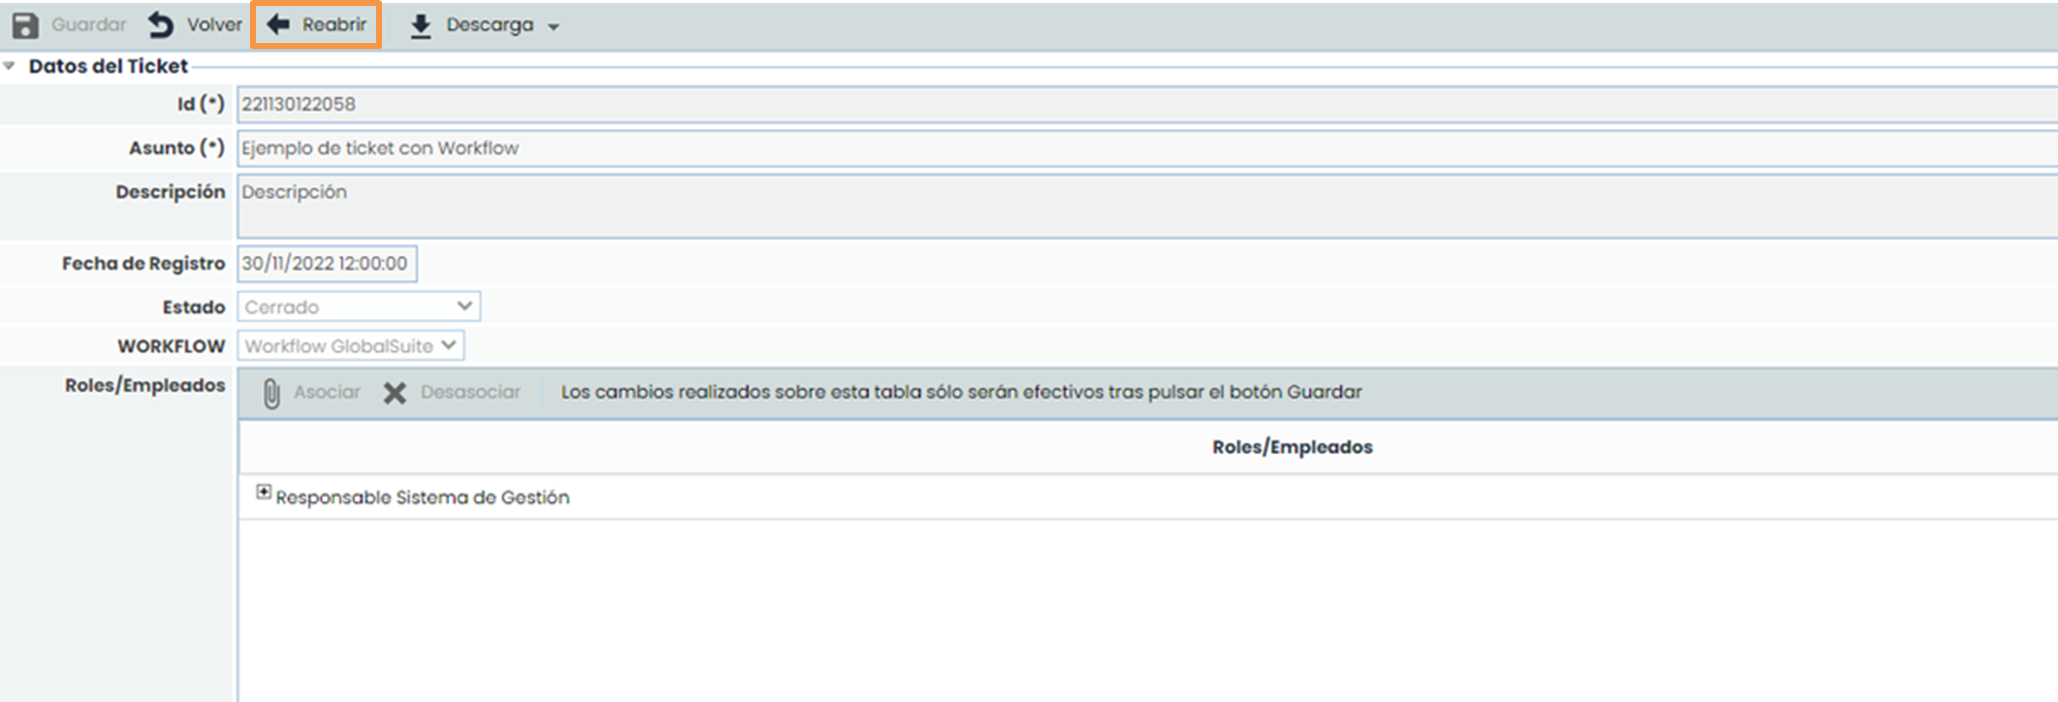
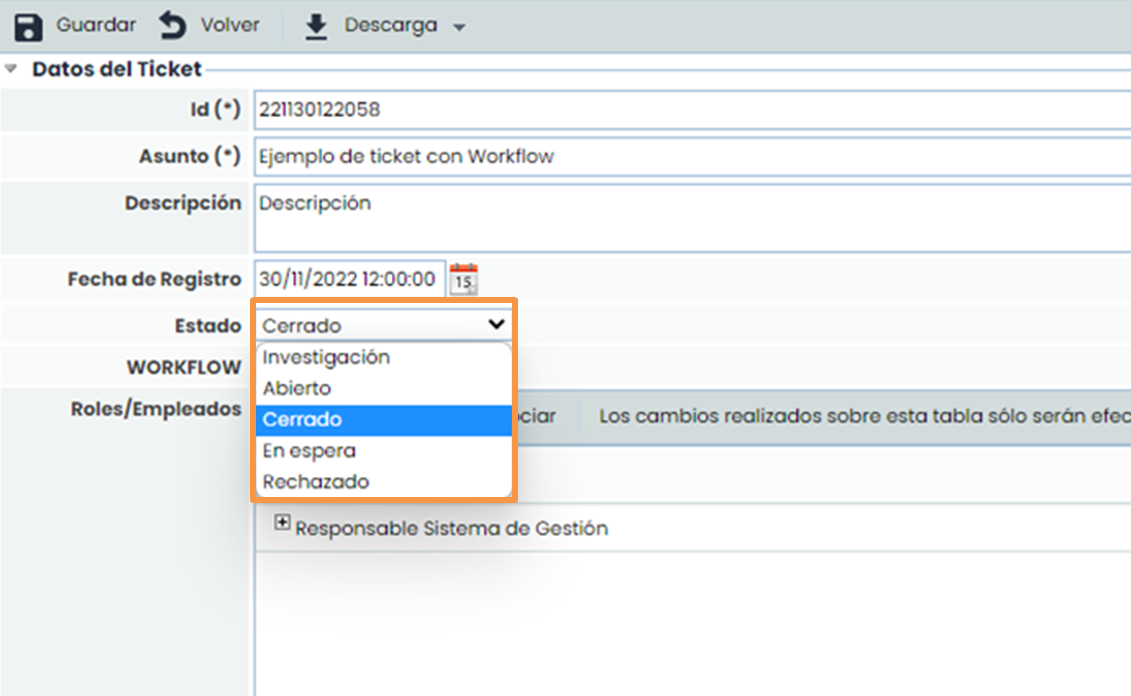
When a ticket reaches one of the final states defined in the workflow, the ticket is automatically closed.
For this example, a state named “ Closed” has been defined, which is of the “Final” type in the workflow. This causes the ticket to automatically close upon reaching this state, all its fields are disabled, and it can no longer be modified.
However, a closed ticket can be reopened by clicking the “Reopen” button located at the top of the ticket.