NOTE: This option is available for Global Administrator and Administrator users.
Questions
NOTE: This functionality is offered as an additional service.
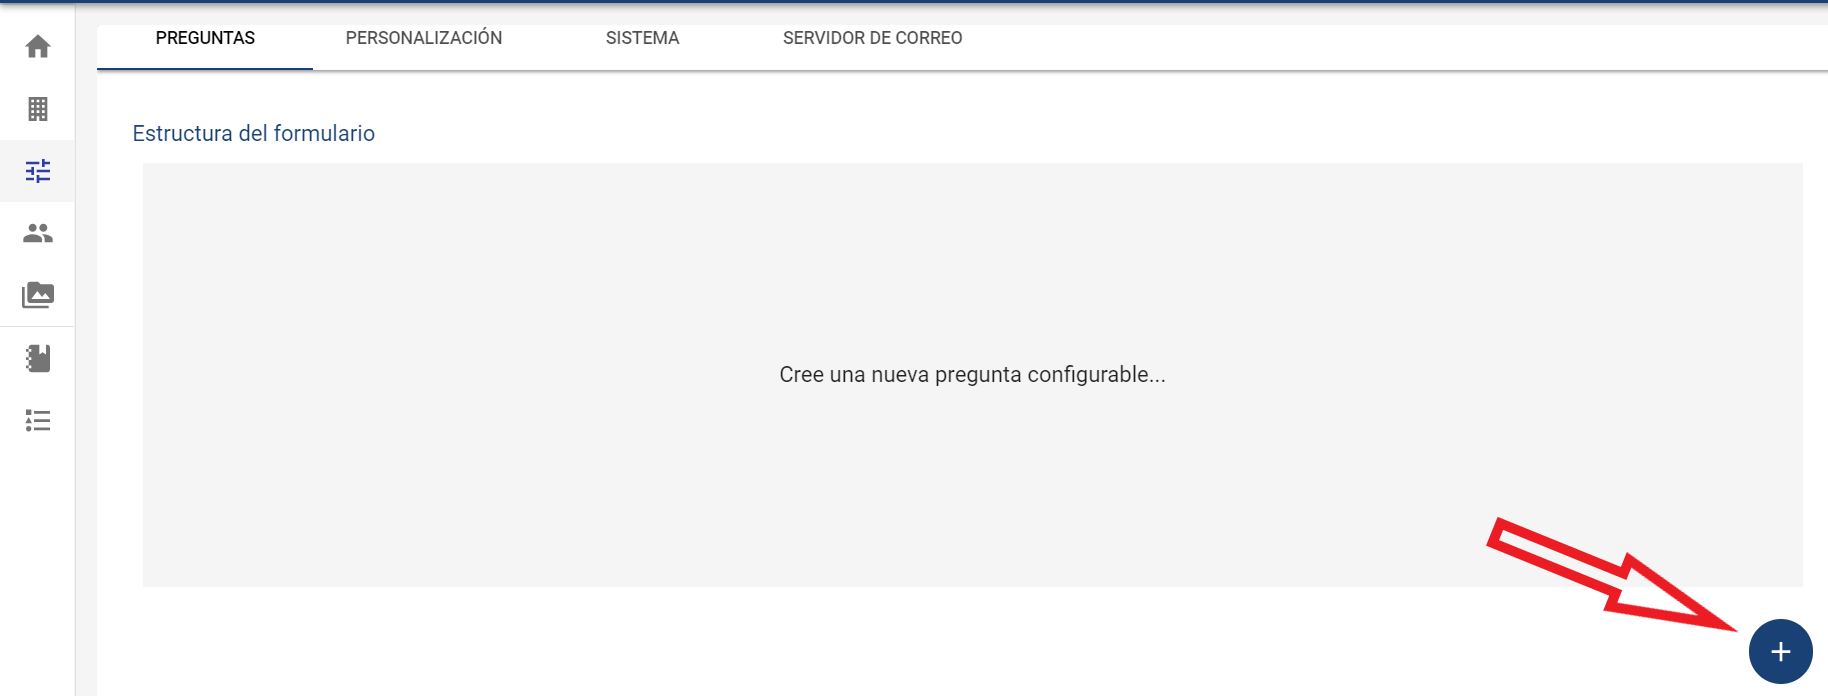
This option allows us to create a communication form from scratch, so its structure will follow a row-by-column pattern as desired. If a type of form is defined in a company, all subsidiary companies created will by default have that type of pre-configured form, which can be modified without affecting the other companies.
We have a button at the bottom to add a new question.
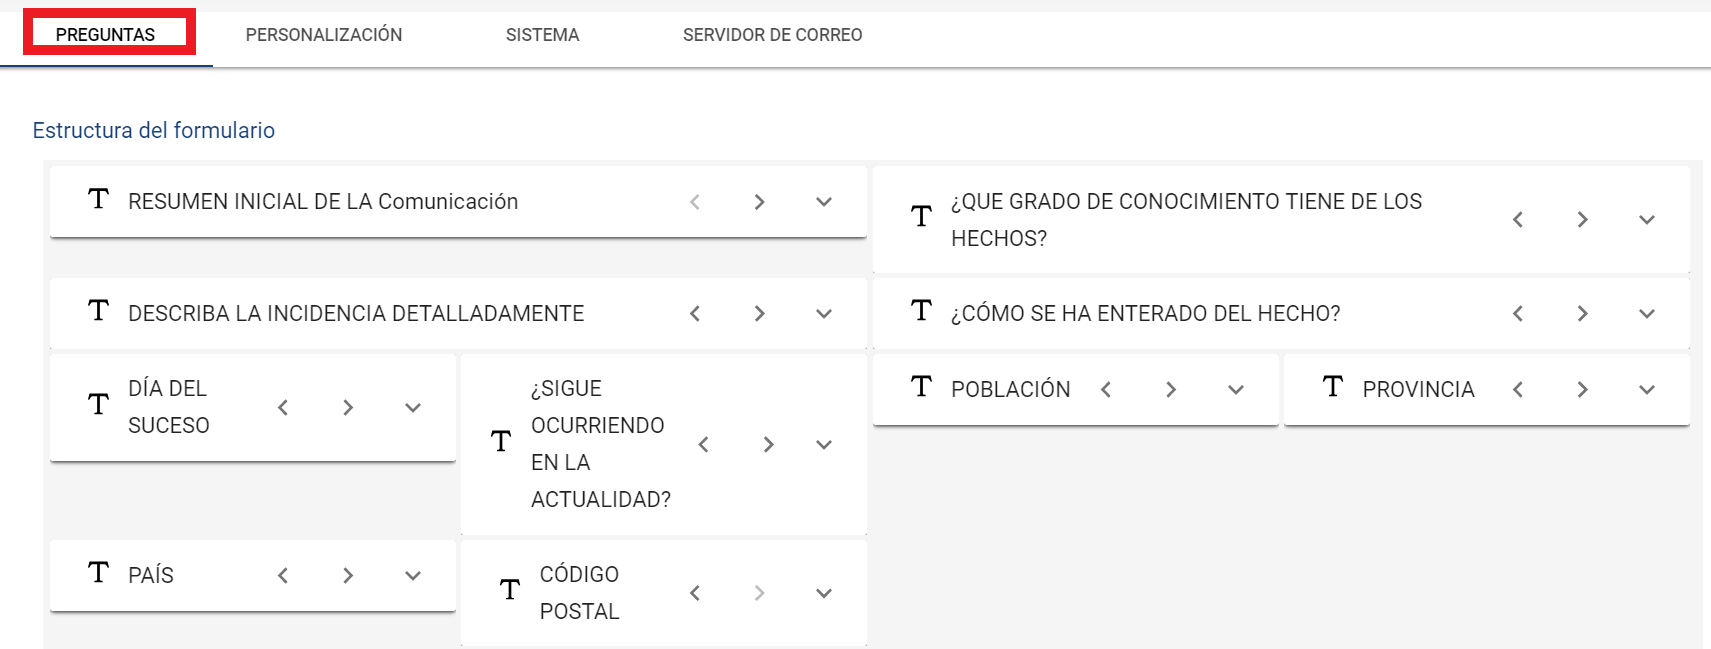
Form Structure
Allows the communication form to be parameterized, enabling us to add, edit, and delete the questions we want within the types explained below. Additionally, we can determine the location of each of these questions. For each question to be configured, the following information must be completed:
-
Type, which can be a field of type:
-
Textual → Allows adding text to complete the question.
-
Selector → Allows providing different options to answer the question.
-
Verification → Gives us two options to mark Yes or No.
-
Date → Allows marking a date as the answer to the question.
-
-
Question Language → To define the form questions in the different possible languages.
-
Question to be asked, is a mandatory field → The specific question must be detailed.
-
Number of Options (only in the case of Selector) → Allows defining the possible options to answer a Selector-type question.
-
Size → Allows defining the size of the question within the form, with the following options:
-
S
-
M
-
L
-
XL
-

It must be completed to define the form/questionnaire by clicking the button at the bottom right., then the tool allows moving them to configure their location, size, and other options if necessary. This way, creating, editing, or deleting questions is very intuitive.
Additionally, there are two Check options:
-
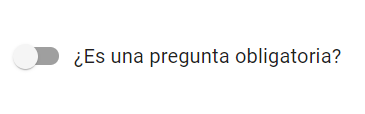
Is it a mandatory question?
-
Allows defining whether it is mandatory to complete the question to send the communication.
-
-
Is the question visible in the communication?
-
Allows defining whether the question will be displayed in the form or is a question that is not approved and is temporarily disabled.
-
-
Is the question visible in the communication list?
-
Allows configuring whether the question will be visible in the main communication list, enabling searches or filters on it, or downloading its information in a CSV list.
-

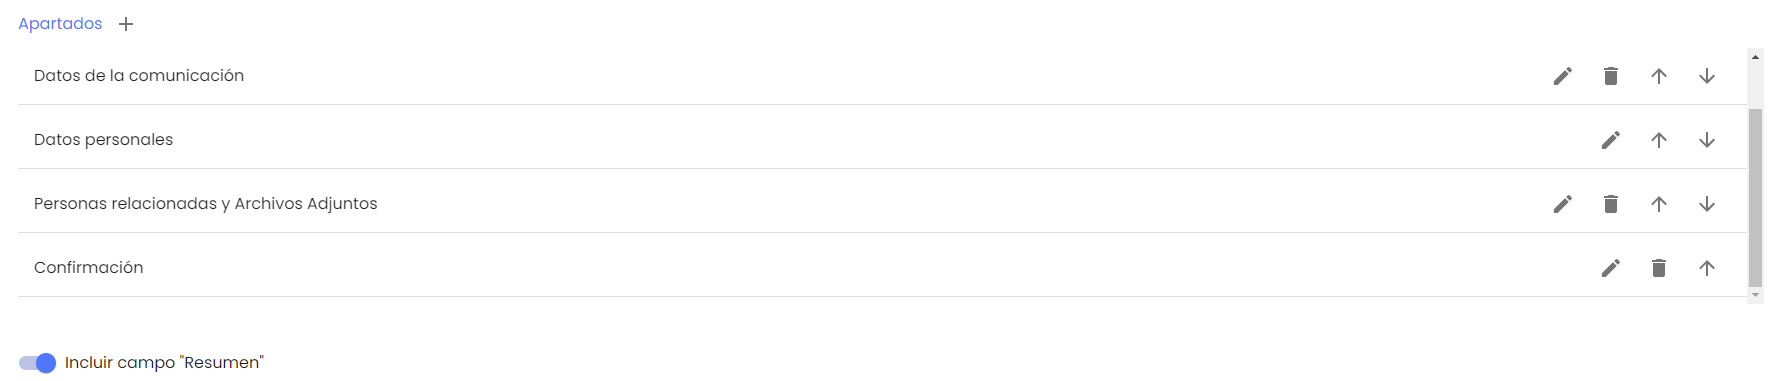
Sections
Allows configuring which sections are defined in the complaint form and what will be displayed in each. This section allows adding, editing, sorting, and deleting sections.
It also allows the possibility of showing or not a Final Summary of the completed information before sending it.
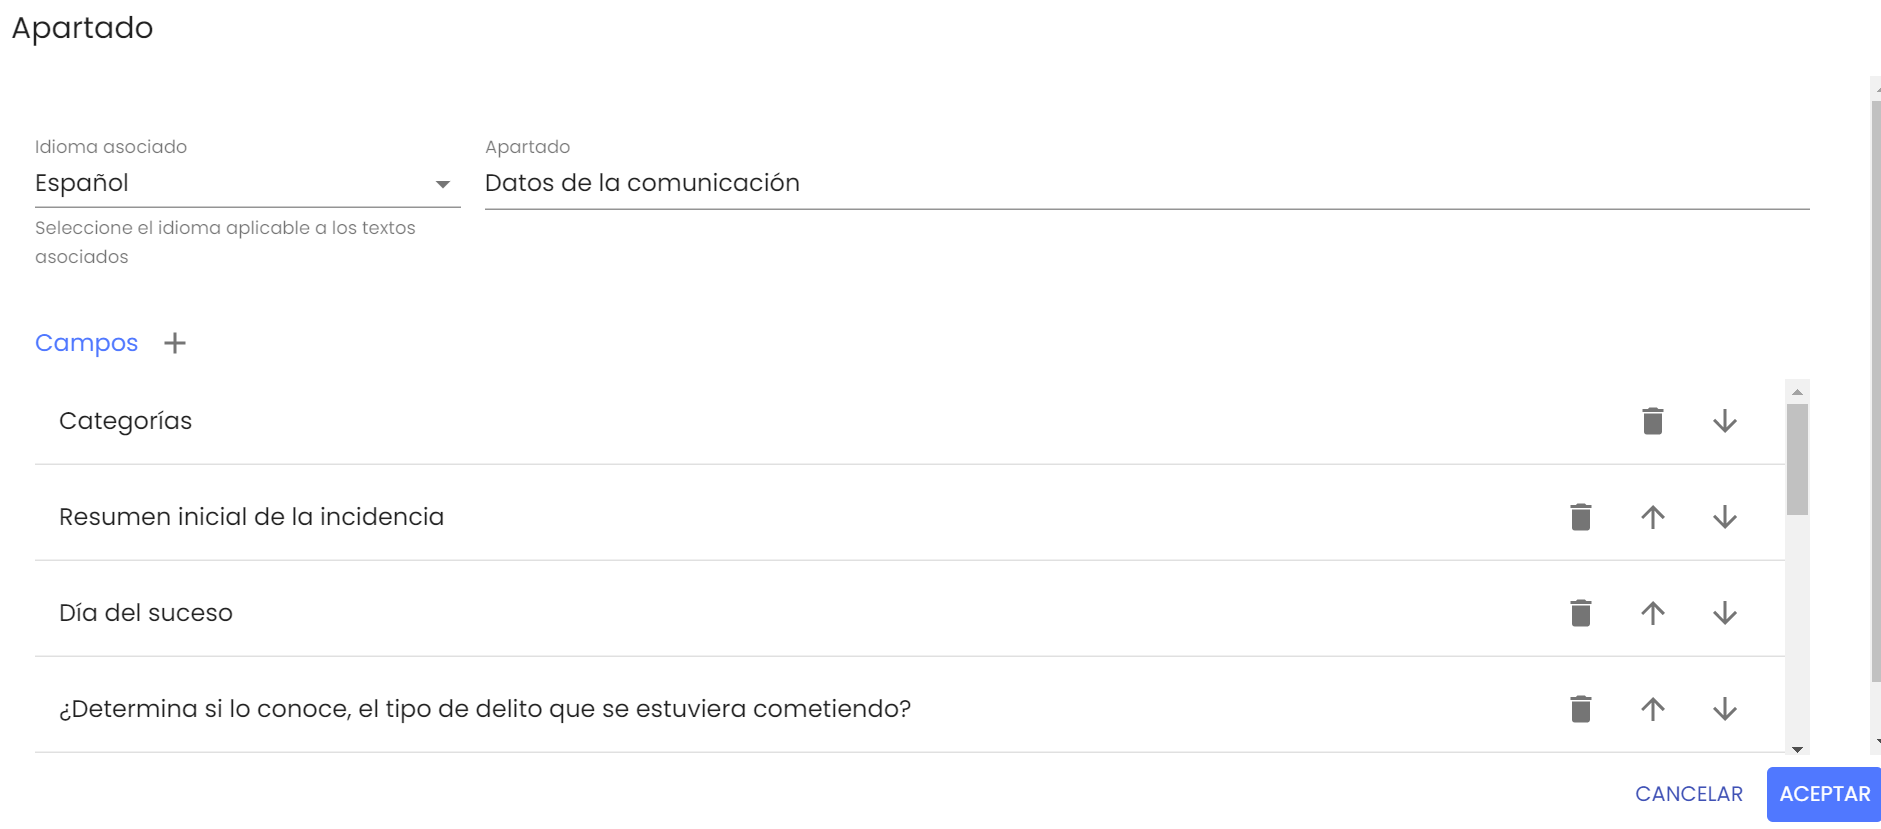
When proceeding to edit a section (by clicking the pencil icon), the following actions can be performed:
-
Reorganize the form questions.
-
Allows selecting the language.
-
Customize the labels and names of the sections.
-
Add questions created in the form from the "Fields" option.
NOTE: If the default section related to Acceptance of Terms of Use is edited, only the section name will be reflected. To edit the link name, it must be done through the "
" option in the "Terms of Use Text" tab.
To define whether to show or not the Final Summary of a complaint, the "Include Summary Field" check must be activated or not. This information is provided by default in the "Confirmation" section. If the check is enabled, this information will appear in the last section of the list, even if this section is deleted or reordered elsewhere other than the last. Similarly, if the check is disabled, this information will not appear, even if the "Confirmation" section is created.
Additionally, it is possible to activate another additional field to address and avoid potential conflicts of interest with channel managers when a complainant registers a complaint, which is the "Enable Conflict of Interest" field
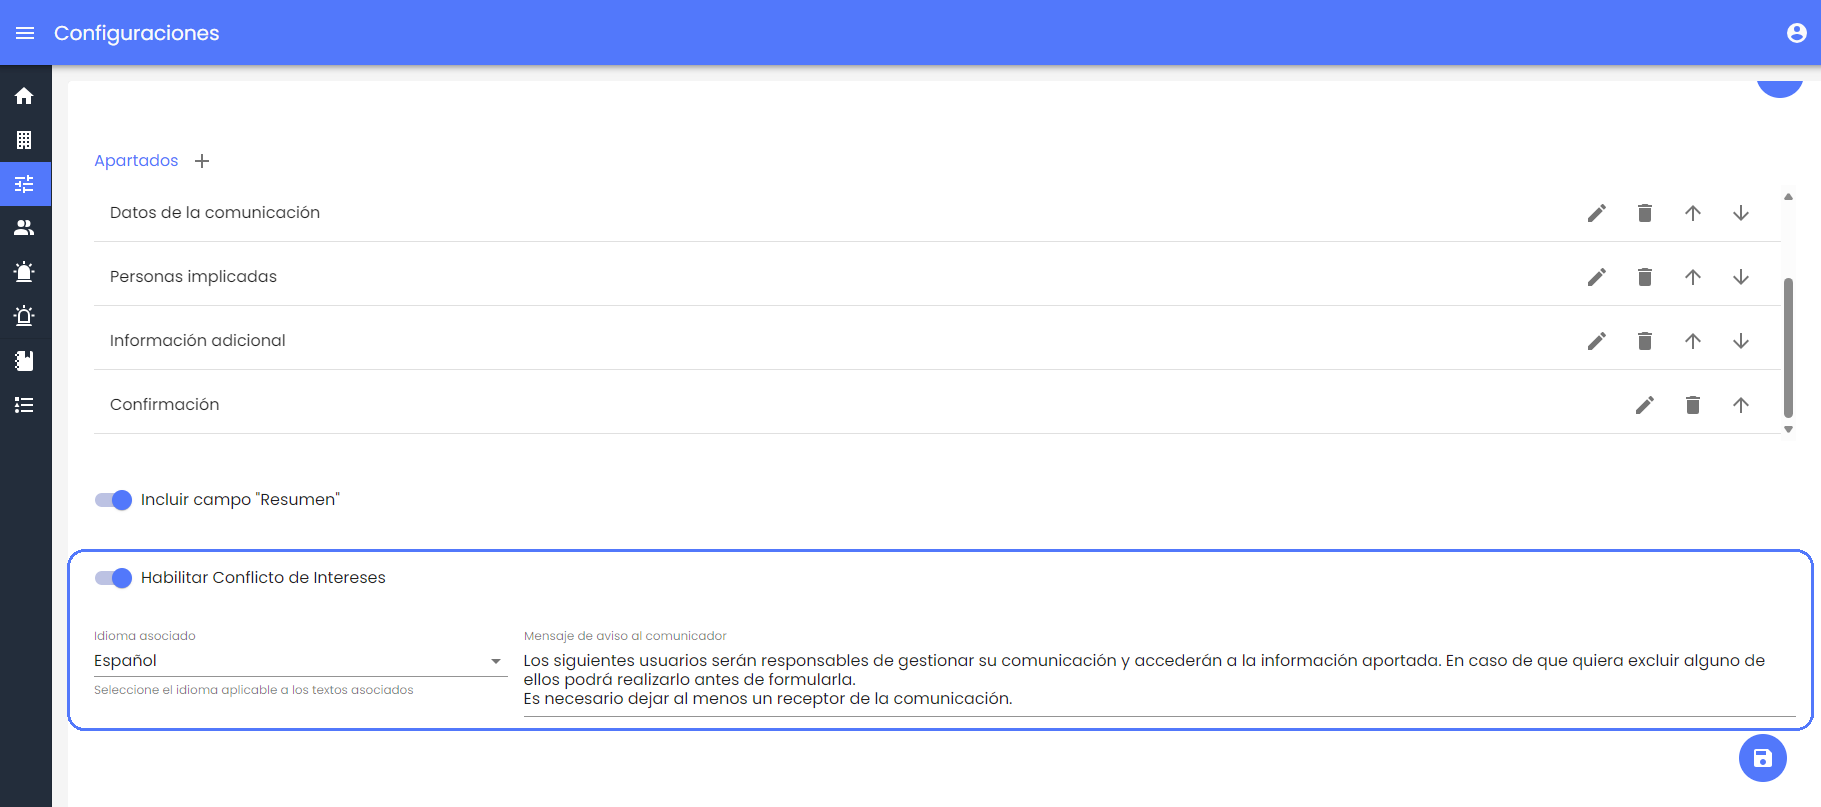
There, the field indicating whether the conflict of interest is enabled or not is displayed. Like the Summary field, it is displayed at the end since it will be in the last section of the complaint form where the complainant can see the recipients of the complaint.
If enabled, a text field "Warning Message to the Communicator" is displayed to define an informative message that the complainant will see in that section.
Personal Data
In this section of the Configuration, it is possible to parameterize which fields and personal data the communicator registering a complaint can complete, and which must be completed as mandatory (when the complaint is not anonymous).
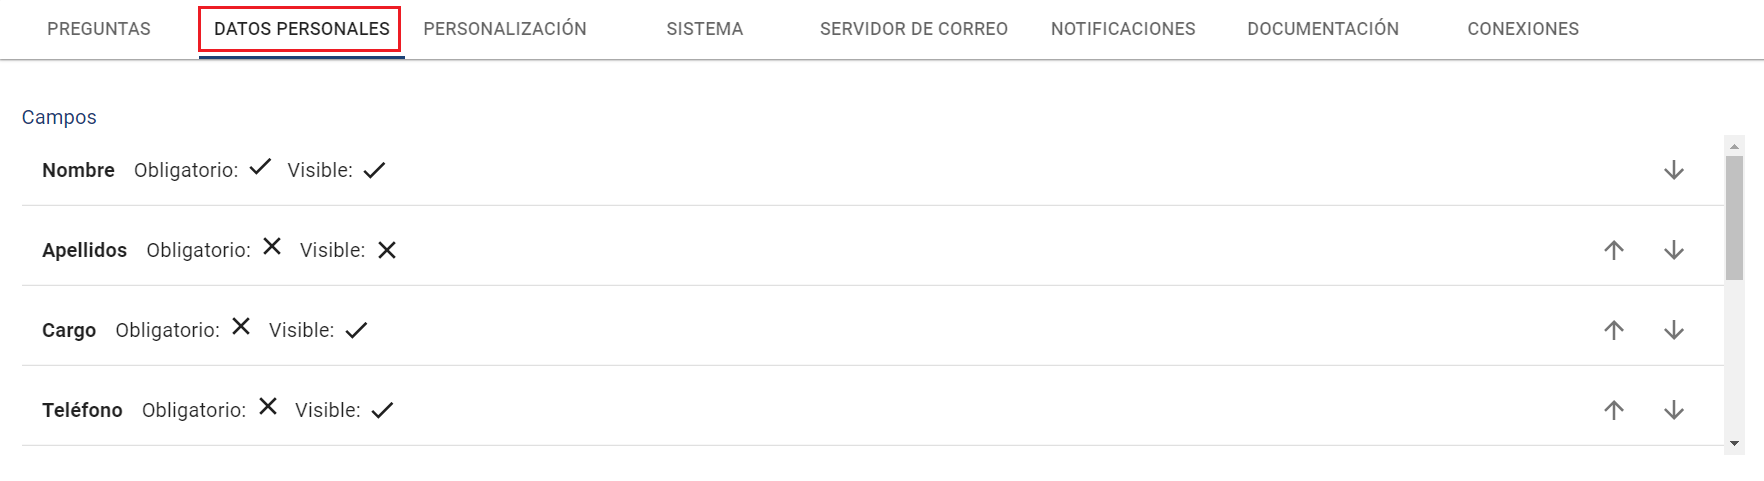
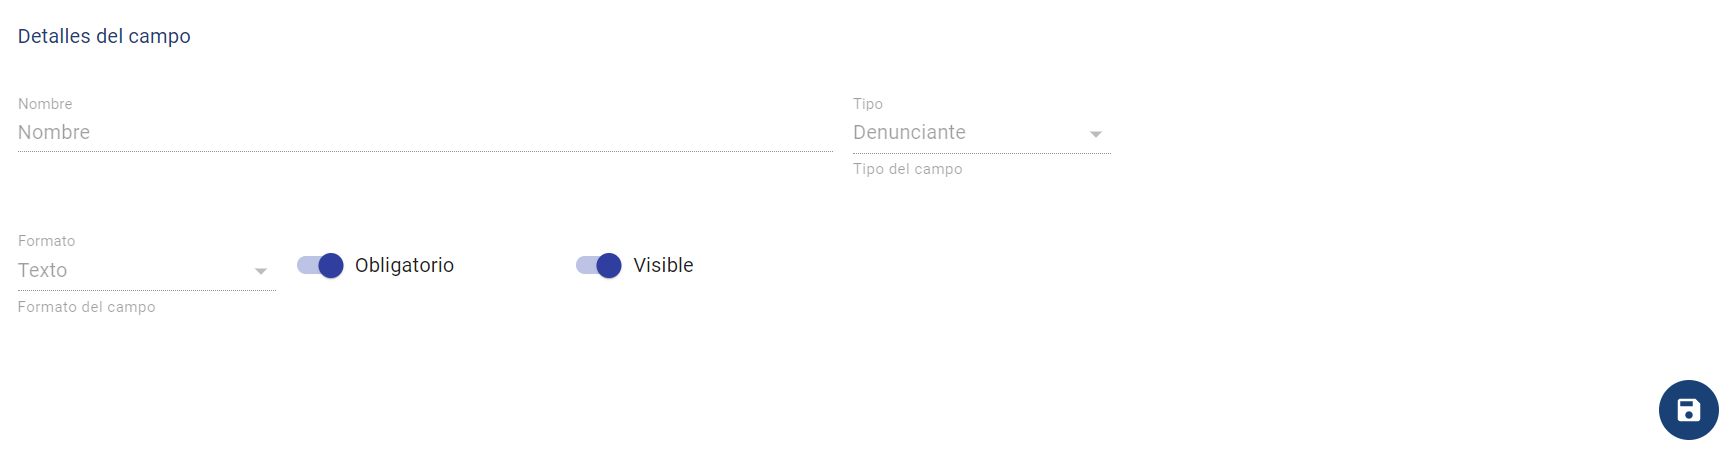
When selecting a field, a form is enabled at the bottom showing the field type (Name, field format), and it is possible to mark or unmark it as:
-
Visible: if deactivated, it will not appear in the complainant's view.
-
Mandatory: in which case it must be completed before the complaint can be sent.
NOTE: The "Email" field is mandatory and cannot be deactivated, as it is necessary for sending access passwords and other purposes.
Customization
In the second option of the Configuration, it is possible to parameterize several sections such as the following:
Texts
-
Language → Allows us to switch between which language we are parameterizing the fields. (Once the language is selected, we can complete the field texts in that language)
-
Application Title → Title that appears next to the logos in the upper left corner.
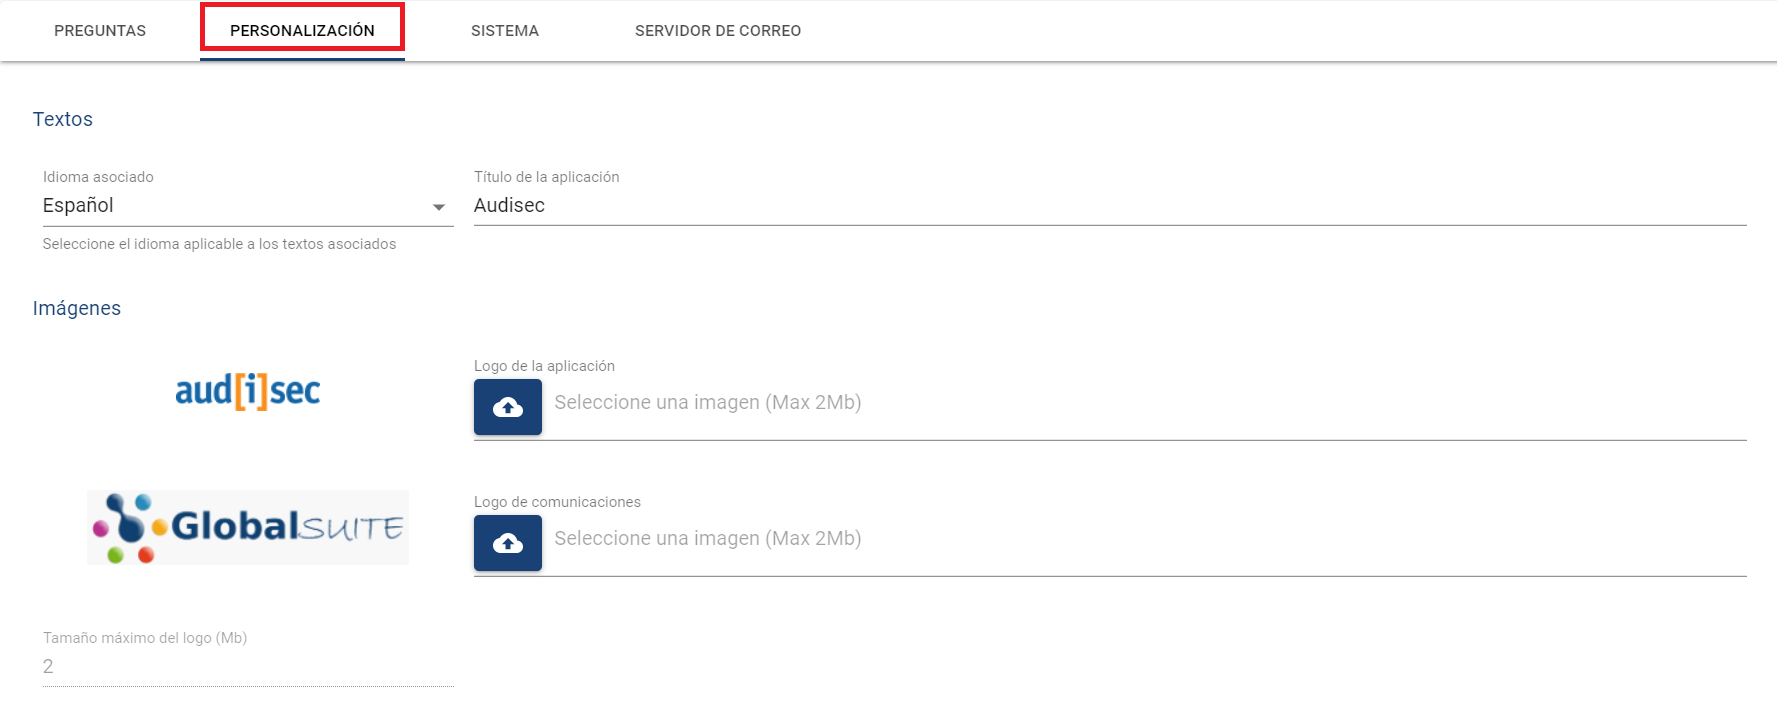
Images and Colors
-
Modify the visible logos in the upper part of the tool's administration, which are also visible in communication forms. Images must occupy a maximum size of 2MB. These two logos are available:
-
Application Logo → This is the logo that will appear in the management views of the communication channel.
-
Communication Logo → This is the logo that will appear in the communication channel.
-
-
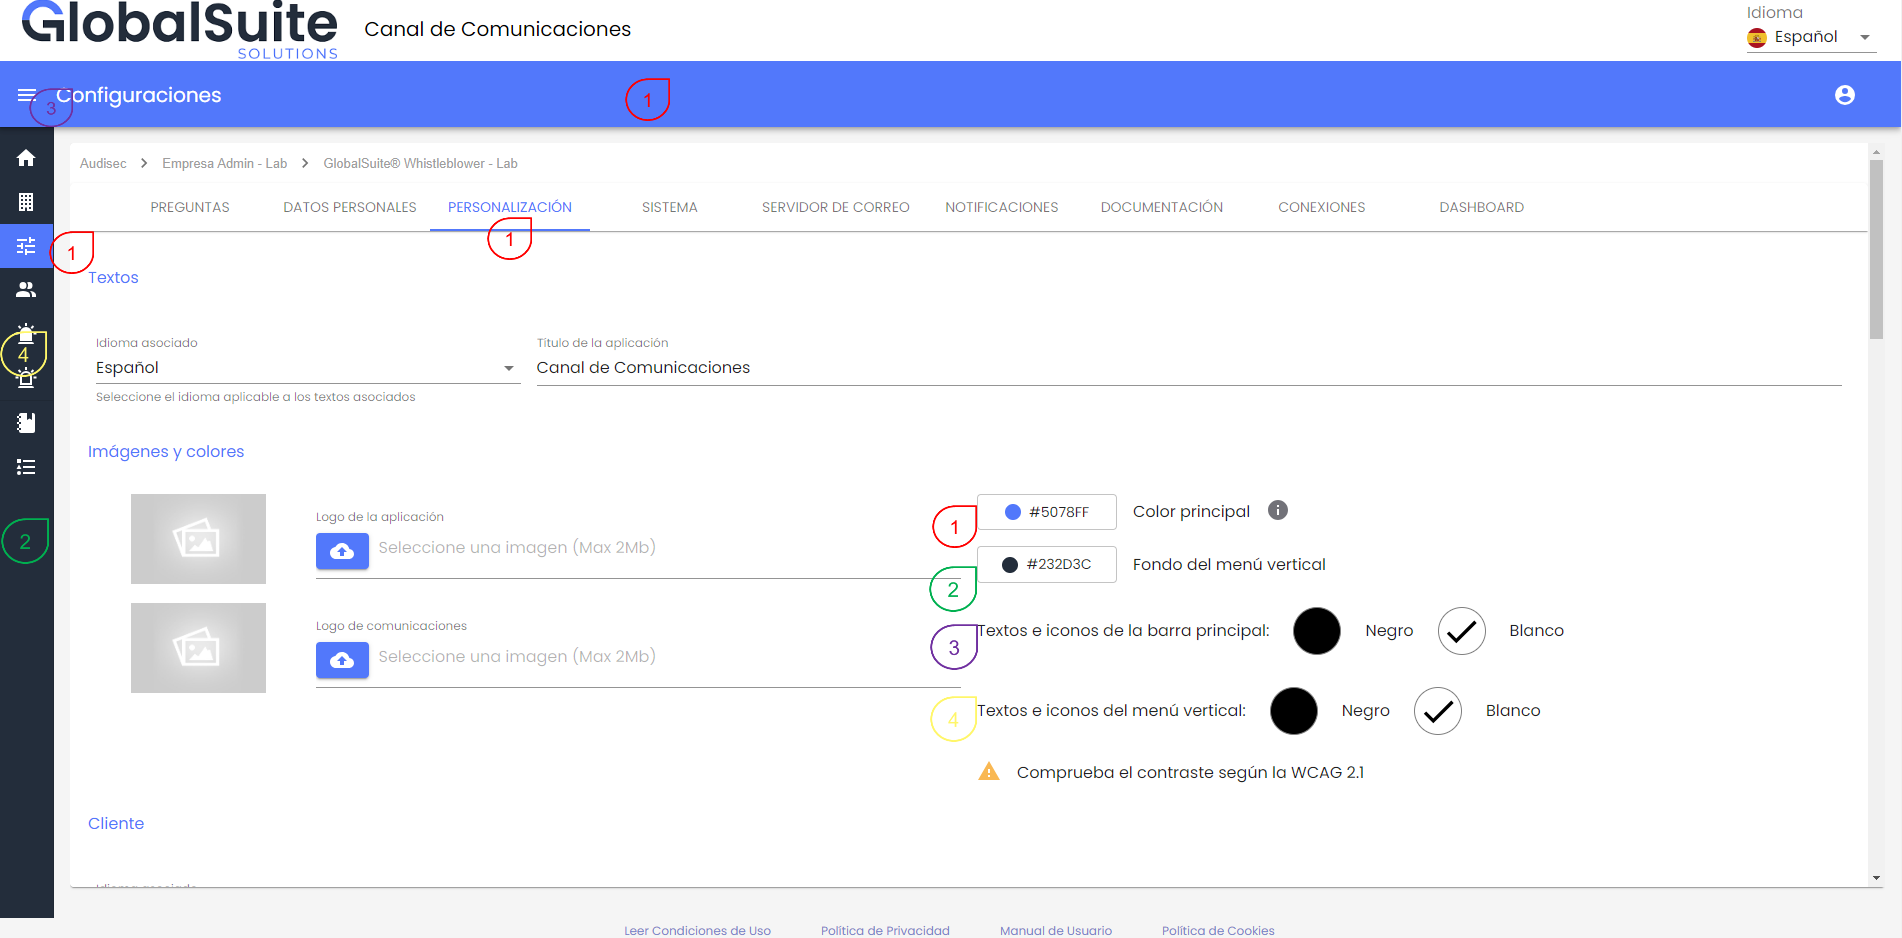
Color Customization → Provides the ability to adapt the corporate colors of the interface.
This change applies to both the administration interface (internal backoffice for channel management) and especially to the complainant's view (public form), both when reporting a new complaint and tracking a previous one.
In the configuration, the current solution colors appear by default, but it is possible to customize them based on different parameters.
-
Main Color: This color will be applied to the main menu bar, buttons, titles, and main front of the complainant's view.
-
Vertical Menu: This color will be used for the vertical menu band of the panel.
-
Texts and icons of the main menu: With the possibility of choosing between white and black, it will be used to represent the texts and icons in the main menu.
-
Texts and icons of the vertical menu: The chosen color (white or black) will be used to represent the icons and texts in the side menu.
This is designed so that, in addition to aligning with the corporate image, the texts and icons are legible and adapt to the contrast and accessibility criteria set by the WCAG 2 (Web Content Accessibility Guidelines).
Once any parameters are modified, it is necessary to click the “Preview” button, which shows in a window how the user interface will look without applying the changes.
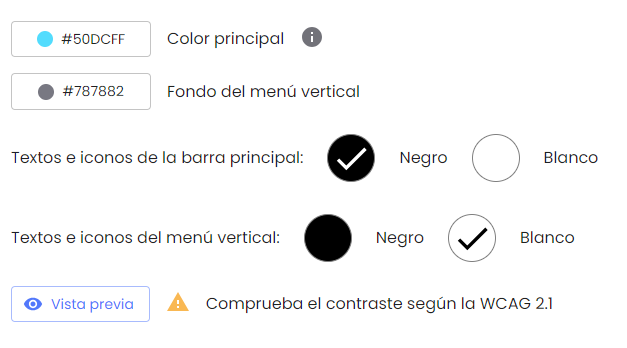
When opened, it will display a window to visualize how it will look with the proposed adjustments, showing the changes in different views:
-
Configuration Section
-
Landing Section
-
Complaint Form
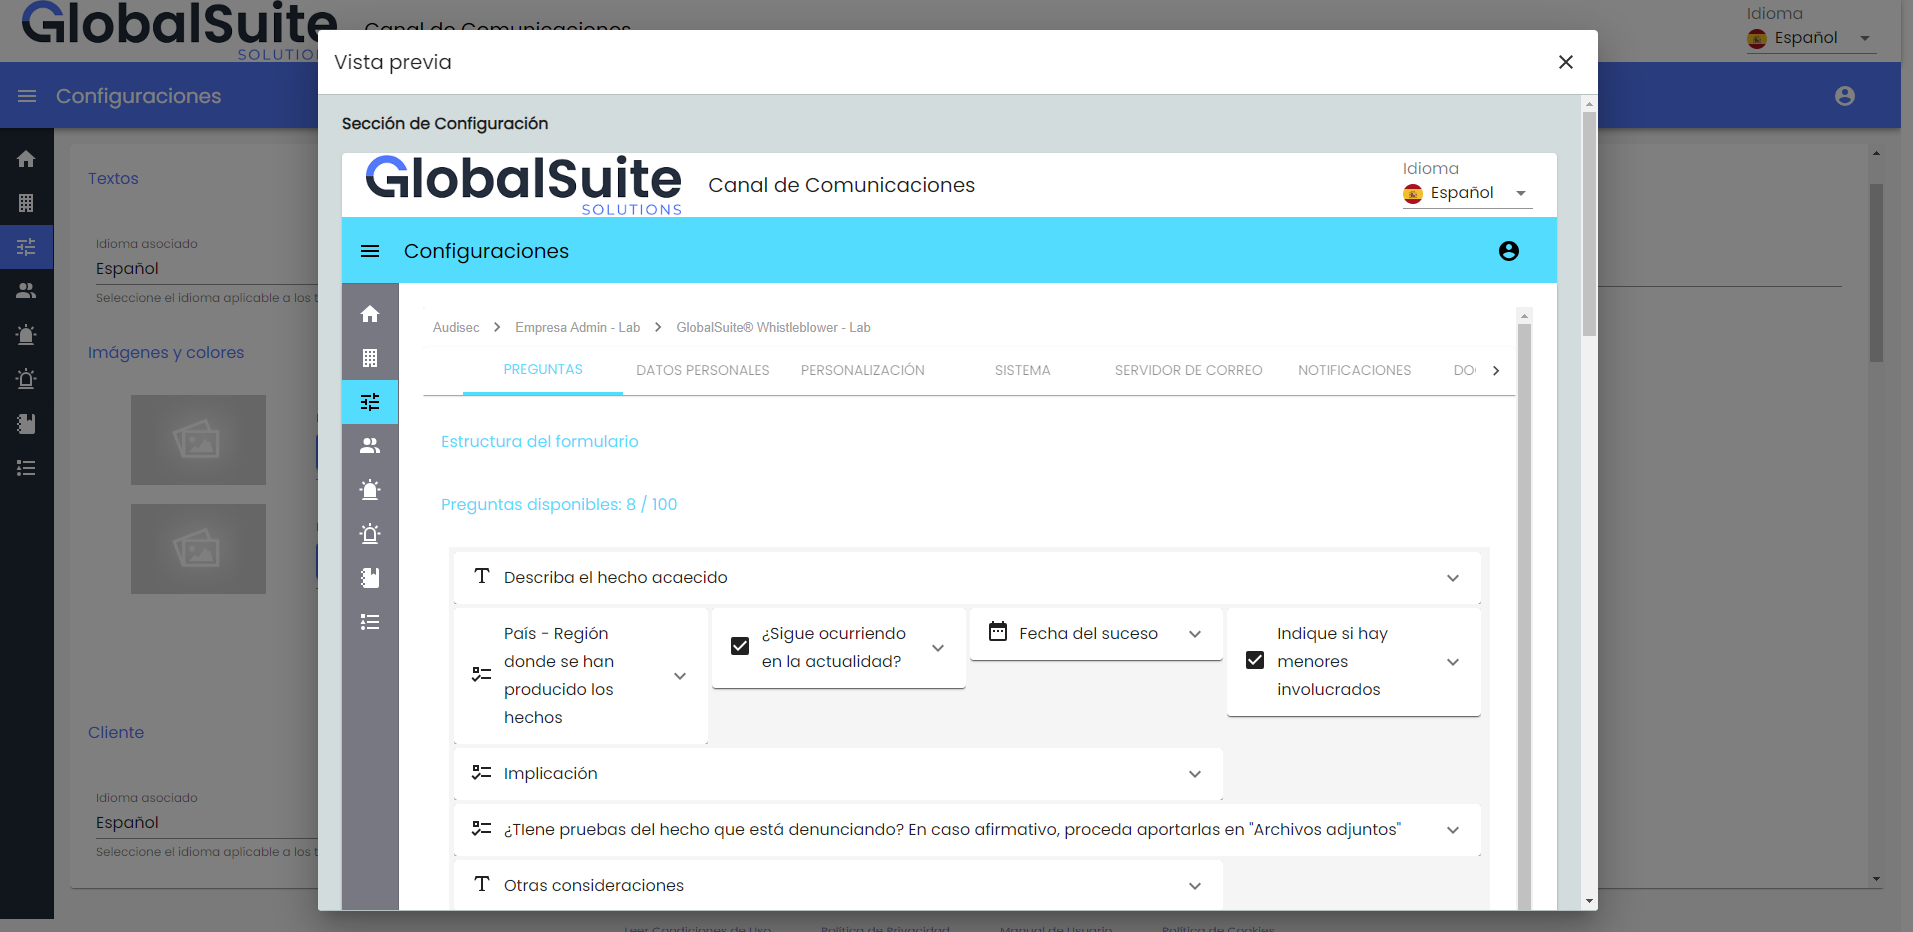
Once the preview is reviewed, changes can be applied using the Save button, and the interface will be updated for all users.
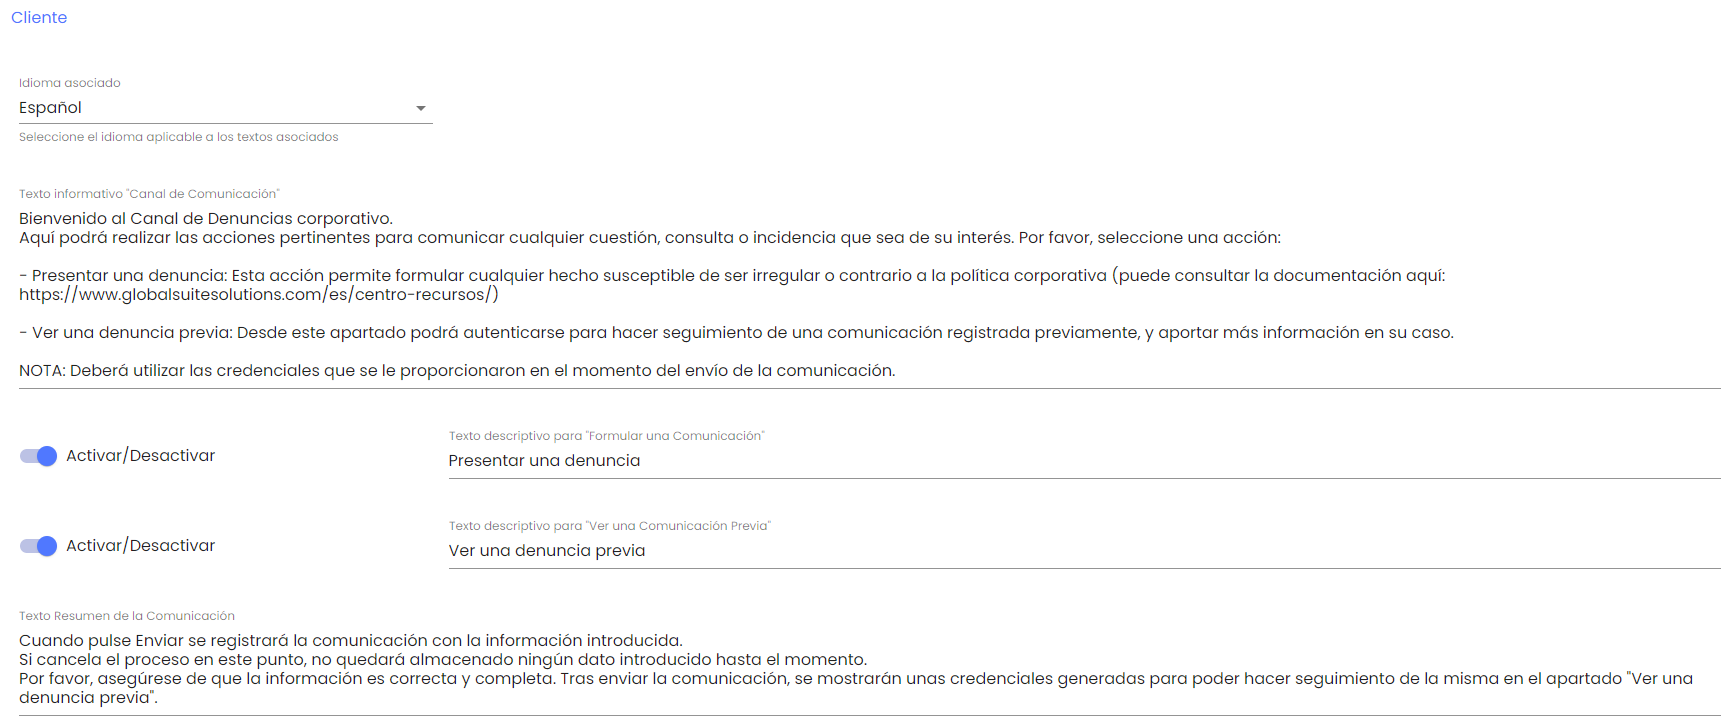
Client
In this section, the client's Home page can be customized, as well as enabling or disabling the buttons "Submit New Communication" or "View Previous Communication."
-
Language → Allows us to switch between which language we are parameterizing the text fields. (Once the language is selected, we can complete the field texts in that language)
-
Informative Text "Complaint Channel" → Text field that allows customizing the message that appears in the client's Home window. If no text is provided, the default text will appear:
Welcome to the Communication Channel. Here you can perform the relevant actions to communicate any matter, query, or incident of interest to you. Please select an action.
-
Button "Submit New Communication" → It is possible to activate or deactivate the button that allows registering a new communication, as well as customizing the text that appears on it.
-
Button "View Previous Communication" → It is possible to activate or deactivate the button that allows consulting previously registered communications, as well as customizing the text that appears on it.
-
Field "Communication Summary Text" → Text field to customize the message displayed before confirming the submission of a new communication.
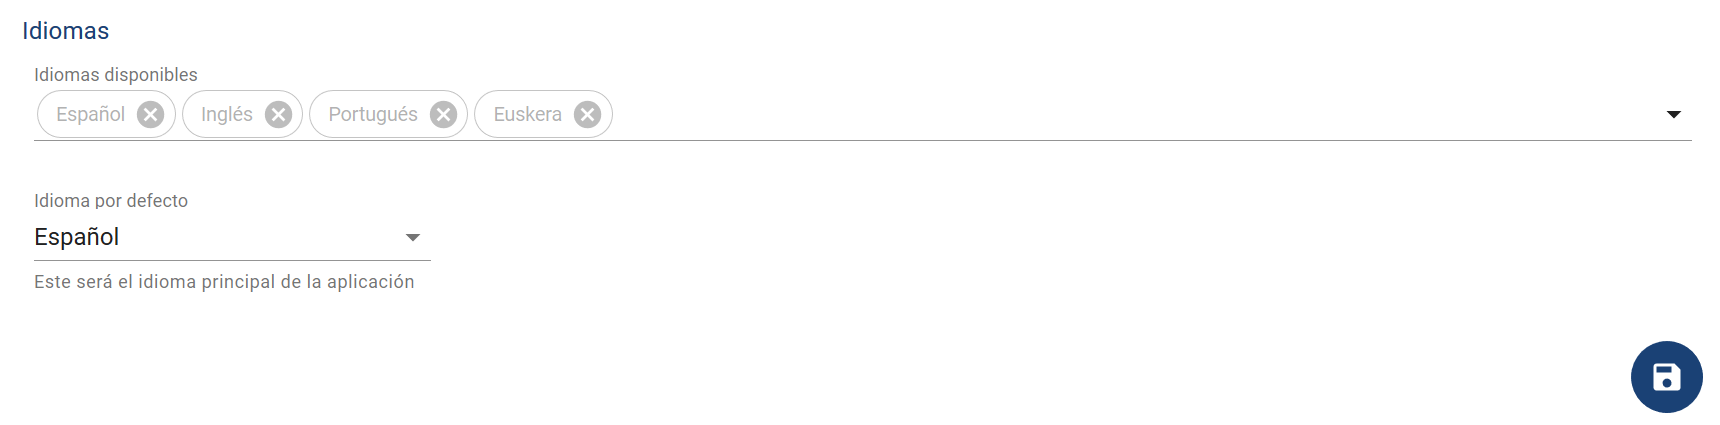
Languages
This section displays the languages enabled in the company.
NOTE: Enabling new languages among those available must be requested from the support service. Currently, the available languages are: Spanish, English, German, French, Portuguese, Brazilian, Czech, Basque, Catalan, Galician, and Valencian.
-
Default language → You can choose the default language for the company (among those available). This will be the default language in which users are created and in which the whistleblower's view will appear.
States
In this section, it is possible to customize the states through which a communication will pass, based on the default ones.
In the table displayed, it is possible to edit and reorder the current states. To change their order, simply click the corresponding arrows.
The first and last states cannot be deleted, only edited. The initial state will be the one taken by new communications created, and the final state is the state in which the communication is already closed (though it can be reopened later).
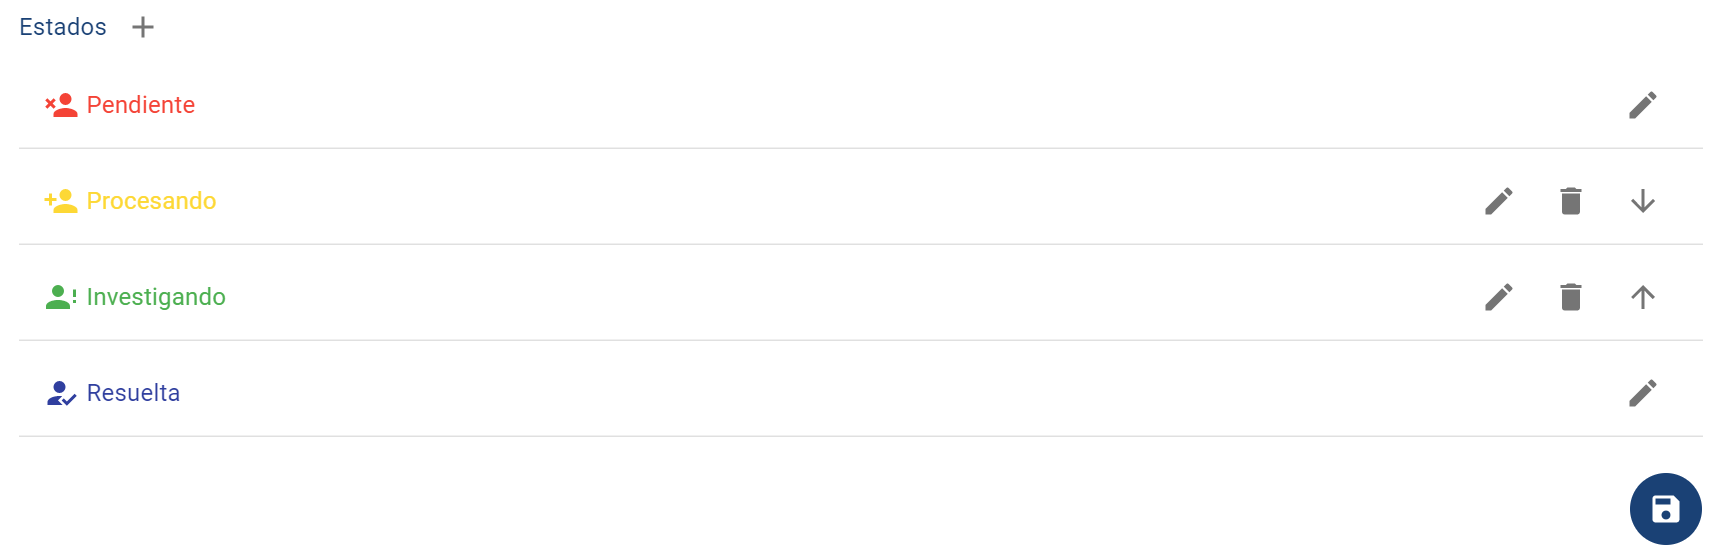
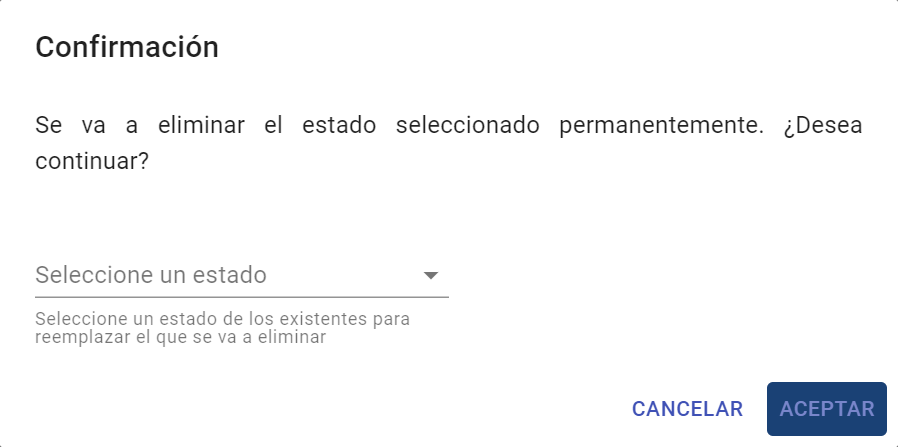
If you click on the trash can icon, you can delete the corresponding state. Since there may be communications in that state, during confirmation, you will need to select another available state before deleting. Communications in the deleted state will move to the selected state.
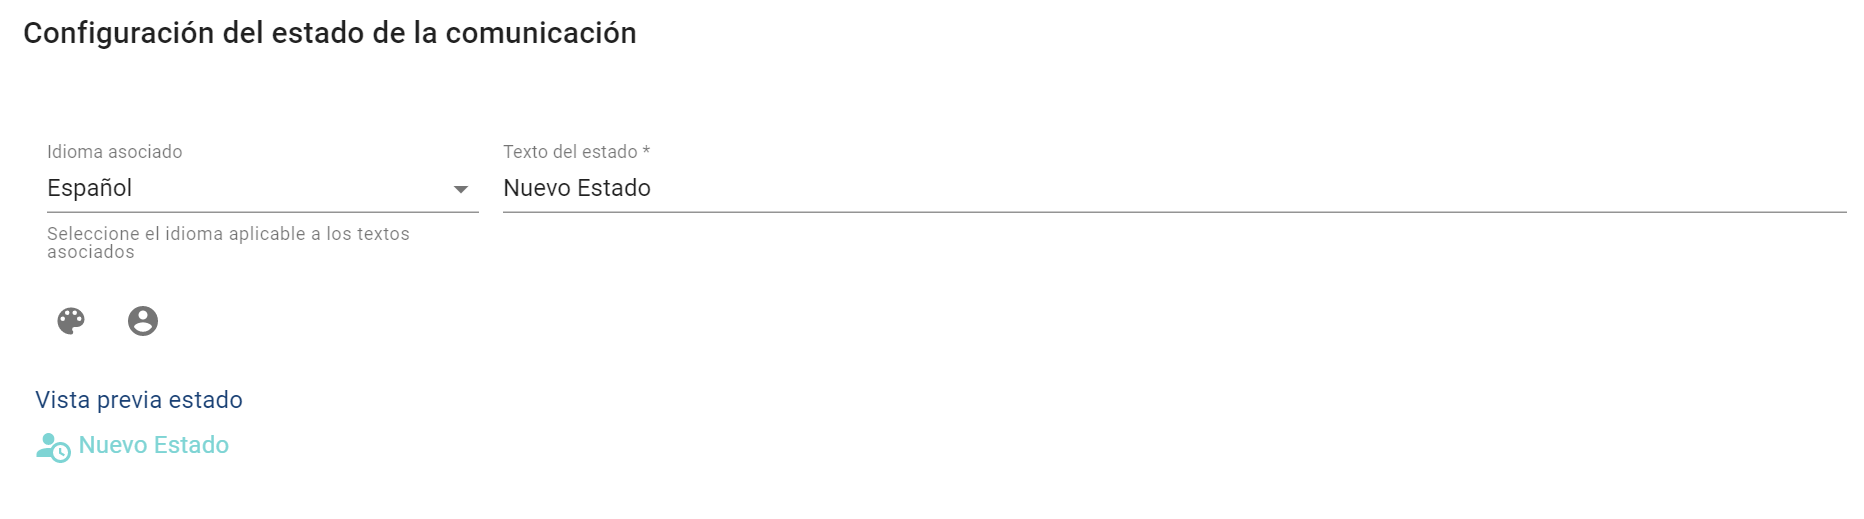
To create a new state, simply click the + symbol next to the section name. Clicking it will open a new window to configure it:
-
Associated language → By default, the company's primary language appears, but it can be changed to define the text if more languages exist.
-
State text → In this field, the name that the state will take in the selected language is defined.
-
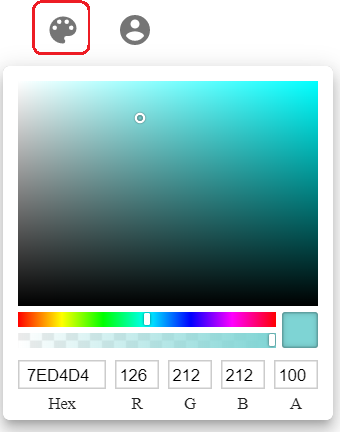
Color → You can select the color of the state, which will allow for quick distinction.
-
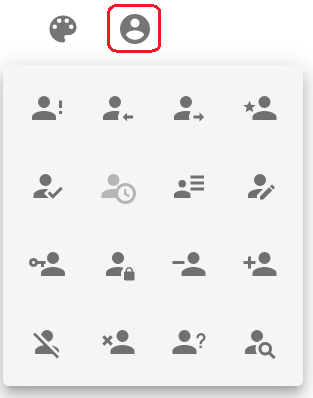
Icon → Similarly, you can choose from a set of available icons the one that will be used for this state.
Categories
In this section, it is possible to customize the categories that can be assigned to a communication, based on the default ones.
In the table displayed, it is possible to add, delete, and edit categories.
NOTE: If categories are not configured to classify communications or are deleted, the field will no longer appear in the form, as well as in communications previously registered. Therefore, the categories provided by the communicator or the manager in each communication will disappear.
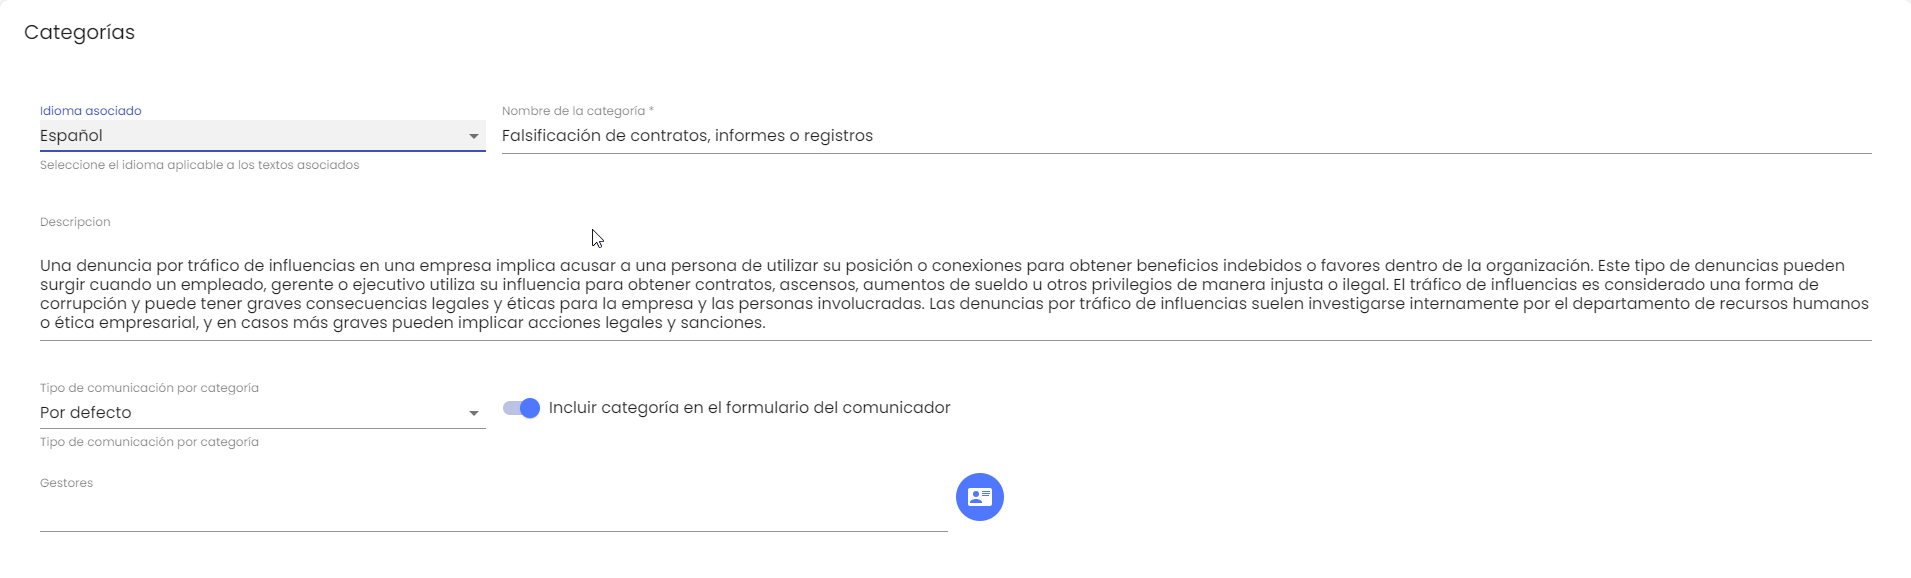
By clicking the "+" button next to the title, you can add a new category, or by clicking the pencil icon of a category, you can edit its properties:
-
Associated language → By default, the company's primary language appears, but it can be changed to define the text of the category if more languages exist.
-
Category name → In this field, the name that the category will take in the selected language is defined.
-
Category description → This field allows adding additional details about the category in the selected language.
-
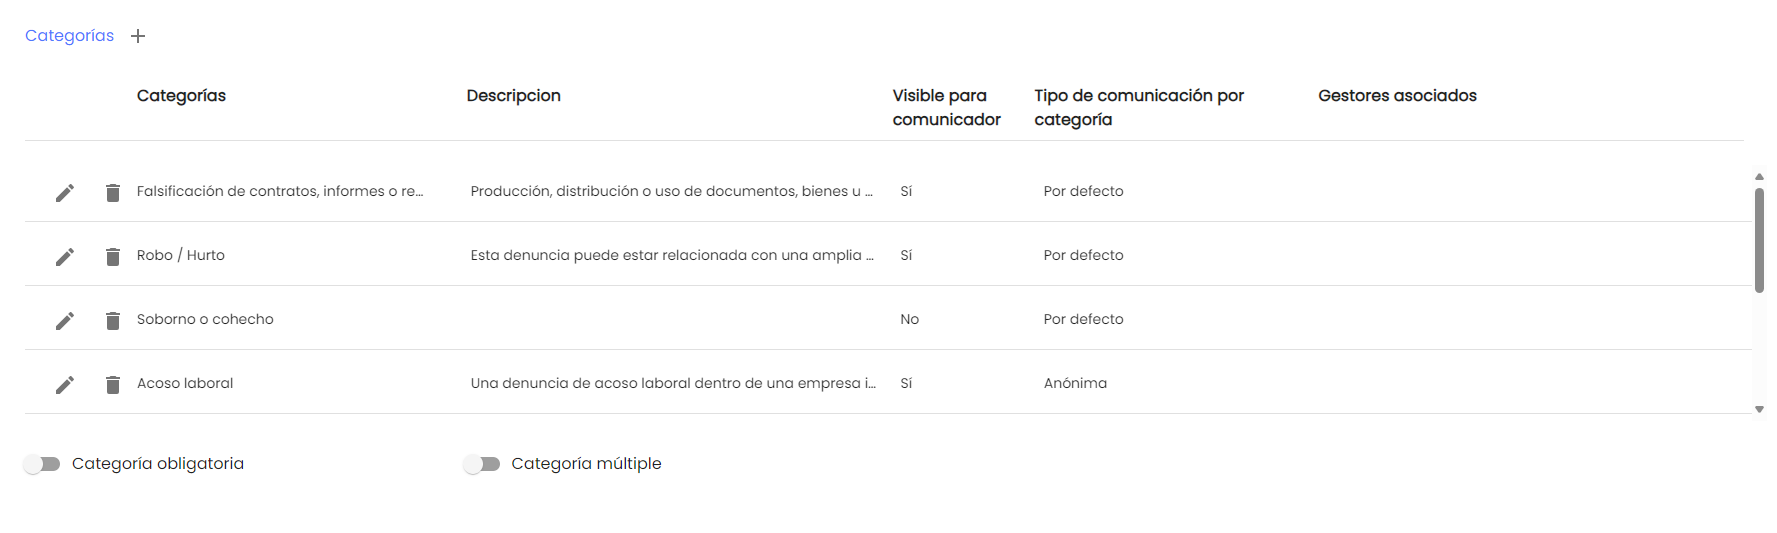
Type of communication by category → If the category is enabled to be assigned by a communicator, it allows defining the type of identification for the communicator:
-
By default: If the channel is configured to allow anonymous communications or communications with the whistleblower identified, it will maintain the general configured behavior.
-
Anonymous: If this type is assigned, if the communicator assigns this category, the communication will necessarily be anonymous regardless of the general configuration.
-
Identified communicator: If this type is defined, the communicator will necessarily have to identify themselves (see Personal Data section), regardless of the general configuration.
-
-
Include category in the communicator's form → This field allows enabling the category so that it can be selected by the communicator when registering a new communication. If not checked, the category will only be available internally for channel managers, will no longer be visible in previous communications, and cannot be assigned to new ones.
NOTE: If no category is enabled for the communicator's form, this field will not appear when registering a new communication. -
Managers: Allows automatically assigning complaints to the defined Managers based on a category.
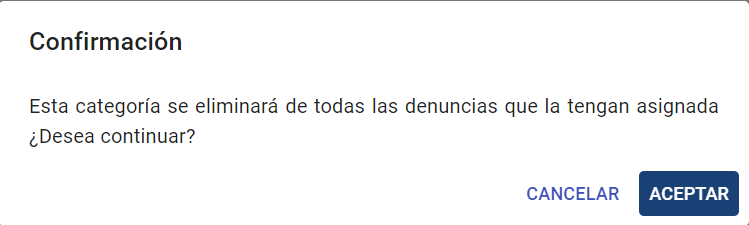
If you click on the trash can icon, you can delete the corresponding category. Confirmation of the action will be required.
Below, there are two additional configuration fields for the categories:
-
Mandatory category → Allows indicating that, if we enable a category to be included in the communicator's form, it must be assigned before registering it.
-
Multiple category → If this field is enabled, channel managers can assign more than one category to the same communication.
You must click the Save button at the bottom right to apply the changes.
Visibility of Communications List
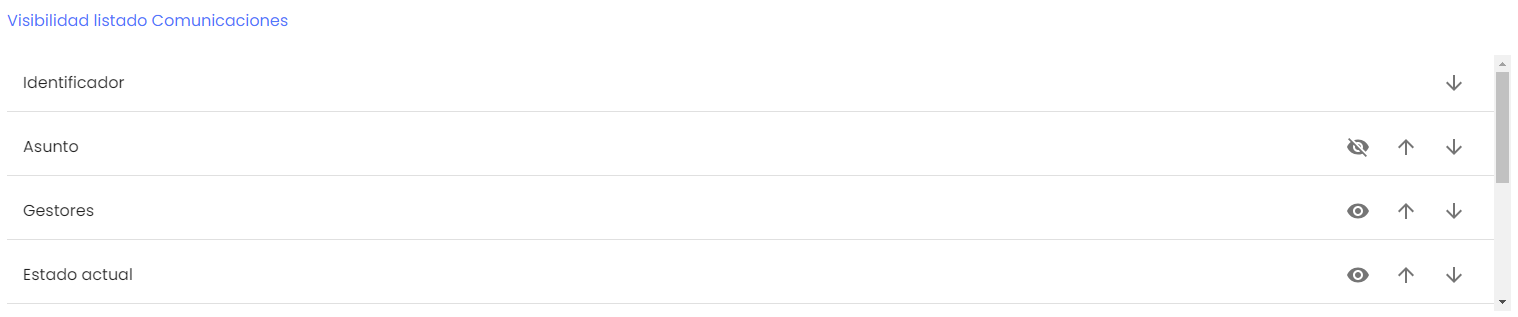
In this section, you can adjust which global fields of the complaint (apart from the customizable questions in the form) will be visible in the main Communications or Expired Communications list, and in what order.
By clicking the eye-shaped icon, you can show or hide the column, which will appear or not in the communications list. Using the arrows, you can reorder them to display them in the desired order.
The fields that can be displayed are:
-
Identifier: This field is the communication ID, which is automatically generated by the solution and is unique. This column cannot be hidden as it serves as a link to access the details of a communication.
-
Subject: Editable field to indicate a summary or code to identify a specific case or communication.
-
Managers: List of users assigned to a communication for its treatment.
-
Current state: Displays the state in which each communication is located. By default, this column is filtered to show only communications that are not closed.
-
Category: Details the category or categories assigned to a communication.
-
Type: Field that shows whether a communication has been anonymized, archived, or is active, and allows filtering to locate those of a specific type.
-
Creation date: This column shows the registration date of a communication.
-
Communicator: For communications where the person who registered it identified themselves, their email address is displayed. In anonymous communications (or those that were anonymized), the field "Anonymous" is displayed.
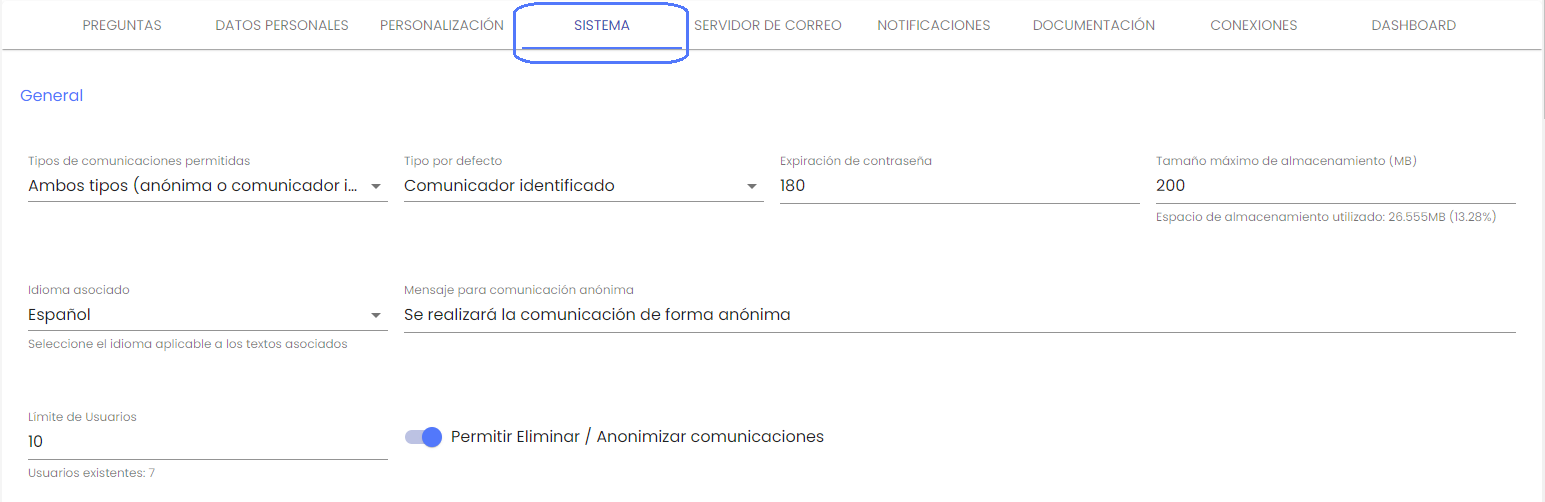
System
This is the third Configuration option, where it is possible to change internal parameters for the form:
General
-
Allowed types of communications.
-
This option allows indicating whether anonymous communications can be made, requiring the whistleblower to identify themselves, or both types.
-
-
Default type.
-
If the previous field allows both types of communications (anonymous or with identified communicator), this field can define which of the two modes will appear marked by default in the Communication Registration form.
-
-
Password expiration.
-
Number of days it takes for user passwords to expire. After these days from the date it was changed, it will require modification at the next login.
-
-
Maximum storage size: Indicates the storage space enabled for files included in communications. Below this limit, a message appears with the space used and the percentage relative to the maximum.
-
Message for anonymous communication: This field is used to customize the information for the communicator when registering a new communication anonymously. This text can be configured for each of the available languages using the Language selector.
-
User limit: Indicates the maximum number of users that can be registered in the system. Below this limit, a message appears with the current number of users.
-
Allow Deleting / Anonymizing Communications.
-
Used to allow users of the channel to delete or anonymize communications. If disabled, it will not be possible to delete communications from the system.
-
Communications
-
Show author in the communicator's Timeline.
-
Allows configuring whether the name of the manager user who registered a visible comment or attachment for the communicator can be displayed in the communicator's tracking view.
-
-
Activate expiration of Communications.
-
Allows enabling/disabling the expiration of communications and defining the period (in days) for a communication to be considered expired or overdue from the date it was registered.
-
If activated, an additional option will appear in the menu to manage them (see Expired Communications).
-
-
Maximum size per communication: Within the total enabled space, it is possible to limit how much space can be occupied in a specific communication. This limit can never exceed the total environment.
-
Reception deadline: Allows defining how many days from the registration of a communication an alert will be sent to the configured recipients to acknowledge receipt.

-
Allow attaching files to the communicator: This field is used to enable or disable permissions to attach local files in the communication to be sent. Enabling it will display the following options:
-
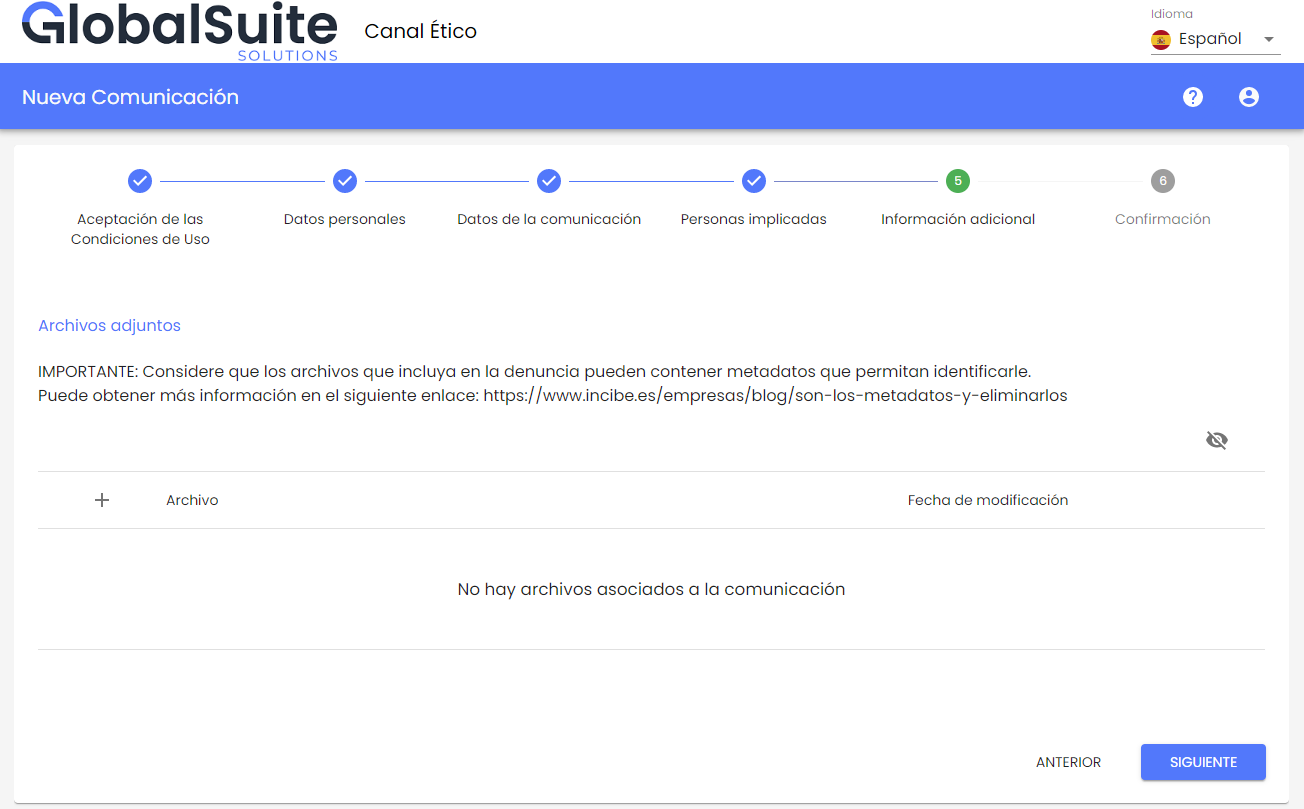
Metadata deletion in files: If metadata deletion is enabled, all files attached to a communication will undergo a process where possible metadata will be removed to protect privacy. When a file is uploaded in a complaint, the metadata deletion process is transparent to the user. If necessary, the "Warning message when attaching files" can be used to inform the communicator about the metadata deletion during the process.
-
The file types supported for automatic metadata deletion are as follows:
pdf, doc, docx, txt, rtf, odt, ppt, xls, pptx, xlsx, odp, ods, jpg, jpeg, png, vsd, vsdx, pps, ppsx, csv, dot, dotx, msg, mpp, mpx, mpd, odg, bmp, gif, xlsm, zip, 7z, rar, mp4, mp3, avi, wmv, mkv, mov, ac3, wma, wav
-
Warning message when attaching files: If enabling the upload of attachments, a message can be customized to appear alongside the "Attachments" field in the communication form to provide instructions or additional information to the communicator.
-
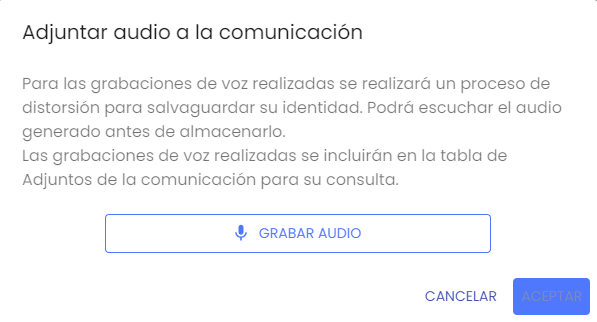
Allow the communicator to record audio files: If this field is enabled, the communicator will be able to record a voice audio to provide another mechanism for registering the communication, which will undergo data processing to distort the voice as part of the process to safeguard the communicator's privacy.
-
Recording instructions: If voice audio recording is allowed, a message with instructions or additional information can be parameterized for the communicator to see when recording the audio.
-
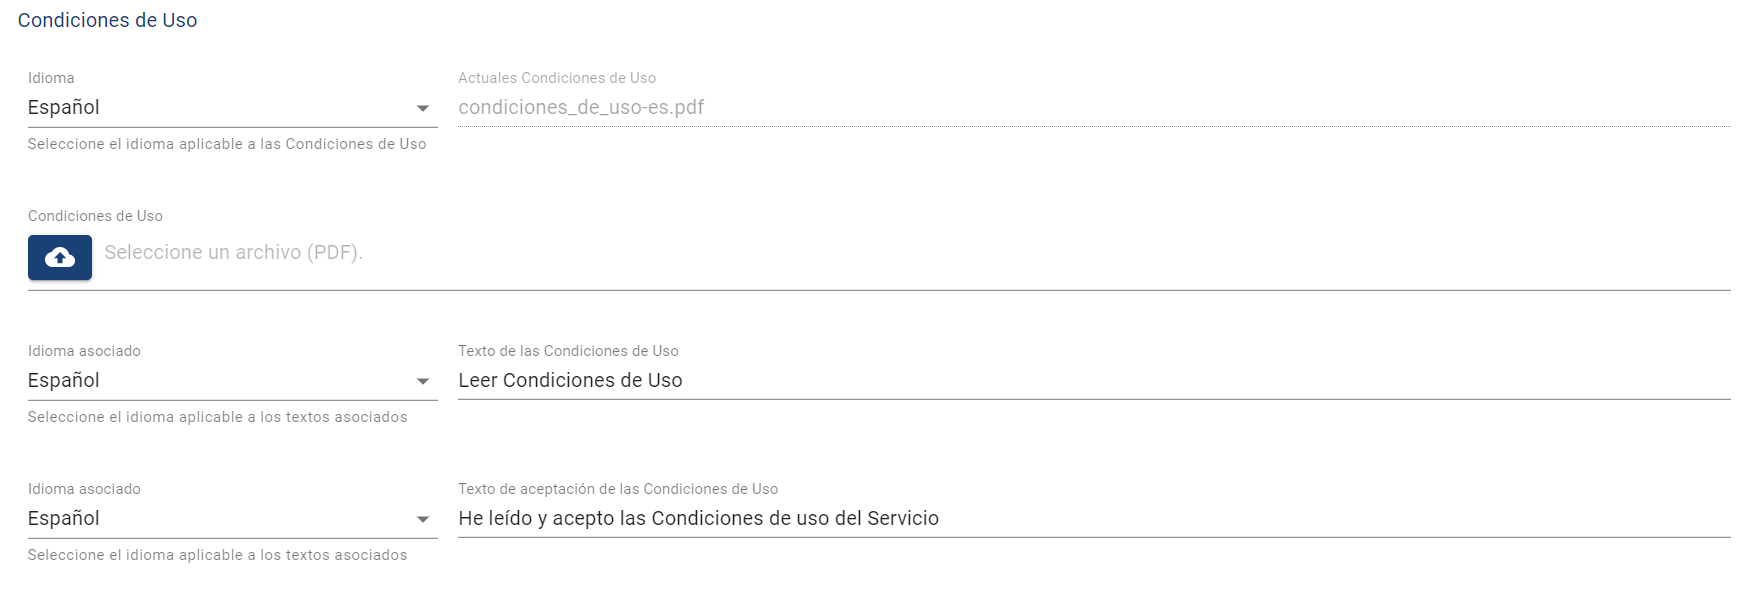
Terms of Use
-
Language → Allows us to select the language in which we are attaching the environment's terms.
-
Terms of Use → Allows attaching terms of use to the tool, which must be accepted for sending new communications.
-
Current Terms of Use → Displays the name of the terms file currently uploaded in the tool.
-
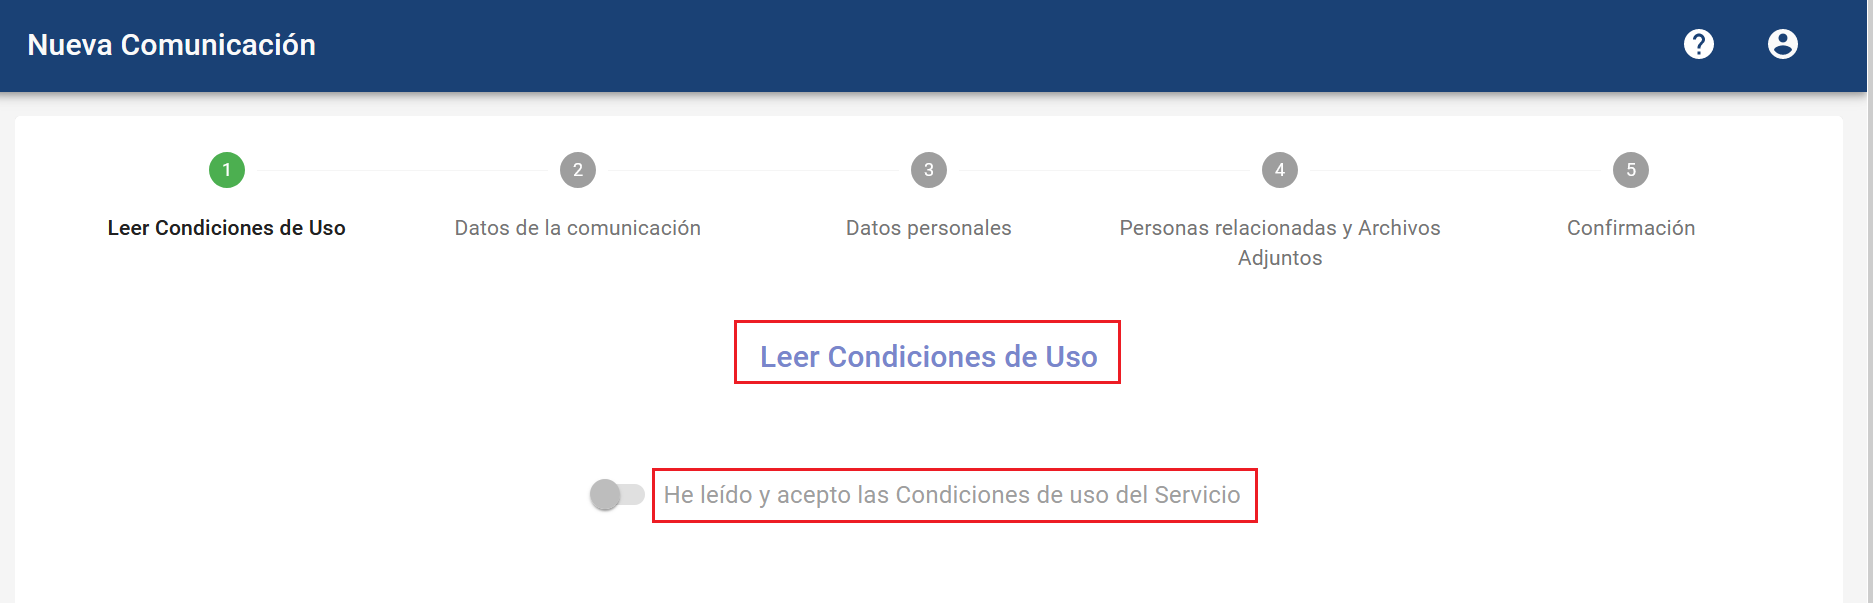
Terms of Use Text → Allows configuring the title of the section for accepting the terms of use, for both internal users and communicators.
-
Terms of Use Acceptance Text → Allows defining the specific text for accepting the terms.
These changes will be applied in the user acceptance sections:
Privacy Policy
In this section, the privacy policy can be customized to be available in the Communicator or complainant's view.
-
Language → Allows us to select the language in which we are attaching the Privacy Policy.
-
Privacy Policy → Allows attaching the corporate Privacy Policy to the tool, which can be consulted by the communicator.
-
Current Privacy Policy → Displays the name of the terms file currently uploaded in the tool.
-
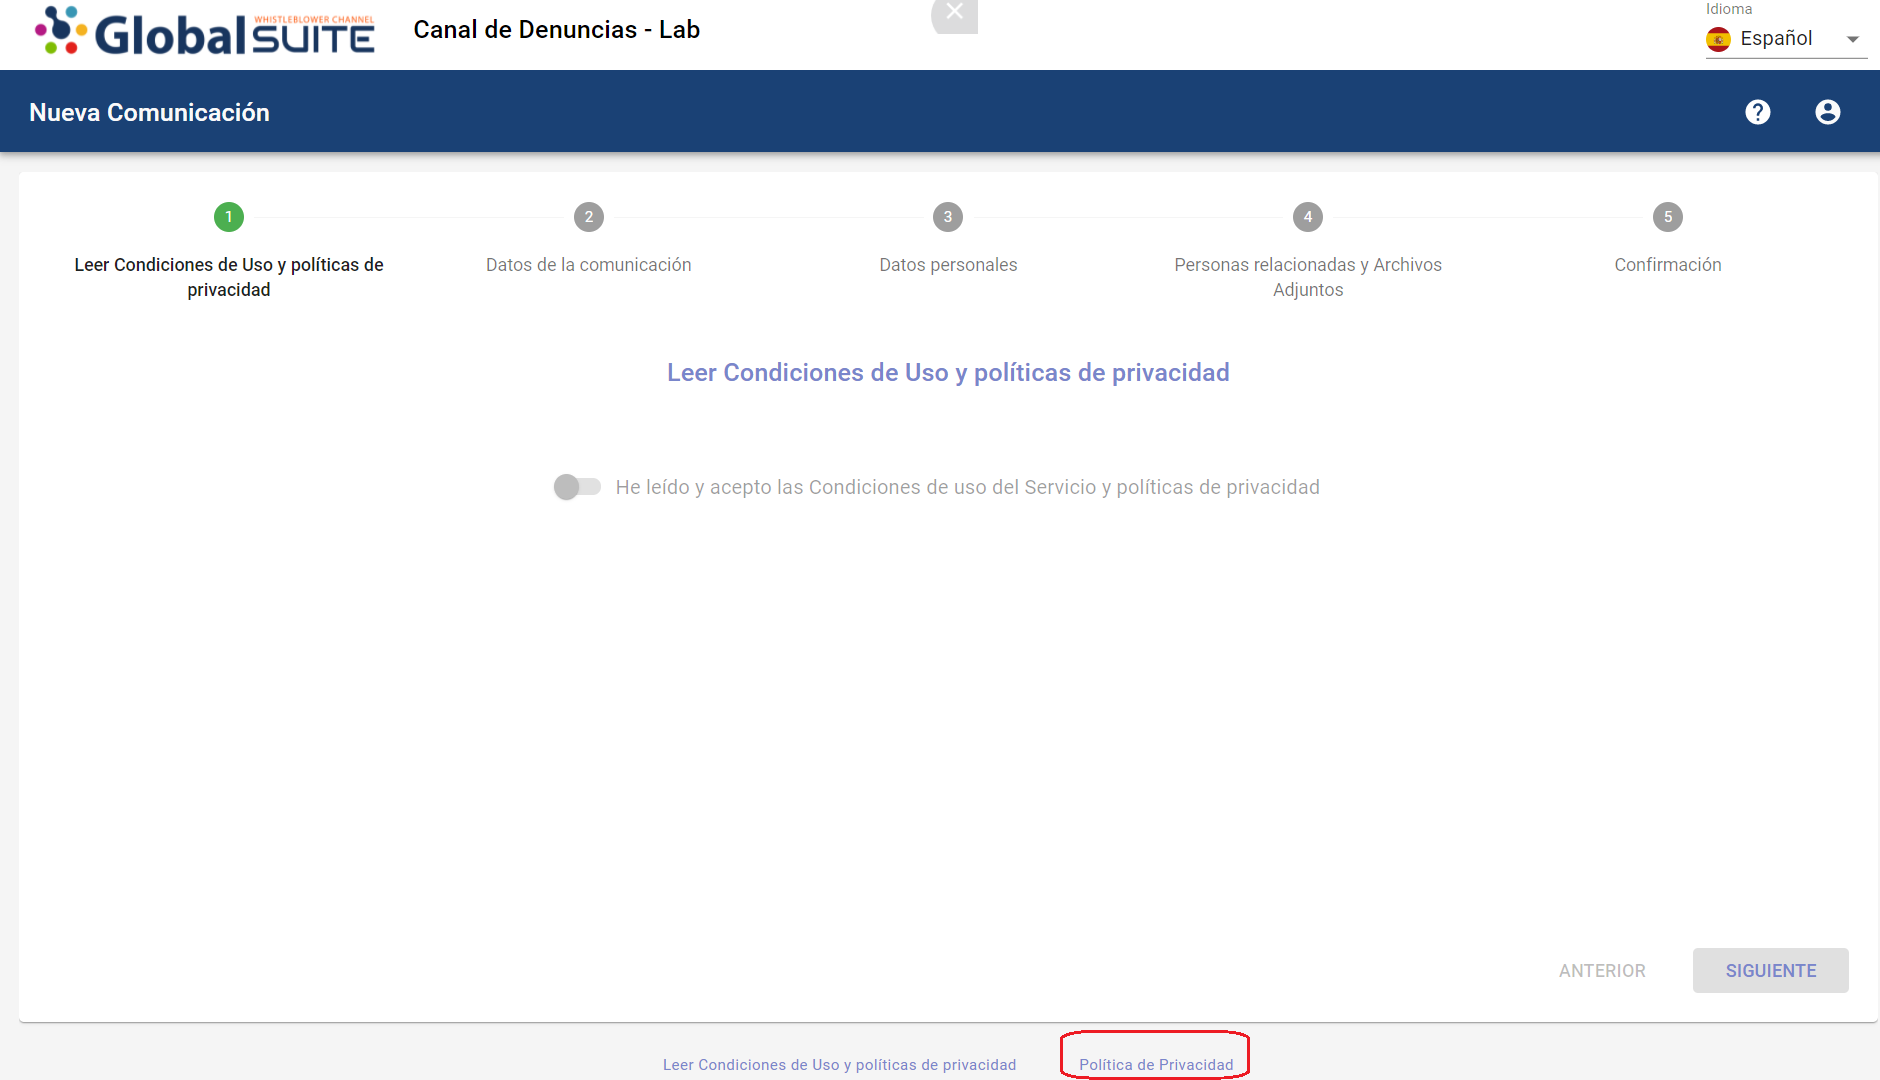
Privacy Policy Text → Allows configuring the title of the link where communicators can download the privacy policy.
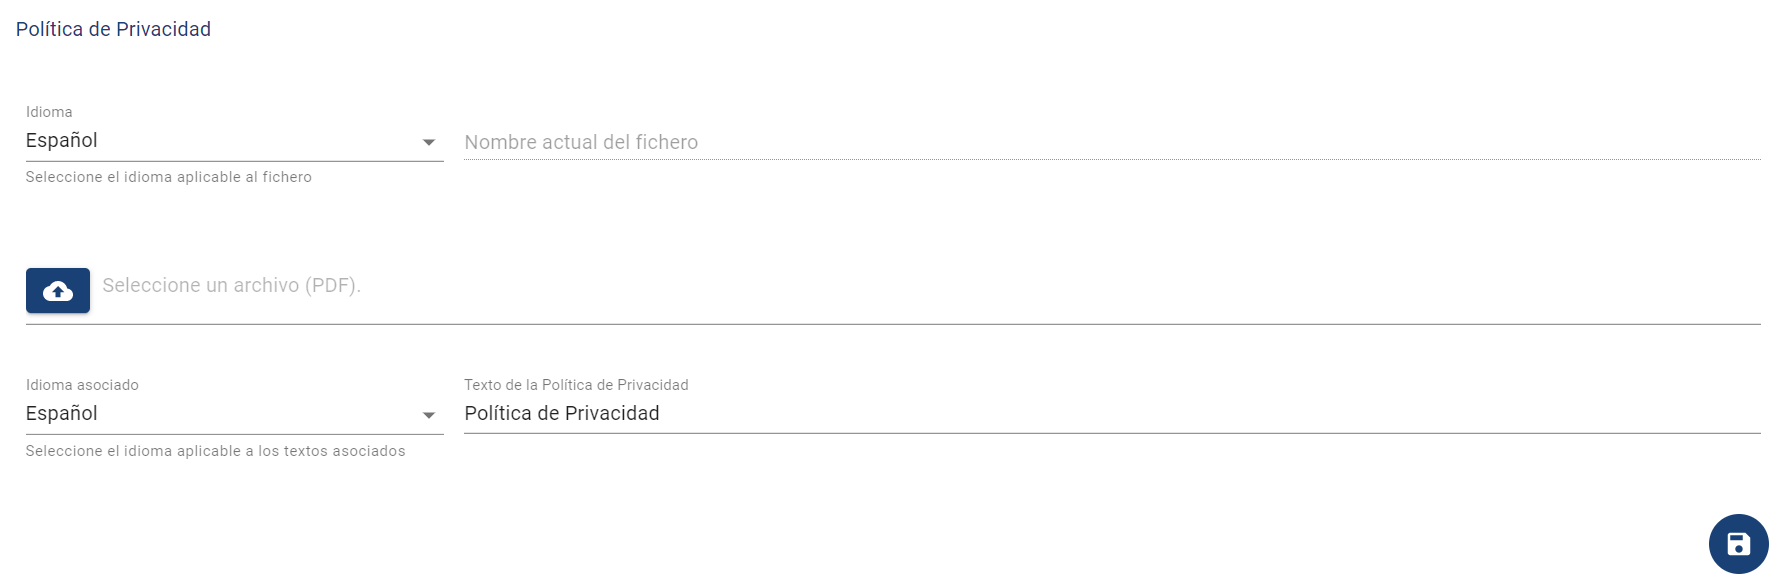
This configuration will apply to the communicator's view, both when making new communications and when accessing the follow-up of a previously made one.
NOTE: This functionality is offered as an additional service. For more information, please contact your provider.
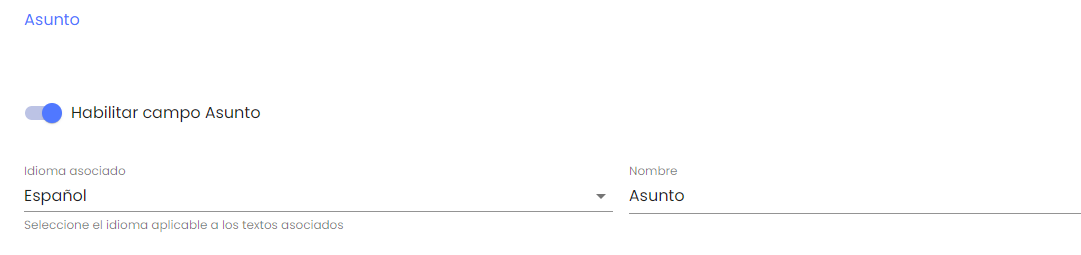
Subject
In this section, it is possible to enable/disable the "Subject" field so that it is visible in the Communications records and will be included in the reports that can be obtained from the tool. If desired, the name of the "Subject" field can also be modified.
Two-Factor Authentication
The functionality to incorporate a second authentication factor has been added to the GlobalSUITE Whistleblower Channel tool.

In addition to the current authentication mechanism (local, Active Directory, or ADFS Single Sign-On), a second authentication factor can be activated using TOTP (Time-Based One-Time Password).
This mechanism allows synchronizing a device to enter a numeric code that changes every 30 seconds and will be requested when the user logs into the tool.
This configuration can be activated as required, either optionally or mandatorily, in which case users will need to configure it on their next access.
It includes security mechanisms to allow one-time access to the tool (Recovery Codes) and can be disabled for a specific user in case of loss or deletion of the associated device.
To activate Two-Factor Authentication using TOTP, follow the steps indicated in Users > Profile
Secondary Environment
In this section, the possibility of sending communications to a secondary environment when they are deleted from the productive environment is activated.

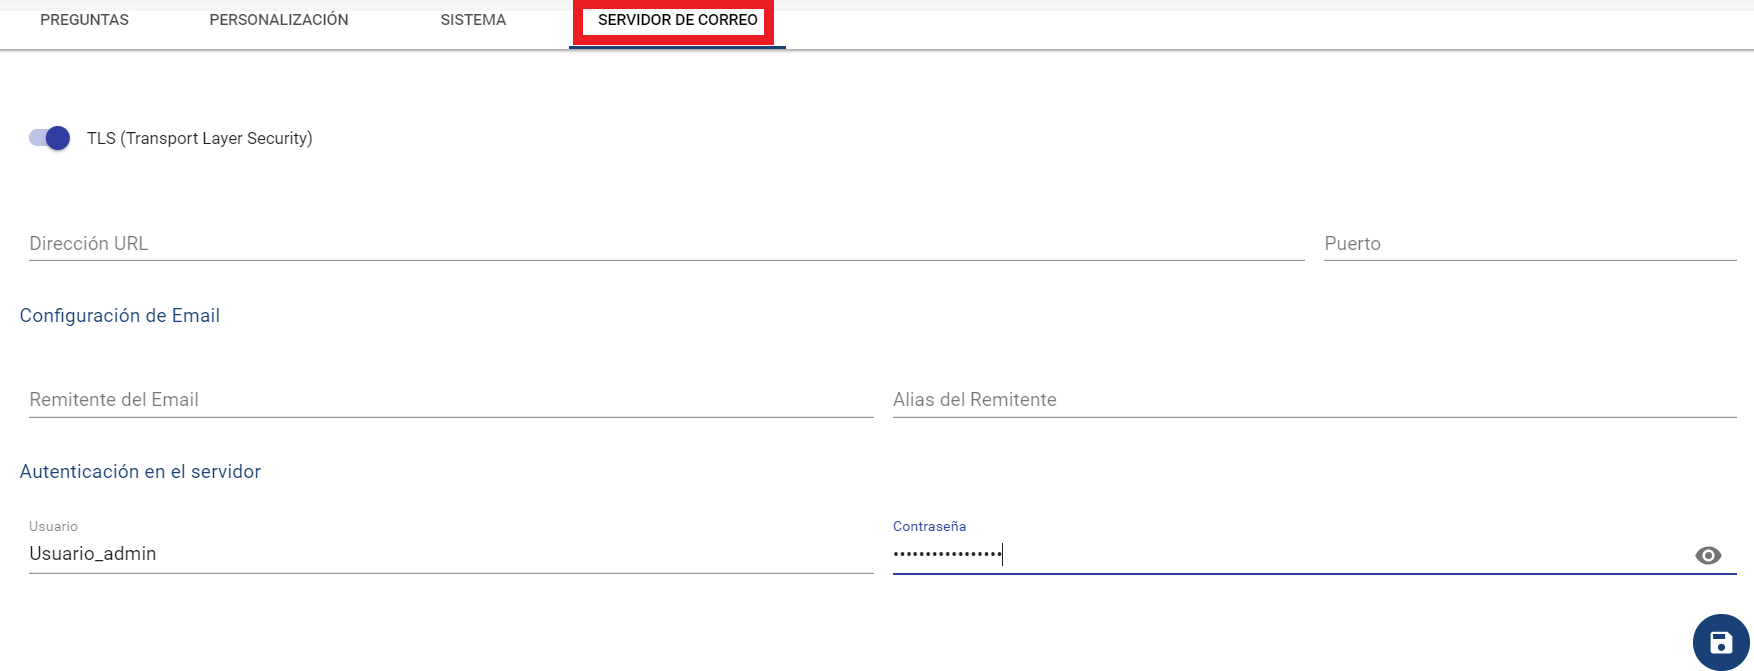
Mail Server
It is the fourth option in the top menu, where it is possible to add a Mail Server for sending notifications from the tool:
-
TLS (Transport Layer Security) → Allows enabling a cryptographic protocol for sending secure notifications.
-
URL Address → Path to the server that must be set by the technical department.
-
Port → Port that needs to be open from the area or technical department to allow communication emails to reach their destinations.
Email Configuration
-
Email Sender → Sender of the notification emails sent by the tool.
-
Sender Alias → Name that the sender will have when these notifications arrive in the email.
Server Authentication
-
User → Email account enabled on the server (Not required if Relay is available)
-
User Password → Password for the email account. (Not required if Relay is available)
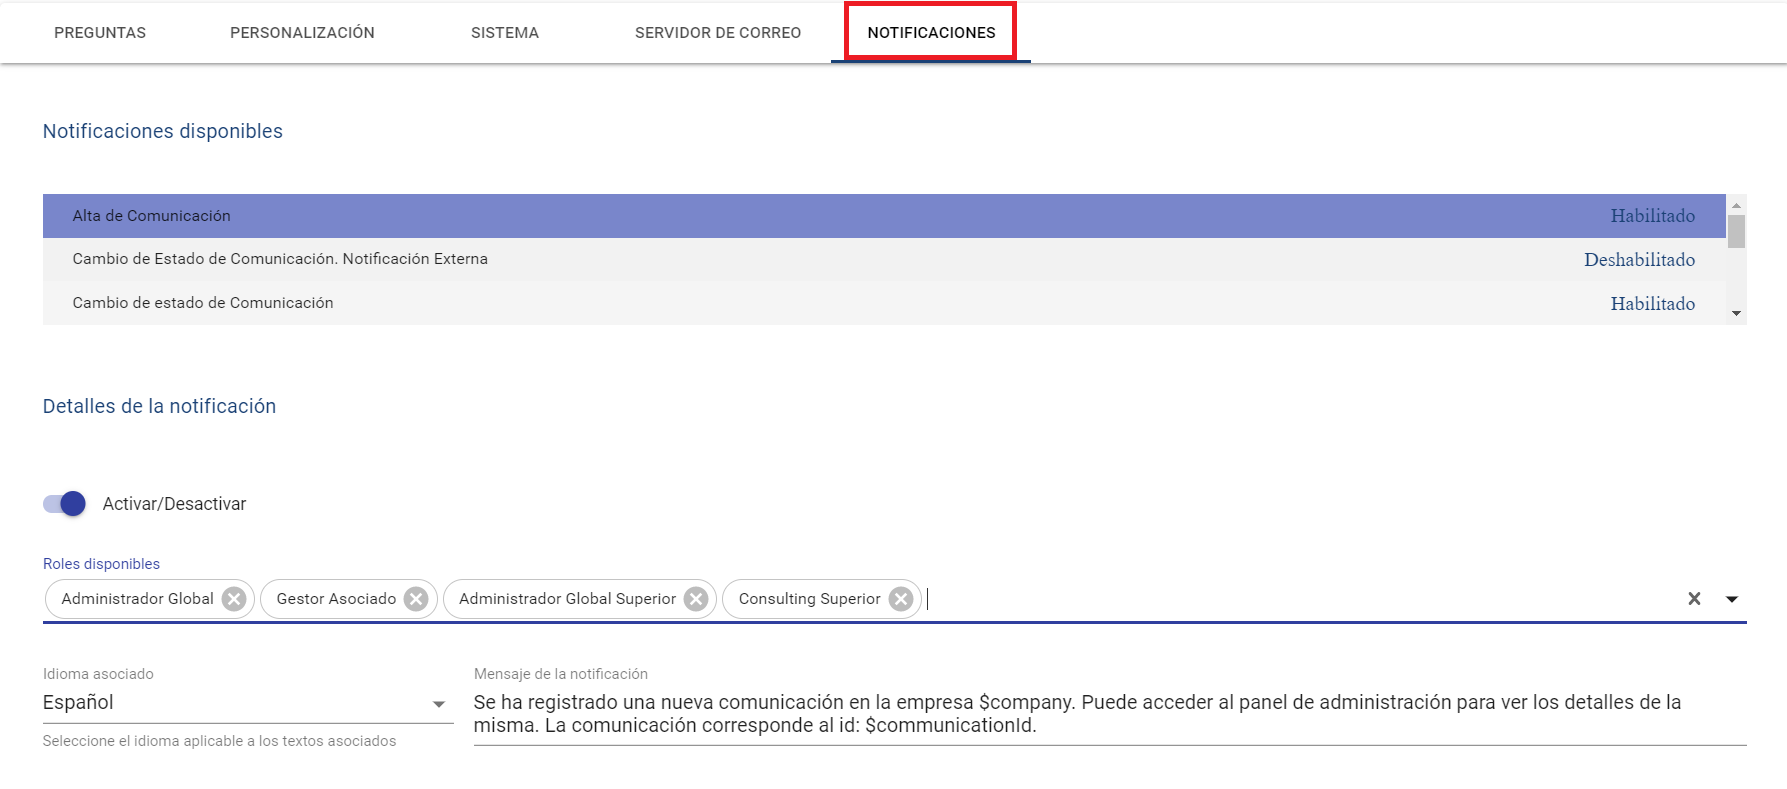
Notifications
It is the fifth option in the top menu, where it is possible to configure the notifications sent by the tool in certain cases.
Available Notifications
There is a series of notifications that can be specifically configured, which appear in the list of this section. On the right side, it is possible to check whether each of them is enabled or not. The available notifications are:
-
New Communication Registration → This notification is sent at the moment a new communication is registered (anonymously or not) and allows informing the users managing the channel.
-
Communication Status Change → This internal notification allows alerting selected users when a status change is made in a communication.
-
Communication Status Change. External Notification → Allows informing the person who made the communication (if they were a non-anonymous communicator) that a status change has been made.
-
Communication Expiry → This automatic alert is sent if there are expired communications in the company. See Expired Communications
-
Communication Comments → If this notification is enabled, it will send an email to the configured recipients if a comment is registered in a communication.
-
Public Communication Comments → This notification allows sending an alert to the communicator (non-anonymous) when public comments are registered, so they can access the communication follow-up to review them.
-
Uploading Documentation in Communication → This notification alerts the corresponding users that a new attached document has been added to a communication.
-
Uploading Public Documentation → Allows informing the communicator (if they are not anonymous) that an attached document has been uploaded to the communication, and they can access it to review it.
-
User Registration → Allows customizing the message that will be sent to users of any profile created in a company, with instructions and credentials to access the channel administration section.
This notification must contain the variables $userLogin and $userPassword, mandatorily. -
Communicator Registration → This notification, which cannot be disabled, allows customizing the message that will be sent to communicators (non-anonymous) who register a new communication, with instructions to access the follow-up.
This notification must contain the variables $userLogin and $userPassword, mandatorily. -
New Communication Assigned → This alert allows customizing the text that will be sent to Managers assigned to a communication for follow-up.
-
Communication Unassigned → Allows configuring how Managers will be notified when a communication previously assigned to them is unassigned.
-
Communication Deleted/Anonymized → Allows alerting selected roles when a communication has been deleted or anonymized. By default, it is disabled; to activate it, the checkbox field "Activate/Deactivate" must be clicked.
-
License Expiry → Allows defining which recipients will receive an alert when the GlobalSuite® Whistleblower Channel license is nearing expiration.
-
Communication Reception Reminder → This internal alert allows notifying Channel users, including assigned managers, when a communication was registered X days ago (this amount is configurable).
-
Communication Reception Notice to Communicator. External Notification → Allows notifying the status or situation of the complaint registered in the Channel when a certain number of days have passed since its creation. This email alert will only be sent if the communicator did not register it anonymously.
Notification Details
When a notification is selected in the table of available notifications, all the information to configure it is loaded in this section.
-
Activate / Deactivate → Allows enabling or disabling a specific notification for the company.
-
Available Roles → It is possible to select which user profiles will receive an email for that notification.
-
Global Administrator: All company users with that profile.
-
Associated Manager: Users of type Manager (or Consulting Manager from the parent company) who are assigned to the communication.
-
Superior Global Administrator: All users of type "Global Administrator" belonging to the parent company immediately above the specific one.
-
Superior Consulting: Users with the "Consulting" profile who are assigned to the company being notified.
-
-
Associated Language → Allows us to switch to the language in which we are parameterizing the notification message. (Once the language is selected, we can complete the text of the fields in that language)
-
Notification Message → Text field that allows specifying the message to be sent in the email body for each notification. Variables or key texts can be incorporated to be replaced by the corresponding parameter. These are:
-
$company: Corresponds to the name (Corporate Name) of the company being worked on.
-
$communicationId: This is the identifier code of the affected communication.
-
$communicationStatus: Indicates the status of the communication being notified.
-
$userLogin: Indicates the login field or user identifier (valid for both internal users and communicators).
-
$userPassword: Displays the password generated for a new user (usable only for User Registration and Communicator Registration notifications).
-
$userName: Full name of the user.
-
$userLastname: Last name of the user.
-
$publicURL: Replaced by the access URL to the communicator view, where they can report a new communication or view a previous one.
-
$adminURL: This is the access address for the internal part of the channel, where both Administrator and Consulting company management can be accessed.
-
Documentation
This option allows administrators to incorporate documents that can be consulted by other manager users from the Documents view, or by people who are going to register a new communication.
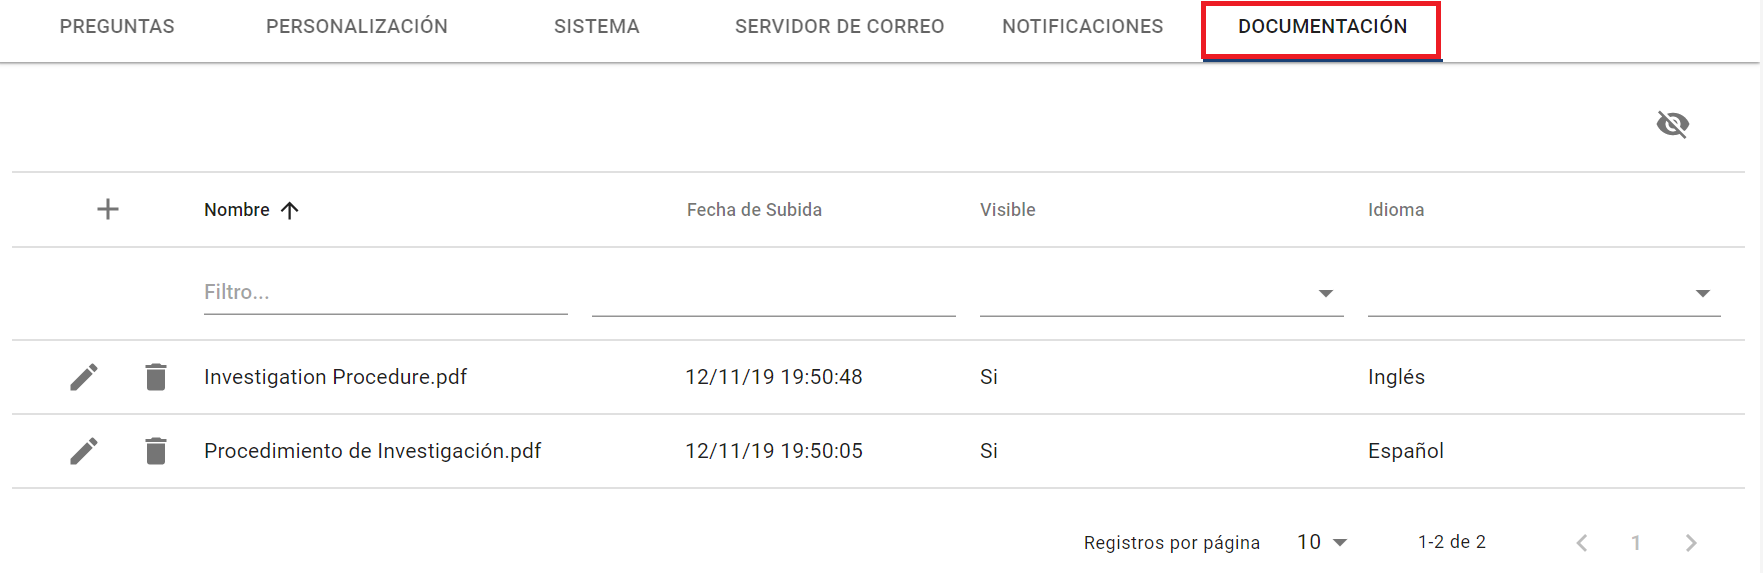
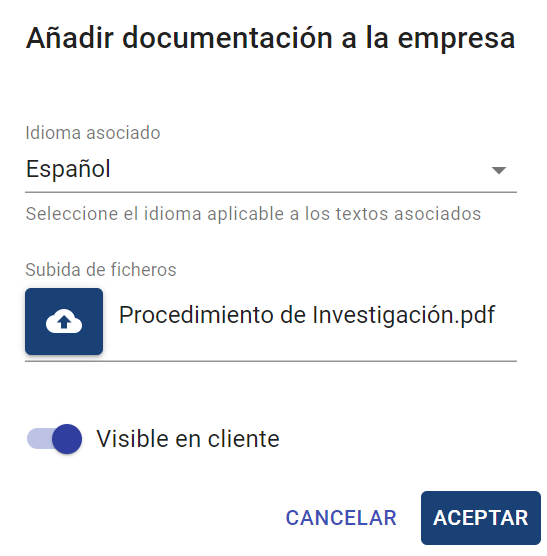
By clicking the + button, a window appears where you can upload the new document, with the following fields:
-
Associated Language → The uploaded file will be visible to users who have that language configured in the tool. This allows uploading a version of the document for each language.
-
File Upload → Allows selecting the document to be incorporated into this table from the local device.
-
Visible to Client → When checked, the document will be available to people who are going to formulate a new communication.
Connections
This section allows administrators to configure connections with external systems, services, or tools.
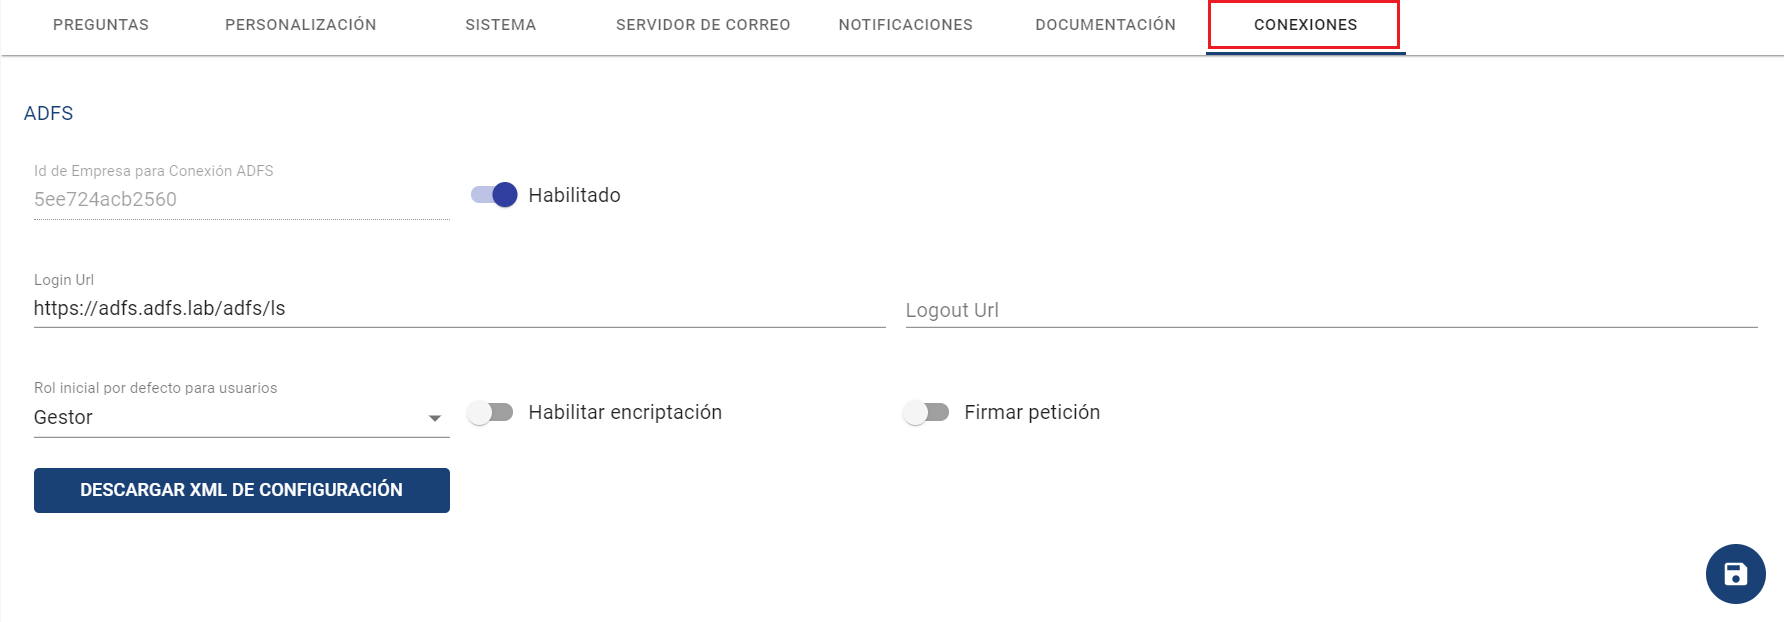
ADFS
If you want to integrate the company with the corporate ADFS server, it can be configured in this section. This will allow users to access via Single Sign-On (SSO) directly if authenticated in the domain.
NOTE: This functionality is offered as an additional service. If you want more information, contact your provider.
First, to configure the integration, it must be enabled (check Enabled).
Next, the following fields are available:
-
Company ID for ADFS Connection → This field is automatically generated. It indicates the trust chain established between the ADFS server and GlobalSUITE® Whistleblower Channel. It is a unique field.
-
Login URL → When configuring a connection using the SP initiated SSO method, the IdP service URL where authentication via ADFS is performed must be entered.
-
Logout URL → Address to which users with ADFS authentication are redirected when they log out. If not defined, logging out will return to the default login screen.
-
Enable Encryption → ADFS connection configuration that allows parameters received from the IdP to be encrypted.
-
Sign Request → Indicates that, using the SP initiated SSO configuration, the authentication request made to the IdP will be signed.
-
Default Initial Role for Users → Here you can specify the default role for new users accessing via ADFS. They can be:
-
Administrator
-
Global Administrator
-
Manager
-
User roles can be obtained directly from the ADFS server. If no role data is received or the received data is incorrect, the role configured in this field will be used.
Using the "Download Configuration XML" button, you can download the configuration XML file to load it as a new entry for trusted user veracity.
IMPORTANT NOTE: The SAML2 standard has several binding protocols.
-
HTTP Redirect
-
HTTP POST
-
HTTP Artifact
Currently, GlobalSuite® Whistleblower Channel only supports the HTTP Redirect protocol.
ADFS Server Configuration (SAML 2.0)
In the ADFS server configuration, it must be indicated that the data to be passed in the request are at least:
-
Name ID (nameidentifier)
-
Email Address (emailaddress)
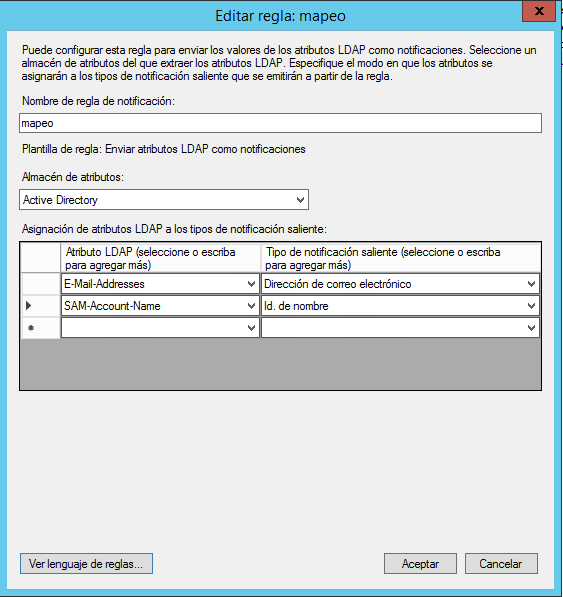
If you want to send the role configuration to create new ADFS users, the claim must be used:
http://schemas.microsoft.com/ws/2008/06/identity/claims/role
IMPORTANT: The role name sent from the ADFS server must match one of the roles configured in GlobalSUITE.
For more information about ADFS server configuration, you can access:
ADFS Authentication (SAML 2.0)
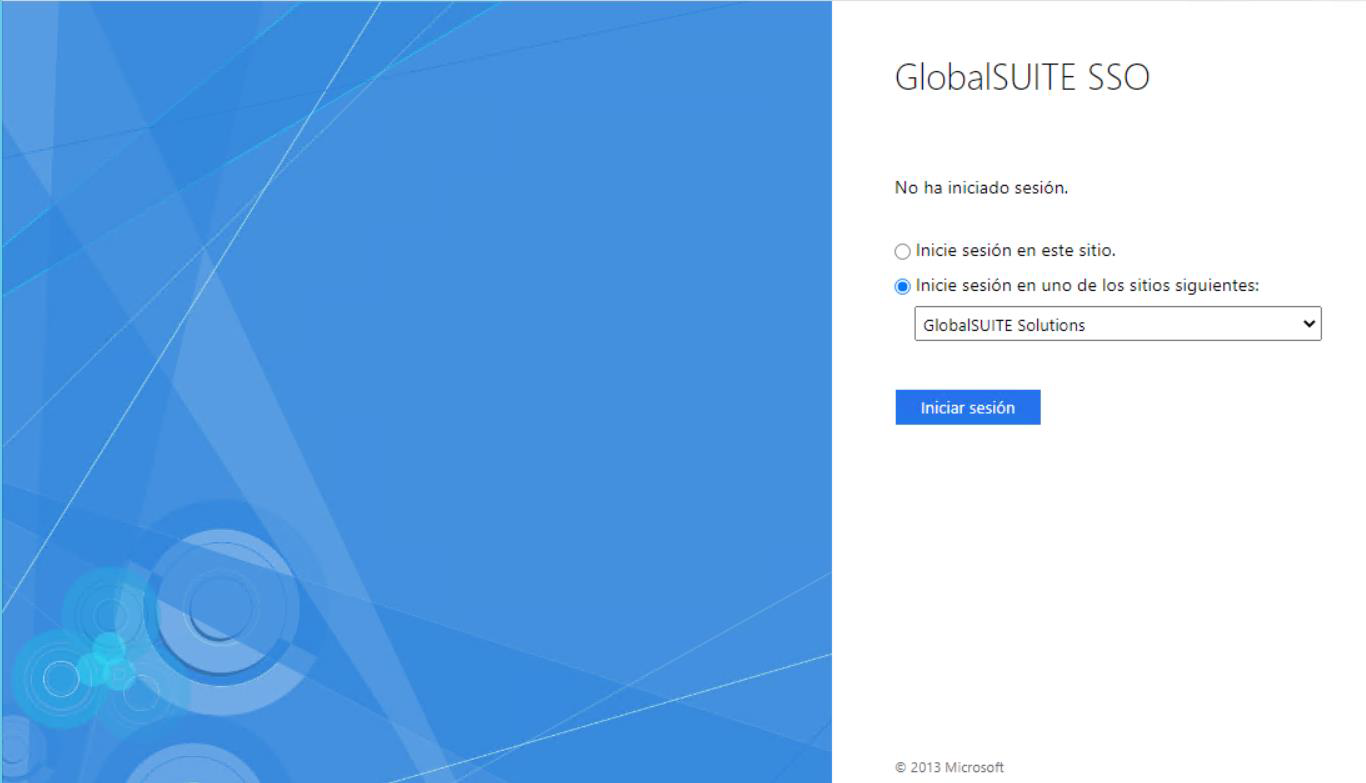
There are two types of authentication with ADFS:
-
IDP initiated SSO, the authentication process is initiated by the IdP. The user has a list of "corporate applications," selects the one corresponding to GlobalSUITE, and initiates authentication. Below is a sample image of this application form.
-
SP initiated SSO, the authentication process is initiated by GlobalSUITE. To use this method, you must access with a specific URL. This URL is formed by concatenating the GlobalSUITE URL with the text: ?entityID=[Trust Identifier], where the trust identifier is the code generated in the connection and can be found in the field with the same name. See section 1 of this document.
An example of a URL is:
https://demochannel.globalsuitesolutions.com/admin/?entityId=5ee724ad10a35
Authentication with ADFS has the following particularities:
-
If the user is accessing the tool for the first time via ADFS, a user will be automatically created with the username provided in the SAML request.
-
If the username already exists in GlobalSUITE and is not the same as the one created in the first connection, an error message will be displayed.
Dashboard
This option allows administrators to customize the graphs that appear in the Home - General Company Overview section.
In this section, we can reorder the graphs to appear in the desired order using the arrows on the right side.
If we do not want to view a particular graph, we can hide it from the main view.
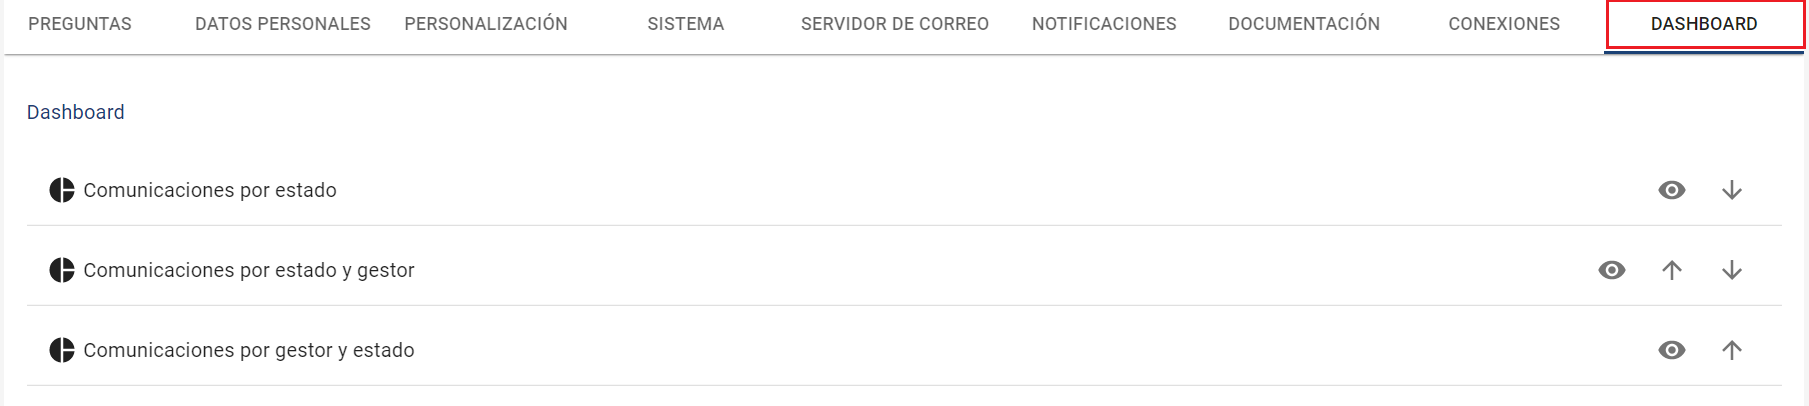
By default, these graphs are:
-
Communications by Status
-
Communications by Status and Manager
-
Communications by Manager and Status
-
Communications by Category
-
Creation of Communications by Date
-
Selection Questions
-
Verification Questions
-
Storage Space