CREATION OF A COMMUNICATION
When creating a communication, the steps indicated below must be completed (these steps are customizable, although this example contains the different types of sections available). At any time, it is possible to consult the support documentation that the channel manager has made available to the communicator:
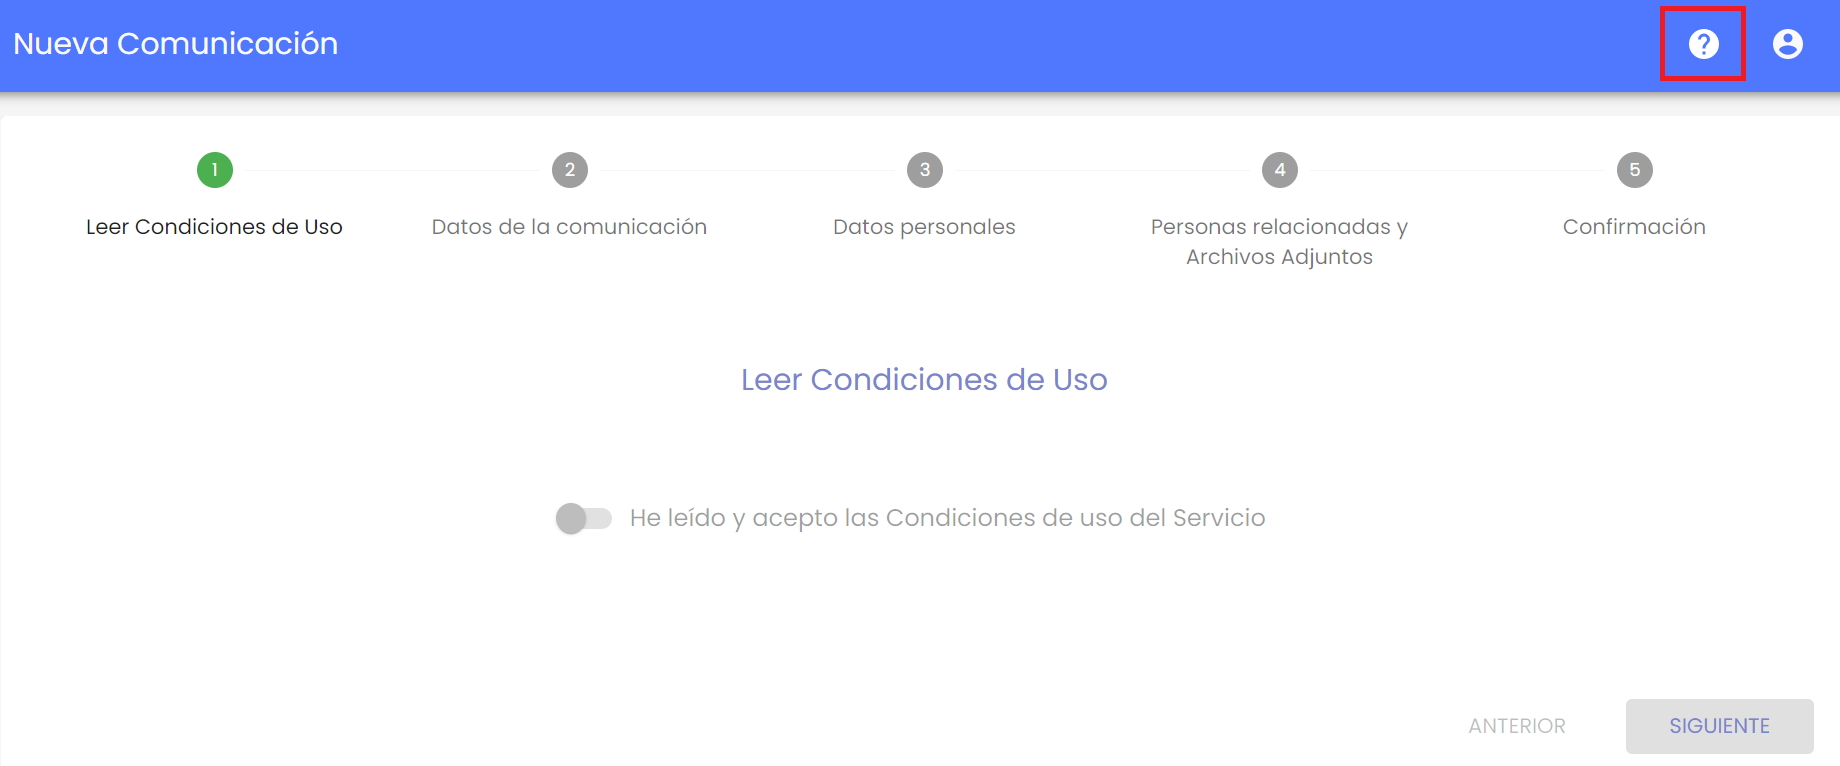
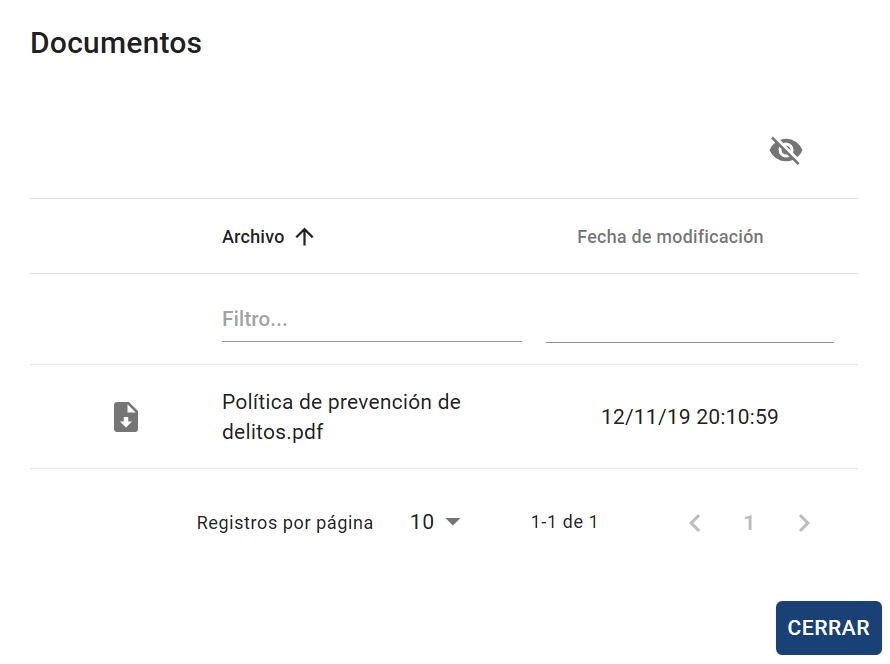
By pressing the button, the list of documents will appear. If none exist, the link to access this user manual will appear.
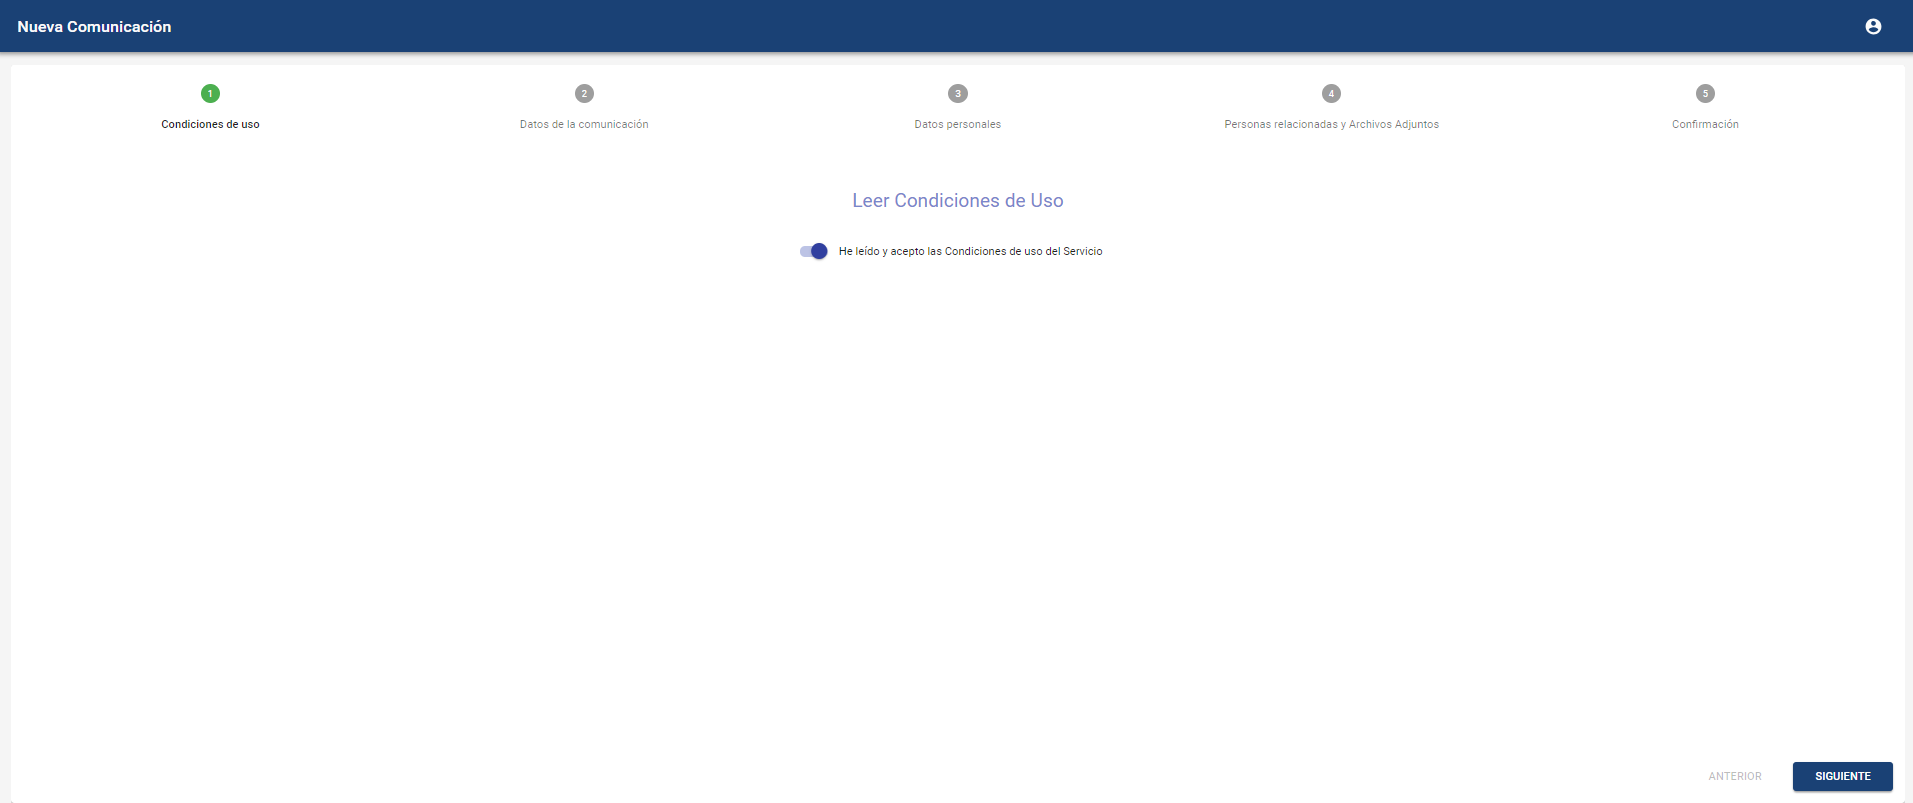
1- Acceptance of the terms of use.
These are the terms of use defined by the company where the communication channel is implemented.
2 - Communication data
General form for drafting the communication. The available fields can be completed, including mandatory fields necessary for registration. If they exist, it will not be possible to proceed to the next step until they are completed. These fields may include dropdown options, textual fields, dates, or checkboxes.
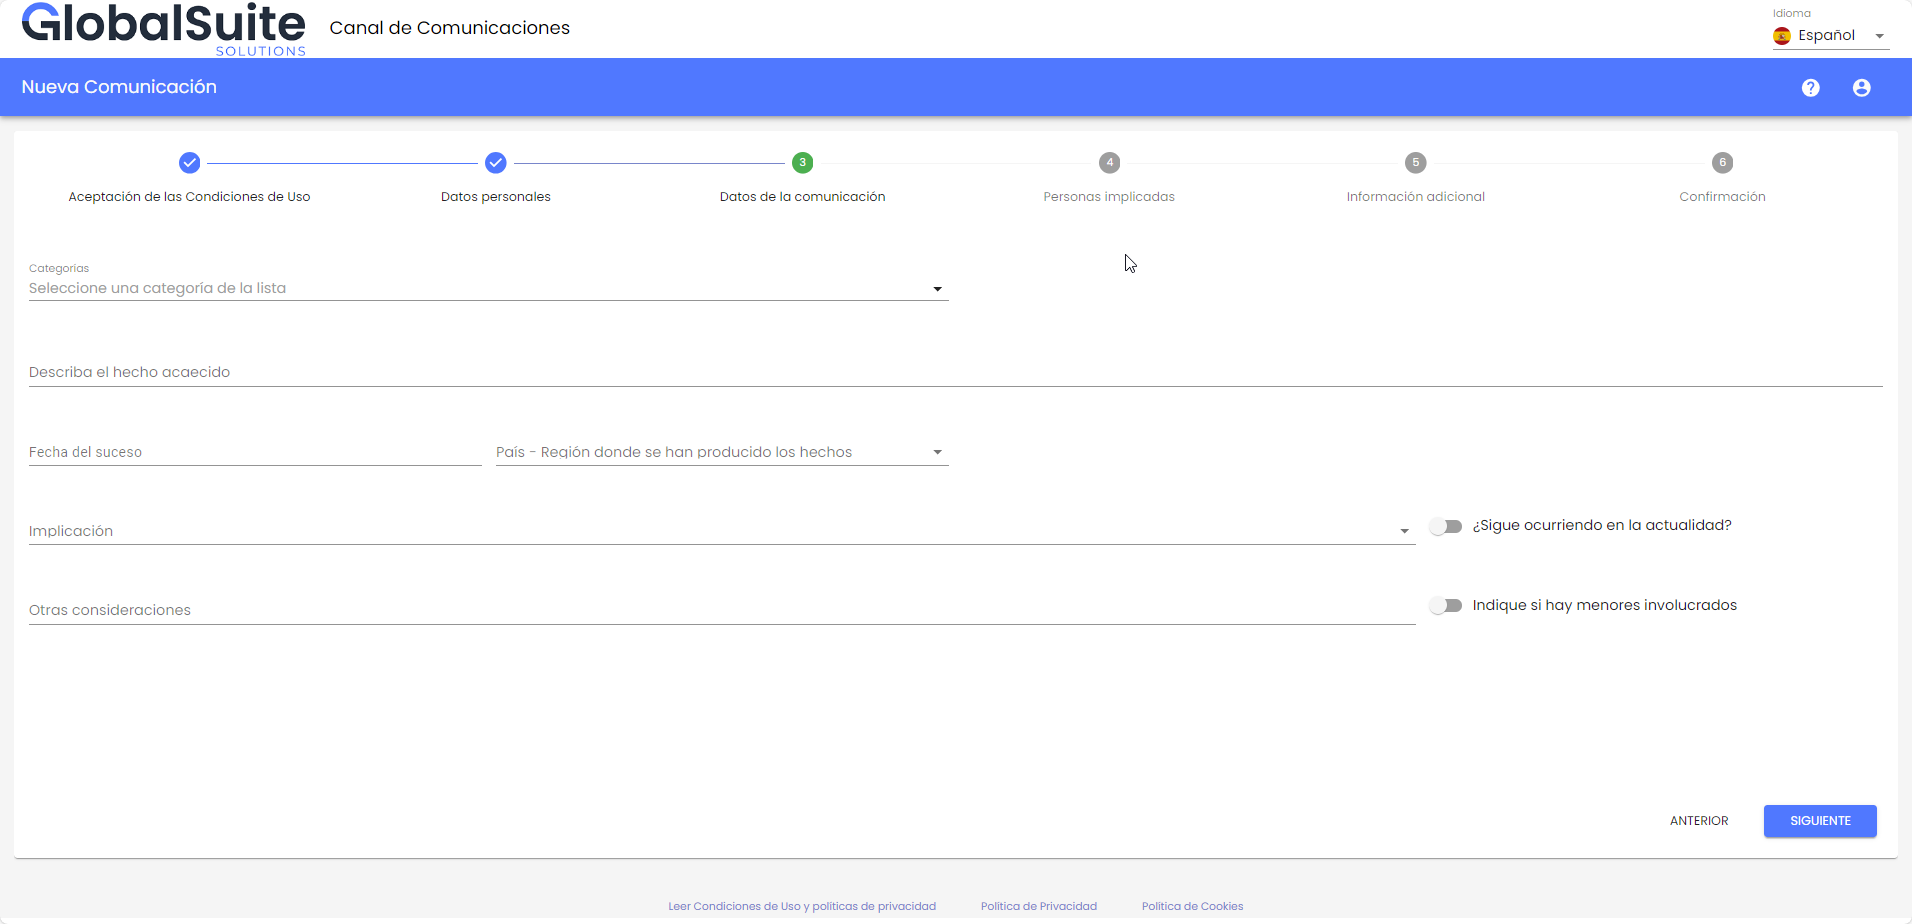
2.1 - Categories
If the categories are configured with at least one visible, within this step, a selector will be displayed to assign a category to the communication.
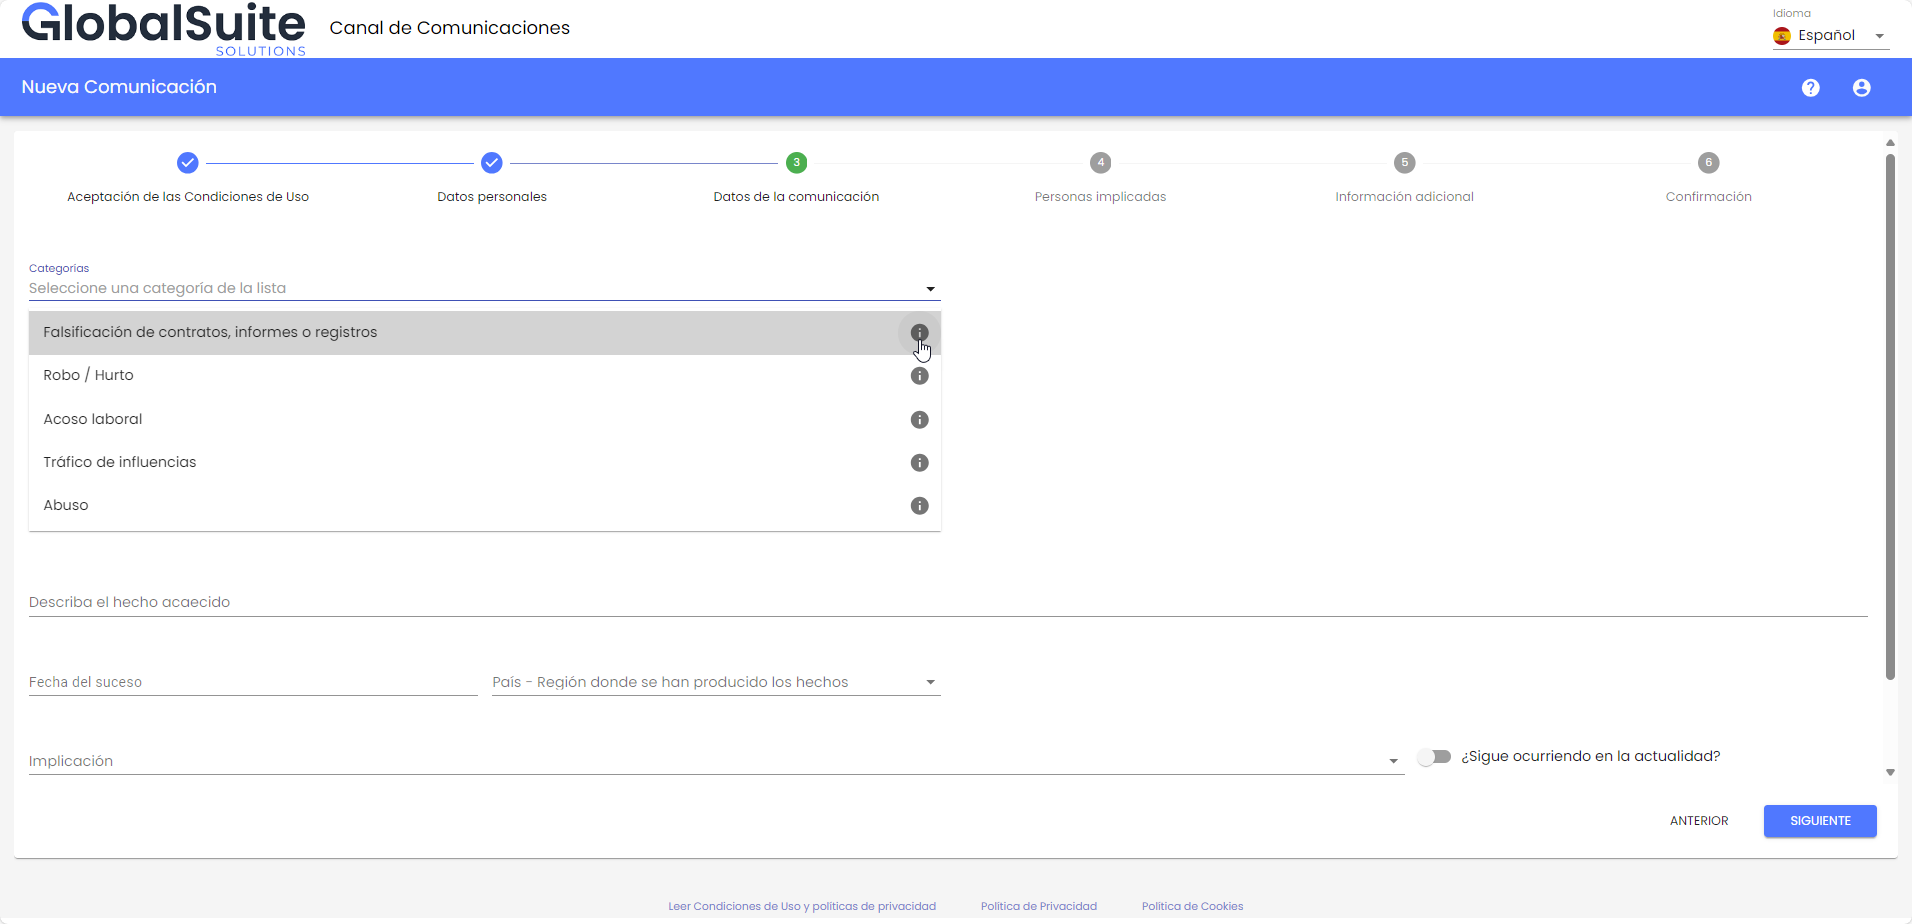
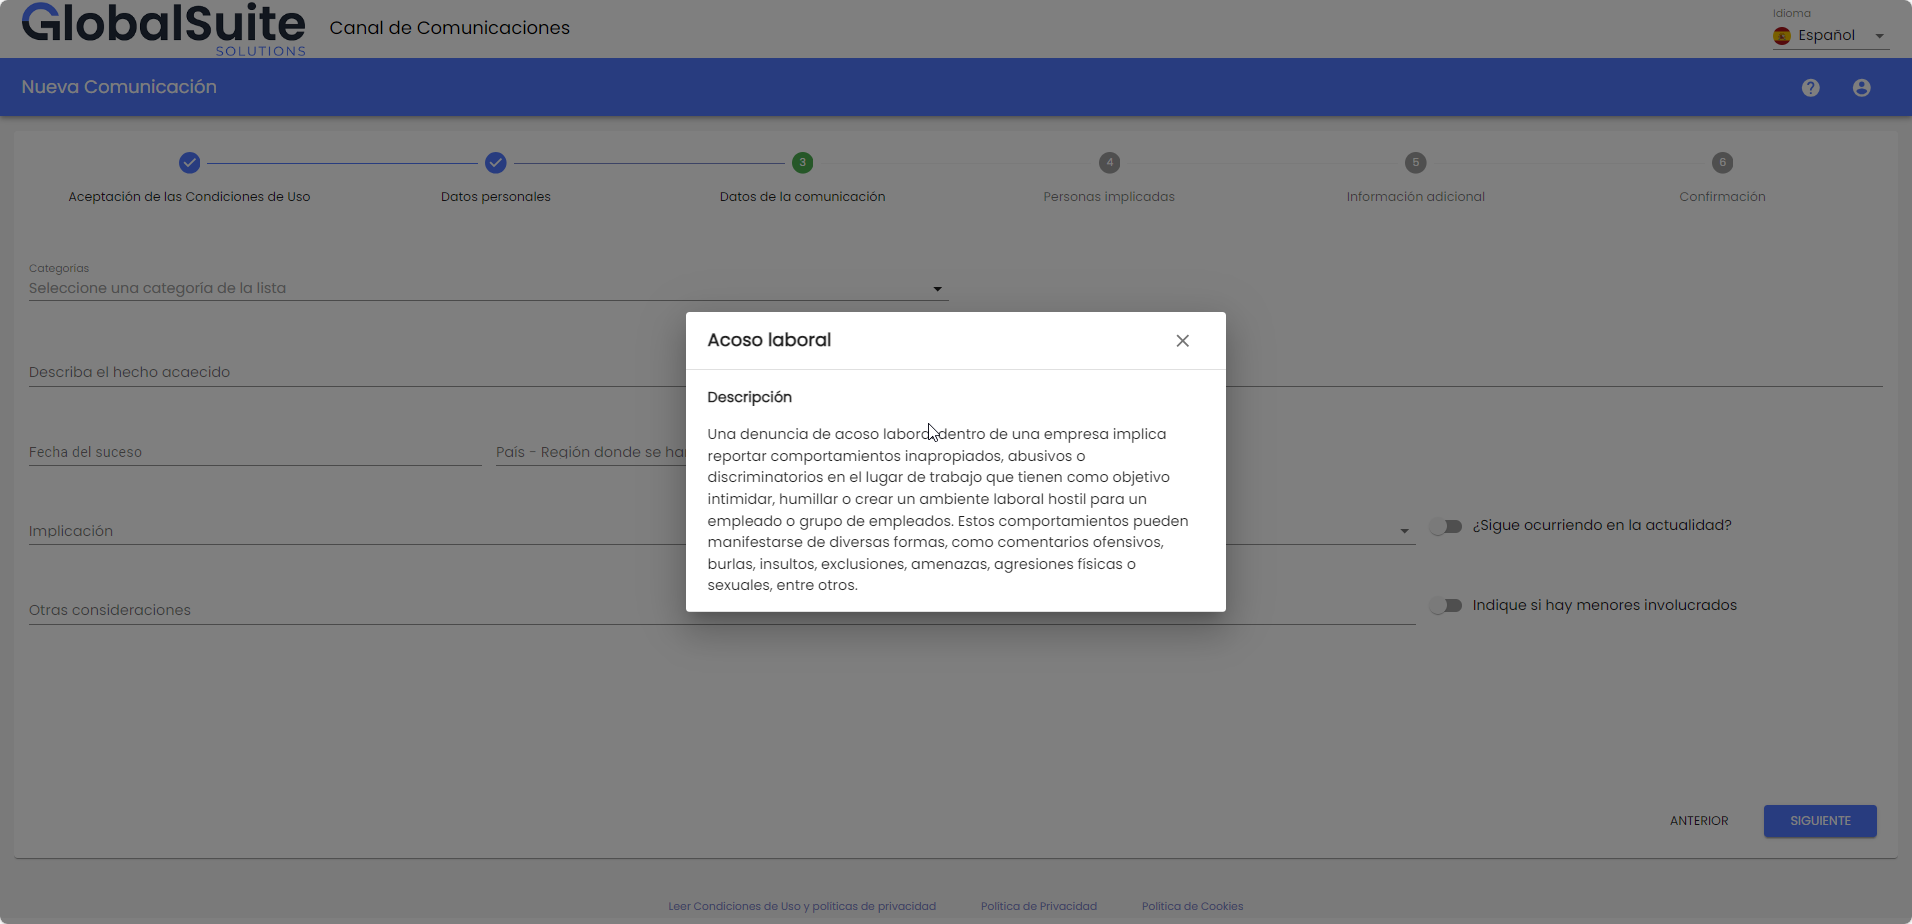
To see more details about the category to select, there are several ways, the first by pressing the Information icon that appears to the right of the name, a pop-up window will open where you can get more information about the category.
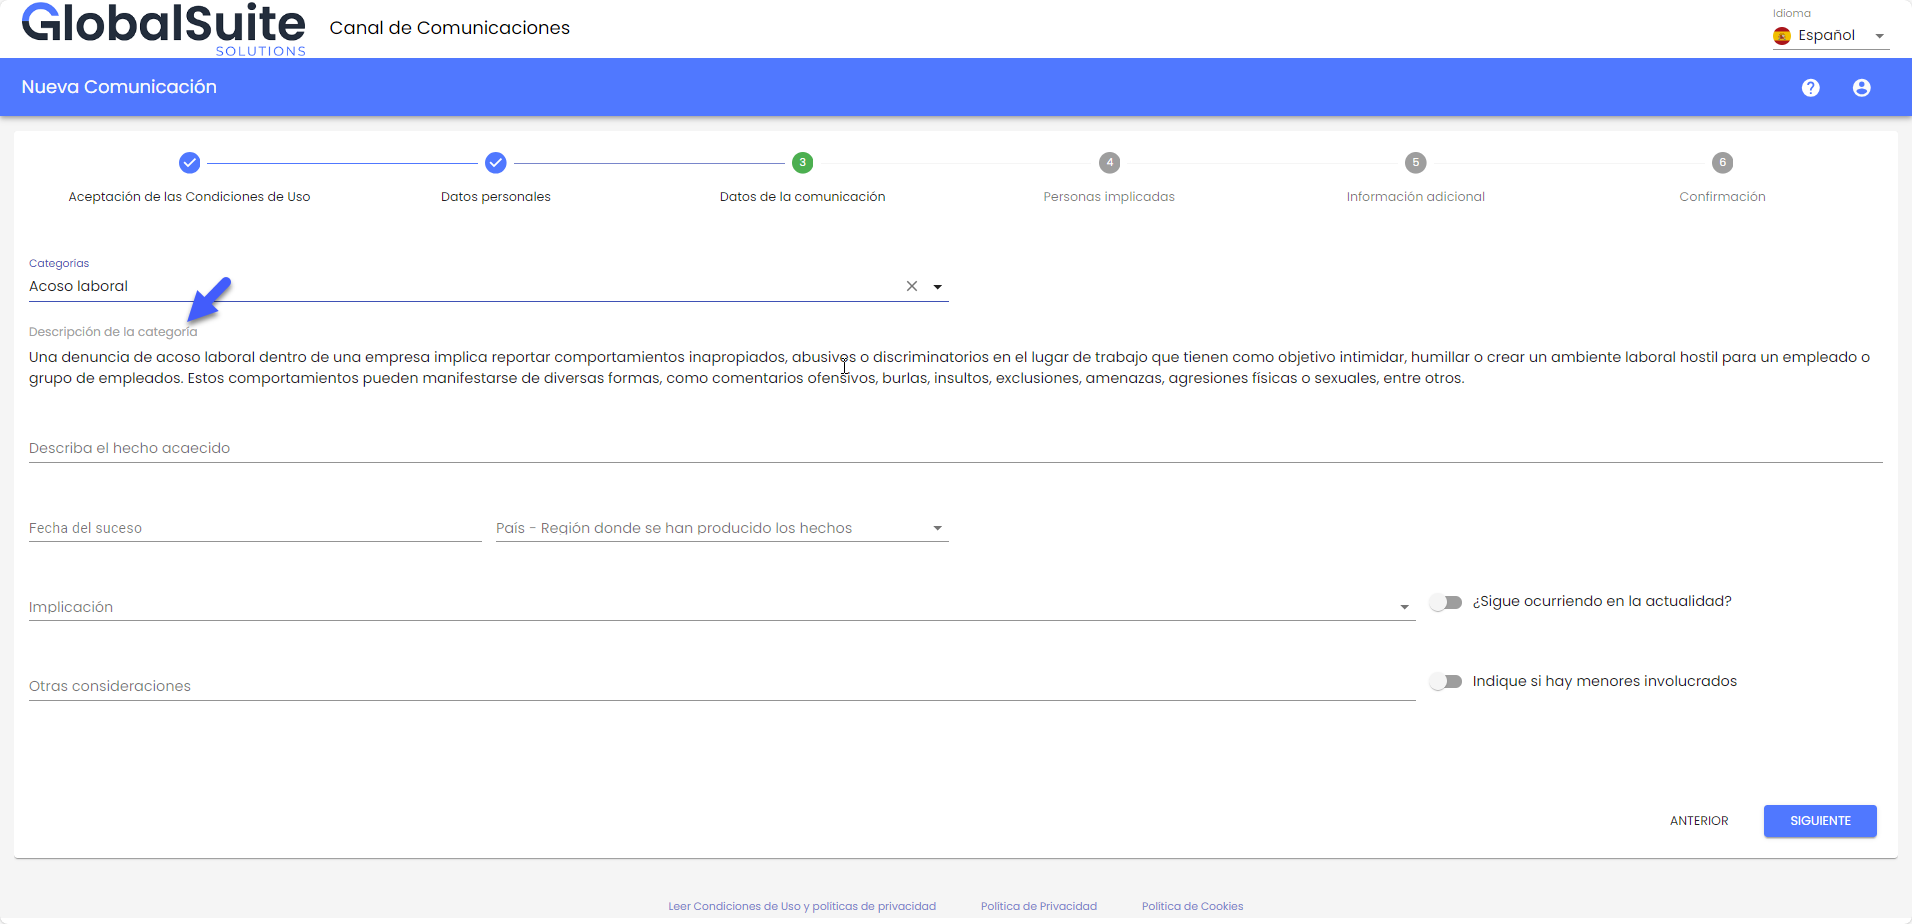
It can also be seen after selecting a category, below it:
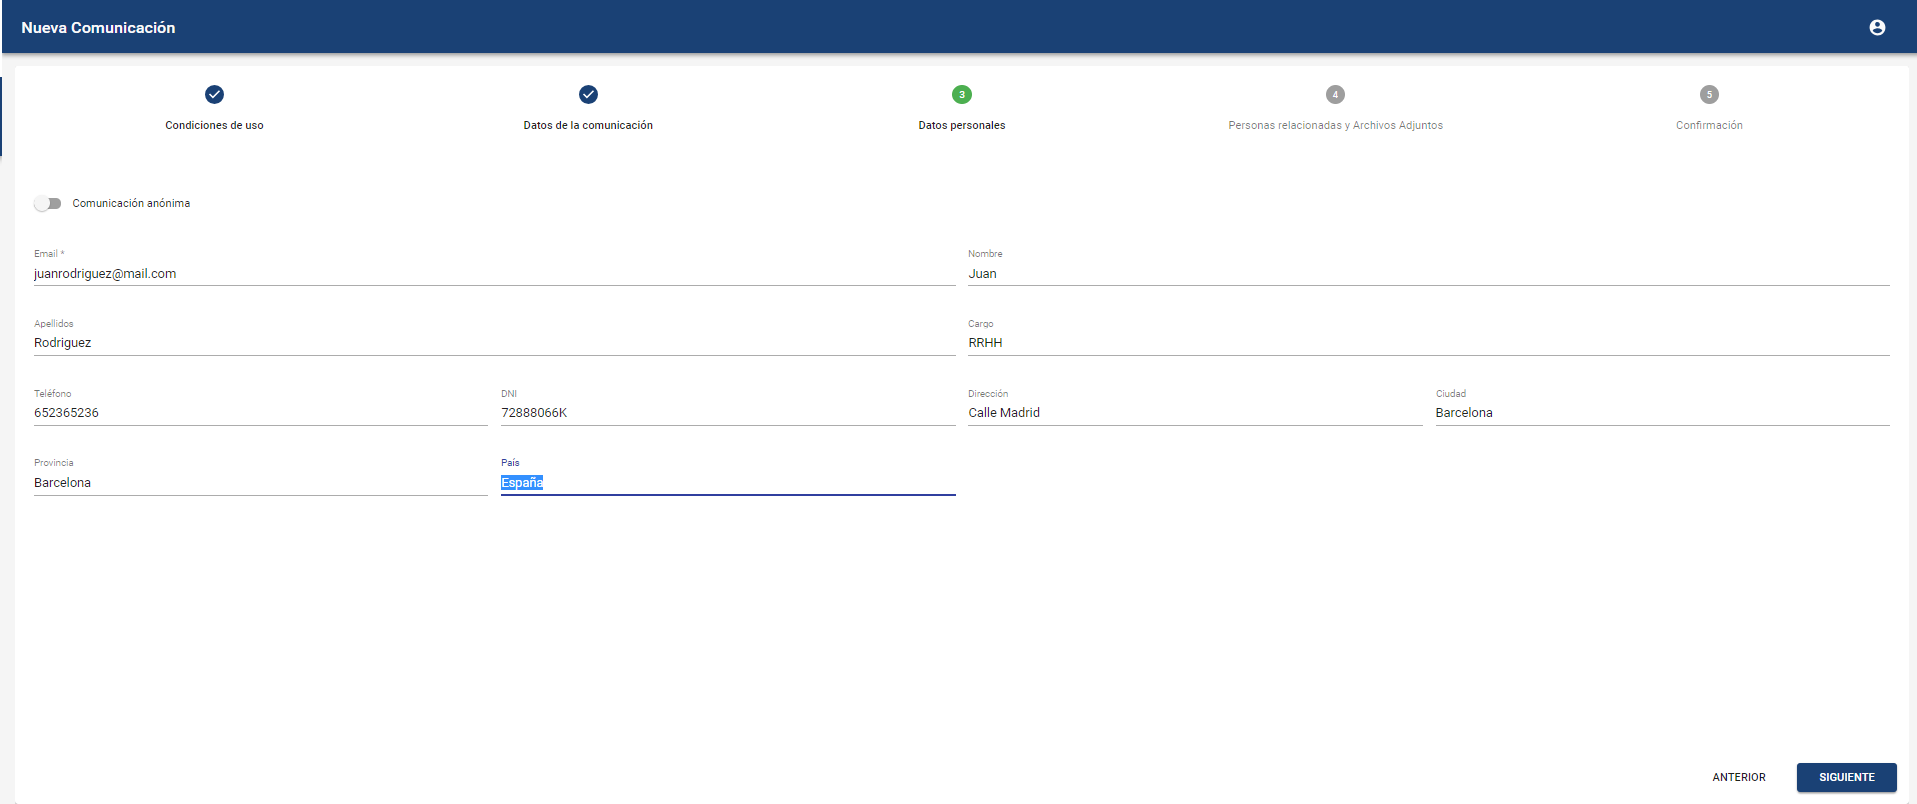
3 - Personal data
Personal data of the communicator. Depending on the configuration, the communication can be sent anonymously, or it will be necessary to identify oneself. In that case, the communicator must complete at least the "Email" field to be able to send it.
4 - People involved in the events, informants, and attachments
Allows reporting on people involved in the reported event, informants who may have more information about it, and attaching files that serve as evidence or proof of the incident.
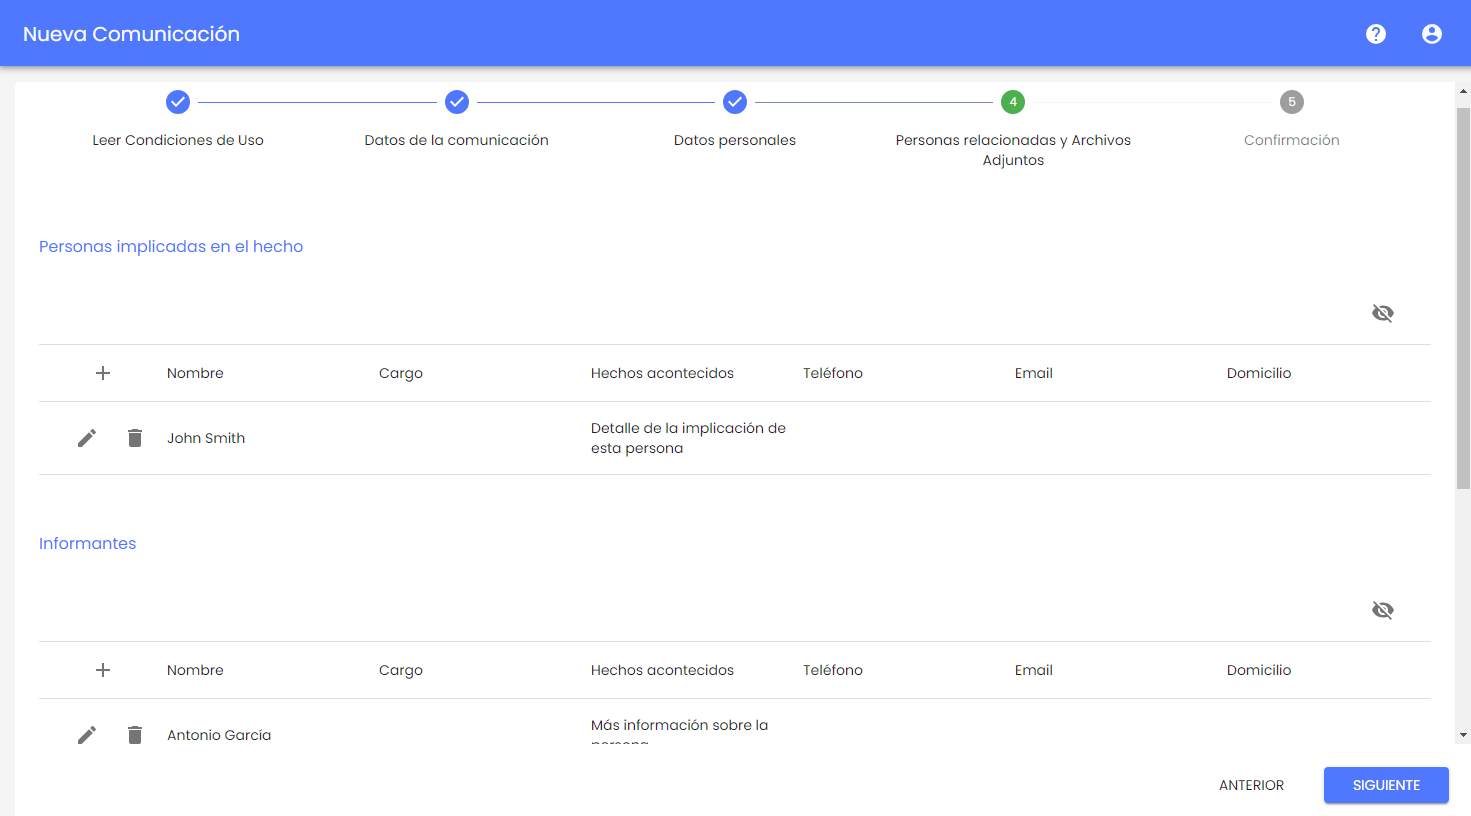
Example of introducing a person involved in the incident:

In the case of the Attachments field, it is possible to upload information in two ways, depending on the channel configuration:
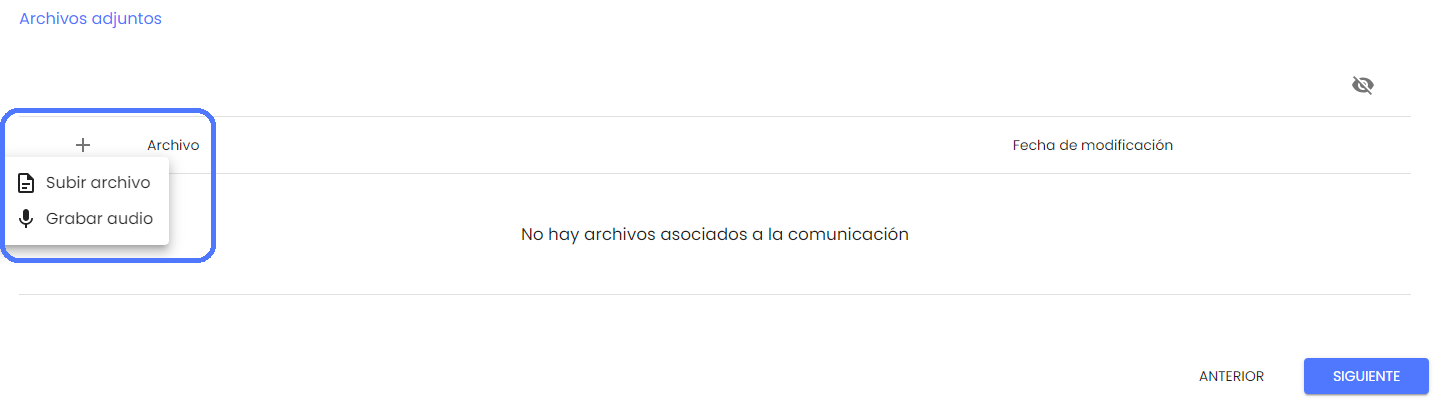
-
Upload file: Allows selecting a file from the local device and uploading it to the communication form.
The files that can be included in the communication must be of one of the allowed types:
.7z, .ac3, .avi, .bmp, .bpm, .bpmc, .csv, .doc, .docx, .dot, .jpeg, .jpg, .mgr, .mkv, .mov, .mp3, .mp4, .mpp, .mpt, .msg, .odg, .odp, .ods, .odt, .pdf, .png, .pps, .ppsx, .ppt, .pptx, .rar, .rtf, .txt, .vsd, .vst, .wmv, .xls, .xlsm, .xlsx, .zip
-
Record audio: This option provides an alternative for recording the communication information using voice. By pressing it, a window will open to start the recording.
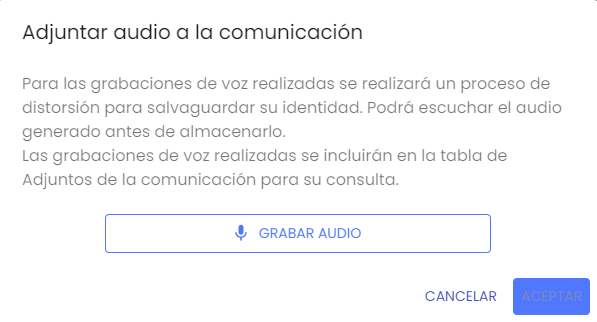
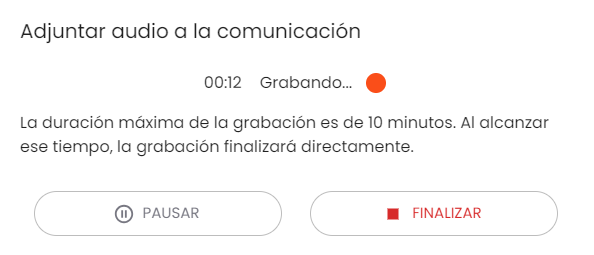
During the recording, it can be paused to continue at any time or finish the recording.
Once the recording is finished, it is processed to distort the voice and safeguard the communicator's privacy. The communicator can play the recorded audio before storing it. If the audio is not to be saved, it can be discarded, or otherwise, a subject can be assigned, and Accept can be pressed.
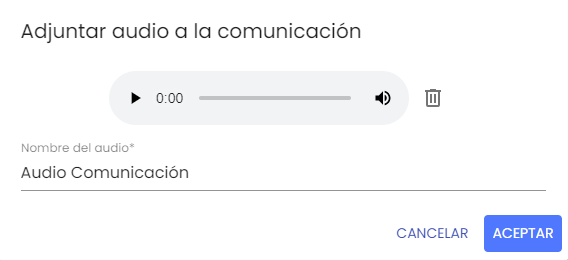
The voice audio (after the distortion process) will be stored in the attachments table and sent along with the rest of the information upon completing the communication.

5 - Confirmation
Summary view of the communication to be sent, indicating how many questions available in the form have been completed, whether any files have been attached, and the communicator's information or if there are people involved.

If the conflict of interest is enabled in the Channel, in addition to the summary of the provided information, the communicator will see which users will receive the communication being sent.
By default, the users corresponding by default or associated with the category selected by the communicator will appear marked.
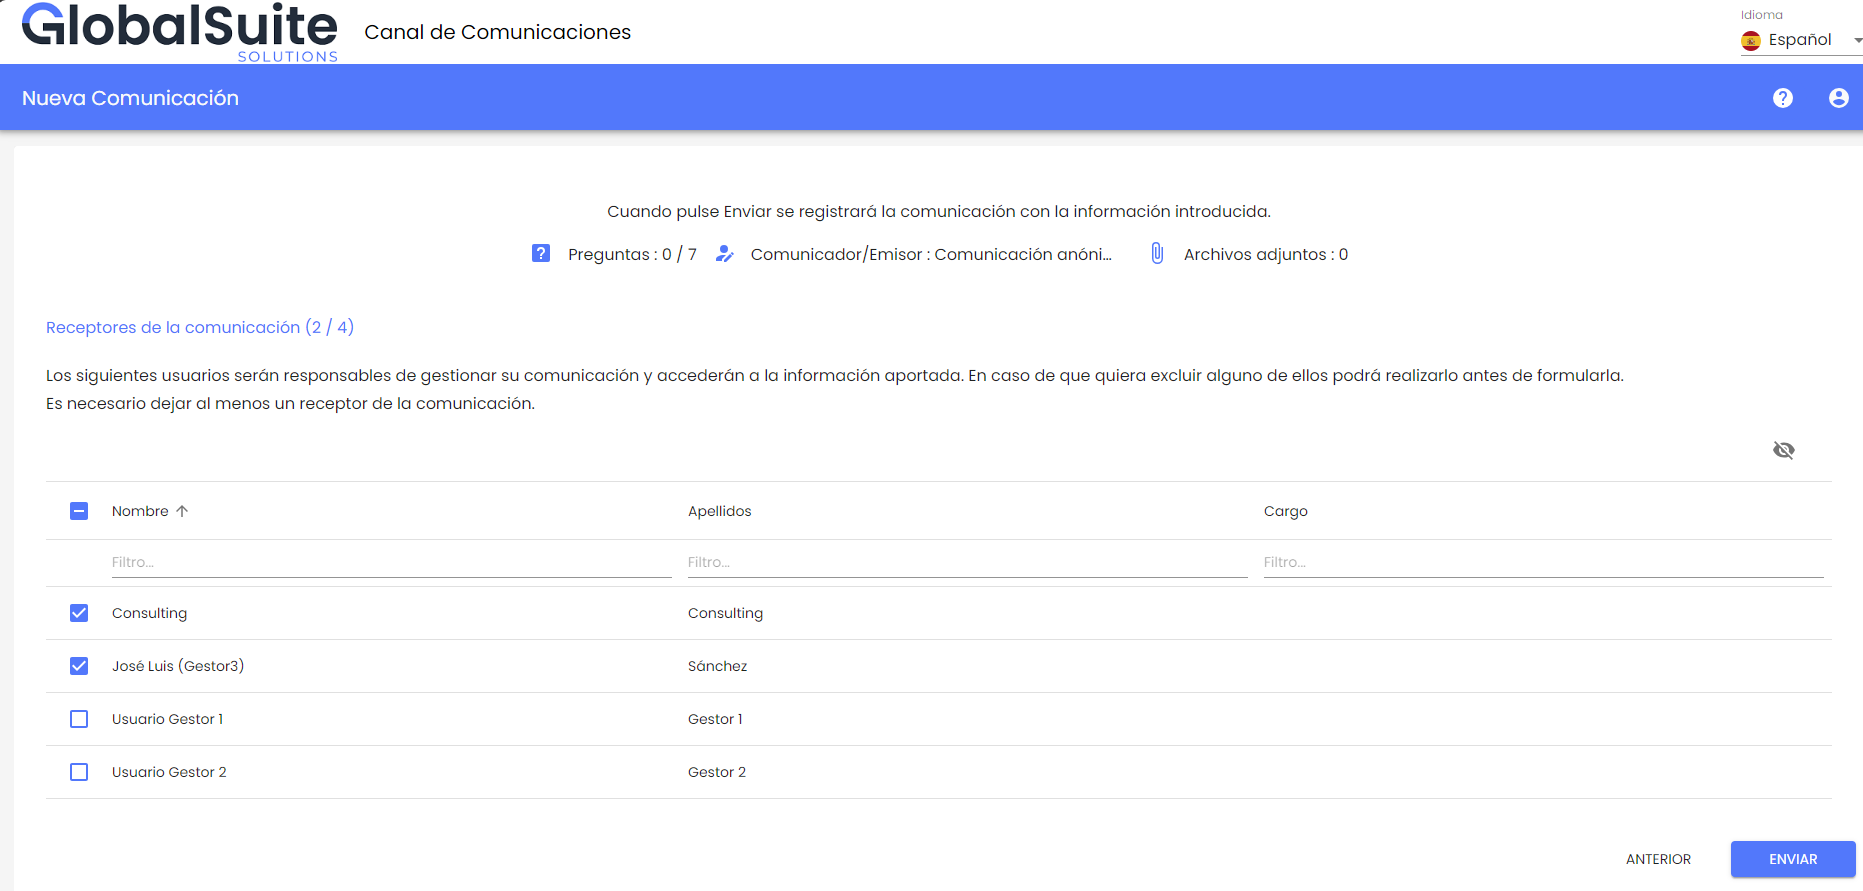
Other managers who do not apply to the selected category will also be displayed, unselected, as alternative recipients.
If the communicator considers that any of the people who will receive the communication may be involved and should not have access to it, they can unmark them and mark an alternative.
To ensure that the communication can be managed in the Channel, it will only be possible to send it if at least one user is marked to receive it; otherwise, the Send button will appear disabled.
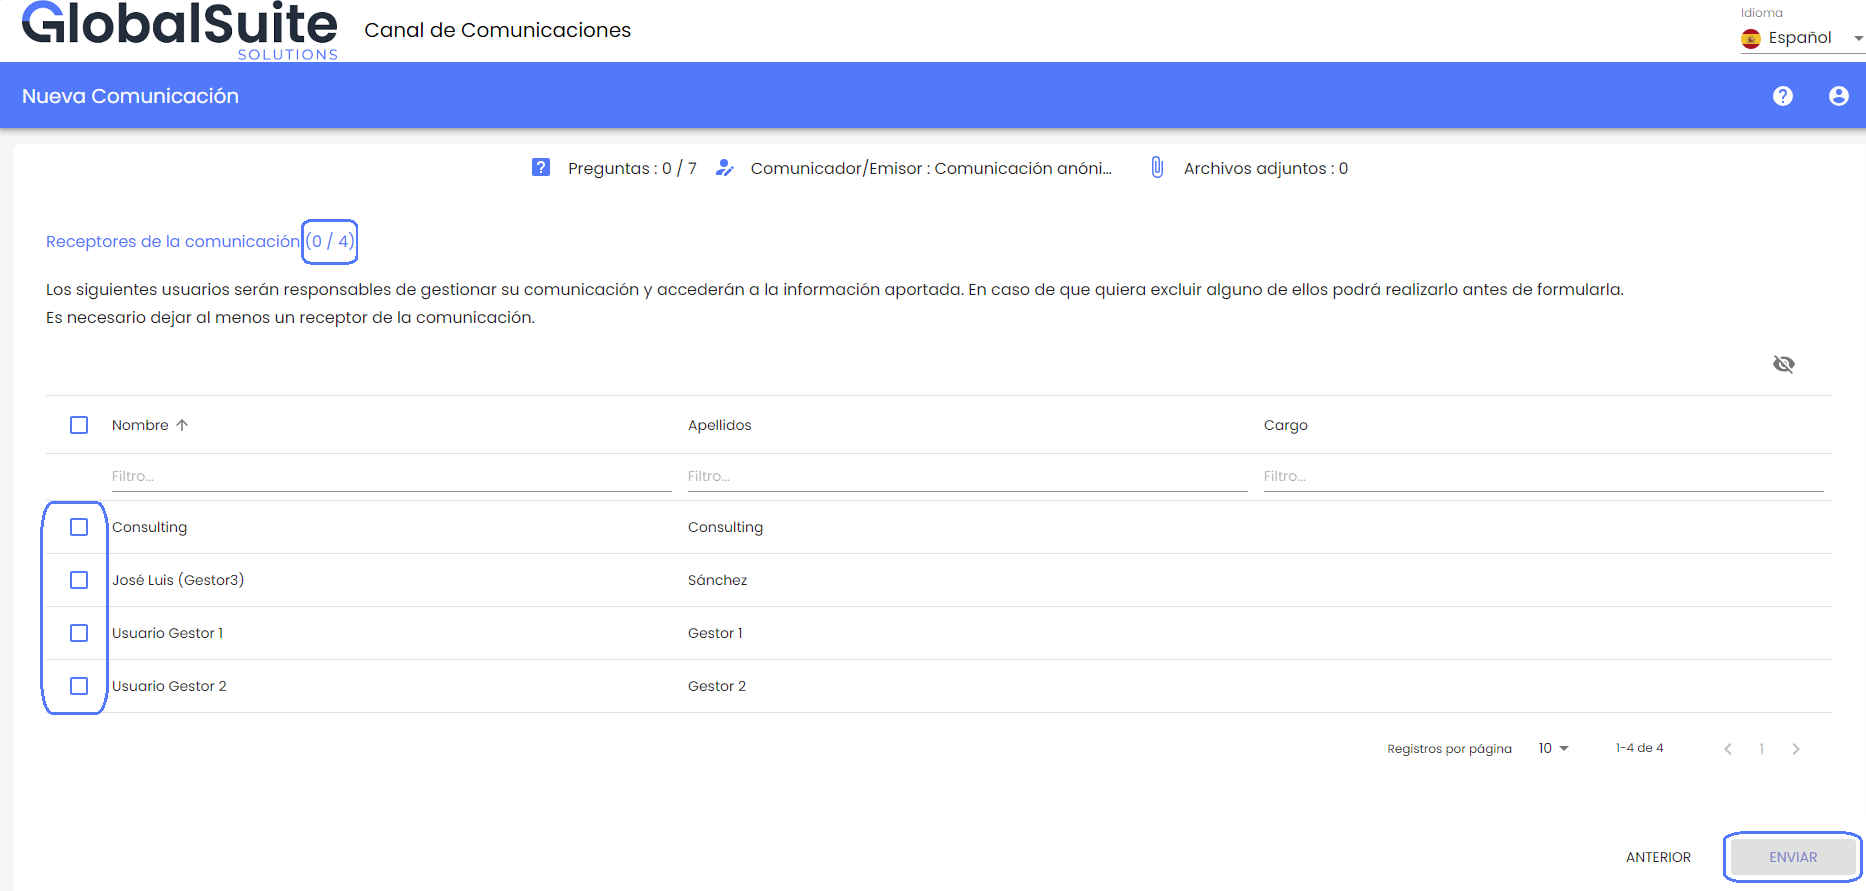
When the communication is sent, channel users who do not have access will not receive any notification or alert about it.
6 - User and Password
Access credentials for future review of the communication.
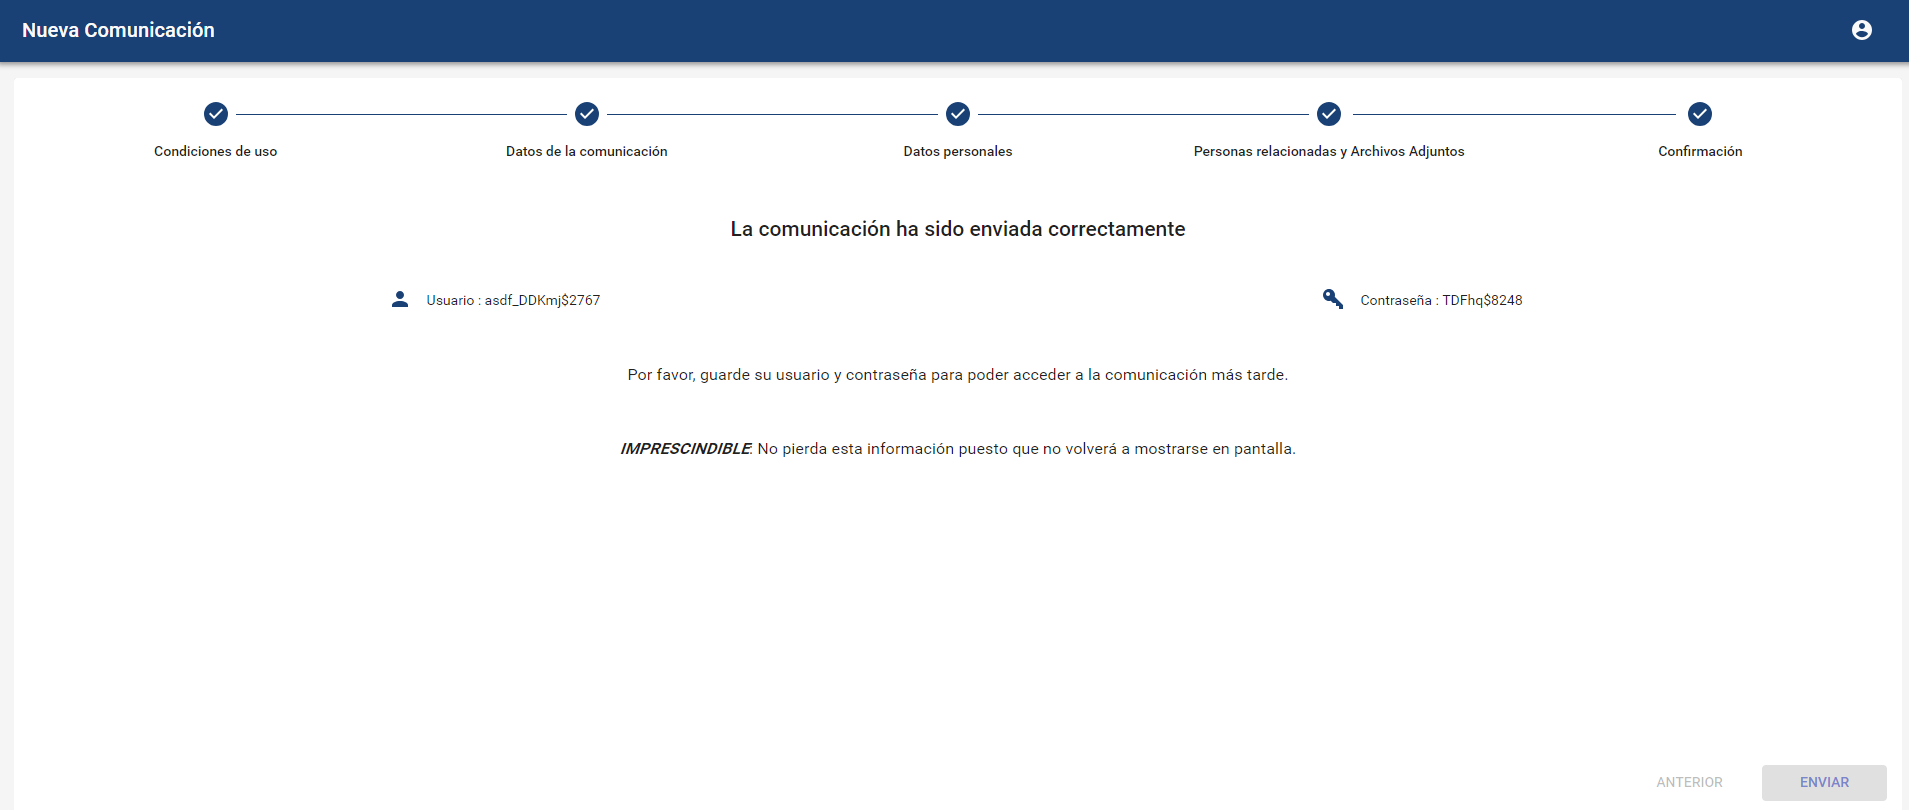
IMPORTANT NOTE: It is very important to store the credentials that appear in the last step, especially in the case of making an anonymous communication, because once the process is completed, they cannot be recovered, and it is the only way to track the communication made.
If the communicator has identified themselves, this username and password will be sent to them by email.