In this article, we will address how to complete the catalog of services and processes, define the organizational structure, establish the scope and objectives of the management system, and configure roles, employees, competencies, and functions, indicating in each case where to do it (Home or Settings) to leave the platform ready to work.
Phases for the initial configuration of the Continuity System
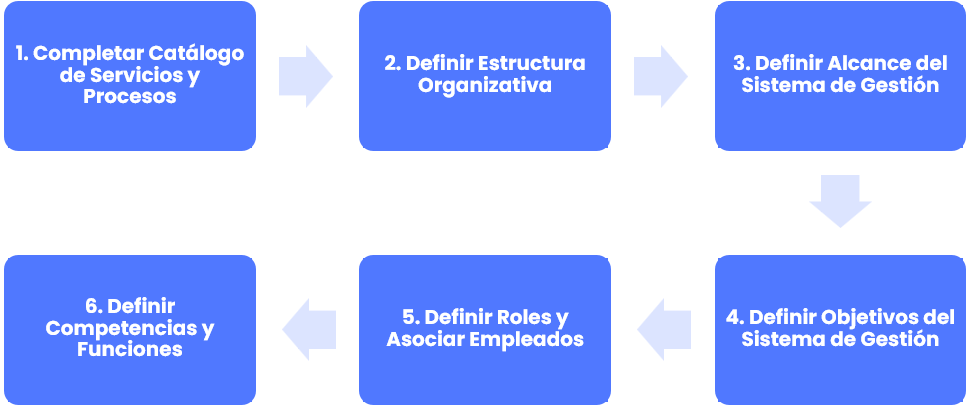
1. Complete Catalog of Services and Processes
To perform this step, see the Guide How to define and manage services and processes in GlobalSuite®?
2. Define Organizational Structure
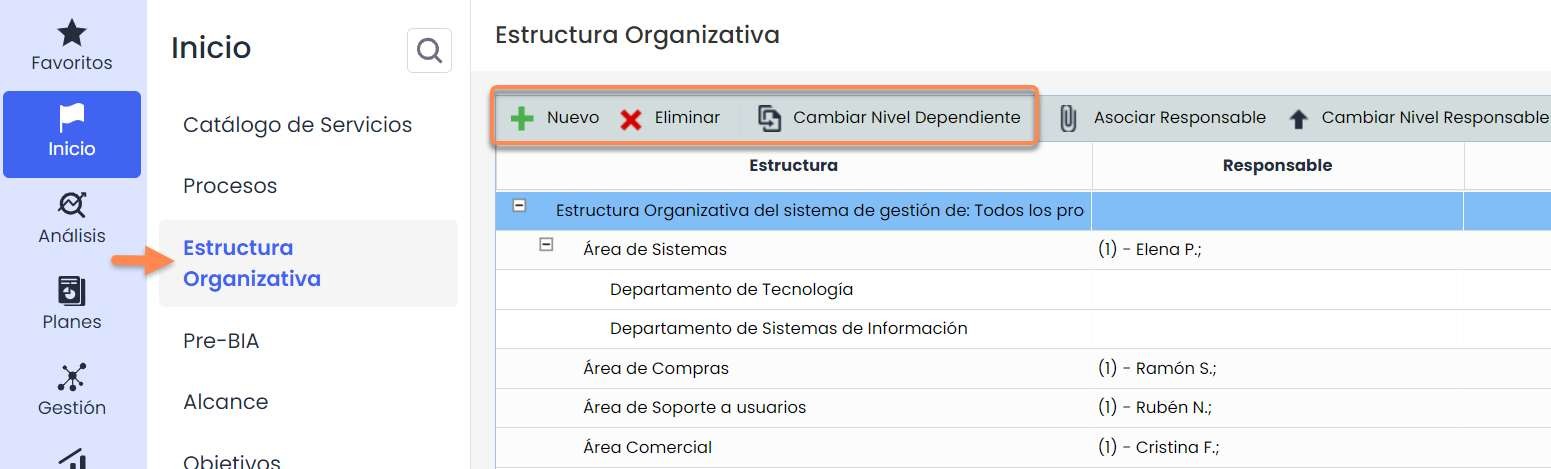
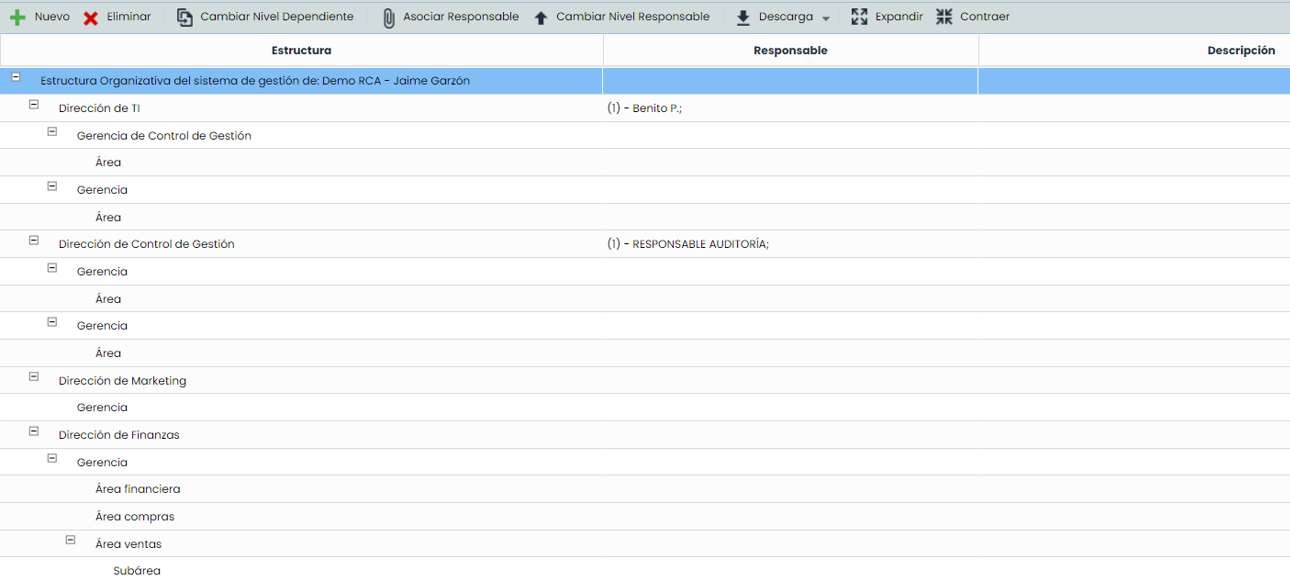
Through the “Organizational Structure” option located in the “Home” tab, GlobalSuite® allows defining the organizational structure of the company.
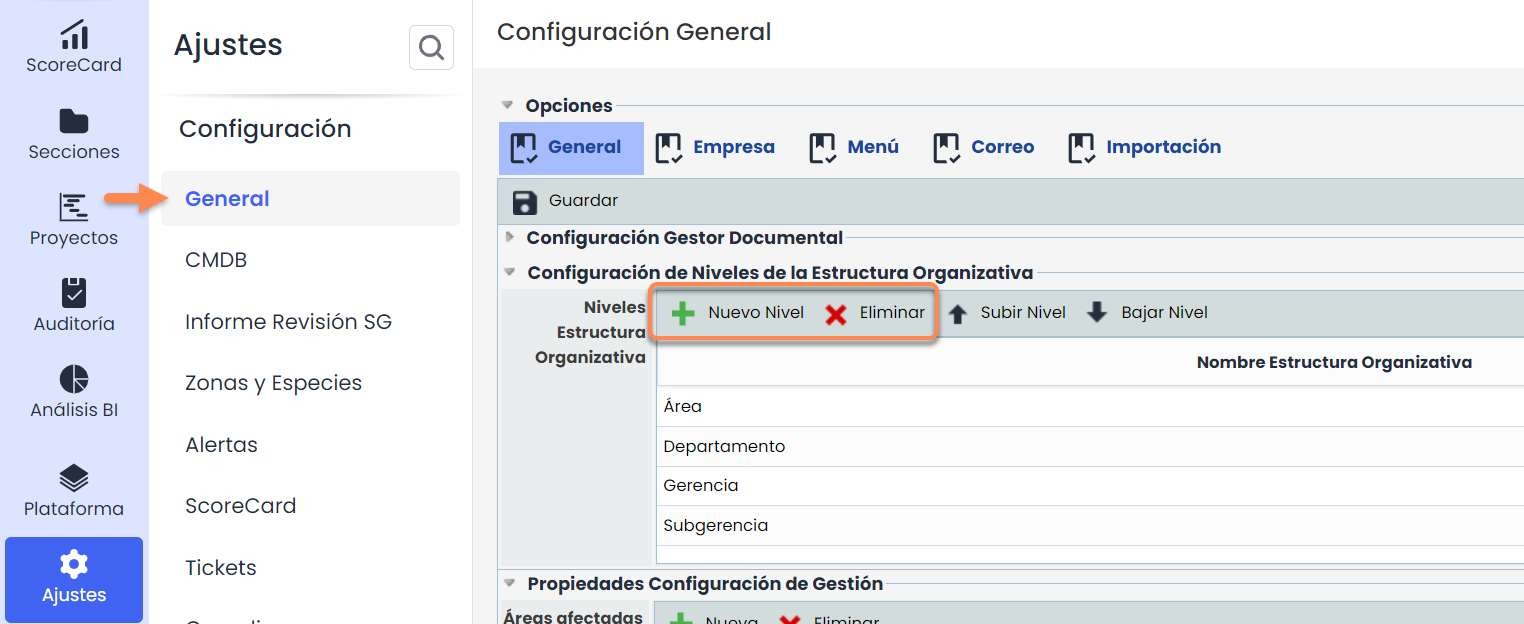
To correctly configure this hierarchy, it is necessary to first define the levels of the company's organizational structure. To do this, go to the option Settings > General Configuration > Organizational Structure Levels Configuration and configure the desired levels.
Once the levels are defined, the “Organizational Structure” option allows performing the following actions:

-
New: Add a new business unit. You must select the dependent business unit of the new option and click the “New” button.
-
Delete: You must select in the table the business unit you want to delete. The dependent business units of this one will also be deleted.
-
Change Dependent: Allows changing a business unit (and its dependent units) to a different business unit.
-
Associate Responsible: Allows linking an employee to the Management System. You must select the business unit and click the button. All employees defined in GlobalSuite® will appear.
-
Change Responsible Level: Allows changing the order when there is more than one Responsible for the MS.
-
Download: Allows downloading the organizational structure in Excel and PDF.

General View of the Organizational Structure
3. Define Scope of the Management System
The definition of the MS scope is carried out in the “ Scope ” option, available in the “ Home” tab.
This option allows formally establishing the scope of our Management System by selecting the services we will include within it.
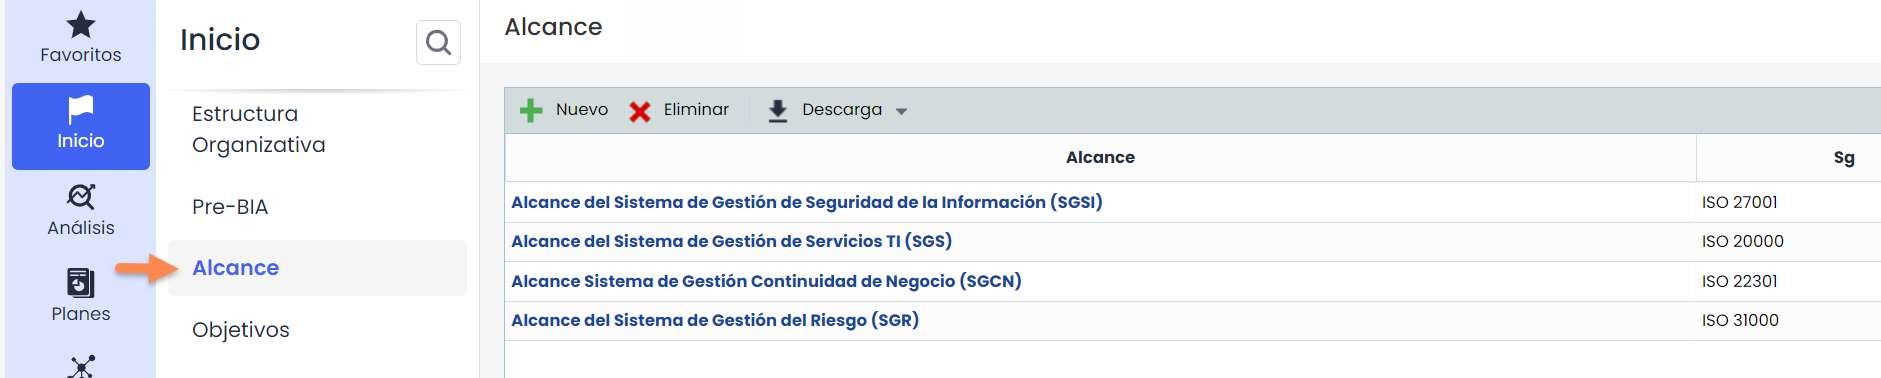
When accessing the “Scope” option, all scopes defined in the entity are displayed.
The creation of a new scope is done by clicking the “ New” button. To register the corresponding information for the scope, you must click on the link in the scope's name. At that moment, a form will appear that allows defining all the corresponding information.
Similarly, it is possible to delete previously defined scopes or download the list of them on this main screen.

The scope form allows defining all the information related to the scope of the defined Management System.
In the section called “MS,” it is necessary to select the management system we want to reference. Additionally, it is possible for two management systems to share a scope. You would need to select the Management System and add it to the table.
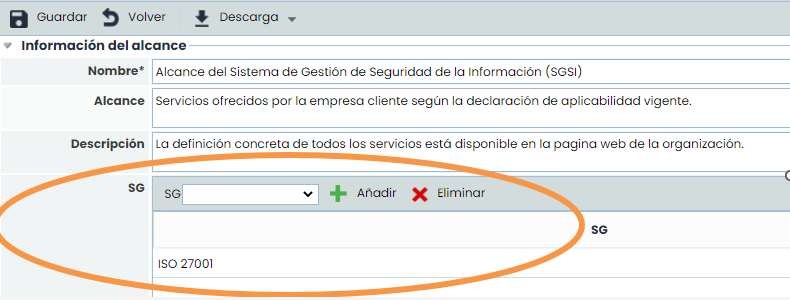
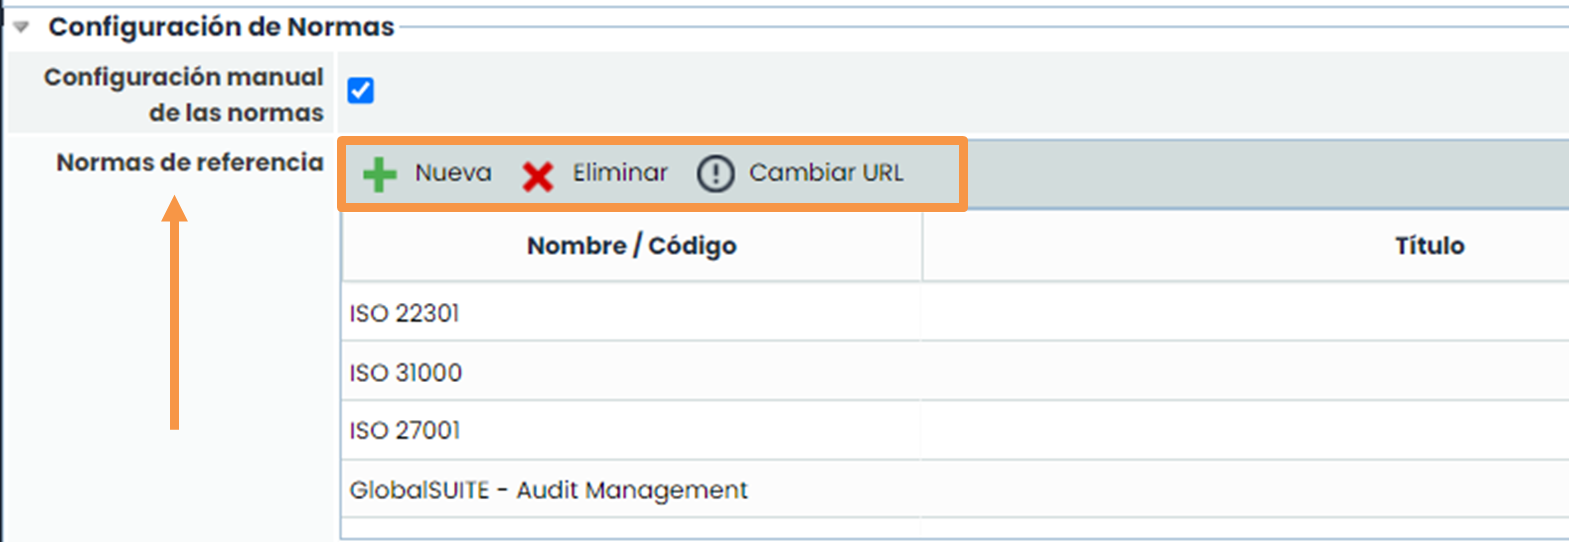
The “MS” (Management Systems) or standards, defined in the Scope, can be configured in the section Settings > General Configuration> Standards Configuration
4. Define Objectives of the Management System
The definition of the MS Objectives is carried out in the “ Objectives ” option, available in the “ Home” tab. This option allows formally establishing the objective or objectives set in our Management System.

When accessing the “ Objectives” option, all active objectives defined in the entity are displayed. To view all objectives (active and inactive), it is necessary to click the “Show” – “Show All” button.
The creation of a new objective is done by clicking the “ New” button. To register the corresponding information for the objective, you must click on the link in the objective's name. At that moment, a form will appear that allows defining all the corresponding information.
Similarly, it is possible to delete previously defined objectives or download the list of them on this main screen.

The Objective form allows defining all the information related to the defined Management System objective.
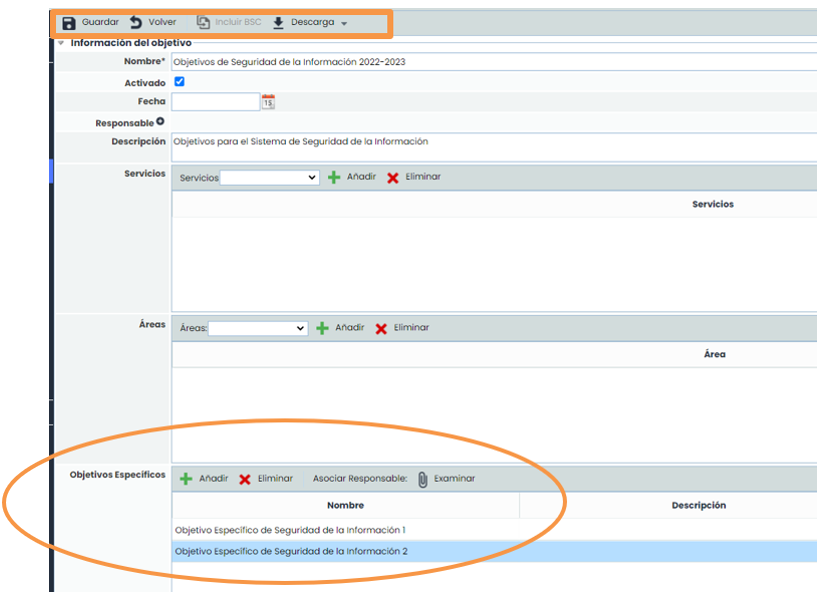
Additionally, it is possible to divide the Objective into more specific objectives. To save the entered data, it is necessary to click the “ Save” button. If you want to download a report of the Objective, you must click the “Download” – “Docx Report” button.
The “ Include BSC” button will only be available if the GlobalSuite® Balanced Scorecard module is enabled.
To monitor the objective, it is necessary to define its evaluation frequency.
Once the frequency is defined, you can add and delete new Evaluations, where you can choose the date of that evaluation and the evaluation result.

5. Define Roles and Associate Employees
Through the “ Role Management ” option located in the “ Home” tab, GlobalSuite® allows:
-
Associating the different employees who are part of the entity with the various roles of the Management System.
-
Associating the required competencies for each of the defined roles of the entity, being able to carry out the association of these competencies to different roles simultaneously.
-
Defining the functions and obligations to be developed by each of the roles, also being able to be associated with several profiles simultaneously.
Through this methodology established by GlobalSuite®, the platform allows describing the different job profiles, associating the employees who perform them, the necessary competencies for each role, and all related functions and obligations.
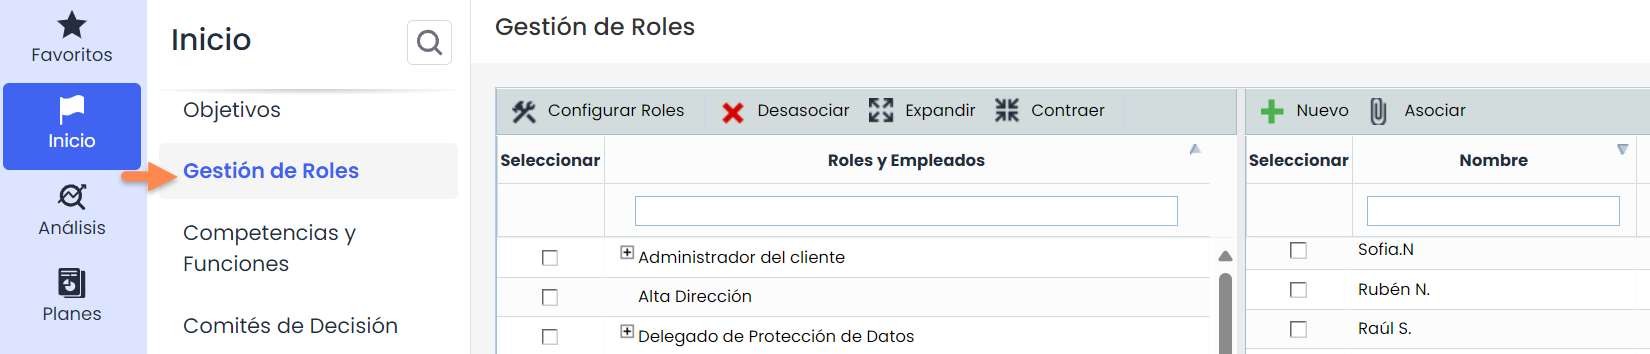
To manage roles and responsibilities of the entity, you must select the “ Role Management ” option, available in the “Home” tab of GlobalSuite®.
The roles that appear in the “Role Management” tab are configurable through the “ Configure Roles” button.
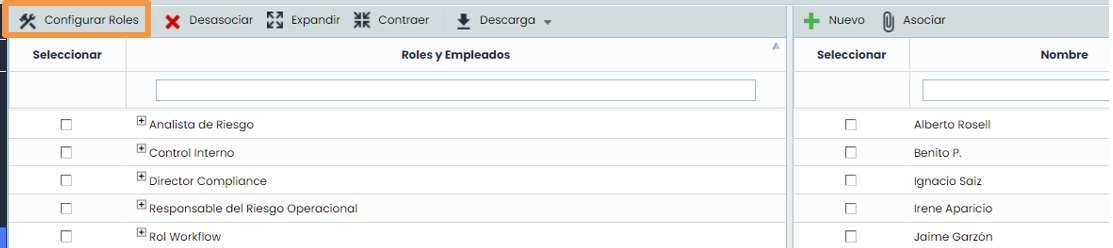
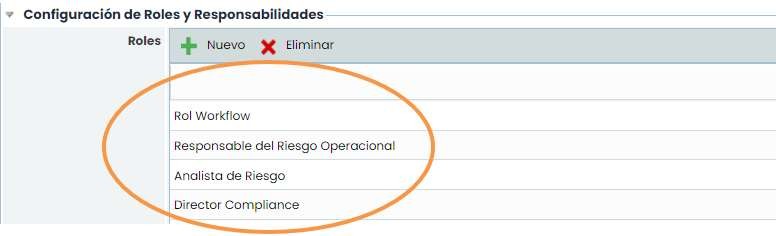
By clicking the button, a new browser tab opens corresponding to the Settings section. Specifically, in the “General” option, the list of Roles is found, where existing roles can be created, deleted, and modified through the marked options.
The list of employees that appears in the table on the right corresponds to the employees registered in the “ Employees ” option of the “ Management” tab.
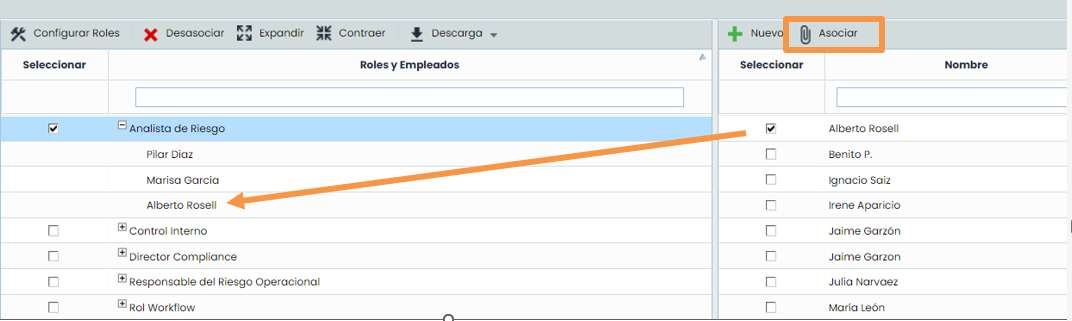
To establish relationships between roles and employees, simply select (tick) the employee from the table on the right and the profile (or profiles) to which they belong located in the table on the left, and click the “Associate” button. Once the association is made, the employee's name will appear at a lower level than the established role in the entity.
6. Define Competencies and Functions
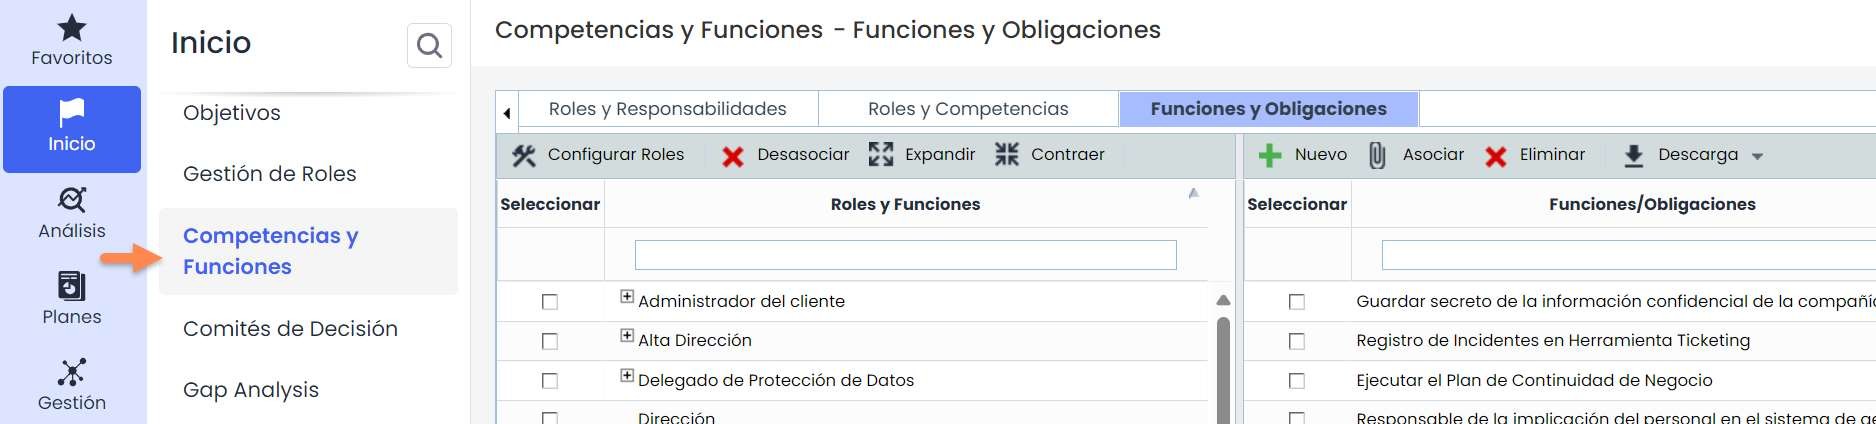
To manage roles and their competencies and obligations/functions, you must select the “ Competencies and Functions ” option, available in the “ Home” tab of GlobalSuite®.
Once employees are related to the roles of the entity, you must define and link the competencies associated with each role. This is done in the “ Roles and Competencies” tab.
To define competencies, it is necessary to click the “ New” button, generating a new line in the list of competencies, which can be edited. GlobalSuite® allows defining as many competencies as deemed necessary. Likewise, you can delete them or download them in an Excel file.
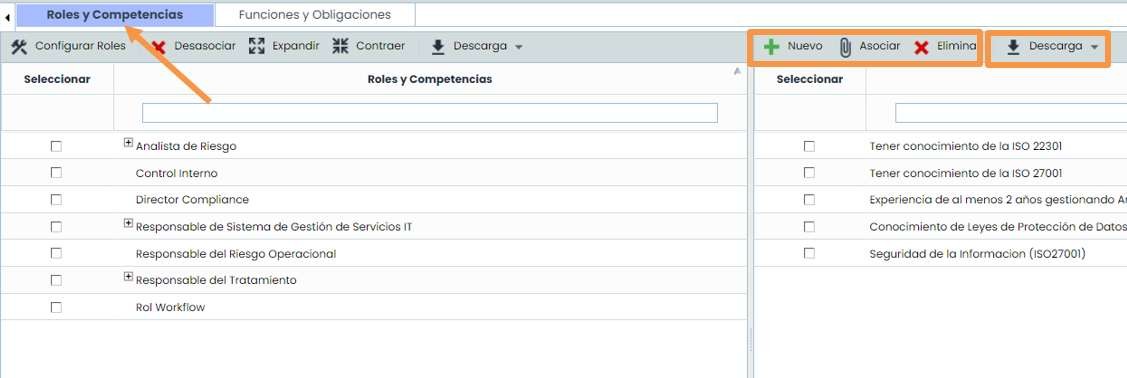
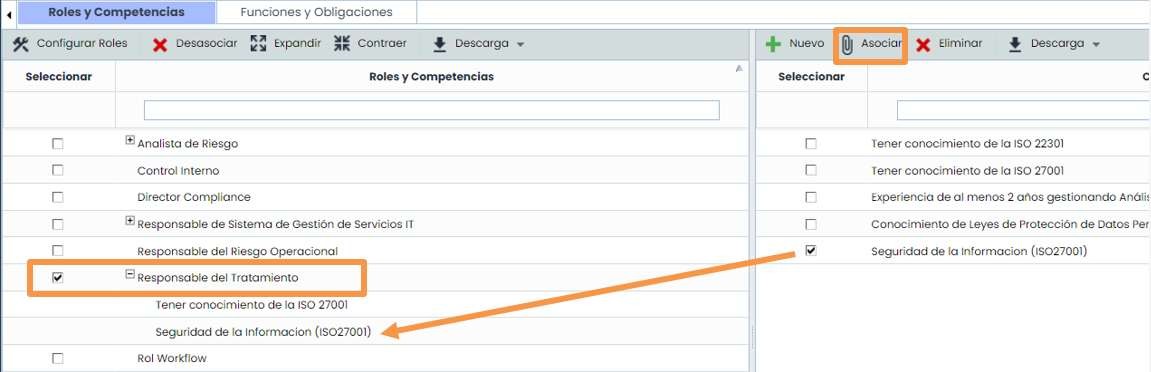
Once the list of necessary competencies for the roles of the entity is defined, the linking of competencies and roles is carried out through the same mechanism used to establish relationships between employees and roles in the “ Roles and Employees” tab. Therefore, it is necessary to select (tick) the competency to link and the role, and click the “ Associate” button.
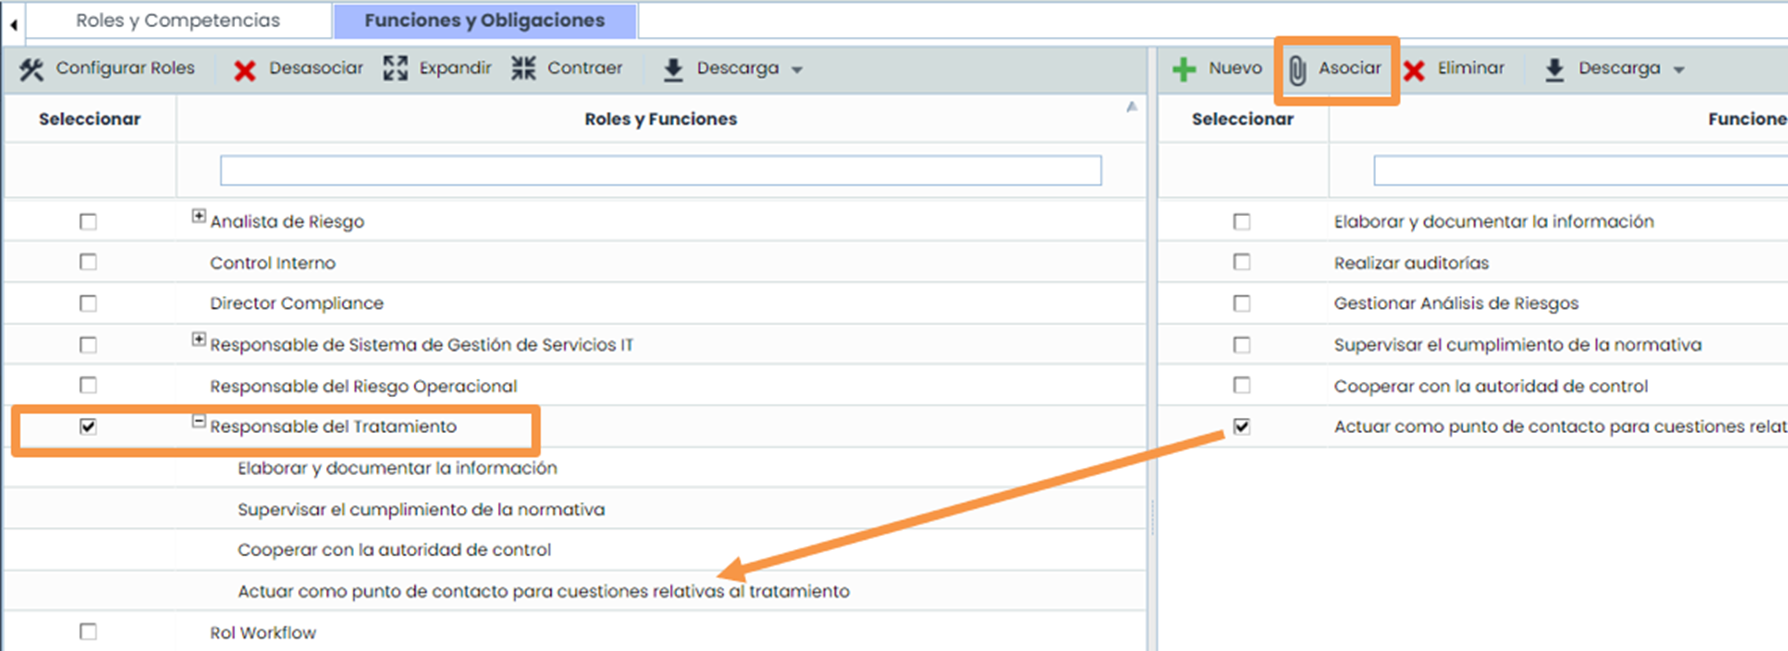
Once both employees and competencies are related to the roles of the entity, the final step is to define and link the functions and obligations. This is done in the “ Functions and Obligations” tab.
To define functions, it is necessary to click the “ New” button, which will generate a new editable line in the list of functions/obligations. GlobalSuite® allows defining as many functions and obligations as deemed necessary. Likewise, you can delete them or download them in an Excel file.
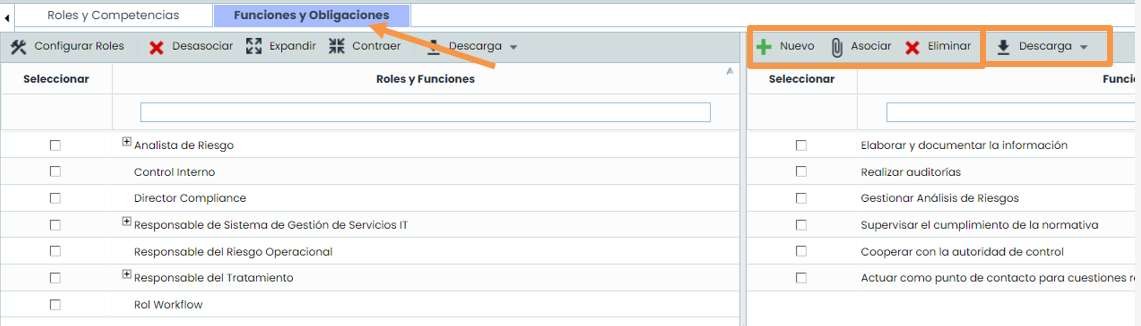
Once the list of necessary functions/obligations for the roles of the entity is defined, the linking with the roles is carried out through the same mechanism used to establish relationships between employees and roles in the “ Roles and Employees” tab. Therefore, it is necessary to select (tick) the function/obligation to link and the role, and click the “ Associate” button.