This tutorial explains, step by step, how to perform the initial configuration of the Document Manager in GlobalSuite®, including the activation of the approval workflows functionality, the role management (association of employees to system roles), and the configuration of the Document Workflow (states, responsible parties, and approval criteria) to control the review cycle until the publication of the documentation.
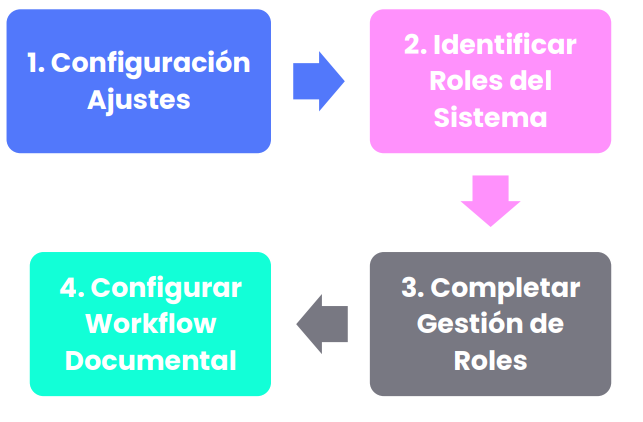
Phases for the initial configuration of the Document System
Configurable Options in Settings
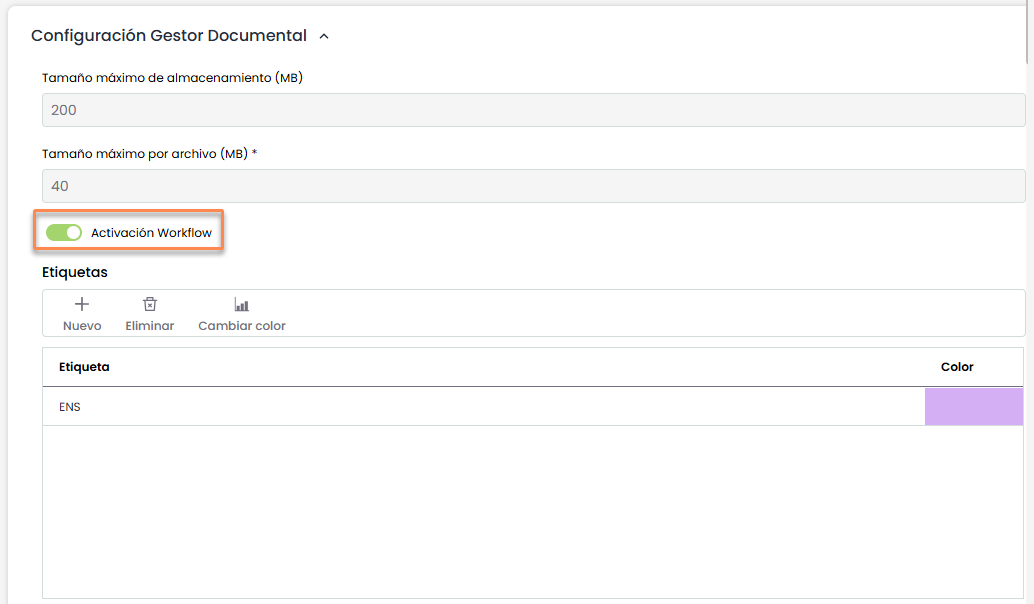
To access the configurable option of the Document Manager, you must click on the Settings> General Configuration.
The functionality of the configurable option is as follows:
-
Enable the “Workflow Activation” option: allows for multiple Workflows, each with its states, so that different users can perform checks on the files in the Document Manager and approve them until reaching the final “publication” state.
-
Tags: From here, you can create, edit, and delete the tags used in the document manager.
Alongside this option, other non-editable options appear:
-
Maximum storage size: indicates the storage limit (MB) of the document manager.
-
Maximum file size: indicates the maximum size of the attached files that can be uploaded to the tool.
Role Management
Through the option Home> Role Management , GlobalSuite® allows associating the different employees who are part of the entity to the different roles of the Management System.
This option is directly related to the “Competence and Functions” option.
Between the two options, with this methodology established by GlobalSuite®, the platform allows describing the different job profiles, associating the employees who perform them, the competencies required for each role, and all related functions and obligations.
Step 1
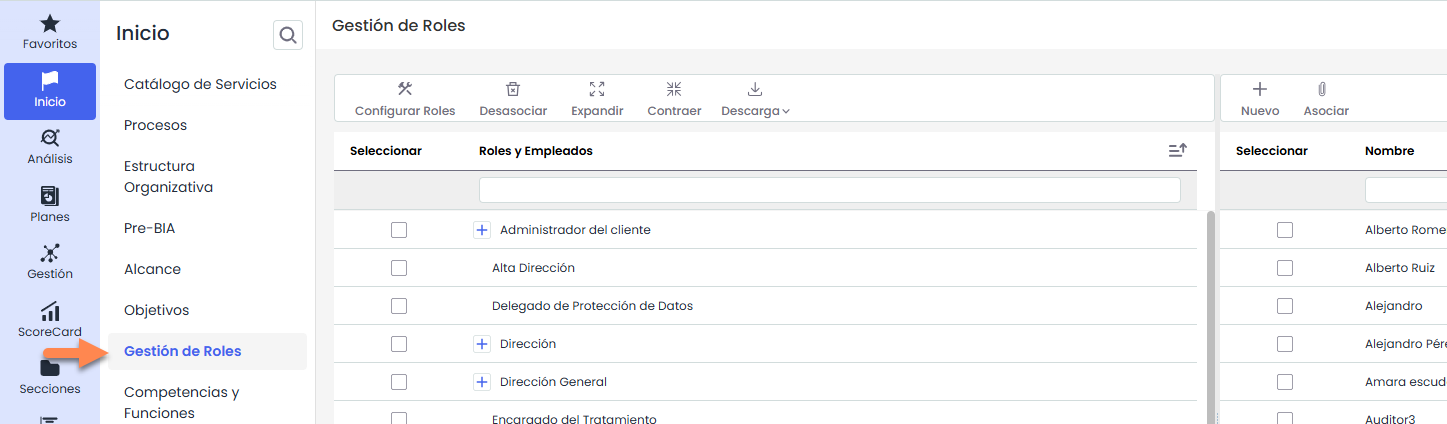
To manage the roles of the entity, you must select the Role Management option, available in the Home tab of GlobalSuite®.
Step 2
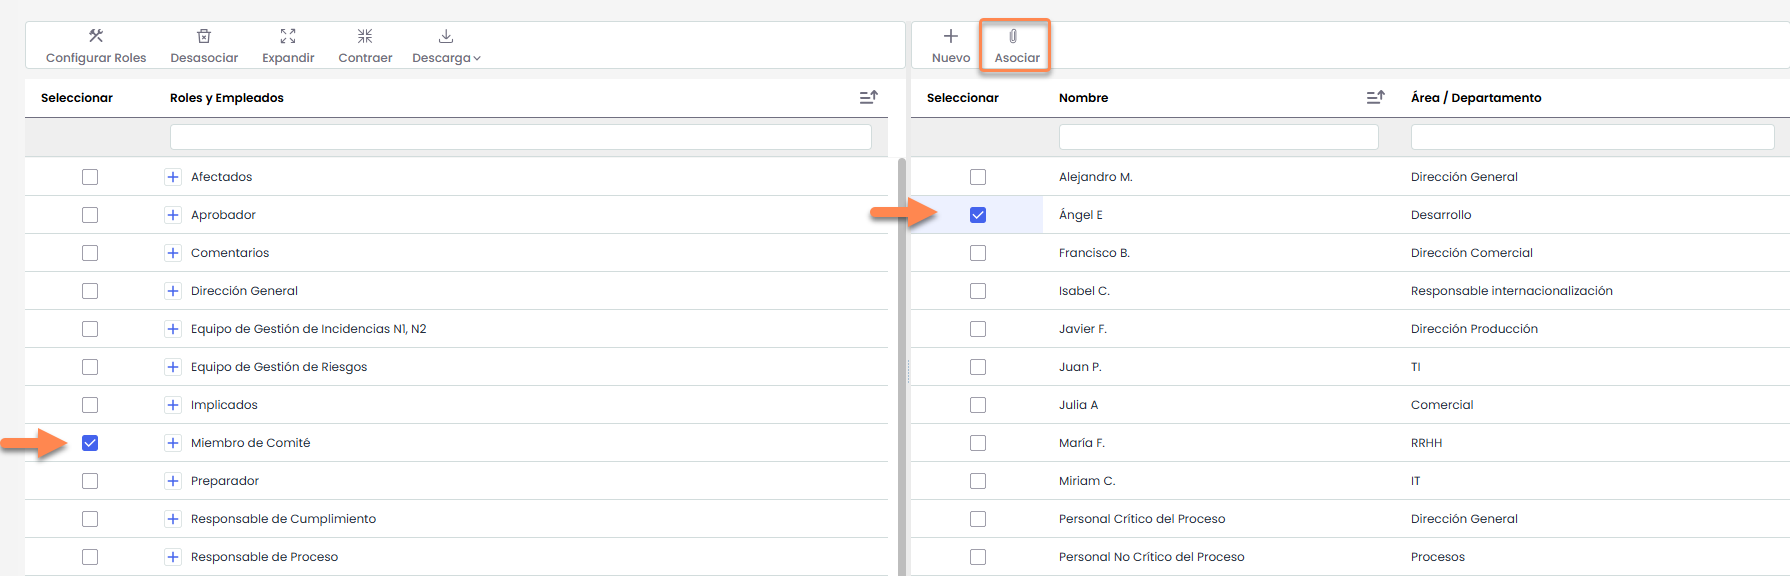
The roles that appear in the “ Roles and Employees” table are configurable through the “ Configure Roles” button.
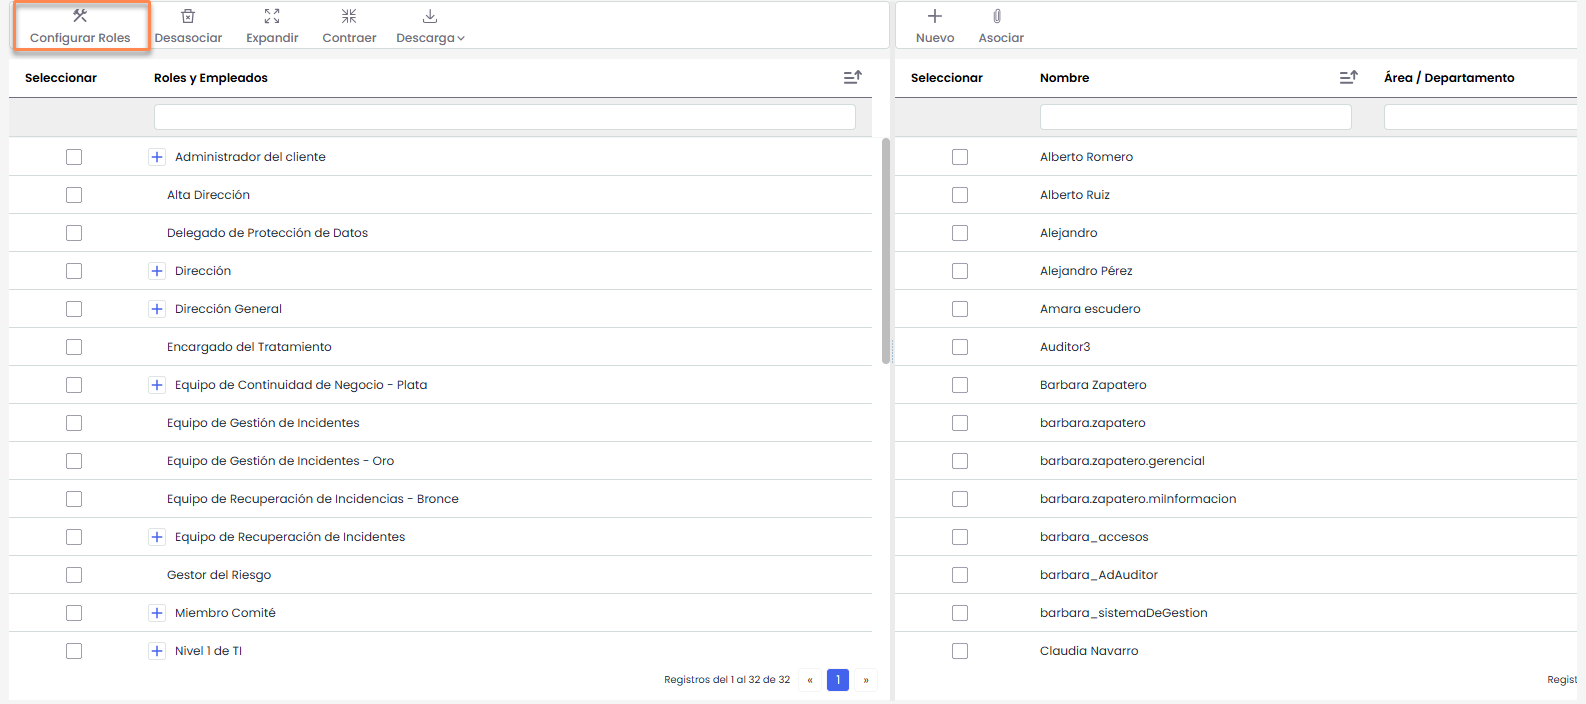
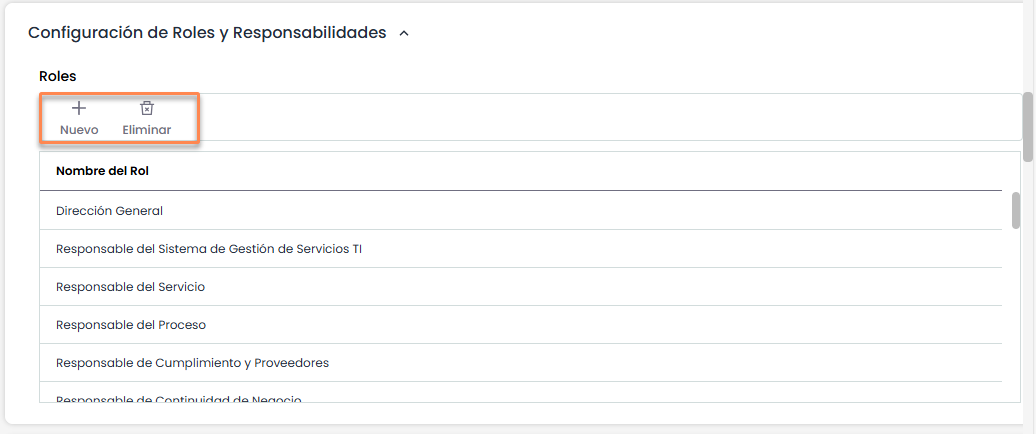
Clicking on the button opens a new browser tab corresponding to the Settings > General Configuration > Role and Responsibility Configuration section, where the list of Roles can be created, deleted, and modified through the marked options.
Step 3
The list of employees that appears in the table on the right corresponds to the employees registered in the Management > Employees option.
To establish relationships between roles and employees, you must check the Employee on the right side, also check the Role on the left side, and then click the “Associate” button. After this step, if you click the “+” of the Role, you will see the employees associated with it.
Step 4
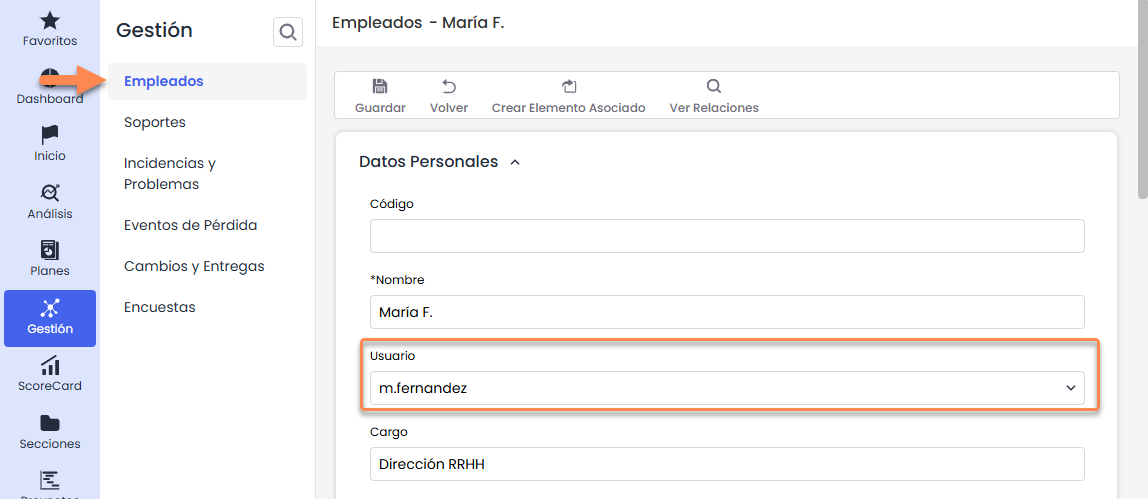
To use the Workflows of the document manager, it is necessary that all employees involved in document management have associated a GlobalSuite® user.
The association is performed from Management > Employees . By selecting an employee, you can modify the corresponding GlobalSuite® access user.
Note: This action can be performed automatically when creating tool users.
Document Workflow Configuration
GlobalSuite® allows the definition and management of workflows for the approval of documentation associated with the system.
The platform is not limited in the number of workflows, states, or responsible parties, but will adapt to the needs of each organization.
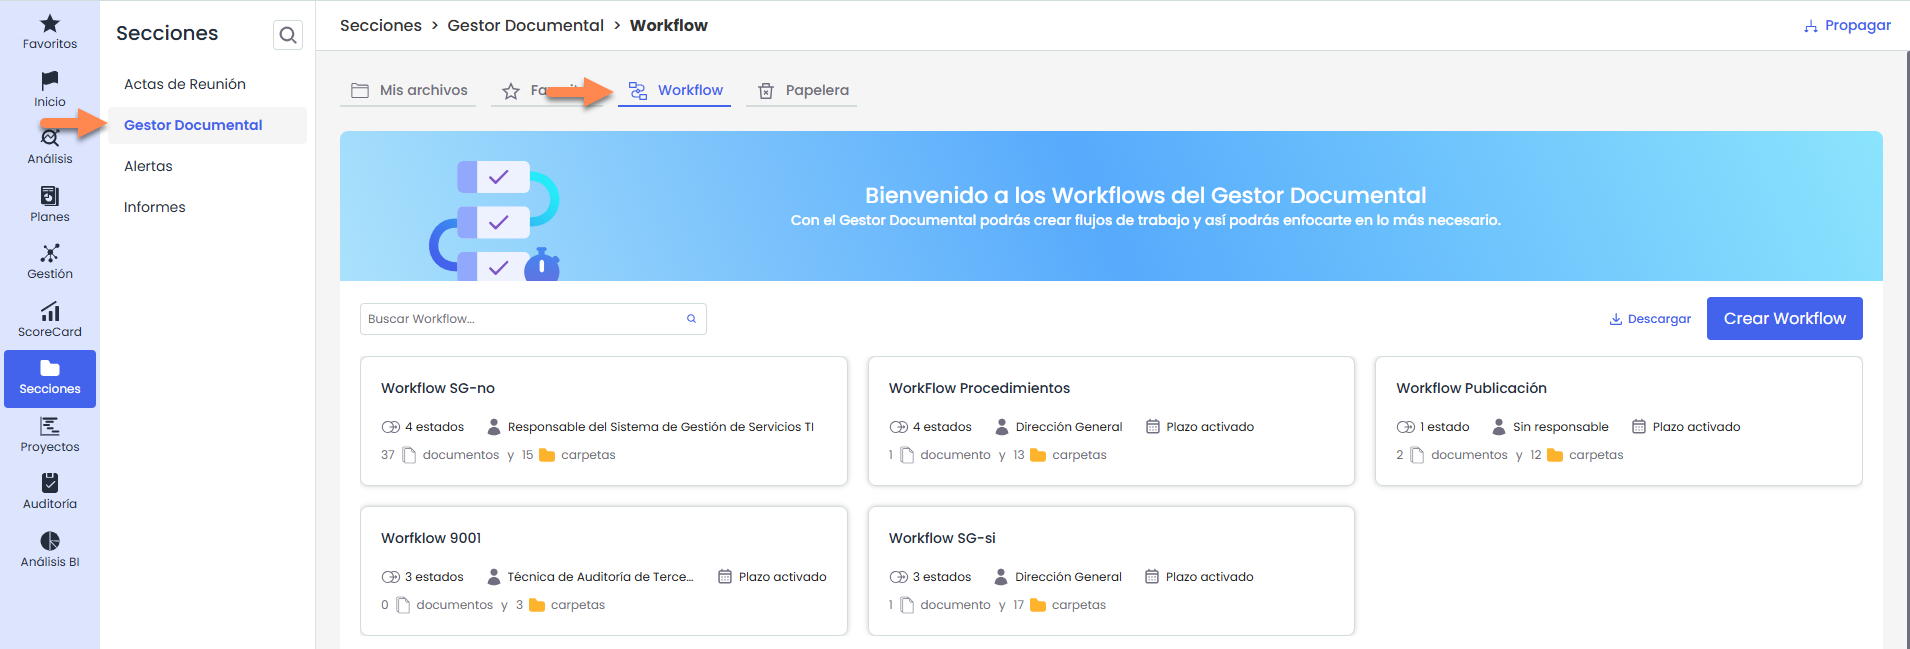
To start using approval workflows, the first step is to define and configure these workflows in the Document Manager> Workflow Configuration option.
Step 1
The first step will be the configuration of the different approval workflows for the documentation. To do this, you must access or create a Workflow in the configuration option. Clicking on the Workflow name will access the information of that workflow.
Step 2
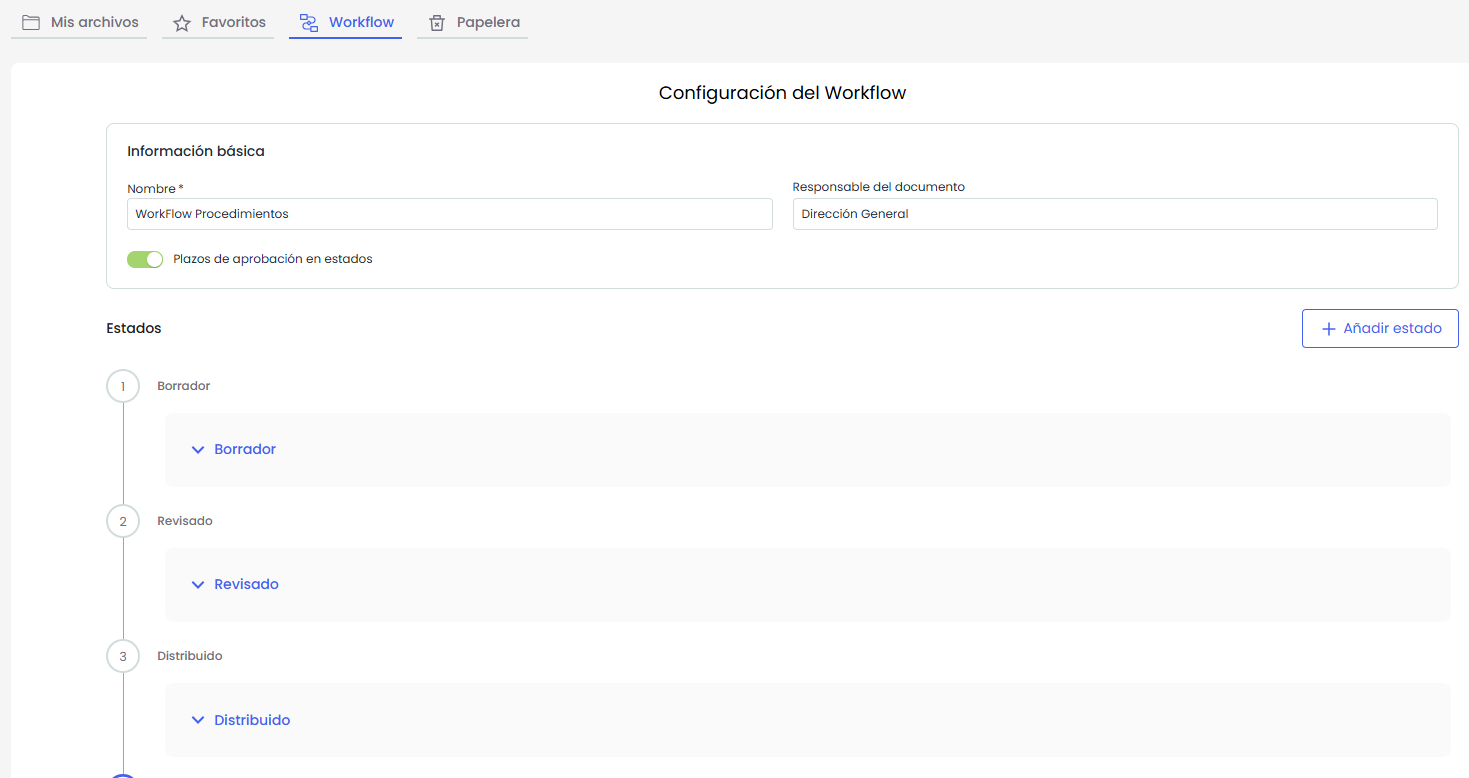
Within a Workflow form, different elements must be defined for its configuration:
Basic Information
-
Workflow Name: Corresponds to the name used to identify the workflow.
-
Document Responsible: Corresponds to the default responsible party for the documents assigned to the Workflow.
States
The states of the workflow are listed below. They are displayed in order and are collapsed by default.
The last state corresponds to the publication of the documents.
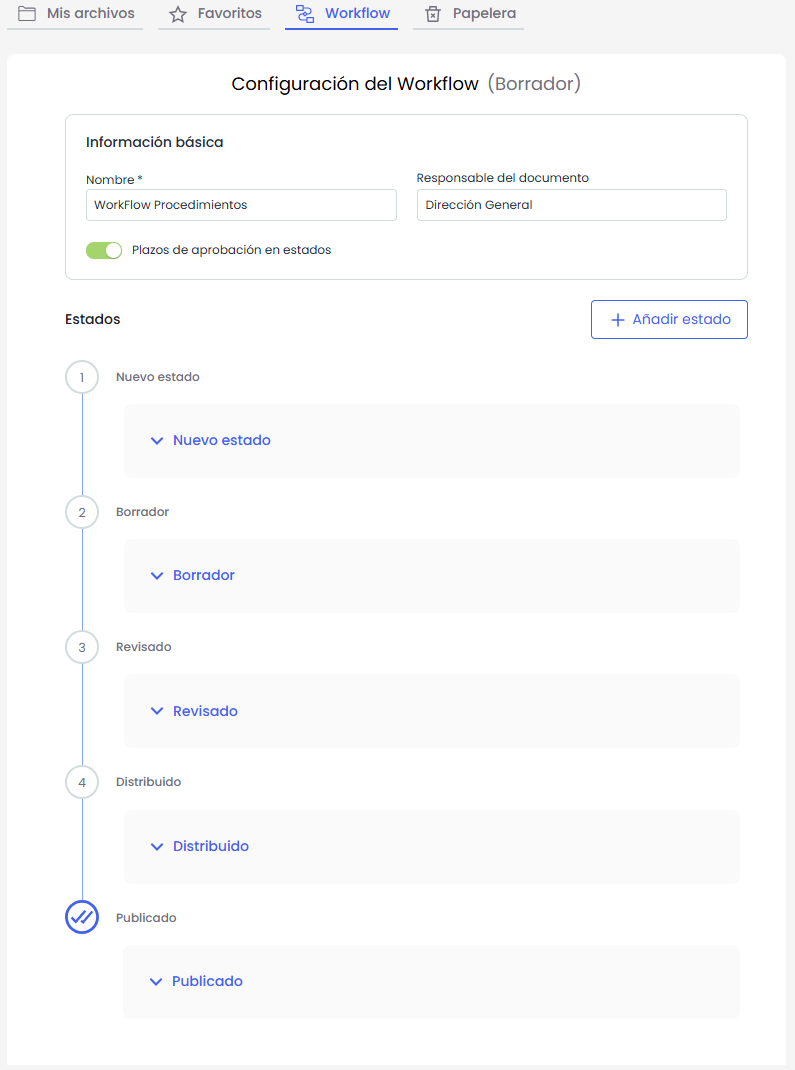
New states can be created by pressing “ Add State”. The new state will be inserted at the beginning, as the first state of the workflow.
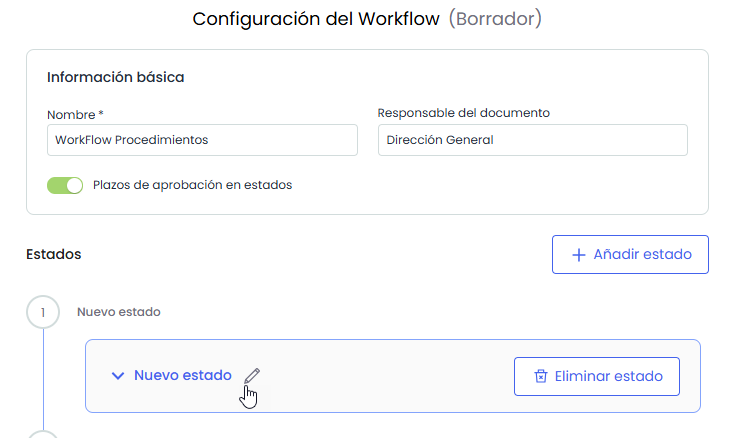
Step 3
Once the states are defined, the responsible parties assigned to each of them must be established:
-
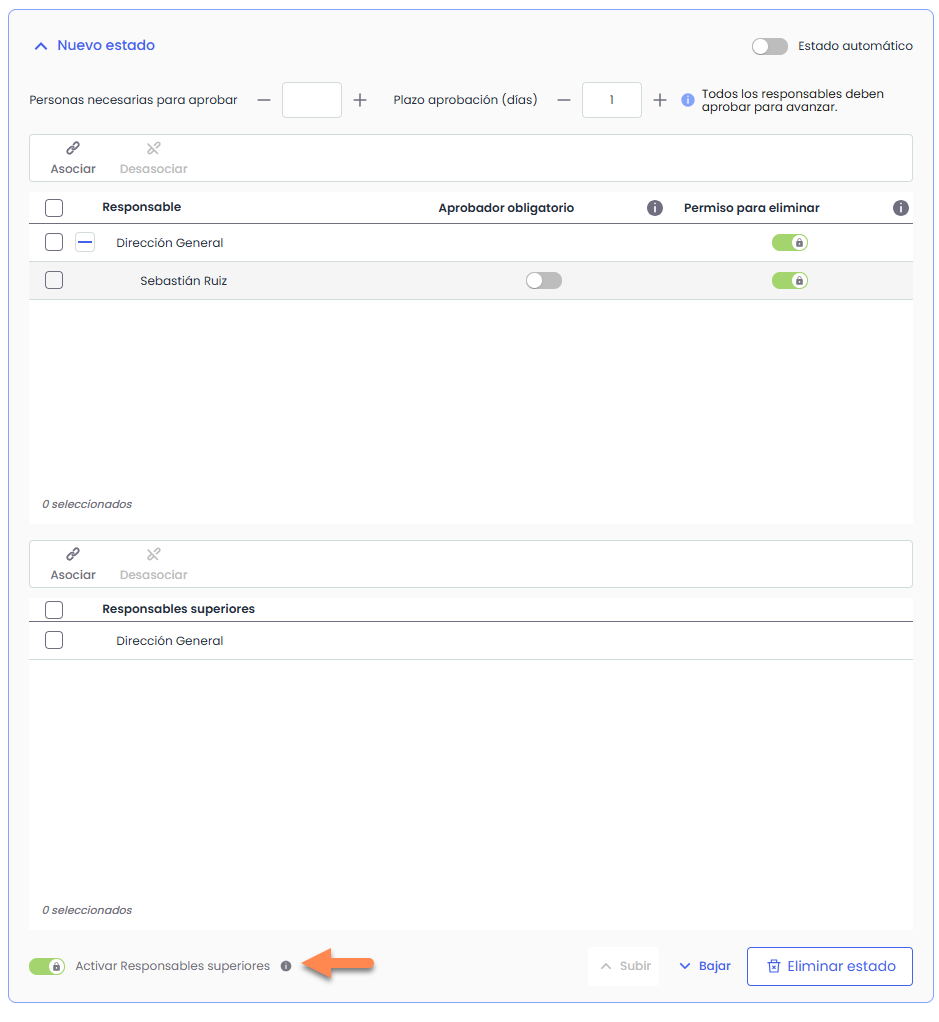
Expanding a state will display the “Responsible Parties” table, where roles can be associated at both role level and role-employee level. Assigned users will be able to view the documents in that state and, depending on the configuration, approve or reject them.

-
In the case of a multi-entity system, the “Superior Responsible Parties” switch can be activated, allowing roles or employees belonging to superior entities to be assigned, who will also be able to view the document manager of the current entity.
Activating this switch will display a new table below the “ Responsible Parties” table, called “ Superior Responsible Parties”, from where these assignments will be managed.
Step 4
Finally, the approval criteria for each state must be defined:
-
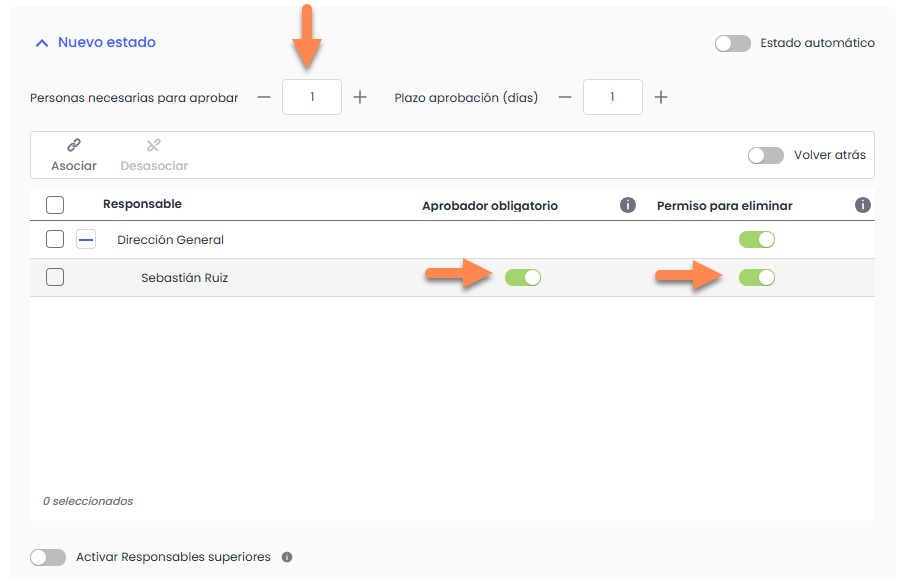
The “ People required to approve” field indicates the number of employees (among those selected as responsible for the state) who must approve the state to move to the next one.
-
If you want to specify one or more employees as mandatory for approval, you must check the “Mandatory Approver” column.
-
Similarly, it is possible to indicate which employees can delete a document that is in an intermediate state.
-
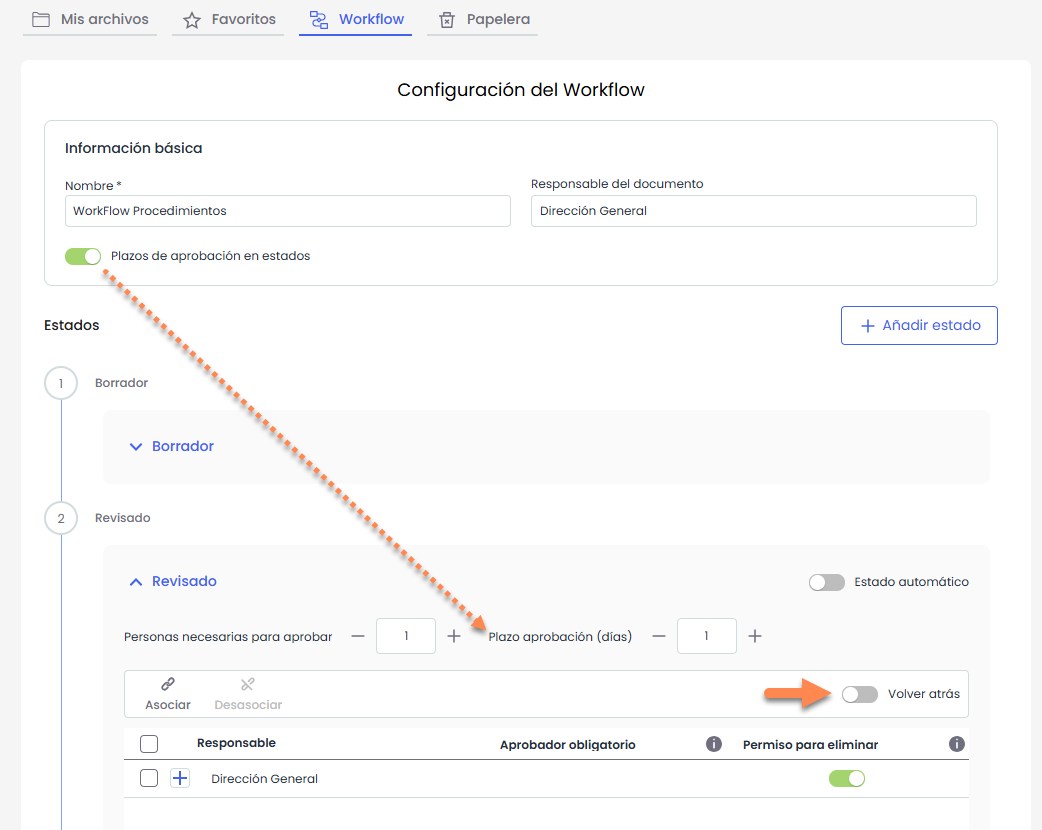
The “Approval Deadline (days)” field is enabled globally from the Basic Workflow Data, activating the “Approval Deadlines in States” option.
Once activated, the field will be available in all workflow states and will allow defining the maximum number of days a document can remain in that state.
If the approval criteria are met but there are still responsible parties pending approval or rejection, the document will remain in the state until the defined deadline is reached. However, the state change can be manually forced if required.
-
If the number of “People required to approve” is not reached within the established deadline, the “Back” switch allows defining the document's behavior: it can be configured to return to the previous state or to remain in the current state.
This check is performed through a daily automatic document update process. If the selected configuration indicates so, the application will automatically revert the documents to the previous state.
-
The “Automatic State” option allows configuring the state as automatic. In this case, it will not be possible to edit the “People required to approve” or “Approval Deadline (days)” fields.
These states are used to record that the document has passed through a workflow phase without requiring intervention from the responsible parties. For this reason, the “People required to approve” and “Approval Deadline (days)” fields will always have the value 0.
However, the association of responsible parties is allowed, as it may be necessary to notify them of the document's state change.