The Reports option is located in the transversal section of Sections, common to all GlobalSuite® modules.
Its function is to allow the creation of reports based on the data recorded in the application.
1. Creating a new Report
On the main screen, a list of all available reports is displayed. To create a report, click on the New button and then click on the name to access the report configuration. Existing reports can also be deleted.

2. General configuration of a Report
When creating a new report, you access the “ Report” tab, but you can previously select the “ General Configuration” tab. The name is the only mandatory data. Other functionalities can be enabled by checking the header, footer, or cover page boxes, and it will be necessary to fill in the corresponding box with the information you want to appear in the report.
Additionally, you can include automatic page numbering, an index, and set the font and size of the different titles and the body of the report.

3. Configuring the sections of a Report
The following specific configuration steps are carried out in the “ Report” tab. On this screen, you can add 5 different items to the report. They must be selected from the dropdown list of items and then the add button is clicked. The order of the sections can be changed by clicking on one and dragging it to the desired position. They can also be deleted by clicking on the right-side cross.
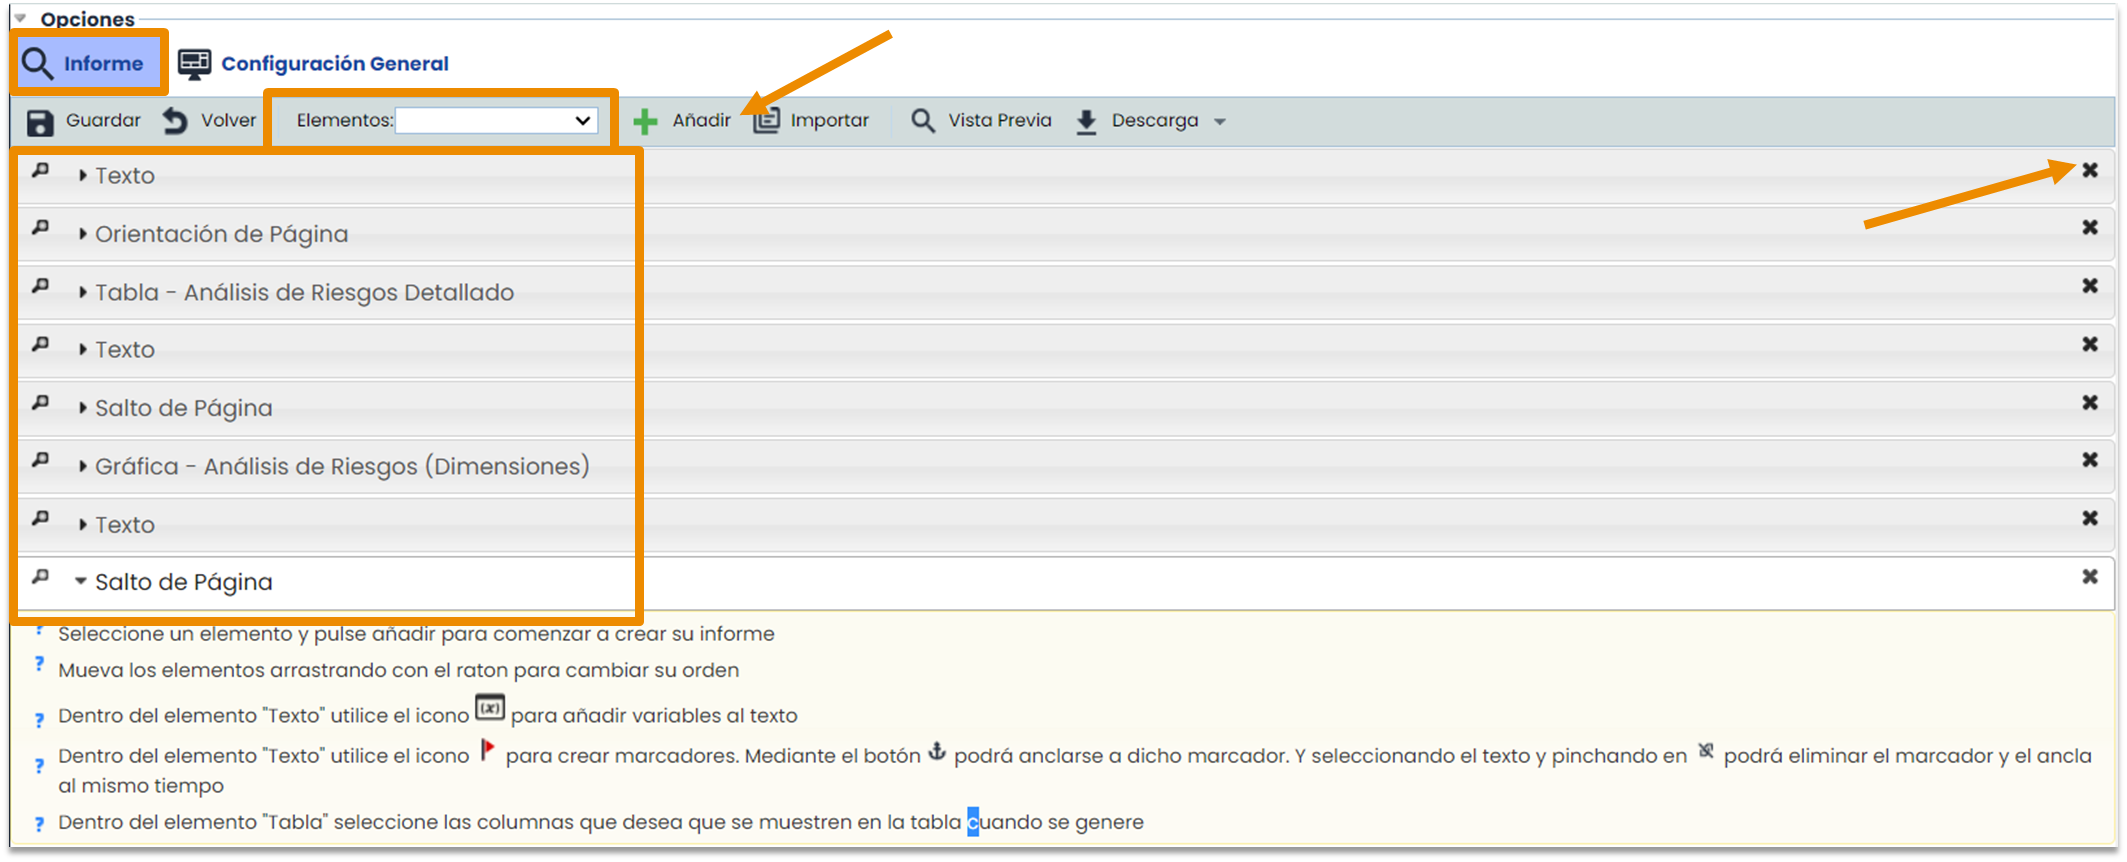
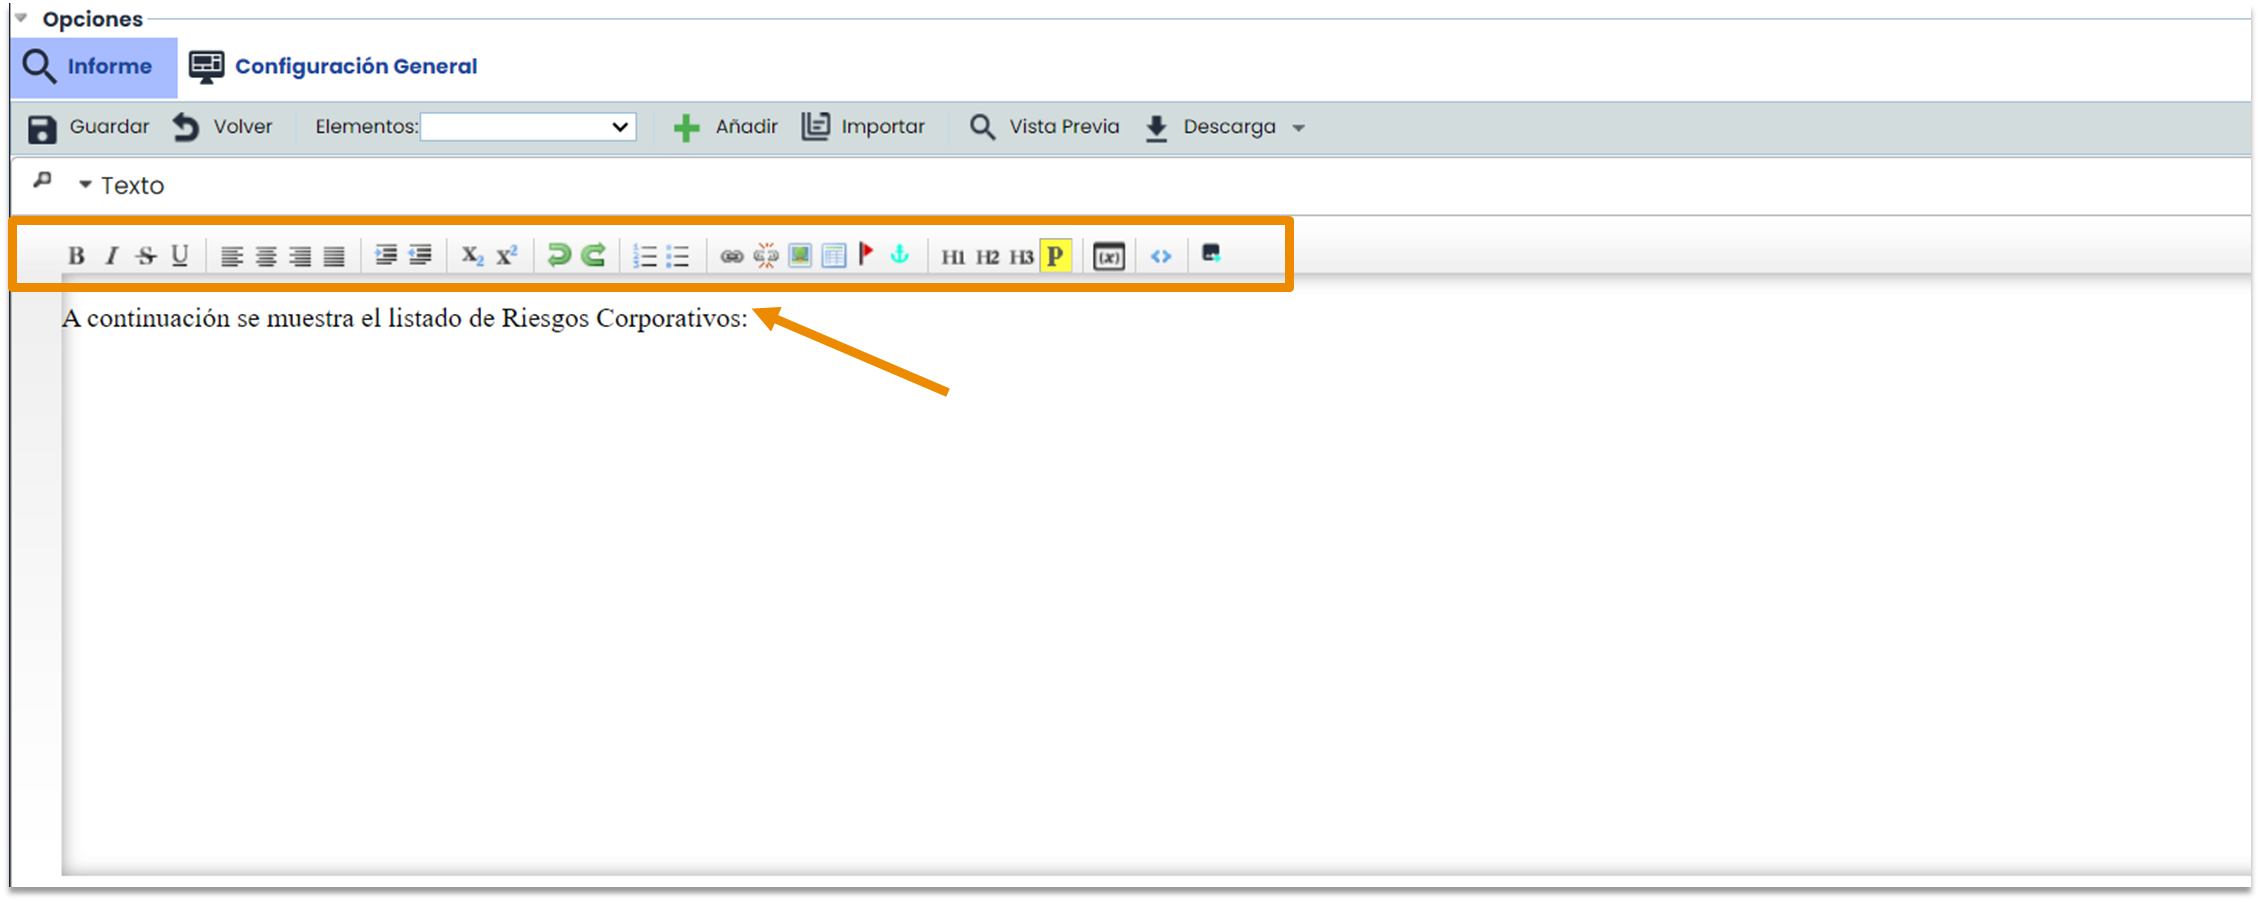
Text Configuration
You can add as many sections of any type as desired. The text section allows you to record introductions, comments, or the body of the report. It contains several options for text editing, similar to a traditional word processor (Word).
Page Orientation and Page Break Configuration
The Page Orientation functionality allows you to change the pages from one position to another, either horizontal or vertical. For example, if only one of the report pages needs to be in a horizontal position, it will be necessary to add a page orientation change, the section that should be horizontal, and finally, a new page change, this time vertical.

The page break inserts a blank page between two pages with content.
Table Configuration
The Table section is used to import data from different GlobalSuite options. First, the option from which the data originates will be selected from the dropdown menu (1), and second, the columns or dimensions of that option will be added, which will be displayed in the report table (2). Additionally, it is possible to filter the data to be displayed by selecting one or more of the proposed filters (3) and to sort the data of a specific column in ascending or descending order (4). The different types of filters and the data order can be applied simultaneously.
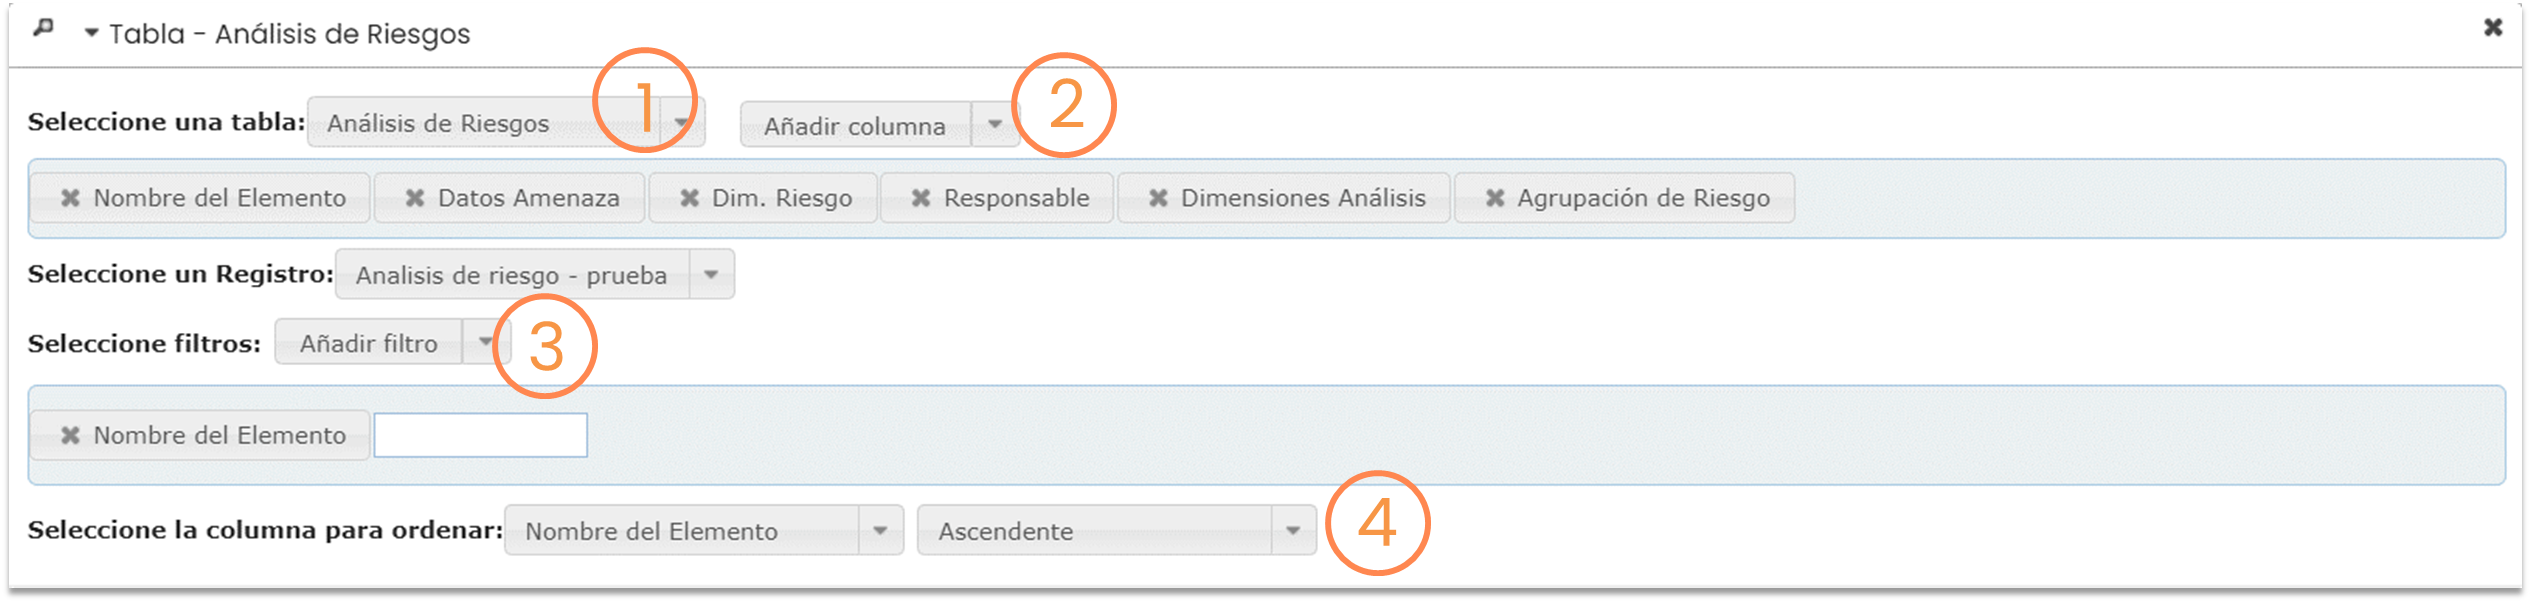
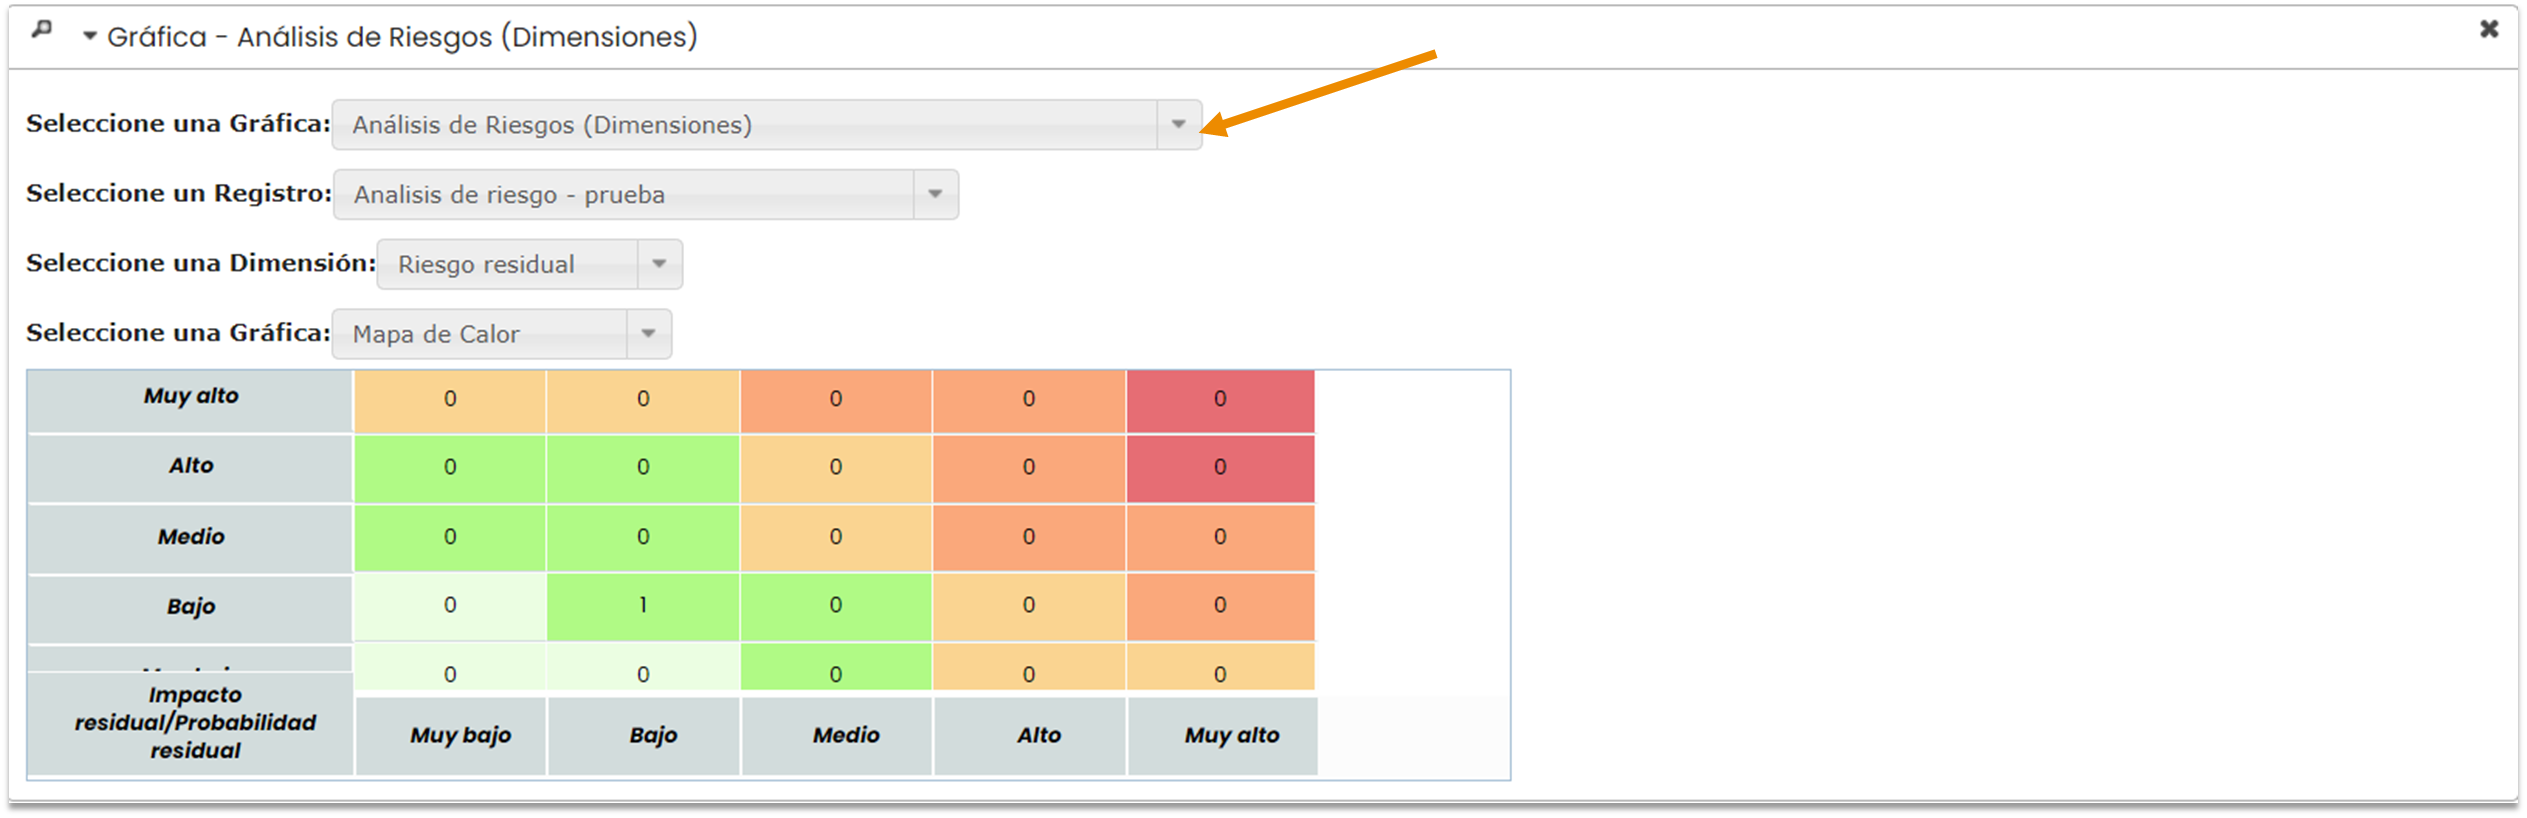
Chart Configuration
Finally, the Charts section allows displaying all those available within the options specified in the dropdown menu.
4. Saving and downloading the Report
Once the report configuration is complete, to preview it, you can click on Preview and see a real-time sample of the final result. Then it must be saved, and it can be downloaded in Word format (.docx).
The Import button allows you to select an existing report and import its configuration into the new one.
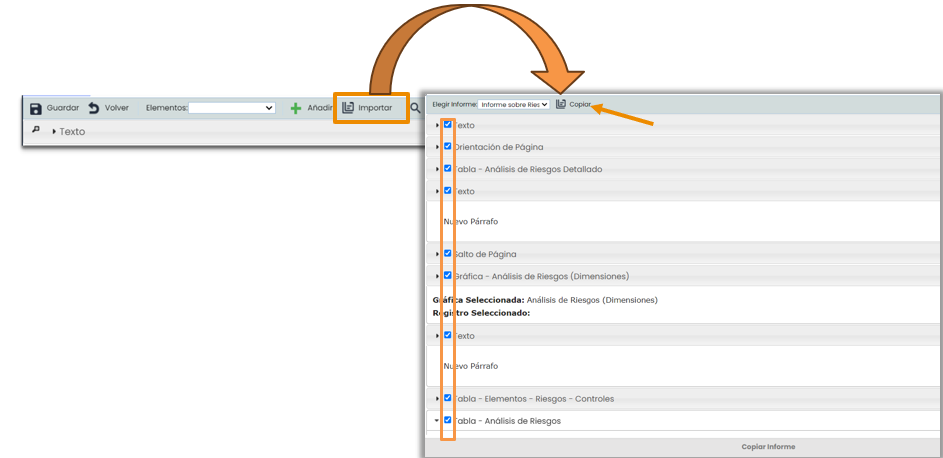
When clicking the Import button, a pop-up like the one shown on the right will appear. Here, you must select from the list of existing reports the one you want to reuse. You can also decide which parts will make up the new report by checking and unchecking them with a tick. Finally, click on the Copy button, and the configurable sections of the report will appear, meaning at this point, you would start from step 2 of this Quick Guide.